Sign In
Upload
Manuals
Brands
bioMerieux Manuals
Laboratory Equipment
PREVI Isola
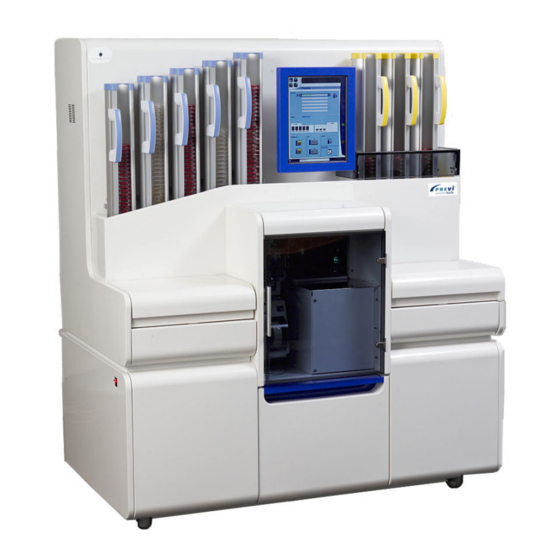
bioMerieux PREVI Isola Manuals
Manuals and User Guides for bioMerieux PREVI Isola. We have
1
bioMerieux PREVI Isola manual available for free PDF download: User Manual
bioMerieux PREVI Isola User Manual (214 pages)
Brand:
bioMerieux
| Category:
Laboratory Equipment
| Size: 24.8 MB
Table of Contents
Table of Contents
11
How to Use this Manual
23
Finding Topics and Procedures
23
Warnings
23
Description
25
Intended Use
25
System Capabilities
25
Workflow Principle
26
Figure 2-1 : Workflow Principle
26
System Architecture
27
Figure 2-2 : System Architecture
27
System Components
28
Figure 2-3 : System Components
28
Workstation
29
Description
29
Instrument
30
Figure 2-4 : Front View of the PREVI Isola with Covers on
30
Figure 2-5 : Front View of the PREVI Isola - Front Covers Removed
31
Figure 2-6 : Back View of the PREVI Isola with Covers on
32
Sample Racks
33
Figure 2-7 : Sample Racks
33
Description
33
Sample Tubes
34
Tubes Compatible for Use with the PREVI Isola
34
Fill Heights
34
Prepoured Media (Plates)
34
Plates Compatible for Use with the PREVI Isola
34
Figure 2-8 : Fill Heights
34
Input Cassettes
35
Figure 2-9 : Input Cassette - Front
35
Figure 2-10 : Input Cassette - Back
35
Output Cassettes
36
Touch-Screen
36
Figure 2-11 : Output Cassette - Front
36
Figure 2-12 : Output Cassette - Back
36
Figure 2-13: Touch-Screen
36
PREVI Isola Waste Paper bin
37
Waste Drawer
37
Figure 2-14 : PREVI Isola Waste Paper bin
37
Figure 2-15 : Waste Drawer
37
Interlocks
38
Consumables
39
PREVI Isola Applicators
39
PREVI Isola Applicator Cartridge
39
Figure 2-16 : PREVI Isola Applicator
39
Figure 2-17 : PREVI Isola Applicator Cartridge
39
PREVI Isola Tips
40
PREVI Isola Labels
40
PREVI Isola Biohazardous Waste bin
40
Figure 2-18 : PREVI Isola Tips in Tray
40
PREVI Isola HEPA Filter
41
Instrument Operating Principle
42
Index Next Sample
42
Read Sample Barcode
42
Retrieve Sample Data
42
Pick up Tip
42
Figure 2-19 : Simplified Sample Workflow
42
Figure 2-20 : Positioning a Barcode Label on a Tube
43
Aspirate Sample
44
Perform Plate Workflow
45
Retrieve Input Plate
45
Transfer to Plate Transfer Robot
45
Transfer to Process Station
45
Measure Agar Height, Dispense Sample
45
Pick up Applicator
45
Streak Plate
45
Discard Applicator
45
If Bi - Plate
45
Transfer to Transfer Robot
45
Label Plate
46
Transfer to Output Robot
46
Dispose of Tip
46
Workstation Software
47
Principle
47
General Screen Layout
47
Menu Bar
47
Title and Button Bar
47
Working Area
47
Status Bar
47
Figure 2-21 : General Screen Layout
47
Table 2-1 : Workstation Software Buttons
48
Instrument Software
49
Main Screen and General Layout
49
Alarm Zone
49
Title Bar
49
Status Bar
49
Navigation/Action Bar
49
Figure 2-22 : Main Screen Layout
49
Table 2-2 : Alarm Types
50
Table 2-3 : Navigation/Action Bar Buttons
51
Working Area
52
Figure 2-23 : Working Area
52
Getting Started
53
Assembly and Installation
53
Choosing a Location
53
Electrical Connections
53
Hazardous Magnetic Fields Precautions
53
Moving the Instrument
53
Barcode Reader Installation
53
Installation of the PREVI Isola and BCI
54
Checking Installation
54
Getting Started
54
Powering up the Workstation
55
Connecting to BCI NET
55
Starting the Workstation Software
56
Entry of an Incorrect User Name or Password
56
Figure 3-1 : Login Pop-Up Window
56
Figure 3-2 : "Invalid User Name / Password" Window
56
Changing Work Sessions
57
Inactivity Timeout
57
Figure 3-3 : Workstation Software Shutdown Window
57
Defining Plate Panels
58
Figure 3-4 : "Plate Panels" Screen
58
Creating a Plate Panel
59
Figure 3-5 : Create a Plate Panel
59
Figure 3-6 : "Plate Panel" Error Message
60
Figure 3-7 : "Invalid Entry" Error Message
60
Modifying a Plate Panel
61
Deleting a Plate Panel
61
Figure 3-8 : "Delete a Plate Panel" Confirmation Message
61
Printing a Plate Panel
62
Figure 3-9 : "Plate Panel Printing" Selection Window
62
Figure 3-10 : Plate Panel "Print Preview" Window
62
Defining Plate Types
63
Creating a Plate Type
63
Figure 3-11 : "Plate Panels" Plate Types Screen
63
Modifying a Plate Type
64
Deleting a Plate Type
64
Defining Incubation Types
65
Creating an Incubation Type
65
Figure 3-12 : Define Incubation Types
65
Modifying an Incubation Type
66
Deleting an Incubation Type
66
Figure 3-13 : Incubation Types
66
Assigning Plate Panels to Specimen Types
67
Figure 3-14 : "Specimen Types" Screen
67
Printing Plate Panels Assigned to Specimen Types
69
Figure 3-15 : Specimen Types "Print Preview" Window
69
Automatically Assigning Plate Panels to Samples
70
Defining Plate Cassettes Configurations
71
Creating a Plate Cassettes Configuration
71
Figure 3-16 : "Plate Cassettes Configuration" Screen
71
Figure 3-17 : New Plate Cassettes Configuration
72
Figure 3-18 : "Invalid Input" Error Message
72
Modifying a Plate Cassettes Configuration
73
Deleting a Plate Cassettes Configuration
73
Figure 3-19 : "Delete a Plate Cassettes Configuration" Confirmation Message
73
Assigning Plate Panels to Samples
74
Figure 3-20 : "Sample Assignment" Screen
74
Viewing and Printing Worklists
75
Figure 3-21 : "Sample Assignment" Screen with Sample
75
Figure 3-22 : "Worklist" Screen
76
Figure 3-23 : Worklist "Print Preview" Window
77
General Settings
78
Figure 3-24 : "General Settings" Screen
78
Using the System
79
Basic Workflow
79
Figure 4-1 : Basic Workflow Diagram
79
Starting the System
80
Powering up the Instrument
80
Screensaver
80
Using the System
80
Figure 4-2 : Powering up the Instrument
80
Figure 4-3 : Main Screen
81
Prerequisites for Sample Processing
82
Pre-Start Checks
82
Selecting Plates
83
Figure 4-4 : "Select Plates" Screen
83
Loading Plates
85
Loading Plates During Processing
85
Figure 4-5 : Load Plates Agar-Side up
85
Loading Plates Without Removing the Input Cassette
86
Plate Cassettes Status
87
Figure 4-7 : Main Screen - "Cassettes Status
87
Table 4-1 : Plate Cassettes Status Icons
87
Loading PREVI Isola Applicators
88
Figure 4-8 : "Load Applicators and Tips" Screen
88
Figure 4-9 : Pulling the Top Lock
89
Figure 4-10 : Inserting the Cartridge
89
Loading PREVI Isola Tips
91
Figure 4-11 : "Load Applicators and Tips" Screen
91
Figure 4-12 : Inserting the PREVI Isola Tip Tray
92
Loading PREVI Isola Labels
93
Figure 4-13 : "Load Labels" Screen
93
Monitoring Consumables and Waste Bins Status
95
Consumables
95
Figure 4-14 : "Main Screen - Consumable Status
95
Table 4-2 : Consumables Status Icons
95
PREVI Isola Waste Bins
96
Table 4-3 : Waste bin Filling Level Icons
96
Sample Preparation
97
Recommended Procedures
97
Urine
97
Feces
97
Dry Mono Swab
97
Swab in a Liquid Transport Medium
97
Swab in Gel Transport Medium
97
Blood
97
Liquid Respiratory Samples
97
Placing Sample Tubes in Racks
98
Figure 4-15 : Sample Tubes in Racks
98
Figure 4-16 : Correct Position of Tubes in Rack
98
Loading Sample Racks
99
Figure 4-17 : "Load Samples" Screen
99
Figure 4-18 : Load Sample Racks
100
Processing Samples
101
Figure 4-20 : Processing Screen
102
Figure 4-21 : Barcode
103
Figure 4-22 : Sample Processing Status
104
Table 4-4 : Sample Processing Status Icons
104
Processing Hints
105
Figure 4-23 : "Processing Complete" Screen
105
Pausing the Instrument
106
Instrument-Generated Pause
106
User-Generated Pause
106
Stopping the Instrument
107
Instrument-Generated Stop (Error Case)
107
Resuming Operations after Stopping
107
Figure 4-24 : "Fatal Error" Screen
107
Figure 4-25 : "Shutdown Requested" Window - Instrument Processing
108
User-Generated Stop
109
Resuming Operations after Stopping
109
Unloading Processed Plates
110
Unloading Processed Plates on Completion of Processing
110
Figure 4-26 : Opening Guard and Removing Output Cassette
110
Unloading Processed Plates During Processing
111
Remove a Full Output Cassette
111
Remove Plates from the Cassettes in Situ
111
Unloading Unprocessed Plates
111
Unloading Sample Tubes
112
Removing Waste
113
PREVI Isola Biohazardous Waste bin
113
PREVI Isola Waste Paper bin
114
Powering down the Instrument
115
Examples of Correct Streaking Patterns
116
Figure 4-27 : Correct Streaking Patterns
116
Quality Control
117
Intended Use
117
Material
117
Workstation Preparation
117
Instrument Preparation
118
Sample Tube Preparation
118
Sample Run and Plate Incubation
118
Results
118
Score Determination
119
Reference Appearance
119
Figure 5-1 : Score Determination
119
Figure 5-2 : Reference Appearance
119
Results
120
Information Technology Security
121
User Management
121
User Groups
121
Creating a New User Account
122
Figure 6-1 : Opening the Computer Management Window
122
Figure 6-2 : "Computer Management" Screen
122
Figure 6-3 : "New User" Screen
123
Figure 6-4 : "New User" Creation Box
123
Figure 6-5 : "New User" Creation Box with Data Entered
124
Assigning User Permissions and Rights
125
Figure 6-6 : "User Rights Management" Screen
125
Figure 6-7 : User "Properties" Screen
125
Figure 6-8 : "User Properties" - " Member of " Tab Screen
126
Figure 6-9 : "Select Groups" Screen
126
Figure 6-10 : "Select Groups" Screen (Cont'D)
127
Figure 6-11 : "Select Groups" Screen (Cont'D)
127
Figure 6-12 : "Select Groups" Screen (Cont'D)
128
Figure 6-13 : "Select Groups" Screen (Cont'D)
128
Figure 6-14 : "Properties" Screen - "Member Of" Tab Screen
129
Disabling a User Account
130
Figure 6-15 : "User Rights Management" Screen
130
Figure 6-16 : "User Properties" - "General" Tab Screen
130
Unlocking a User Account
131
Figure 6-17 : "User Rights Management" Screen
131
Changing of a Password by a User
132
Figure 6-18 : " Windows Security" Window
132
Figure 6-19 : "Change Password" Window
132
Antivirus
133
Windows Update
133
Verification Protocol
133
Printer Verification Protocol
134
Data Backup, Restore and Audit Trail
135
Presentation
135
Manual Data Backup
135
Data Restoration from a Removable Medium
135
Audit Trail Data Viewing Using the Event Viewer
135
Figure 7-1 : Event Viewer Shortcut
136
Figure 7-2 : "Event Viewer" Window
136
Figure 7-3 : Event Viewer "As_Audit" Window
137
Figure 7-4 : "Event Properties" Window
137
Saving the Audit Trail
138
Instrument and Workstation Log File Retrieval
140
Instrument Log Files
140
Workstation and Data Server Log Files
140
Full System Backup and Restoration
141
Full System Backup
141
Full System Restoration
141
Maintenance
143
Introduction
143
Safety Precautions and Controls
143
Biological Safety Requirements
143
Recommended Maintenance Product
143
Presentation of the Maintenance Menu
144
Figure 8-1 : Maintenance Menu
144
Maintenance Logs
145
Daily Maintenance Procedures
146
Clean the Tray under Input Cassettes
146
Figure 8-2 : Removing the Tray under the Input Cassettes
146
Clean the Waste Chute Top, the Area Around the Waste Chute Top and the Waste Chute Chimney
147
Figure 8-3 : Removing the Waste Chute Top
147
Clean the Process Station Drip Tray
148
Figure 8-4 : Removing the Process Station Drip Tray
148
Clean the Pipettor, Drip Tray and Area under and Around the Drip Tray
149
Figure 8-5 : Cleaning the Pipettor
149
Clean the Sample Racks
150
Figure 8-6 : Drip Tray to the Right of the Process Station
150
Clean the Sample Rack Tray and Sample Spill Tray
151
Figure 8-7 : Sample Rack Tray Presented for Cleaning
151
Figure 8-8 : Applying Cleaning Solution
151
Figure 8-9 : Removing the Sample Spill Tray
152
Figure 8-10 : Lifting up the Sample Spill Tray
152
Clean the Tray under Output Cassettes
153
Figure 8-11 : Removing the Tray under Output Cassettes
153
Clean the Waste Chute Deflector
154
Figure 8-12 : Removing the Waste Chute Deflector
154
Figure 8-13 : Waste Chute Deflector
154
Check, Replace or Empty the Waste Bins, and Clean the Deflector
155
Figure 8-14 : PREVI Isola Waste Bins in Drawer
155
Weekly Maintenance Procedures
156
Clean the Inside of Input and Output Cassettes
156
Figure 8-15 : Cleaning Inside Cassettes
156
Figure 8-16 : Wiping Inside Cassettes
156
Clean the Area Around the Applicator Cartridge and the Tip Tray
157
Clean the Process Station, Reference Block, Transfer Robot Suction Cups, and Agar Sensor
157
Figure 8-17 : Cleaning the Process Station
157
Figure 8-18 : Reference Block
158
Figure 8-19 : Robot Suction Cups
158
Figure 8-20 : Cleaning the Agar Sensor
159
Clean the Printer and the Printer Platen
160
Figure 8-21 : Cleaning the Platen
160
Clean the Print Head
161
Clean the Touch-Screen
161
Figure 8-22 : Print Head
161
Clean the External Surfaces of the Instrument
162
Clean the Waste Drawer
162
Maintenance Operations Performed by Biomérieux
163
Spill Management
163
Materials Required
163
Decontamination Procedures
163
Basic Decontamination
163
Removal and Disposal of Materials and Waste
164
Disposal of Used Consumables
164
Loading PREVI Isola Label Rolls
165
Figure 8-23 : Raising the Roller Arms
165
Figure 8-24 : Raising the Release Latches
165
Figure 8-25 : Removing the Empty Roll
165
Figure 8-26 : Correct Position of New Roll
166
Figure 8-27 : Using the Guides
166
Figure 8-28 : Feeding Label Backing through the Printer
167
Figure 8-29 : Instructions for Loading Labels on Instrument Touch-Screen
167
Figure 8-30 : Pull Mechanism Slot (Top View)
168
Figure 8-31 : Label Backing Correctly Pulled into the Slot (Top View)
168
Figure 8-32 : Lowering the Roller Arms
168
Figure 8-33 : Turning the Label Roll
169
Figure 8-34 : Metal Plate Not to be Removed
169
Figure 8-35 : Label Backing Coming out of Deflector
170
Replacing Fuses
171
Replacing the PREVI Isola HEPA Filter
171
Figure 8-36 : Main Power Inlet Fuses
171
Troubleshooting
173
Introduction
173
List of Error Messages
174
Event Log
182
Figure 9-1 : Event Log Screen
182
Error, Cause and Recovery
183
Recovery from Events with "Warning" Severity
187
Recovery from Events with "Error" Severity
187
Figure 9-2 : Warning Message
187
Figure 9-3 : Error Message
187
Recovery from Events with "Fatal" Severity
188
Restarting the Instrument Software
188
Figure 9-4 : Fatal Message
188
PREVI Isola HEPA Filter
189
Figure 9-5 : PREVI Isola HEPA Filter Error Message
189
Replacing the PREVI Isola HEPA Filter
190
Figure 9-6 : Unlocking the Latch
190
Figure 9-7 : Unhooking the Latch
190
Figure 9-8 : Preparing to Place the PREVI Isola HEPA Filter in a Plastic Bag
191
Figure 9-9 : Sliding the PREVI Isola HEPA Filter out of Its Housing
191
Figure 9-10 : Removing the PREVI Isola HEPA Filter from Its Housing
192
Figure 9-11 : Covering the PREVI Isola HEPA Filter as It Comes out of Its Housing
192
Figure 9-12 : Covering the PREVI Isola HEPA Filter until Fully Extracted
192
Figure 9-13 : PREVI Isola HEPA Filter in the Plastic Bag
193
Figure 9-14 : New PREVI Isola HEPA Filter in Place
193
Pipettor
195
Clean and Decontaminate the Pipettor if It Descends into a Sample Tube
195
Material Required
195
Procedure
195
Figure 9-15 : Unscrew the Pipettor Barrel
195
Figure 9-16 : Cleaning the Black Pipettor Piston
196
Figure 9-17 : Cleaning the Inside of the Pipettor Barrel
196
Figure 9-18 : Cleaning the Outisde of the Pipettor Barrel
196
Possible Issues after Cleaning
197
Reinitialize the Instrument after the Pipettor Descends into a Plate on the Process Station
197
Procedure
197
Figure 9-19 : Pipettor that Has Descended into a Plate
197
Examples of Incorrect Inoculation and Streaking Patterns
198
Figure 9-20 : Incorrect Inoculation and Streaking Patterns
198
Back up Instrument Log Files
199
Anonymization of Patient Data
199
Figure 9-21 : "Database Anonymiser" Screen
199
Figure 9-22 : Database Successfully Anonymized
199
General System Characteristics
201
Dimensions
201
Weight
201
Electrical Specifications
201
Environmental Considerations
201
Appendices
203
Appendix A: Packing List
203
Instrument Kit
203
User Manual Kit
203
Workstation PC Kit
203
Appendix B: Stopping and Restarting the Data Server
204
Stopping the Data Server
204
Figure 11-1 : Opening the "Services" Window
204
Figure 11-2 : "Services" Window
204
Figure 11-3 : "Dataserver" Selection Window
205
Figure 11-4 : "Service Control" Dialog Box
205
Restarting the Data Server
206
Figure 11-5 : Selecting the "Start" Link
206
Glossary
208
Advertisement
Advertisement
Related Products
bioMerieux PREVI Color Gram
bioMerieux Air IDEAL 3P
bioMerieux BACT/ALERT 3D 60
bioMerieux NucliSENS easyMAG
bioMerieux TEMPO
BioMerieux VITEK 2
bioMerieux VITEK 2 XL
bioMerieux Categories
Laboratory Equipment
Test Equipment
Medical Equipment
Accessories
Transmitter
More bioMerieux Manuals
Login
Sign In
OR
Sign in with Facebook
Sign in with Google
Upload manual
Upload from disk
Upload from URL