
Related Manuals for Samsung NV75J5540RS


Summary of Contents for Samsung NV75J5540RS
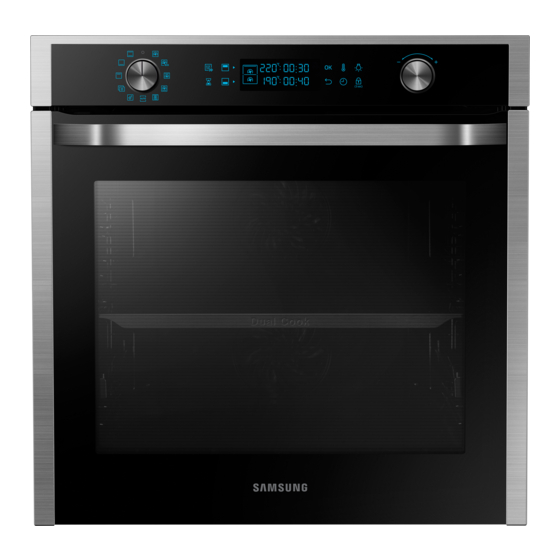
- Page 1 Built-in Oven User & installation manual NV75J5540RS NV75J5540RS_EU_DG68-00616E-00_EN.indd 1 2015-05-20 11:03:09...
-
Page 2: Table Of Contents
Contents Using this manual The following symbols are used in this User Manual: Safety instructions Important safety precautions Correct Disposal of This Product (Waste Electrical & Electronic Equipment) Auto energy saving function Installation What’s included Power connection Cabinet mount Before you start Initial settings New oven smell Smart safety mechanism... - Page 3 Cooking Smart Manual cooking Auto cook programmes Test Dishes Collection of frequent Auto cook recipes Maintenance Cleaning Replacement Troubleshooting Checkpoints Information codes Appendix Product data sheet English 3 NV75J5540RS_EU_DG68-00616E-00_EN.indd 3 2015-05-20 11:03:09...
-
Page 4: Using This Manual
Using this manual Thank you for choosing SAMSUNG Built-In Oven. This User Manual contains important information on safety and instructions intended to assist you in the operation and maintenance of your appliance. Please take the time to read this User Manual before using your oven and keep this book for future reference. -
Page 5: Safety Instructions
Safety instructions Installation of this oven must be performed only by a licensed electrician. The installer is responsible for connecting the appliance to the mains power supply in observance of the relevant safety recommendations. Important safety precautions WARNING This appliance is not intended for use by persons (including children) with reduced physical, sensory or mental capabilities, or lack of experience and knowledge, unless they have been given supervision or instruction concerning use of the appliance by a person responsible for... - Page 6 Safety instructions Accessible parts may become hot during use. Young children should be kept away. If this appliance has steam or self cleaning function, excess spillage must be removed before cleaning and all utensils should not be left in the oven during steam cleaning or self cleaning. The cleaning function depends on the model.
- Page 7 In the event of a fault or damage to the appliance, do not attempt to operate it. Repairs should be performed by a licensed technician only. Improper repair may result in considerable danger to you and others. If your oven needs repair, contact a SAMSUNG Service center or your dealer.
- Page 8 Safety instructions When the cartridge is cracked or broken, do not use it and contact your nearest service center. (Vapour or steam function model only) This oven has been designed only for the cooking of household foods. During use, the oven interior surfaces become hot enough to cause burns. Do not touch heating elements or interior surfaces of the oven until they have had time to cool.
-
Page 9: Correct Disposal Of This Product (Waste Electrical & Electronic Equipment)
WARNING: Do not disconnect the appliance from the main power supply even after the cooking process is completed. WARNING: Do not leave the door open while oven is cooking. Correct Disposal of This Product (Waste Electrical & Electronic Equipment) (Applicable in countries with separate collection systems) This marking on the product, accessories or literature indicates that the product and its electronic accessories (e.g. -
Page 10: Installation
What’s included Make sure all parts and accessories are included in the product package. If you have a problem with the oven or accessories, contact a local Samsung customer centre or the retailer. Oven at a glance 01 Control panel... - Page 11 Accessories The oven comes with different accessories that help you prepare different types of food. Wire rack Wire rack insert * Baking tray * Universal tray * Extra-deep tray * Rotisserie spit * Rotisserie spit and Shashlik * Telescopic rail * Divider NOTE Availability of accessories with an asterisk (*) depends on the oven model.
-
Page 12: Power Connection
If you use a plug-type socket, the plug must remain accessible after the oven is installed. Samsung is not responsible for accidents caused by missing or faulty earthgrounding. WARNING Do not step on or twist the wires during installation, and keep them away from heat- emitting parts of the oven. -
Page 13: Cabinet Mount
90 °C, and adjacent furniture must be resistant up to 75 °C. Samsung is not responsible for damage to furniture from the oven’s heat emission. The oven must be properly ventilated. For ventilation, leave a gap of about 50 mm between the lower shelf of the cabinet and the supporting wall. - Page 14 Installation Under-sink cabinet (mm) Min. 550 Min. 560 Min. 600 Min 460 x Min. 50 NOTE The built-in cabinet must have vents (D) to ventilate heat and circulate the air. Mounting the oven Make sure to leave a gap (A) of at least 5 mm between the oven and each side of the cabinet.
- Page 15 Fit the oven into the cabinet and fix the oven firmly on both sides using 2 screws. After installation is complete, remove the protective film, tape, and other packing material, and take out the provided accessories from inside the oven. To remove the oven from the cabinet, first disconnect power to the oven and remove 2 screws on both sides of the oven.
-
Page 16: Before You Start
Before you start Initial settings When you power on the oven for the first time, the default time of “12:00” appears on the display where the hour element (“12”) blinks. Follow the steps below to set the current time. 1. With the hour element blinking, turn the value dial (right-sided dial) to set the hour, and then press OK to move to the minute element. -
Page 17: New Oven Smell
Soft Closing Door (Gentle, Safe, and Silent) The Samsung Built-in Oven features a soft closing door that gently, safely, and silently closes. When closing the door, the specially designed hinges catch the door a few centimetres before the final position. -
Page 18: Accessories
Before you start Accessories For first time use, clean the accessories thoroughly with warm water, detergent and a soft clean cloth. • Insert the accessory to the correct position inside of the oven. • Allow at least a 1 cm space from the accessory and the bottom of the oven, and from any other accessory. - Page 19 Rotisserie spit and Put the tray at rack position 1 to collect cooking juices, or on the Shashlik * bottom of the oven for a large serving of meat. It is recommended to use the spit accessories for meat under 1.5 kg. 1.
-
Page 20: Dual Cook Mode
Before you start Dual cook mode You can use both the upper and lower compartments to cook two different recipes, or simply choose one compartment to cook with. Insert the divider in level 3 to separate the cooking chamber in two compartments. The oven senses the divider and activates the upper compartment by default. -
Page 21: Operations
Operations Control panel The front panel comes in a wide range of materials and colours. For improved quality, the actual appearance of the oven is subject to change without notice. 02 04 06 08 10 07 09 11 01 Mode selector Turn to select a cooking mode or function. -
Page 22: Common Settings
Operations 12 Value dial Use the value dial to: • Set the cooking time or temperature. • Choose a sub item of top-level menus: Cleaning, Auto cook, Special function, or Grill. • Choose a serving size for Auto Cook programmes. NOTE Tapping on the display while wearing plastic or oven gloves may not operate properly. - Page 23 Cooking time 1. Turn the mode selector to choose a mode or function. 2. Press the button, and then turn the value dial to set a desired time up to 23 hours 59 minutes. 3. Optionally, you can delay the end time of your cooking to a desired point.
- Page 24 Operations End time 1. Turn the mode selector to choose a mode or function. 2. Press twice, and turn the value dial to set a desired end time. 3. Press OK to confirm your changes. NOTE • You can cook without setting the end time if you want to.
- Page 25 Delay End Delay End is designed to make cooking more convenient. Case 1 Suppose you select a one-hour recipe at 2:00 PM and you want the oven to finish cooking at 6:00 PM. To set the end time, change the Ready At time to 6:00 PM. The oven will start cooking at 5:00 PM and end at 6:00 PM as you set.
- Page 26 Operations To clear the cooking time You can clear the cooking time. This is useful if you want to stop the oven manually at any time during the process. 1. While the oven is cooking, press the button to display the default cooking time.
- Page 27 To clear the end time You can clear the end time. This is useful if you want to stop the oven manually at any time during the process. 1. While the oven is cooking, press twice to display the set end time. 2.
-
Page 28: Cooking Modes (Except For Grill)
Operations Cooking modes (except for Grill) 1. Turn the mode selector to select an cooking mode. 2. Set the cooking time and/or temperature if necessary. See the Common Settings section for details. 3. Optionally, you can fast preheat the oven. To do this, press the button, and set the target temperature. - Page 29 2. Press to select the upper compartment, or press to select the lower compartment. 3. Turn the mode selector to select an cooking mode. 4. Set the cooking time and/or temperature if necessary. See the Common Settings section for details. 5.
- Page 30 Operations Temperature range (°C) Suggested Mode Dual temperature (°C) Single Upper Lower 30-275 The heat is generated from the top and bottom heating Conventional elements. This function should be used for standard baking and roasting for most types of dishes. 40-275 40-250 Top heat +...
-
Page 31: Cooking Modes (Grill)
Cooking modes (Grill) 1. Turn the mode selector to select 2. Use the value dial to select a Large grill (G 1) or Eco grill (G 2), and then press 3. Use the value dial to set the temperature, and then press OK. Dual cook mode Grilling with Dual cook mode is useful for small serving sizes to save power. - Page 32 Operations 3. Use the value dial to set the temperature, and then press OK. Cooking modes (Grill) Temperature range (°C) Suggested Mode Dual temperature (°C) Single Upper Lower 100-300 40-250 Large grill The large-area grill emits heat. Use this mode for browning the tops of food (for example, meat, lasagne, or gratin).
-
Page 33: Dual Cook Mode Temperature Setting Range
Dual cook mode temperature setting range You can use both the upper and lower compartments simultaneously for different cooking operations. In Dual Cook mode, the temperature range of one compartment is affected by the temperature settings of the other compartment. For instance, broiling in the upper compartment will be limited by the operation in the lower compartment in terms of cooking temperatures. - Page 34 Operations Upper compartment is limited to (°C)) If Lower is set to (°C) Minimum Maximum 34 English NV75J5540RS_EU_DG68-00616E-00_EN.indd 34 2015-05-20 11:03:15...
-
Page 35: To Stop Cooking
To stop cooking While cooking is in process, turn the mode selector to “ ”. The oven turns off in a few seconds. This is because, to avoid accepting incorrect commands by users, the oven waits a few seconds so that they can correct their selection. -
Page 36: Special Function
Operations Special function Add special or additional functions to improve your cooking experience. Special functions are not enabled in Dual cook mode. 1. Turn the mode selector to select 2. Turn the value dial to select a function, and then press OK. The default temperature appears. -
Page 37: Auto Cook
Auto cook For inexperienced cooks, the oven offers a total of 50 auto cooking recipes. Take advantage of this feature to save you time or shorten your learning curve. The cooking time and temperature will be adjusted according to the selected recipe. 1. -
Page 38: Steam Cleaning
Operations 3. Turn the mode selector to select 4. Turn the value dial to select a programme for the upper compartment, and press OK. 5. Turn the value dial to select a serving size. The weight range depends on the programme. - Page 39 3. Ppress OK to start cleaning. 4. Use a dry cloth to clean inside the oven. WARNING • Do not open the door before the cycle is complete. The water inside the oven is very hot, and it can cause a burn. NOTE • If the oven is heavily soiled with grease, for example, after roasting or grilling, it is...
-
Page 40: Timer
Operations Timer Timer helps you check the time or operating duration while cooking. 1. Press 2. Turn the value dial to set the time, and then press OK. NOTE • When the time has elapsed, the oven • You can change the timer settings at any beeps with a blinking message of “00:00”... -
Page 41: Cooking Smart
Cooking Smart Manual cooking WARNING on acrylamide NOTE Acrylamide produced while baking starch- • Pre-heating is recommended for all contained food such as potato chips, French cooking modes unless otherwise specified fries, and bread may cause health problems. in the cooking guide. It is recommended to cook these foods at • When using Eco Grill, put food in the low temperatures and avoid overcooking,... - Page 42 Cooking Smart Type of Food Accessory Level Temp. (°C) Time (min.) heating Fruit crumble Wire rack, 22- 170-180 25-30 24 cm oven dish Scones Universal tray 180-190 30-35 Lasagne Wire rack, 22- 190-200 25-30 24 cm oven dish Meringues Universal tray 80-100 100-150 Soufflé...
- Page 43 Type of Food Accessory Level Temp. (°C) Time (min.) heating Pork roast, 1 kg Wire rack + 200-210 50-60 Universal tray Joint of pork, 1 Wire rack + 160-180 100-120 Universal tray Leg of lamb on Wire rack + 170-180 100-120 the bone, 1 kg Universal tray...
- Page 44 Cooking Smart Grilling We recommend preheat the oven using large grill mode. Turn over after half of time. Type of Food Accessory Level Temp. (°C) Time (min.) heating Bread Toast Wire rack 270-300 Cheese toast Universal tray Beef Steak* Wire rack + 240-250 15-20 Universal tray...
- Page 45 Type of Food Accessory Level Temp. (°C) Time (min.) heating Frozen oven Universal tray 220-225 20-25 chips Frozen Universal tray 220-230 25-30 Croquettes Frozen oven Wire rack 190-200 10-15 camembert Frozen Wire rack + 190-200 10-15 baguettes with Universal tray topping Frozen fish Wire rack +...
- Page 46 Cooking Smart ECO convection This mode uses the optimized heating system so that you save the energy during cooking your dishes. The times of this category are suggested to not be preheated before cooking for saving more energy. Food Accessory Level Temp.
- Page 47 Dual cook Before using dual cook function insert the divider into the oven. We recommend preheat the oven for best results. The following table presents 5 dual cook guides we recommended for cooking, roasting and baking. Using dual cook function, you will be able to cook your main dish & side dish or main dish &...
-
Page 48: Auto Cook Programmes
Cooking Smart Auto cook programmes Single cook The following table presents 40 auto programmes for cooking, roasting and baking. It contains its quantities, weight ranges and appropriate recommendations. Cooking modes and times have been pre-programmed for your convenience. You will find some recipes for the auto programmes in your instruction book. - Page 49 Code Food Weight (kg) Accessory Level 1.2-1.4 Wire rack Prepare apple pie using a 24-26 cm round metal baking tin. Apple pie Start programme, after preheating beep sounds, put tin in the centre of rack. 0.3-0.4 Universal tray Prepare croissants (chilled ready dough). Put on baking paper Croissants on Universal tray.
- Page 50 Cooking Smart Code Food Weight (kg) Accessory Level 0.5-0.6 Universal tray A 14 Scones Put scones (5-6 cm diameter) on baking paper on tray. Start programme, after preheating beep sounds, insert tray. 0.5-0.6 Wire rack Prepare dough and put into a black metal round baking tin A 15 Sponge cake with 26 cm diameter.
- Page 51 Code Food Weight (kg) Accessory Level 0.4-0.6 Wire rack + Universal tray 0.6-0.8 A 22 Lamb chops Marinate the lamb chops with herbs and spices and put them on wire rack. 1.0-1.5 Wire rack + Leg of lamb on Universal tray A 23 1.5-2.0 the bone...
- Page 52 Cooking Smart Code Food Weight (kg) Accessory Level 0.3-0.5 Universal tray A 30 Trout fillet 0.5-0.7 But trout fillets with the skin side up on the Universal tray. 0.3-0.5 Wire rack + Universal tray 0.5-0.7 A 31 Trout Rinse and clean the fish and put head to tail on the rack. Add lemon juice, salt and herbs inside fish.
- Page 53 Code Food Weight (kg) Accessory Level 0.3-0.5 Universal tray Frozen potato A 37 0.5-0.7 wedges Distribute frozen potato wedges evenly on tray. 0.3-0.6 Wire rack 0.6-0.9 A 38 Frozen pizza Start programme, after preheating beep sounds, put the frozen pizza in the middle of the wire rack. The first setting is for thin Italian pizza, the second setting for thick pan pizza.
- Page 54 Cooking Smart Dual cook The following table presents 10 auto programmes for cooking, roasting and baking. You can use only upper cavity or lower cavity and use the upper and lower cavity at the same time. The programme contains its quantities, weight ranges and appropriate recommendations. Cooking modes and times have been pre-programmed for your convenience.
- Page 55 Code Food Weight (kg) Accessory Level Lower 1.2-1.4 Wire rack Prepare apple pie using a 24-26 cm round metal baking tin. Apple pie Start programme, after preheating beep sounds, put tin in the centre of rack. 0.3-0.4 Universal tray Apple puff Put Apple Puff Pastries on baking paper on Universal tray.
-
Page 56: Test Dishes
Cooking Smart Test Dishes According to standard EN 60350-1 1. Baking The recommendations for baking refer to a preheated oven. Do not use the fast preheat function. Always put trays the slanted side to the door front. Type of Temp. Time Type of food Accessory... - Page 57 2. Grilling Preheat the empty oven for 5 minutes using Large Grill function. Type of Temp. Time Type of food Accessory Level heating (°C) (min.) White bread Wire rack toast (max) Beef burgers* Wire rack + 15-18 (12 ea) Universal tray (max) (to catch drippings) * Turn over after...
-
Page 58: Collection Of Frequent Auto Cook Recipes
Cooking Smart Collection of frequent Auto cook recipes Potato gratin Ingredients 800 g potatoes, 100 ml milk, 100 ml cream, 50 g beaten whole egg, 1 tbsp each of salt, pepper, nutmeg, 150 g grated cheese, butter, thyme Directions Peel potatoes and slice them to 3 mm thickness. Rub the butter all over the surface of a gratin dish (22-24 cm). - Page 59 Lasagne Ingredients 2 tbsp olive oil, 500 g minced beef, 500 ml tomato sauce, 100 ml beef stock, 150 g dried lasagne sheets, 1 onion (chopped), 200 g grated cheese, 1 tsp each of dried parsley flakes, oregano, basil Directions Prepare tomato meat sauce.
- Page 60 Cooking Smart Quiche Lorraine Ingredients • Pastry: 200 g plain flour, 80 g butter, 1 egg • Filling: 75 g cubed fatless bacon, 125 ml cream, 125 g crème fraiche, 2 eggs, beaten, 100 g grated cheese from Switzerland, salt and pepper Directions To make the pastry, put the flour, butter and egg in a bowl and mix to a soften pastry and then rest it in the refrigerator for 30 min.
- Page 61 Roast sirloin of beef Ingredients 1 kg sirloin of beef joint, 5 g salt, 1 g pepper, 3 g each of rosemary, thyme Directions Season the beef with salt, pepper and rosemary and leave in refrigerator for 1 hour. Put on the Wire rack. Put it in the oven and cook. Herb roasted lamb chops Ingredients 1 kg lamb chops (6 pieces), 4 large garlic cloves (pressed), 1 tbsp fresh...
-
Page 62: Maintenance
Maintenance Cleaning Accessories WARNING Wash the accessories after every use, and • Make sure the oven and accessories are dry it with a tea towel. To remove stubborn cool before cleaning. impurities, soak the used accessories in • Do not use abrasive cleaning agents, warm soapy water for about 30 minutes hard brushes, scouring pads or cloths, before washing. - Page 63 Door Do not remove the oven door unless for cleaning purposes. To remove the door for cleaning, follow these instructions. WARNING The oven door is heavy. 1. Open the door and flip open the clips at both hinges. 2. Close the door approximately 70°. Hold the oven door by the sides using both hands, and lift and pull upwards until the hinges are removed.
- Page 64 Maintenance Door glass Depending on the model, the oven door is equipped with 3-4 sheets of glass placed against each other. Do not remove the door glass unless for cleaning purposes. To remove the door glass for cleaning, follow these instructions. 1.
- Page 65 6. When done, reinsert the sheets as follows: • Insert sheet 2 between support clip 1 and 2, and sheet 1 into support clip 3 in this order. 01 Support clip 1 02 Support clip 2 03 Support clip 3 7.
- Page 66 WARNING If you encounter a water leak from the water collector, contact us at a local Samsung service center. 01 Water collector Ceiling (applicable models only) 1. Put down the grill heater. For this, turn the circular nut anticlockwise while holding the grill heater.
- Page 67 Side runners (applicable models only) 1. Press the top line of the left side runner, and lower by approximately 45 º. 2. Pull and remove the bottom line of the left side runner. 3. Remove the right side runner in the same way.
- Page 68 Maintenance Telescopic rails (applicable models only) 1. On the left Side runner, gently press the upper side of the rail to remove in the arrow direction. 2. Repeat the above step on the right Side runner to remove the right rail. 3.
-
Page 69: Replacement
• Use only 25-40 W/220-240 V, 300 °C heat-resistant bulbs. You can purchase approved bulbs at a local Samsung service center. Side oven light 1. Hold the lower end of the cover of the side... -
Page 70: Troubleshooting
Troubleshooting Checkpoints If you encounter a problem with the oven, first check the table below and try the suggestions. If the problem continues, contact a local Samsung service centre. Problem Cause Action The buttons cannot be • If there is foreign matter • Remove the foreign matter... - Page 71 Problem Cause Action The interior light is dim • If the lamp turns on and • The lamp automatically or does not turn on. then off turns off after a certain • If the lamp is covered amount of time to save by foreign matter during power.
- Page 72 Troubleshooting Problem Cause Action Smoke comes out during • During initial operation • Smoke may come from operation. • If there is food on the the heater when you first heater use the oven. This is not a malfunction, and if you run the oven 2-3 times, it should stop happening.
-
Page 73: Information Codes
Turn off the oven and try again. If held for a period of time. the problem continues, contact a local Samsung service centre. The divider must not be removed during cooking in Dual cook mode. If the divider is removed during Turn off the oven and then restart. - Page 74 Troubleshooting Code Meaning Action Safety shutoff Oven has continued operating at a set temperature for an extended This is not system failure. Turn off S-01 time. the oven and remove food. Thenm • Under 105 °C - 16 hours try again normally. • From 105 °C to 240 °C - 8 hours • From 245 °C to Max - 4 hours 74 English...
-
Page 75: Appendix
Appendix Product data sheet SAMSUNG SAMSUNG Model identification NV75J5540RS Energy Efficiency Index per cavity (EEI cavity) 95.4 Energy Efficiency Class per cavity Energy consumption required to heat a standardised load in a 0.99 kWh/cycle cavity of an electric heated oven during a cycle in conventional... - Page 76 70 70 19 70 www.samsung.com/dk/support FINLAND 030-6227 515 www.samsung.com/fi/support FRANCE 01 48 63 00 00 www.samsung.com/fr/support 0180 6 SAMSUNG bzw. 0180 6 7267864* GERMANY (*0,20 €/Anruf aus dem dt. Festnetz, aus dem www.samsung.com/de/support Mobilfunk max. 0,60 €/Anruf) ITALIA 800-SAMSUNG (800.7267864) www.samsung.com/it/support...