Table of Contents
Advertisement
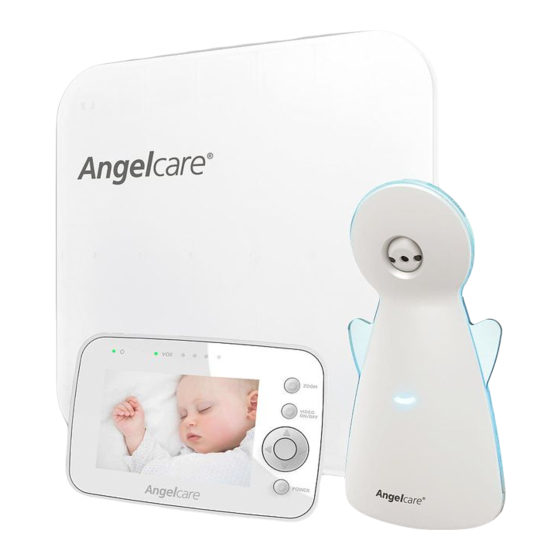
OWNER'S MANUAL
DIGITAL VIDEO, MOVEMENT
& SOUND MONITOR
Model AC1300
IMPORTANT ADVICE FOR INITIAL SETUP
Movement Alarm
Your monitor comes with the movement alarm activated.
When switching on your monitor it will alarm, with or without
the Sensor Pad plugged in, if no movement is detected.
Deactivate the movement function to use the monitor without
the Sensor Pad.
Cord Safety
Ensure the Nursery Unit is at least 1 metre away from your
baby's cot. The Sensor Pad cord must always be kept out of
reach of baby and secured using the cord cover kit provided.
PLEASE FOLLOW THE INSTRUCTIONS CAREFULLY FOR CORRECT SETUP
Please DO NOT return this product to the store. For assistance please
contact our helpline on 0345 009 1789 or email helpline@babyhelpline.co.uk
Mon – Fri 10am – 4pm, excluding bank holidays.
FOR YOUR PEACE OF MIND
Advertisement
Table of Contents

Subscribe to Our Youtube Channel
Related Manuals for Angelcare ac1300


Summary of Contents for Angelcare ac1300
- Page 1 FOR YOUR PEACE OF MIND OWNER’S MANUAL DIGITAL VIDEO, MOVEMENT & SOUND MONITOR Model AC1300 IMPORTANT ADVICE FOR INITIAL SETUP Movement Alarm Your monitor comes with the movement alarm activated. When switching on your monitor it will alarm, with or without the Sensor Pad plugged in, if no movement is detected.
-
Page 2: Table Of Contents
Keep small parts away from children when assembling. This Angelcare Monitor is a Personal Care Product. Please DO NOT return this to the store where you purchased it from. If you have any questions or require assistance please call the Angelcare Helpline on 0345 009 1789 or email helpline@babyhelpline.co.uk. -
Page 3: Warnings
WARNINGS 1. T H I S P R O D U C T C A N N O T R E P L A C E and assembling the product and keep small parts RESPONSIBLE ADULT SUPERVISION. This product away from children. is designed to aid in the monitoring of your child. - Page 4 Sensor Pad measuring Any mounting of the product should follow the at least 33 x 33 cm and 6 mm thick. Only use manufacturer’s instructions. your Angelcare ® monitor in a stationary sleeping environment such as a crib where the Sensor 15.9 Unplug this appliance during lightning storms...
-
Page 5: Ac1300 Setup Requirements
Maximum dimensions: equal to the mattress size Hardboard IMPORTANT Miniature Philips 3 AA Alkaline Screwdriver Batteries for Nursery The hardboard must be larger than the Sensor Pad Unit surface area or in the case of the AC1300-2SP of two Sensor Pads. -
Page 6: Step 1 - Charging The Parent Unit (9 Hours)
STEP 1 - CHARGING THE PARENT UNIT (9 HOURS) IMPORTANT The Parent Unit uses a non- removable rechargeable lithium battery. DO NOT attempt to change it. 1) Connect the adapter to the NOTE: Parent Unit and into an electrical outlet. To optimize your battery performance please refer 2) Charge the unit for 9 continuous... -
Page 7: Step 2 - Installing The Sensor Pad
Cord covers 1, 2, 3, 4: STEP 2 - INSTALLING THE SENSOR PAD Position on floor Cord cover 4: Contains double sided tape to securely install beneath crib leg Cord cover 5: Position vertically between mattress support and floor Cord cover 6: Sensor Pad with pre-installed cord covers Place under the mattress 2.1 - SELECT A LOCATION FOR THE NURSERY UNIT... - Page 8 4) Bring the first 4 cord covers down the floor, and keep the 5 cord cover vertically, along the backside of the crib leg, (between the mattress and the inside edge of the crib). 5) Remove any cord slack to make sure no parts of the cord are loose.
-
Page 9: Step 3 - Setting Up The Nursery Unit
STEP 4 - TURNING ON YOUR MONITOR 1) Press and hold the Parent Unit ON/OFF button for 2 seconds until LCD screen is turned ON. Angelcare’s logo will be shown for 1 second. 2) Push and hold the Nursery Unit Power ON/ OFF button for 2 seconds. -
Page 10: Step 5 - Testing And Getting To Know Your Monitor
2/3 Full Full STEP 5 - TESTING AND GETTING TO KNOW YOUR MONITOR The Angelcare monitor can be used with the pre-program factory settings or ® you can also customize your settings to your preference. Main menu on the LCD display shows the different operation settings. -
Page 11: Sound
TO STOP THE ALARM On the Parent Unit, press any key Press the Pager/Hold to stop the alarm. button on the Nursery Unit. TO ADJUST THE SENSOR PAD SENSITIVITY LEVEL: 1) Press Menu/Select button to access main menu. 2) Select the Settings icon to access sub-menu. 3) Select the Movement Sensitivity icon. -
Page 12: Batteries
LCD screen. we recommend that you fully recharge them. YOU ARE NOW READY TO USE YOUR MONITOR The Angelcare ® monitor can be used with the pre-program factory settings or you can also customise your settings to your preference. -
Page 13: Voice Activation/Continuous Sound Mode
STEP 6 - HOW TO CHANGE AND SAVE ADDITIONAL FUNCTIONS IMPORTANT When in the menu or sub-menu modes, sound transmission between Parent and Nursery Units will be temporarily deactivated. ONLY the movement detection alarm will remain active (if function is activated). 6.1 - VOICE ACTIVATION (VOX) OR CONTINUOUS SOUND MODE Allows you to select your option on how you monitor sound: VOX (voice activation picks up sound based on the setting of the sensitivity level) This... - Page 14 6.3 - THERMOMETER TO CHANGE THE MEASUREMENT UNIT: 1) Press Menu/Select button to access main menu. 2) Select the Temperature icon to access sub-menu. 3) Select the ˚C ˚F icon. 4) Use the up and down arrows to change from Celsius to Fahrenheit. ºC ºC ºC...
- Page 15 6.4 - SCREEN SAVER 1) Press Menu/Select button to access Allows you to set the screen saver starting point. main menu. 2) Select the Settings icon to access sub-menu. 3) Select the Screen Saver icon. 4) Use the up and down arrows to select the delay before Video mode turns into Screen Saver mode.
- Page 16 TO STOP THE PAGING SOUND: Press the Press any button Nursery Unit’s on the Parent Unit. Pager/Hold button 6.8 - ZOOM MODE Allows you to zoom in to twice the normal view. 1) Press and release the Zoom button on the Parent Unit. 2) The Zoom icon will appear at the bottom left corner of the screen.
-
Page 17: Troubleshooting
TROUBLESHOOTING TAKING CARE OF YOUR RECHARGEABLE BATTERY • Ensure that you fully charge your battery for 9 hours before their first use. • To maintain maximum battery life it is recommended that you fully discharge your battery periodically. If your Parent Unit is not in use, please turn it OFF. FALSE ALARMS •... -
Page 18: Re-Connection Procedure
4) Turn the Parent Unit ON You will see the blue Angelcare logo on the screen followed by a blank screen – now press & hold the Zoom Button on the Parent Unit. -
Page 19: Technical Specifications
The EU declaration of conformity can be obtained TECHNOLOGY (SHENZHEN) COMPANY LIMITED. at: www.angelcarebaby.com. ErP COMPLIANCE SOUTH AFRICA-BRAZIL-ECUADOR-EUROPEAN UNION-UK USE ONLY ANGELCARE® BRAND POWER SUPPLY - MODEL NUMBER: T05005V001 / T05005B001 GERMANY USE ONLY ANGELCARE® BRAND POWER SUPPLY - MODEL NUMBER: T05005F002 PROTECT THE ENVIRONMENT AUSTRALIA USE ONLY ANGELCARE®... - Page 20 This Angelcare Baby Monitor is a Personal Care Product. Please DO NOT return this to the store, but contact us initially for advice and assistance: Angelcare Helpline on 0345 009 1789 Website: www.angelcare.co.uk Email: helpline@babyhelpline.co.uk NOTE: Helpline is open Monday to Friday, 10am to 4pm, excluding bank holidays.
Need help?
Do you have a question about the ac1300 and is the answer not in the manual?
Questions and answers