
Related Manuals for Angelcare ac1300


Summary of Contents for Angelcare ac1300
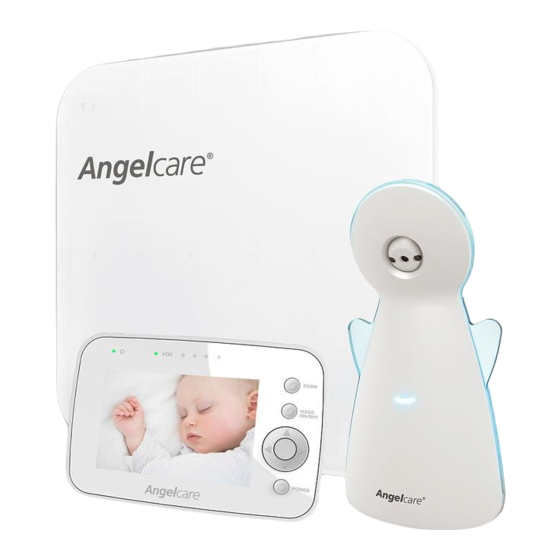
- Page 1 FOR YOUR PEACE OF MIND OWNER’S MANUAL VIDEO, MOVEMENT & SOUND MONITOR Model AC1300...
-
Page 2: Table Of Contents
® , stand behind all of our products. If you are not completely satisfied or have any questions, United States and Canada: Please contact us at: angelcare@cdecinc.ca Other countries: Please contact your local distributor. FCC AND IC REGULATIONS RF radiation exposure statement The Nursery Unit complies with FCC RF radiation exposure limits set forth for an uncontrolled environment. -
Page 3: Warnings
WARNINGS 1. T H I S P R O D U C T C A N N O T R E P L A C E 13. When using the monitor, the room temperature RESPONSIBLE ADULT SUPERVISION. This product should be between 50°F (10°C) and 104°F (40°C). is designed to aid in the monitoring of your child. - Page 4 Sensor Pad measuring at least 13” x 13” (33 x 33 cm) and 1/4 inch (6 mm) thick. Only use 15.9 Unplug this appliance during lightning storms your Angelcare ® monitor in a stationary sleeping or when not used for long periods of time.
-
Page 5: Ac1300 Setup Requirements
Maximum dimensions: equal to the mattress size Hardboard IMPORTANT Miniature Philips 3 AA Alkaline Screwdriver Batteries for Nursery The hardboard must be larger than the Sensor Pad Unit surface area or in the case of the AC1300-2SP of two Sensor Pads. -
Page 6: Step 1 - Charging The Parent Unit (9 Hours)
STEP 1 - CHARGING THE PARENT UNIT (9 HOURS) IMPORTANT 73 F The Parent Unit uses a non- removable rechargeable lithium battery. DO NOT attempt to change it. 1) Connect the adapter to the NOTE: Parent Unit and into an electrical outlet. To optimize your battery performance please refer 2) Charge the unit for 9 continuous... -
Page 7: Step 2 - Installing The Sensor Pad
STEP 2 - INSTALLING THE SENSOR PAD Cord covers 1, 2, 3, 4: Position on floor Cord cover 4: Contains double sided tape to securely install beneath crib leg Cord cover 5: Position vertically between mattress support and floor Cord cover 6: Sensor Pad with pre-installed cord covers Place under the mattress 2.1 - SELECT A LOCATION FOR THE NURSERY UNIT... - Page 8 4) Bring the first 4 cord covers down the floor, and keep the 5 cord cover vertically, along the backside of the crib leg, (between the mattress and the inside edge of the crib). 5) Remove any cord slack to make sure no parts of the cord are loose.
-
Page 9: Step 3 - Setting Up The Nursery Unit
STEP 4 - TURNING ON YOUR MONITOR 1) Press and hold the Parent Unit ON/OFF button for 2 seconds until LCD screen is turned ON. Angelcare’s logo will be shown for 1 second. 2) Push and hold the Nursery Unit Power ON/ OFF button for 2 seconds. -
Page 10: Step 5 - Testing And Getting To Know Your Monitor
2/3 Full Full STEP 5 - TESTING AND GETTING TO KNOW YOUR MONITOR The Angelcare monitor can be used with the pre-program factory settings or ® you can also customize your settings to your preference. Main menu on the LCD display shows the different operation settings. -
Page 11: Sound
TO STOP THE ALARM On the Parent Unit, press any key Press the Pager/Hold to stop the alarm. button on the Nursery Unit. TO ADJUST THE SENSOR PAD SENSITIVITY LEVEL: 1) Press Menu/Select button to access main menu. 2) Select the Settings icon to access sub-menu. 3) Select the Movement Sensitivity icon. -
Page 12: Batteries
LCD screen. we recommend that you fully recharge them. YOU ARE NOW READY TO USE YOUR MONITOR The Angelcare ® monitor can be used with the pre-program factory settings or you can also customise your settings to your preference. -
Page 13: Step 6 - Activating And Deactivating Additional Functions
STEP 6 - ACTIVATING AND DEACTIVATING ADDITIONAL FUNCTIONS IMPORTANT When in the menu or sub-menu modes, sound transmission between Parent and Nursery Units will be temporarily deactivated. ONLY the movement detection alarm will remain active (if function is activated). 6.1 - VOICE ACTIVATION (VOX) OR CONTINUOUS SOUND MODE Allows you to select your option on how you monitor sound: VOX (voice activation picks up sound based on the setting of the sensitivity level) or Continuous (sound monitoring is continuously on, picking up all sounds). - Page 14 6.3 - THERMOMETER TO CHANGE THE MEASUREMENT UNIT: 1) Press Menu/Select button to access main menu. 2) Select the Temperature icon to access sub-menu. 3) Select the ˚C ˚F icon. 4) Use the up and down arrows to change 73 F from Celsius to Fahrenheit.
- Page 15 6.4 - SCREEN SAVER 1) Press Menu/Select button to access Allows you to set the screen saver starting point. main menu. 2) Select the Settings iconto access sub-menu. 3) Select the Screen Saver icon. 4) Use the up and down arrows to select 73 F the delay before Video mode turns into Screen Saver mode.
- Page 16 TO STOP THE PAGING SOUND: 73 F Press the Press any button Nursery Unit’s on the Parent Unit. Pager/Hold button 6.8 - ZOOM MODE Allows you to zoom in to twice the normal view. 1) Press and release the Zoom button 73 F on the Parent Unit.
-
Page 17: Troubleshooting
TROUBLESHOOTING TAKING CARE OF YOUR RECHARGEABLE BATTERIES • Ensure that you fully charge your batteries for 9 hours before their first use. • To maintain maximum battery life it is recommended that you fully discharge your batteries periodically. If your Parent Unit is not in use, please turn it OFF. FALSE ALARMS •... -
Page 18: Limited Warranty
® video, movement and sound accessories which are not Angelcare-branded, or monitor (model AC1300) is free from any material any problems that result from usage that is not in and workmanship defects, for a period of one (1) accordance with product instructions, failure to year from the date of the original purchase. -
Page 19: Español
PARA SU TRANQUILIDAD MANUAL DEL PROPIETARIO MONITOR DE VIDEO, MOVIMIENTOS Y SONIDOS Modelo AC1300... -
Page 20: Manual Del Propietario
ÍNDICE ADVERTENCIAS............................21 REQUISITOS PARA LA INSTALACIÓN DEL MONITOR AC1300 ............23 PASO 1 - Carga de la unidad de los padres (9 horas) ................. 24 PASO 2 - Instalación del detector de movimientos ................25 PASO 3 - Instalación de la unidad del bebé ................... 27 PASO 4 - Encendido del monitor ....................... -
Page 21: Advertencias
ADVERTENCIAS 1. ESTE PRODUCTO NO PUEDE REEMPLAZAR LA 12. Este producto contiene piezas pequeñas. Este SUPERVISIÓN RESPONSABLE DE UN ADULTO. producto debe ser armado por un adulto. Tenga Este producto está diseñado para ayudar en la cuidado cuando quite el producto de su empaque supervisión de su hijo. - Page 22 13” x 13”(33 x 33 cm) y 1/4” (6 u otros peligros. mm) de espesor. Solo use el monitor Angelcare ® 15.11 Piezas de repuesto. Cuando se necesiten en un ambiente para dormir fijo, como una repuestos, asegúrese de que las piezas de...
-
Page 23: Requisitos Para La Instalación Del Monitor Ac1300
REQUISITOS DE INSTALACIÓN MOVIMIENTOS Y SONIDOS Modelo AC1300 PARTES INCLUIDAS: 73 F 2 adaptadores 1 detector de movimientos (AC1300) o 2 detectores Unidad de los padres Unidad del bebé de movimientos (AC1300-2SP) con cubrecables de CA con batería de litio... -
Page 24: Paso 1 - Carga De La Unidad De Los Padres (9 Horas)
El tablero compactado debe ser más grande que el bebé área de la superficie del detector de movimientos o, en el caso de AC1300-2SP, de los dos detectores de movimientos. PASO 1 - CARGAR LA UNIDAD DE LOS PADRES (9 HORAS) -
Page 25: Paso 2 - Instalación Del Detector De Movimientos
ADVERTENCIA PELIGRO DE ESTRANGULACIÓN. Hubo casos de niños que se han ESTRANGULADO con cables: • Mantenga los cables de los adaptadores fuera del alcance de los niños (a más de 3 pies [0.9 metro] de distancia). • Debido al grave riesgo de estrangulación para los bebés y niños pequeños, los padres y los cuidadores nunca deben colocar la unidad del bebé... - Page 26 2.2 -ELIJA LA PATA DE LA CUNA DEBAJO DE LA CUAL FIJARÁ LOS CUBRECABLES RECOMENDADO Figura 1 Figura 2 1) Use la pata de la cuna que esté junto a la pared más cercana a la unidad del bebé (Figura 1). Si la unidad del bebé se encuentra al otro lado de la habitación, coloque el cable cubierto junto a la pata más cercana a la unidad del bebé...
-
Page 27: Paso 3 - Instalación De La Unidad Del Bebé
8) Elimine todo excedente del cable para asegurarse de que no queden partes flojas. 9) Retire la protección de la cinta de doble cara del 4.º cubrecable y fije el cubrecable firmemente debajo de la pata de la cuna. 10) Instale la unidad del bebé sobre una superficie plana y estable en dirección a la cuna a una distancia mínima de 3 pi. -
Page 28: Paso 4 - Encendido Del Monitor
1) Mantenga presionado el botón de encendido (ON)/apagado (OFF) de la unidad de los padres durante 2 segundos hasta que la pantalla LCD se encienda. El logotipo de Angelcare aparecerá durante 1 segundo. 2) Mantenga presionado el botón de encendido (ON)/apagado (OFF) de la unidad del bebé... -
Page 29: Paso 5 - Prueba Y Familiarización Con El Monitor
PASO 5 - PRUEBA Y FAMILIARIZACIÓN CON EL MONITOR Puede usar el monitor Angelcare con la configuración preprogramada de fábrica ® o puede personalizar la configuración según su preferencia. El menú principal de la pantalla LCD muestra las distintas configuraciones de funcionamiento. Presione las teclas de dirección para establecer o seleccionar las distintas funciones en la... - Page 30 PARA AJUSTAR EL NIVEL DE SENSIBILIDAD DEL DETECTOR DE MOVIMIENTOS: 1) Presione el botón de Menú/Selección para acceder al menú principal. 2) Seleccione el ícono de Configuración para acceder al submenú. 73 F 3) Seleccione el ícono de Sensibilidad del movimiento.
- Page 31 1/3 de carga, recomendamos que se carguen por completo. AHORA ESTÁ LISTO PARA USAR EL MONITOR Puede usar el monitor Angelcare® con la configuración preprogramada de fábrica o puede personalizar la configuración según su preferencia. AJUSTES PREDETERMINADOS...
-
Page 32: Paso 6 - Activación Y Desactivación De Funciones Adicionales
PASO 6 - ACTIVACIÓN Y DESACTIVACIÓN DE FUNCIONES ADICIONALES IMPORTANTE En los modos de menú o submenú, se desactiva transitoriamente la transmisión de sonido entre la unidad de los padres y la unidad del bebé. SOLO permanecerá activa la alarma de detección de movimientos (si la función está... - Page 33 6.3 - TERMÓMETRO PARA CAMBIAR LA UNIDAD DE MEDIDA: 1) Presione el botón de Menú/Selección para acceder al menú principal. 2) Seleccione el ícono de Temperatura para acceder al submenú. 3) Seleccione el ícono de ˚C ˚F. 4) Use las flechas hacia arriba y hacia abajo 73 F para cambiar de Celsius a Fahrenheit.
- Page 34 6.4 - PROTECTOR DE PANTALLA 1) Presione el botón de Menú/Selección Le permite establecer cuándo debe activarse el protector de pantalla. para acceder al menú principal. 2) Seleccione el ícono de Configuración para acceder al submenú. 3) Seleccione el ícono del Protector de pantalla.
- Page 35 PARA DETENER EL SONIDO DE LOCALIZACIÓN: 73 F Presione el botón de Presione el botón Pausa/Localizador de Salir/LCD de la la unidad del bebé. unidad de los padres. 6.8 - MODO ZOOM Le permite ampliar la vista normal hasta duplicar su tamaño. 1) Presione y suelte el botón de Zoom de 73 F la unidad de los padres.
-
Page 36: Resolución De Problemas
RESOLUCIÓN DE PROBLEMAS CUIDADO DE LAS BATERÍAS RECARGABLES • Cargue completamente las baterías durante 9 horas antes de usar la unidad por primera vez. • Para maximizar la vida útil de las baterías, es recomendable descargarlas por completo con regularidad. Si la unidad de los padres no está... -
Page 37: Garantía Limitada
La garantía también excluye cualquier responsabilidad que no se haya especificado anteriormente. No se otorga ninguna otra garantía. Esta garantía no cubre productos ni accesorios que no sean de la marca Angelcare, ni problemas derivados de un uso no acorde a las instrucciones del producto, del incumplimiento de las instrucciones del producto o de problemas causados por el uso de accesorios, piezas o componentes no provistos por Angelcare. -
Page 38: Especificaciones Técnicas
Llévelo a un centro de recolección de aparatos eléctricos y electrónicos (solicite información a las autoridades locales). CUMPLIMIENTO ERP SUDÁFRICA – BRASIL – ECUADOR – UNIÓN EUROPEA – REINO UNIDO Use solo la fuente de alimentación de la marca Angelcare , número de modelo: T05005V001/T05005B001. ® ALEMANIA Use solo la fuente de alimentación de la marca Angelcare... - Page 39 www.angelcarebaby.com...
Need help?
Do you have a question about the ac1300 and is the answer not in the manual?
Questions and answers