Makita 4334D Instruction Manual
Makita instructions manual cordless jig saw 4334d
Hide thumbs
Also See for 4334D:
- Instruction manual (88 pages) ,
- Instruction manual (17 pages) ,
- Instruction manual (37 pages)

Related Manuals for Makita 4334D


Summary of Contents for Makita 4334D
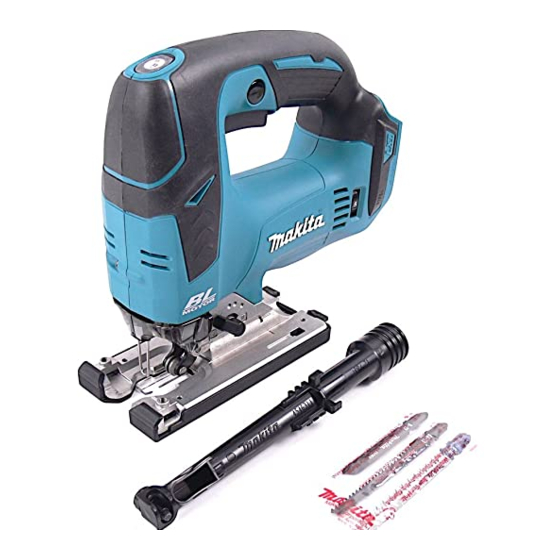
- Page 1 Cordless Jig Saw MODEL 4334D I N S T R U C T I O N M A N U A L WARNING: For your personal safety, READ and UNDERSTAND before using. SAVE THESE INSTRUCTIONS FOR FUTURE REFERENCE. w w w . m a k i t a t o o l s . c o m...
-
Page 2: Specifications
SPECIFICATIONS Model 4334D Length of stroke 26 mm (1”) Wood 135 mm (5-5/16”) Max. cutting capacities Mild steel 10 mm (3/8”) Aluminum 20 mm (13/16”) Strokes per minute 500 - 2,800/min Overall length 281 mm (11”) Net weight 3.4 kg (7.5 lbs) - Page 3 Work Area 1. Keep your work area clean and well lit. Cluttered benches and dark areas invite acci- dents. 2. Do not operate power tools in explosive atmospheres, such as in the presence of flammable liquids, gases, or dust. Power tools create sparks which may ignite the dust or fumes.
-
Page 4: Additional Safety Rules
18. Maintain tools with care. Keep cutting tools sharp and clean. Properly maintained tools with sharp cutting edge are less likely to bind and are easier to control. 19. Check for misalignment or binding of moving parts, breakage of parts, and any other condition that may affect the tool’s operation. - Page 5 (1) battery charger, (2) battery, and (3) product using battery. 3. CAUTION - To reduce risk of injury, charge only MAKITA rechargeable marked on the charger label. Other types dust inhalation and skin contact. Follow material supplier safety data.
- Page 6 7. Make sure cord is located so that it will not be stepped on, tripped over, or other- wise subjected to damage or stress. 8. An extension cord should not be used unless absolutely necessary. Use of improper extension cord could result in a risk of fire and electric shock.
- Page 7 (1) Do not touch the terminals with any conductive material. (2) Avoid storing battery cartridge in a container with other metal objects such as nails, coins, etc. (3) Do not expose battery cartridge to water or rain. A battery short can cause a large current flow, overheating, possible burns and even a breakdown.
-
Page 8: Functional Description
FUNCTIONAL DESCRIPTION 002703 1. Button 2. Battery cartridge 004346 1. Battery cartridge 2. Charging light 3. Battery charger CAUTION: • Always be sure that the tool is switched off and the battery cartridge is removed before adjusting or checking function on the tool. Installing or removing battery cartridge •... - Page 9 NOTE: • The battery charger is for charging Makita battery cartridge. Never use it for other purposes or for other manufacturer’s batteries. • When you charge a new battery cartridge or a battery cartridge which has not been used for a long period of time, it may not accept a full charge.
- Page 10 002706 1. Cutting action changing lever Position 002709 1. Lock-off button 2. Switch trigger 002712 1. Speed adjusting dial Selecting the cutting action This tool can be operated with an orbital or a straight line (up and down) cutting action. The orbital cutting action thrusts the blade forward on the cutting stroke and greatly increases cutting speed.
- Page 11 ASSEMBLY 002719 1. Blade installing lever Workpiece to be cut Wood Mild steel Stainless steel Aluminum Plastics CAUTION: • If the tool is operated continuously at low speeds for a long time, the motor will get overloaded and heated up. •...
- Page 12 002720 002721 1. Blade holder 2. Clamp 3. Slot 4. Roller 5. Blade 002722 1. Blade installing lever 2. Blade 002723 1. Blade installing lever 2. Pull the blade installing lever in the (2) direction until it stops with a little click. If you have difficulty pulling it out, try to do so while moving it back and forth in the (3) direction.
- Page 13 002719 1. Blade installing lever 002720 002724 1. Blade installing lever 002723 1. Blade installing lever 002734 1. Base 2. Anti-splintering device Removal 1. Push the blade installing lever in the (1) direction to release it. 2. Pull the blade installing lever in the (2) direction until it stops with a little click.
- Page 14 002736 1. Screw 2. Plastic base plate 002738 1. Hex wrench 2. Bolt 3. Rip fence (Guide rule) 002739 1. Threaded knob 2. Circular guide 3. Pin 002740 1. Notches 2. Base 3. Plastic cover Plastic base plate (optional accessory) Use the plastic base plate when cutting decorative veneers, plastics, etc.
-
Page 15: Operation
To attach the vacuum head on the tool, insert the hooks of the vacuum head into the hole in the base. The vacuum head can be installed on either left or right side of the base. Then connect a Makita vacuum cleaner to the vacuum head. CAUTION: •... -
Page 16: Bevel Cutting
002754 1. Base securing lever 002755 1. Dent mark 2. Slot 3. Graduation 002759 002765 1. Starting hole Bevel cutting CAUTION: • Always be sure that the tool is switched off and the battery cartridge is removed before tilting the base. With the base tilted, you can make bevel cuts at any angle between 0°... -
Page 17: Maintenance
002766 002770 MAINTENANCE B) Plunge cutting You need not bore a starting hole or make a lead-in cut if you carefully do as follows. (1) Tilt the tool up on the front edge of the base with the blade point positioned just above the workpiece sur- face. - Page 18 002719 1. Blade installing lever 002720 002993 1. Blade holder 2. Clamp 002781 1. Blade holder 2. Clamp Removing clamp 1. Push the blade installing lever in the (1) direction to release it. 2. Pull the blade installing lever in the (2) direction until it stops with a little click.
-
Page 19: Replacing Carbon Brushes
002782 002783 1. Blade holder 2. Clamp 002784 1. Blade installing lever 001145 1. Limit mark Installing clamp 1. Make sure that the blade installing lever has been rotated in the (4) direction until it stops. 2. Insert the clamp into the blade holder while rotating it in the (6) direction one quarter to one full turn so that its slot will face forward. -
Page 20: Recycling The Battery
Makita Authorized or Factory Service Centers, always using Makita replacement parts. Recycling the Battery The only way to dispose of a Makita battery is to recycle it. The law prohibits any other method of disposal. To recycle the battery: 1. Remove the battery from the tool. - Page 21 CAUTION: • These accessories or attachments are recommended for use with your Makita tool specified in this manual. The use of any other accessories or attachments might present a risk of injury to persons. Only use accessory or attachment for its stated purpose.
- Page 22 Memo...
- Page 23 Memo...
- Page 24 Memo...
- Page 25 First-Class Postage Required Post Office will not deliver without proper postage. Makita U.S.A., Inc. 14930 Northam Street La Mirada, CA 90638-5753 Fold...
- Page 26 Paste 3. How did you learn about this product: Magazine From Dealer Newspaper Store Display Catalog 4. Most favored points are: Design Features Size Price Makita Brand MODEL NO. YEAR SERIAL NO. PHONE 20-29 30-39 40-49 Paste Paste Radio Exhibition...
-
Page 27: Factory Service Centers
Date Purchased When you need service: Send complete tool (prepaid) to one Dealer’s Name & Address of the Makita Factory Service Centers listed, or to an Authorized Makita Service Center. Be sure to attach a letter to the outside of Model No. - Page 28 MAKITA LIMITED ONE YEAR WARRANTY Warranty Policy Every Makita tool is thoroughly inspected and tested before leaving the factory. It is warranted to be free of defects from workmanship and materials for the period of ONE YEAR from the date of original purchase.