
Related Manuals for HIKVISION DS-2AE714


Summary of Contents for HIKVISION DS-2AE714
-
Page 1: User Manual
IR Speed Dome User Manual V1.0.0 Hikvision Digital Technology Co., Ltd. http://www.hikvision.com... - Page 2 Thank you for purchasing our product. If there is any question or request, please do not hesitate to contact the dealer. This manual is applicable to the IR Speed Dome. This manual may contain several technically inaccurate places or printing errors, and the content is subject to change without notice.
-
Page 3: Regulatory Information
The battery is marked with this symbol, which may include lettering to indicate cadmium (Cd), lead (Pb), or mercury (Hg). For proper recycling, return the battery to your supplier or to a designated collection point. For more information see: www.recyclethis.info. © Hikvision Digital Technology Co., Ltd. All Rights Reserved. -
Page 4: Safety Warnings And Cautions
This notice is required by California Code of Regulations, Title 22, Division 4.5, Chapter 33: Best Management Practices for Perchlorate Materials. This device includes a battery which contains perchlorate material. Taiwan battery recycling: Please recycle batteries. © Hikvision Digital Technology Co., Ltd. All Rights Reserved. - Page 5 Lead Content: Please recycle this device in a responsible manner. Refer to local environmental regulations for proper recycling; do not dispose of device in unsorted municipal waste. © Hikvision Digital Technology Co., Ltd. All Rights Reserved.
-
Page 6: Safety Instruction
4. Exposing the equipment to direct sun light, low ventilation or heat source such as heater or radiator is forbidden (ignorance can cause fire danger). 5. Do not aim the camera at the sun or extra bright places. A blooming or smear may occur © Hikvision Digital Technology Co., Ltd. All Rights Reserved. - Page 7 7. Please use a soft and dry cloth when clean inside and outside surfaces of the dome cover, do not use alkaline detergents. © Hikvision Digital Technology Co., Ltd. All Rights Reserved.
-
Page 8: Table Of Contents
Appendix 1 Lightning & Surge Protection ..........................20 Appendix 2 RS485 Bus Connection ............................21 Appendix 3 24VAC Wire Gauge & Transmission Distance ....................24 Appendix 4 Table of Wire Gauge Standards.......................... 25 Glossary © Hikvision Digital Technology Co., Ltd. All Rights Reserved. -
Page 9: Chapter 1 Introduction
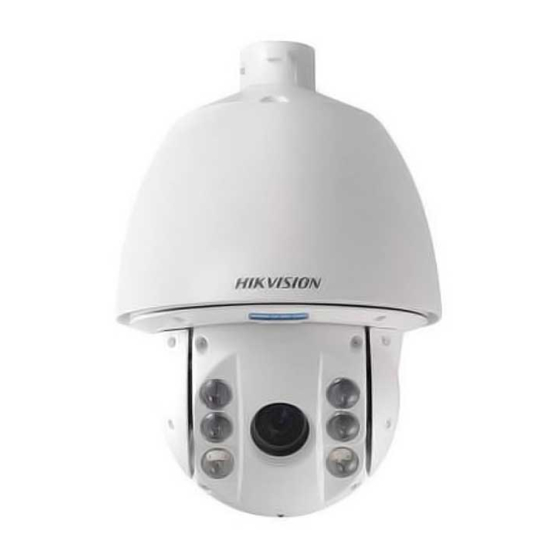
With the above features, the IR speed dome can be widely used in various surveillance fields, such as forest, railway, airport, harbor, oil field, plaza, park, scenic spot, street, train station, stadium, etc. 1.2 Appearance IR speed dome Figure 1-1 © Hikvision Digital Technology Co., Ltd. All Rights Reserved. -
Page 10: Chapter 2 Getting Started
Baudrate(default 2400), data bit(8 digit) and stop bit(1 digit). The version of the software. SOFT VERSION The version of the hardware. HARD VERSION The date when the program of the software is compiled. BUILD DATE © Hikvision Digital Technology Co., Ltd. All Rights Reserved. -
Page 11: System-Defined Presets
Time Display: Displayed as Day/Month/Year/Day of Week/Hour/Minute. It supports 24-hour time system. Preset Title: After you call the configured preset, the preset number is displayed if the lens move to the certain place where you’ve set a preset for. © Hikvision Digital Technology Co., Ltd. All Rights Reserved. -
Page 12: Chapter 3 Menu Operation
3. Press IRIS+ to confirm the change or click IRIS- to cancel and restore the original value. 3.2 Dome Setup Move the cursor to the Dome Setup, and click IRIS+ to enter the Dome edit mode. See Figure 3-2. © Hikvision Digital Technology Co., Ltd. All Rights Reserved. -
Page 13: Configuring The System Parameters
(the hard address is set as 0 by default). Notes: 1. Before you set the soft address of the speed dome, you need to confirm the control range of © Hikvision Digital Technology Co., Ltd. All Rights Reserved. - Page 14 This option is for the on screen display setup. The Zoom, Pan/Tilt angle, Preset title, Time, and Heatfan can be displayed on the screen by setting them to “ON”. To disable the display of those © Hikvision Digital Technology Co., Ltd. All Rights Reserved.
-
Page 15: Configuring The Camera Settings
HAF (Half-auto Focus): The lens remains at a fixed focus point when PTZ movements stop; when the PTZ movements are resumed, the lens focuses automatically. It is the default focus mode. (3) Click IRIS+ button to confirm. Zoom Limit Settings Purpose: © Hikvision Digital Technology Co., Ltd. All Rights Reserved. -
Page 16: Slow Shutter
The value of X indicates that the shutter speed is 1/X second. If you set the SHUTTER value bigger (shutter speed is faster), the amount of entering light per second is fewer, and the image is darker. Gain © Hikvision Digital Technology Co., Ltd. All Rights Reserved. -
Page 17: Configuring The Ptz Parameters
You can configure the Park Time, Image Freeze, Dome Speed, etc. according to the steps in this session. See Figure 3-7. Enter PTZ configuration menu: MAIN MENUS > DOME SETUP > PTZ PARAMETER SET © Hikvision Digital Technology Co., Ltd. All Rights Reserved. - Page 18 It can also reduce the use of bandwidth in a digital network system. You can set IMAGE FREEZE on to enable this function. Note: The image freeze function is only supported by a certain camera model series. Dome Speed © Hikvision Digital Technology Co., Ltd. All Rights Reserved.
-
Page 19: Configuring The Ir Parameter Setup
Near LED Current refers to the strength of the near IR LED. Note: The near LED current function is only supported by a certain camera model series. Far LED Current © Hikvision Digital Technology Co., Ltd. All Rights Reserved. -
Page 20: Configuring The Patrol
(3) Click IRIS+ again to confirm and exit edit mode of this column. Note: You can configure up to 4 patrols. PATROL SETUP !!PATROL NUM PATROL SETUP PREVIEW PATROL DELE PATROL BACK EXIT Figure 3-9 Patrol Configuration Menu © Hikvision Digital Technology Co., Ltd. All Rights Reserved. - Page 21 Move the cursor to PREVIEW and click IRIS+ to preview the current patrol and enable the speed dome to scan among the presets. 5. Delete a patrol. You can move the cursor to CLEAR PATH and click IRIS+ to delete the current patrol. © Hikvision Digital Technology Co., Ltd. All Rights Reserved.
-
Page 22: Configuring The Pattern
Pattern Setup. Step: (1) Move the cursor to PATTERN SETUP and click IRIS+ to enter the edit mode. REMAIN MEMO DONE: OPEN QUIT: CLOSE BACK EXIT Pattern Setup Figure 3-12 © Hikvision Digital Technology Co., Ltd. All Rights Reserved. -
Page 23: Configuring The Time Tasks
You can configure up to 8 tasks. TASK SETUP !! TASK NUM TASK STATE TASK MO NONE TASK TIME TASK PREVIEW TASK CLEAN BACK EXIT Time Task Configuration Menu Figure 3-13 3. Set the Task State. Steps: © Hikvision Digital Technology Co., Ltd. All Rights Reserved. - Page 24 00:00 00:00 NONE Preview the Task Time Figure 3-15 Note: The first line of the task refers to task No.1, and the second line refers to task No.2, and so on, © Hikvision Digital Technology Co., Ltd. All Rights Reserved.
-
Page 25: Configuring The Privacy Mask
4. Configure the SET BLANK. Steps: (1) Move the cursor to SET BLANK and click IRIS+ button to enter edit mode. You will see a purple privacy mask on the live window. © Hikvision Digital Technology Co., Ltd. All Rights Reserved. -
Page 26: Restoring The Default Settings
IRIS- to exit. Parameters Default Value Dome address Baud rate 2400bps 120Ω matching resistance Soft address Azimuth zero Zero angle Auto-focus Zoom limit Max Optical Zoom Zoom speed High Low light limit © Hikvision Digital Technology Co., Ltd. All Rights Reserved. -
Page 27: Restoring The Camera Settings
Click IRIS+ to restore the camera settings to the default value; or click IRIS- to exit. Note: Camera settings include the lens settings and display settings. 3.5 Rebooting the Dome Enter MAIN MENUS > REBOOT DOME and click IRIS+ to reboot the speed dome remotely. © Hikvision Digital Technology Co., Ltd. All Rights Reserved. -
Page 28: Appendix
4Ω, the section al area of the grounding cable should be no less than 25mm2. For grounding instructions, please refer to the Installation Manual of Speed dome. © Hikvision Digital Technology Co., Ltd. All Rights Reserved. -
Page 29: Appendix 2 Rs485 Bus Connection
120Ω terminal resistance (show as Diagram 1), the simplified connection method is shown as diagram 2, but the distance of “D” should not be too long. © Hikvision Digital Technology Co., Ltd. All Rights Reserved. - Page 30 For such case, the best way is adding a RS485 distributor. This product can effectively change the star-shape connection to which satisfies the requirement of RS485 industry standard, in order to avoid those problems and improve the communication reliability. © Hikvision Digital Technology Co., Ltd. All Rights Reserved.
- Page 31 IR Speed Dome User Manual RS485 Distributor Figure A-5 FAQ of RS485 Bus © Hikvision Digital Technology Co., Ltd. All Rights Reserved.
-
Page 32: Appendix 3 24Vac Wire Gauge & Transmission Distance
10%. For example, for a device with the rating power of 80VA which is installed at a distance of 35 feet (10m) away from the transformer, then the minimum wire gauge required is 0.8000mm. Wire Gauge Distance feet(m) Power (va) © Hikvision Digital Technology Co., Ltd. All Rights Reserved. -
Page 33: Appendix 4 Table Of Wire Gauge Standards
IR Speed Dome User Manual Appendix 4 Table of Wire Gauge Standards Cross-sectional Area Bare Wire Gauge Americ an Wire Gage (Brit ish)St andard Wire G auge Bare Wire (mm) © Hikvision Digital Technology Co., Ltd. All Rights Reserved. -
Page 34: Glossary
If there is a bright light source outside of this area, it will wash out to white. The camera will adjust the iris so that the object in the sensitive area is properly exposed. Camera Title © Hikvision Digital Technology Co., Ltd. All Rights Reserved. - Page 35 On Screen Display(OSD) The IR speed dome provides a series of on screen display for better operation. The on screen display © Hikvision Digital Technology Co., Ltd. All Rights Reserved.
- Page 36 DIP switch settings. You can also configure the protocol via OSD menu. Soft Baud Rate © Hikvision Digital Technology Co., Ltd. All Rights Reserved.
- Page 37 If the speed dome has dwelled at a zone without receiving any command over 4 minutes, this feature will enable the speed dome to perform panorama scanning within the zone. © Hikvision Digital Technology Co., Ltd. All Rights Reserved.
- Page 38 First Choice for Security Professionals...