Cisco Aironet 1130AG Quick Start Manual
Hide thumbs
Also See for Aironet 1130AG:
- Hardware installation manual (138 pages) ,
- Datasheet (13 pages) ,
- Hardware installation manual (132 pages)
Table of Contents
Advertisement
Read This First
You should review this table and the instructions for opening the top cover.
The table contains important information you need to know so you can
successfully configure your access point.
Setting
Login
Password
IP address
Service Set Identifier (SSID)
Status LED
Blue
Light green
Amber or red
Quick Start Guide Cisco Aironet 1130AG Access Point
Default
Cisco (case sensitive)
Cisco (case sensitive)
Determined by DHCP server. See
the "Obtaining an IP Address" on
page 16 for additional information.
None assigned
Status Description
Normal operating condition, and at
least one client device is associated
with the access point.
Normal operating condition, no
client devices are associated.
Error condition. See the "Checking
the Access Point LEDs" section on
page 38.
1
Advertisement
Table of Contents

Related Manuals for Cisco Aironet 1130AG


Summary of Contents for Cisco Aironet 1130AG
- Page 1 Light green Normal operating condition, no client devices are associated. Amber or red Error condition. See the “Checking the Access Point LEDs” section on page 38. Quick Start Guide Cisco Aironet 1130AG Access Point...
-
Page 2: Radio And Ip Address Configuration
Radio and IP Address Configuration The access point ships with its radio disabled.You must enable them when you configure the access point for the first time. Also, the access point no longer is assigned an IP address. It is configured to obtain an IP address using a DHCP server. - Page 3 Follow these steps to open the top cover: 1. Put the access point on a flat surface, and grasp it with both hands, as shown in this illustration. Cable access notch and arrow Quick Start Guide Cisco Aironet 1130AG Access Point...
- Page 4 2. Gently push the cover away from you until it stops, as shown in this illustration. 3. Remove the opening instruction label from the top cover. Note We recommend that you save the label for reference. 78-15955-02...
-
Page 5: Safety Information
The use of wireless devices in hazardous locations is limited to the constraints posed by the safety directors of such environments. Warnings Translated versions of these safety warnings are provided in the Cisco Aironet 1130AG Series Access Point Hardware Installation Guide. Quick Start Guide Cisco Aironet 1130AG Access Point... - Page 6 Warning This product must be connected to a Power-over-Ethernet (PoE) IEEE 802.3af compliant power source or an IEC60950 compliant limited power source. Warning In order to comply with FCC radio frequency (RF) exposure limits, antennas should be located a minimum of 7.9 in. (20 cm) or more from the body of all persons.
- Page 7 20A. Overview This guide is designed to help you minimally configure a Cisco Aironet 1130AG Series Access Point using the access point graphical user interface (GUI) through your web browser. The GUI is the primary-configuration tool.
- Page 8 These documents are also available on Cisco.com. This guide provides an overview of the access point, but does not discuss mounting it. Those instructions are in the Cisco Aironet 1130AG Series Access Point Hardware Installation Guide, which is available on Cisco.com.
- Page 9 These documents are on Cisco.com. Follow these steps to access them: 1. Browse to http://www.cisco.com. 2. In the Quick Links section, click Products & Solutions. The Cisco Products page appears. 3. Click Wireless. A small window appears containing a partial listing of wireless products.
-
Page 10: Unpacking The Access Point
5. Scroll down to the Product Portfolio section of the page and find the Wireless LAN subsection. 6. Click Cisco Aironet 1130AG Series. A list of Cisco Aironet 1130AG Series Access Points documents appears. 7. Click the appropriate document. Unpacking the Access Point Each access point package contains the following items: •... - Page 11 2. Return all packing material to the shipping container, and save it. 3. Verify all the package contents, and inspect each item for damage. If any item is missing or damaged, contact your Cisco representative for support. 4. Obtain the mounting instructions by downloading the Cisco Aironet 1130AG Series Access Point Hardware Installation Guide from Cisco.com.
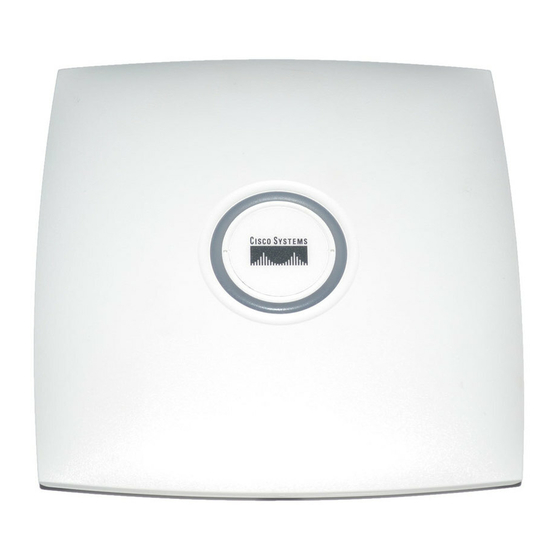
- Page 12 Power connector Padlock post Ethernet port Mode button Keyhole slot Ethernet (E) and Radio (R) LEDs Console port Status LED 78-15955-02...
-
Page 13: Installation Summary
A system name • The case-sensitive wireless service set identifier (SSID) for your radio network • A Simple Network Management Protocol (SNMP) community name and the SNMP file attribute (if SNMP is in use) Quick Start Guide Cisco Aironet 1130AG Access Point... -
Page 14: Mounting The Access Point
When you have mounted the access point, its padlock post enables you to protect the Ethernet, power cables, and Mode button, and to lock the access point with a padlock. Detailed mounting instructions are in the Cisco Aironet 1130AG Series Access Point Hardware Configuration Guide. This document is available on Cisco.com. -
Page 15: Connecting Power
The following devices that provide Power-over-Ethernet (PoE): – An IEEE 802.3af compliant power source – A compliant Cisco inline power switch – A Cisco power injector with a compliant AC power module Caution If the access point receives power through PoE, the output current of the PSE cannot exceed 400 mA or 154000/Vport, whichever is smaller. -
Page 16: Obtaining An Ip Address
DHCP server, you or your network administrator can find it by querying the DHCP server using the access point’s MAC address. You can also find the access point’s IP address using Cisco’s IP Setup Utility You can download IPSU from Cisco.com. -
Page 17: Assigning An Ip Address Using The Cli
Enter global configuration mode. Step 2 Interface bvi1 Enters interface configuration mode for the BVI. Step 3 ip address address mask Assigns an IP address and subnet mask address to the BVI. Quick Start Guide Cisco Aironet 1130AG Access Point... -
Page 18: Using A Telnet Session To Access The Cli
Note If you are connected to the access point using a Telnet session you lose your connection to the access point when you assign a new IP address to the BVI. If you need to continue configuring the access point using Telnet, use the new IP address to open another Telnet session to the access point. -
Page 19: Configuring Power
1. Open your browser and enter the access point’s IP address in the address field. A login and password screen appears. 2. Enter the user name Cisco and password Cisco. The username and password are case sensitive. 3. When the access point does not receive enough power for full operations, it is in low power mode. - Page 20 5. Set the power settings and power injector fields and verify your switch status as indicated in the power settings table. Note To verify switch status, you will need to use the switch’s CLI. See the Cisco IOS software configuration guide for your switch. 78-15955-02...
- Page 21 Intelligent Power Management feature Cisco Aironet Power Power Settings: Power power inline Injector with a Cisco Negotiation selected never PSE not supporting Power Injector: Checked Cisco Intelligent MAC address Power Management feature Quick Start Guide Cisco Aironet 1130AG Access Point...
- Page 22 AC power adapter No configuration requirement 1. Please check the release notes for your power sourcing equipment to determine which Cisco IOS version supports Cisco Intelligent Power Management. For some PSEs, support for Cisco Intelligent Power Management may not be available yet.
-
Page 23: Configuring Basic Settings
1. Open your browser and enter the access point’s IP address in the address field. A username and password screen appears. 2. Enter the username Cisco and password Cisco. The username and password are case sensitive. 3. Press Enter. The Summary Status page appears. - Page 24 4. If required, configure the power settings as described in the previous section. Otherwise, Click Express Setup. The Express Setup page appears. 78-15955-02...
- Page 25 Quick Start Guide Cisco Aironet 1130AG Access Point...
- Page 26 5. Configure the settings using the following sections as a guide. Host Name The system name (system name) is a name for the access point that identifies it on your network. Default: ap Configuration Server Protocol This setting specifies how the access point obtains an IP address. Options: DHCP or Static IP Default: DHCP Option...
- Page 27 Default Gateway The default gateway identifies the address the access point uses to access another network. This gateway is provided by your network administrator. If DHCP is enabled, leave this field blank. Quick Start Guide Cisco Aironet 1130AG Access Point...
- Page 28 Web Server This setting specifies the type of HTTP used to access the access point using a web browser. Options: Standard (HTTP) or Secure (HTTPS) Default: Standard (HTTP) Option Description Standard Standard protocol used to transfer HTML using (HTTP) unencrypted traffic between web browsers. Secure Protocol used to transfer secure data by using (HTTPS)
- Page 29 LAN and accepts associations from wireless clients. Repeater non Access point connects to a remote LAN, accepts root associations from wireless clients, and must associate with a root access point using the wireless interface. Quick Start Guide Cisco Aironet 1130AG Access Point...
- Page 30 Uses settings that you enter on the Network Interfaces GUI page. Note For more information on this setting, see the Cisco IOS Software Configuration Guide for Cisco Aironet Access Points or the Cisco Aironet Command Reference for Cisco Aironet Access Points and Bridges. 78-15955-02...
-
Page 31: Configuring Security Settings
Aironet Extensions By default, the access point uses Cisco Aironet 802.11 extensions to detect the capabilities of Cisco Aironet client devices and to support features that require specific interaction between the access point and associated client devices. Aironet extensions must be enabled to support... - Page 32 78-15955-02...
-
Page 33: Understanding Express Security Settings
SSIDs to eliminate the conflict. If any VLANs are defined on the access point, the trunk port on the switch must be limited to allow only the VLANs defined on the access point. Quick Start Guide Cisco Aironet 1130AG Access Point... -
Page 34: Express Security Limitations
Express Security Limitations Because the Express Security page is designed for simple configuration of basic security, the options available are a subset of the access point security capabilities. Keep these limitations in mind when using the Express Security page: • You cannot edit SSIDs. -
Page 35: Ssid Configuration
2 to 32 characters. Default: No SSID assigned Note These characters are not allowed: ?, “, $, [, \, ], and +. In addition, these characters cannot be the first character: !, #, and ;. Quick Start Guide Cisco Aironet 1130AG Access Point... - Page 36 VLAN A VLAN is a switched network that is logically segmented by functions, project teams, or applications rather than on a physical or geographical basis. Options: No VLAN, Enable VLAN ID (1–4095) Default: No VLAN Option Description No VLAN No VLANs are enabled. Enable VLAN Enables a VLAN and specifies its identification number (1 through 4095).
- Page 37 There are two different lengths for WEP keys: 40-bit and 128-bit (hexadecimal or ASCII characters. Cisco access points use hexadecimal characters. Client adapters may use either, depending on how the vendor chooses to configure them. Quick Start Guide Cisco Aironet 1130AG Access Point...
- Page 38 IP address and shared secret for an authentication server on your network (server authentication port 1645). Note For detailed information about security and security settings, see the Cisco IOS Software Configuration Guide for Cisco Aironet Access Points. 78-15955-02...
-
Page 39: In Case Of Difficulty
If you do experience difficulty, the following sections provide basic troubleshooting information. Before contacting Cisco, look for a solution to your problem in this guide or the troubleshooting chapter of the Cisco Aironet 1130AG Series Access Point Hardware Installation Guide. -
Page 40: Checking The Access Point Leds
Checking the Access Point LEDs If your access point is not working properly, check the Status LED on the top panel or the Ethernet and Radio LEDs in the cable bay area. You can use the LED colors to assess the unit status. Note To see the Ethernet and Radio LEDs you must open the access point cover. -
Page 41: Checking Basic Settings
Various Boot loader errors For more details on these LED status codes, see the “Troubleshooting” chapter of the Cisco Aironet 1130AG Series Access Point Hardware Installation Guide. Checking Basic Settings Mismatched basic settings are the most common causes of lost connectivity with wireless clients. -
Page 42: Security Settings
However, the access point does not need to use WEP Key 3 as the transmit key. Refer to the Cisco IOS Software Configuration Guide for Cisco Aironet Access Points for instructions on setting the access point WEP keys. -
Page 43: Resetting To Default Configuration
1. Open the access point cover (refer to the “How to Open the Top Cover” section on page 2). 2. Disconnect power from the access point (the power jack for external power or the Ethernet cable for in-line power). Quick Start Guide Cisco Aironet 1130AG Access Point... -
Page 44: Using The Web Browser Interface
Enter. An Enter Network Password screen appears. 3. Enter the username Cisco in the User Name field. 4. Enter the password Cisco in the Password field and press Enter. The Summary Status page appears. 5. Click System Software. The System Software screen appears. -
Page 45: Compliance Information
The Declarations of Compliance for this product relevant to the European Union and other countries following EU Directive 1999/5/EC (R&TTE Directive) can be found in the Cisco Aironet 1130AG Series Access Point Hardware Installation Guide. This guide is available on Cisco.com. -
Page 46: Cisco One-Year Limited Hardware Warranty Terms
Warranty Statement, including the warranties and license agreements applicable to Cisco software, is available on Cisco.com. Follow these steps to access and download the Cisco Information Packet and your warranty and license agreements from Cisco.com. 1. Launch your browser, and go to this URL: http://www.cisco.com/univercd/cc/td/doc/es_inpck/cetrans.htm... - Page 47 The Cisco warranty page appears. d. Read the document online, or click the PDF icon to download and print the document in Adobe Portable Document Format (PDF). You can also contact the Cisco service and support website for assistance: http://www.cisco.com/public/Support_root.shtml. Duration of Hardware Warranty...
- Page 48 Replacement, Repair, or Refund Policy for Hardware Cisco or its service center will use commercially reasonable efforts to ship a replacement part within ten (10) working days after receipt of a Return Materials Authorization (RMA) request. Actual delivery times can vary, depending on the customer location.