Table of Contents
Advertisement
Quick Links
Advertisement
Table of Contents

Related Manuals for HIKVISION DS-2CC5197P-DG1

Summary of Contents for HIKVISION DS-2CC5197P-DG1
- Page 1 User Manual of Mini Camera UD.6L0201D0017A01...
- Page 2 Day/Night High-definition Box Camera· User Manual Thank you for purchasing our product. If there are any questions, or requests, please do not hesitate to contact the dealer. This manual applies to the following cameras: DS-2CC5197P(N)-DG1 DS-2CC51A7P(N)-DG1 DS-2CC5192P(N)-DG1 DS-2CC51A2P(N)-DG1 DS-2CC502P(N)-DG1 DS-2CC502P(N)-DG2 This manual may contain several technical incorrect places or printing errors, and the content is subject to change without notice.
-
Page 3: Regulatory Information
Day/Night High-definition Box Camera· User Manual Regulatory Information FCC Information FCC compliance: This equipment has been tested and found to comply with the limits for a digital device, pursuant to part 15 of the FCC Rules. These limits are designed to provide reasonable protection against harmful interference when the equipment is operated in a commercial environment. - Page 4 Day/Night High-definition Box Camera· User Manual 2002/96/EC (WEEE directive): Products marked with this symbol cannot be disposed of as unsorted municipal waste in the European Union. For proper recycling, return this product to your local supplier upon the purchase of equivalent new equipment, or dispose of it at designated collection points.
-
Page 5: Safety Warnings And Cautions
Day/Night High-definition Box Camera· User Manual Safety Warnings and Cautions Please pay attention to the following warnings and cautions: Hazardous Voltage may be present: Special measures and precautions must be taken when using this device. Some potentials (voltages) on the device may present a hazard to the user. - Page 6 Day/Night High-definition Box Camera· User Manual attached is also connected to properly wired grounded receptacles and are approved medical devices. Power Connect and Disconnect: The AC power supply cord is the main disconnect device to mains (AC power).The socket outlet shall be installed near the equipment and shall be readily accessible.
- Page 7 Day/Night High-definition Box Camera· User Manual Perchlorate Material: Special handling may apply. See www.dtsc.ca.gov/hazardouswaste/perchlorate. This notice is required by California Code of Regulations, Title 22, Division 4.5, Chapter 33: Best Management Practices for Perchlorate Materials. This device includes a battery which contains perchlorate material. Taiwan battery recycling: Please recycle batteries.
- Page 8 Day/Night High-definition Box Camera· User Manual Lead Content: Please recycle this device in a responsible manner. Refer to local environmental regulations for proper recycling; do not dispose of device in unsorted municipal waste.
-
Page 9: Safety Instruction
Day/Night High-definition Box Camera· User Manual Safety Instruction These instructions are intended to ensure that user can use the product correctly to avoid danger or property loss. The precaution measure is divided into “Warnings” and “Cautions” Warnings: Serious injury or death may occur if any of the warnings are neglected. - Page 10 Day/Night High-definition Box Camera· User Manual responsibility for problems caused by unauthorized repair or maintenance.) To reduce the risk of fire or electrical shock, do not expose this product to rain or moisture. This installation should be made by a qualified service person ...
- Page 11 Day/Night High-definition Box Camera· User Manual The sensor may be burned out by a laser beam, so when any laser equipment is being used, make sure that the surface of the sensor will not be exposed to the laser beam. Do not place the camera in extremely hot or cold temperatures ...
- Page 12 Day/Night High-definition Box Camera· User Manual...
-
Page 13: Table Of Contents
Day/Night High-definition Box Camera· User Manual Table of Contents 1 Introduction ..............14 1.1 Product Features ............ 14 1.2 Function Summary ..........16 1.3 Hardware Overview ..........18 2 Menu Description ..............23 2.1 MAIN MENU ............23 2.2 Scene ..............24 2.3 Exposure.............. - Page 14 Day/Night High-definition Box Camera· User Manual 2.4.12 Pixel Correction ........... 38 2.5 System ..............40 2.5.1 Camera ID Settings ........40 2.5.2 System Information ........42 2.5.3 Camera Reset ..........42 2.6 Language ............... 42 2.7 Exit ................ 43...
-
Page 15: Introduction
It is possessed of high resolution, low distortion, low noise features and etc. It is suitable for both surveillance systems and image processing systems. Key features for DS-2CC5197P-DG1 and DS-2CC51A7P-DG1: Adopt high performance SONY CCD, supply ing users with high ... - Page 16 Day/Night High-definition Box Camera· User Manual Adopt high performance SONY CCD, supply ing w ith high definition image. Designed for low illumination situations, and day/night auto-switch function is supported. Support auto gain control, providing adaptive brightness to changing environments.
-
Page 17: Function Summary
Day/Night High-definition Box Camera· User Manual 1.2 Function Summary Motion Detection: In the user-defined motion detection surveillance area, the moving object can be detected to trigger the alarms. The sensitive level can be customized specifically. Privacy Mask: This function allows you to block or mask certain areas of a scene to prevent the personal privacy from being recorded or viewed. - Page 18 Day/Night High-definition Box Camera· User Manual S/N ratio: The ratio of Signal voltage and Noise voltage. The ratio is larger, the effect of noises is less, and the image is clearer. OSD (On-Screen Display): The on-screen display is a text superimposed on the live view screen to display information and menu.
-
Page 19: Hardware Overview
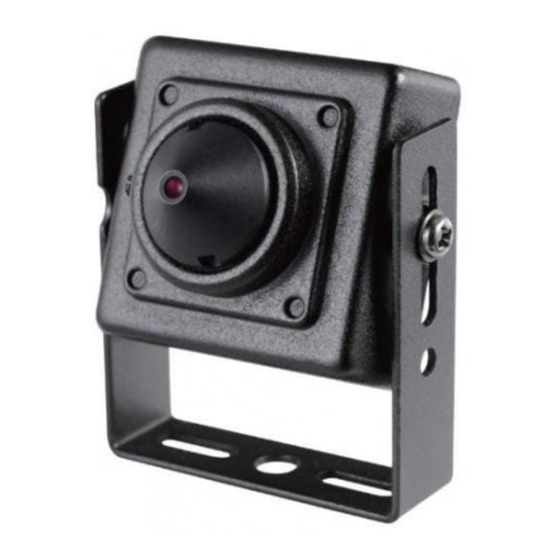
Day/Night High-definition Box Camera· User Manual 1.3 Hardware Overview Appearance of DS-2CC5197P-DG1 and DS-2CC51A7P-DG1: Lens Bracket Figure 1-3 Front view Figure 1-4 Rear View... - Page 20 Day/Night High-definition Box Camera· User Manual Appearance of DS-2CC5192P-DG1 and DS-2CC51A2P-DG1: Lens Bracket Figure 1-5 Front View Video Line and power ling adapter Figure 1-6 Rear Panel...
- Page 21 Day/Night High-definition Box Camera· User Manual Appearance of DS-2CC502P-DG1: Lens Bracket Figure 1-7 Front View Video Line and power ling adapter Figure 1-8 Rear View...
- Page 22 Day/Night High-definition Box Camera· User Manual Appearance of DS-2CC502P-DG2: Lens Bracket Figure 1-9 Front View Video Line and power ling adapter Figure 1-10 Rear View The video output interface can connect to the interface of the video controller, and the controller connects to the DVR or display devices.
- Page 23 Day/Night High-definition Box Camera· User Manual Figure 1-11 Wiring for connection of the controller...
-
Page 24: Menu Description
Day/Night High-definition Box Camera· User Manual Note: Only the DS-2CC5197P-DG1 and DS-2CC51A7P-DG1support the video controller. Coaxial controlling is supported, and the coaxial controller is not the standard configuration. 2 Menu Description 2.1 MAIN MENU Steps: 1. Press the menu button on the video controller of the camera to access the main menu and the submenu. -
Page 25: Scene
Day/Night High-definition Box Camera· User Manual 2.2 Scene Purpose: This menu helps you to get the appropriate image of camera without adjusting the complicated parameters in the EXPOSURE and FUNCTION menu. There are 2 scenes selectable: INDOOR BACKLIGHT and OUTDOOR BACKLIGHT. You can select the two predefined scenes or you can alsocustomize the image parameters to adapt to different scenarios. -
Page 26: Blc (Backlight Compensation) And Wdr (Wide Dynamic Range)
Day/Night High-definition Box Camera· User Manual LENS SETUP VALUE ---|--- CONTRAST ---|--- RETUREN 2.3.2 BLC (Backlight Compensation) and WDR (Wide Dynamic Range) Purpose: You can set the backlight compensation and high light compensation functions of the camera on BACKLIGHT settings submenu. - Page 27 Day/Night High-definition Box Camera· User Manual BLC/WDR ▽ MODE eeeeeeeeeeeeeeeeeeeeeeeeeeeeeee ▽ AREA CUSTOMIZED SIZE ENTER POSITION ENTER VALUE ------| 回 Move the cursor to select the value and the area for the BLC and you can choose to customize the BLC area.
-
Page 28: Day/Night Switch
Day/Night High-definition Box Camera· User Manual BLC/WDR ▽ MODE VALUE ---|--- CONTRAST ---|--- ▽ WD ADJUST ▽ H-COLOR ADJ RETUREN The VALUE of the WDR ranges from 0 to 15.The contrast of the WDR ranges from 0 to 15. The WD ADJUST should be on; if the camera is used in the relatively dark scene and the WDR effect is not so good. -
Page 29: Shutter
Day/Night High-definition Box Camera· User Manual If you choose the auto day/night switch, you enter the following interface: DAY/NIGHT SETUP ▽ MODE AUTO D->N LEVEL (L)--|--(H) ▽ D->N DELAY N->D LEVEL (L)--|--(H) ▽ N->D DELAY RETURN The D->N LEVEL refers to the threshold of the automatic changing of the DAY and NIGHT parameters. -
Page 30: Agc
Day/Night High-definition Box Camera· User Manual 2.3.5 AGC You can choose the OFF, LOW, MEDIUM, and HIGH mode. 2.3.6 Anti-Flicker Purpose: The image of the camera may flicker in the 60Hz light when in PAL standard and in 50Hz in NTSC standard. You can enable this function to avoid the problem. -
Page 31: White Balance
Day/Night High-definition Box Camera· User Manual 2.4.1 White Balance This feature processes the viewed image to retain co lor balance over a color temperature range and remove the unrealistic colorcasts. Steps: 1. On the FUNC submenu, move the cursor to WHITE BALANCE, and press the menu button to set the white balance mode. - Page 32 Day/Night High-definition Box Camera· User Manual ATC: Adjust the white balance when the monitoring scene is w ith stable color temperature. When you select AUTO mode and press the Enter, the system will start white balance processing for the current scene. MANUAL: Set the white balance by adjusting the R-Gain and B-Gain value.
-
Page 33: Nr (Noise Reduction)
Day/Night High-definition Box Camera· User Manual 2.4.2 3D-NR (Noise Reduction) The 3D-NR (Noise Reduction) is used to reduce the no ises in the video signal. You can set the mode to ON or OFF. When the NR is enabled, level 0~7 is selectable. 2.4.3 Sharpness The SHARPNESS describes the clarity of details in the image. -
Page 34: Mirror
Day/Night High-definition Box Camera· User Manual 2.4.7 Mirror When the MIRROR function is enabled, the image can be mirrored horizontally, vertically or by center. 2.4.8 Anti-shake The Anti-shake function is used to maintain image stabilization in monitoring scene w ith slight vibration. Move the cursor to ANTI-SHAKE, and press the menu button to set enter the anti-shake settings menu. - Page 35 Day/Night High-definition Box Camera· User Manual Select the mode to ON. Set the type to TYPE1, TYPE2 or TYPE3. Configure motion detection area. Configuring area for type1: (1) Move the cursor to AREA SET, and press the menu button to enter the area settings menu. (2) Move the cursor to AREA SEL and select the area (Area...
- Page 36 Day/Night High-definition Box Camera· User Manual 1~ Area 4) to be configured. (3) Set the motion detection for the selected area to ON. (4) Set the area size and position by defining the top/bottom and left/right values. The configured area can be viewed on the screen.
-
Page 37: Privacy Mask
Day/Night High-definition Box Camera· User Manual 2.4.10 Privacy Mask Purpose: You can set privacy masks on the live view screen to cover certain areas where don’t need to be viewed or recorded. The size, color and transparency of the areas are adjustable. Steps: 1. -
Page 38: Digital Zoom
Day/Night High-definition Box Camera· User Manual Move the cursor to the four points and press the menu button left/right to set the top/bottom/left/right value. The configured area can be viewed on the screen. 6. Press the menu button left/right to select the co lor for the privacy mask. -
Page 39: Pixel Correction
Day/Night High-definition Box Camera· User Manual X8 or X16. 3. When the digital zoom ratio has been selected, you can set the position of the image area to be zoomed. Move the cursor to POSITION and press the menu button up/down to move the image area. - Page 40 Day/Night High-definition Box Camera· User Manual 2. Set the value of sensitivity to 0~7. 3. Move the cursor to DBC to set its value to 0~7. 4. The DBC function enables the camera to dynamically detect and correct the defective pixels on the image. The lower value represents higher pixel correcting level, yet the image definition w ill be affected.
-
Page 41: System
Day/Night High-definition Box Camera· User Manual 2.5 System On the main menu, move the cursor to SYSTEM and press the menu button to access the SYSTEM submenu: 2.5.1 Camera ID Settings Purpose: On Camera ID submenu, you can customize the camera ID. You can also adjust the camera ID position on the live view screen. - Page 42 Day/Night High-definition Box Camera· User Manual 2. Move the menu button up/down/left/right to select the character shown on the screen, and then press the menu button to enter the character you selected. Repeat the same step to edit other characters. Note: The characters include letters, numbers and symbols.
-
Page 43: System Information
Day/Night High-definition Box Camera· User Manual 2. Press the menu button to position the cursor on the character of the current camera ID which needs to modify. 3. Move the cursor to the character list and select one to replace Clearing the camera ID Steps: 1. -
Page 44: Exit
Day/Night High-definition Box Camera· User Manual 2.7 Exit Steps: On the main menu, move the cursor to EXIT and press the menu button to enter the Exit menu. Move the cursor to SAVE ALL to save all the settings; or select CANCEL to exit w ithout saving.