Table of Contents
Advertisement
Advertisement
Table of Contents

Related Manuals for X-TREME XM-4000Li


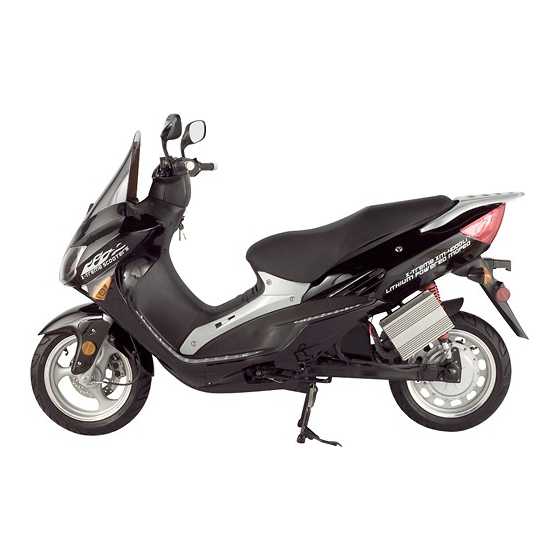
Summary of Contents for X-TREME XM-4000Li
-
Page 2: Contents Page
Contents Page Page 3 General Instructions Before Riding Page 4 Point Inspection (Pre-ride Check) Page 5 Assembly Instructions Page 6 & 7 Equipment Location Page 8 Ignition Key Positions Page 9 Handle Bar Controls Page 10 Accelerating & Braking Page 11 Battery &... -
Page 3: General Instruction Before Riding
General Instruction Before Riding 1) Tire check - Check the tires for correct inflation pressure and for any signs of physical damage. 2) Brake check - Squeeze the brake lever (Front then Rear) as hard as you can, push the scooter forward and check the braking resistance. - Page 4 Point Inspection before every use (pre-ride check) The following checks/operations are necessary before riding and delivering. ALWAYS: 1) Always Charge the batteries (observing battery guidelines) before using and after every use. 2) Check the action of the front and rear-wheel suspension. 3) Check the functionality of all controls.
-
Page 5: Assembly Instructions
Assembly Instructions Installing the rear view mirrors 1. Rear view mirrors can be easily fixed to the handle bars between the grips and the brake handle. 2. Screw in the rear view mirror clockwise. The rear view mirror that goes on the left controller is curved to the left and the rear view mirror that goes on the right controller curves to the right. -
Page 6: Equipment Location
Equipment Location... - Page 7 Equipment Location...
-
Page 8: Ignition Key Positions
Ignition Key Positions Key Position Description Key cannot be removed when power is on. key can be removed when power is off. To prevent theft,turn the handle bar to the far left and turn the key into the lock position. The key can Using the steering lock now be removed when handle bar when handle bar is... -
Page 9: Left Handle Bar Controls
Left Handle Bar Controls High Beam--Push switch up Headlights Switch Low Beam-- Push switch down Left Turn Signal--Slide switch to the left Horizontal Switch Right Turn Signal--Slide switch to the right Turning off Signal--Press the central release button Horn Button Sound the Horn--Push the yellow button on both handles. -
Page 10: Accelerating And Braking
Accelerating and Braking Throttle Tips 1. Turn the key to the ‘ON’ position, then turn the Throttle gradually to accelerate. 2. To avoid losing control of your scooter, please turn the Throttle slowly until the speed increases. 3. Do not turn the throttle until you are ready to ride. 4. -
Page 11: Battery Gauge And Charging Instructions
Battery Gauge and Charging Instructions Marks Description When the battery is fully charged(over 90%). The needle will point to the upper section of the dial. When the battery is around 50% charged, The needle Middle will point to the middle section of the dial.You should Position charge if possible now. -
Page 12: Easy Maintenance
Easy Maintenance Good maintenance will play a major role in keeping your scooter in good working condition and prolong the life of the batteries and scooter Please follow these recommendations ◆ Rust prevention ★ Always keep your scooter dry and clean. ★... -
Page 13: Maintenance Schedule
Maintenance Schedule Regular Service Intervals - kilometres Kilometres 1,000 2,000 3,000 4,000 5,000 6,000 Battery Charger Tire Pressure Tire Wear Brake System Brake Pad Nuts and Bolts Kilometres 7,000 8,000 9,000 10,000 11,000 12,000 Battery Charger Tire Pressure Tire Wear Brake System Brake Pad Nuts and Bolts... - Page 14 Diagnostics Indicators If your scooter fails to function properly, please check the diagnostic indicators on the display panel. Symptom: Light 1 on Diagnostics: Faulty brake switch, kickstand down or missing, or motor overheating can cause light 1 to illuminate. Solution: Please take the following steps: Step 1.
-
Page 15: Frequently Asked Questions
Frequently Asked Questions 1. Fully charged, what is the range of the electric vehicle? A. The Range is affected by the weight of rider, the type of terrain and the speed in which the vehicle is driven. A range of 40 miles at full throttle and 60 miles at cruising speed of 25mph has been recorded on a single charge, but is not guaranteed. - Page 16 9. How can I know the battery condition and energy level? The display panel includes a battery gauge on the right, which clearly indicates the power level of the batteries in your vehicle. I. FULL: upper gauge close to letter “H”. II.
-
Page 17: Technical Specifications
Technical Specifications Motor High efficiency 4000W Brushless Hub Motor Battery 40Ah Lithium Battery Charger 110V-250V/50Hz-60Hz Charging Time 4-8 Hours Expected Life of 2000 Deep Cycles Battery Tire 130/60-13 Max Torque 180N.m Max Speed 50-55 mph based on 40AH Lithium Batteries 40 miles at 45mph based on 40AH Lithium Batteries Single Charge Up to 60 miles at cruising speed (25mph) based on 40AH Lithium Batteries... - Page 20 For General Information or Parts Visit www.x-tremescooters.com For Technical Support or Assistance Visit www.x-tremescooters.com/support/...