Brother HL-1430 / HL-1435 - Laser Printer Setup Manual
- User manual (95 pages) ,
- Quick setup manual (23 pages) ,
- Manual de configuration rapide (23 pages)
Advertisement
Getting Started
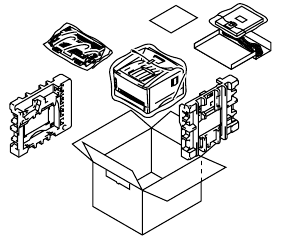
Carton Components
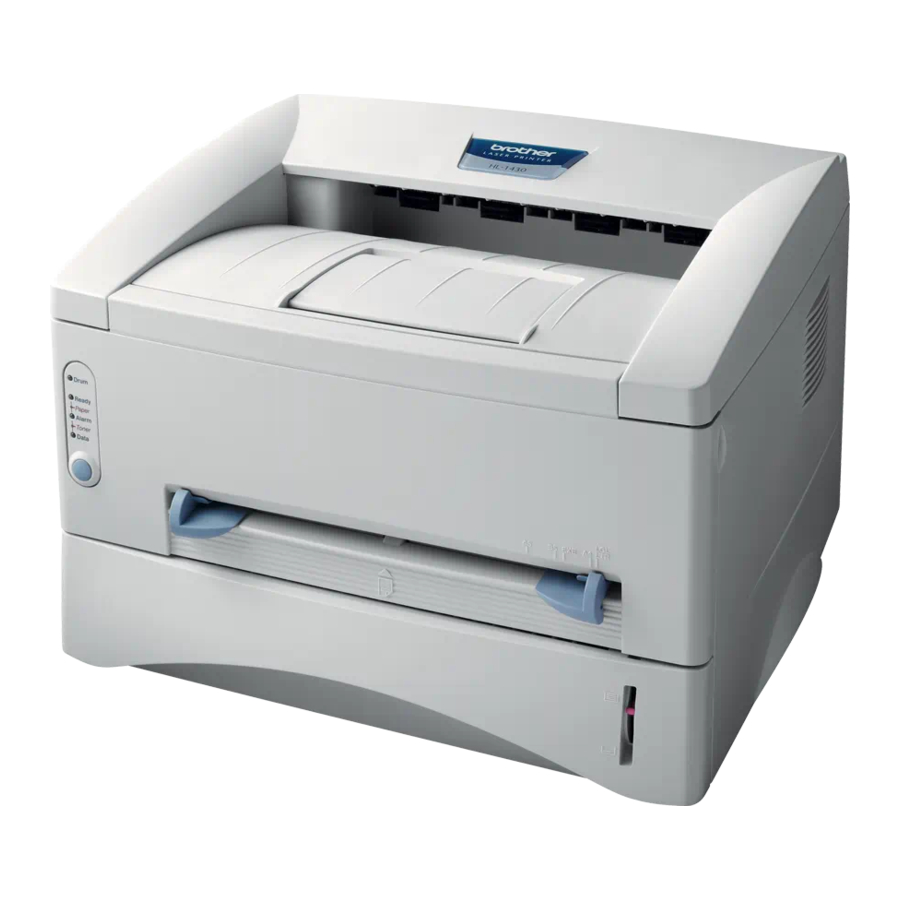
Printer

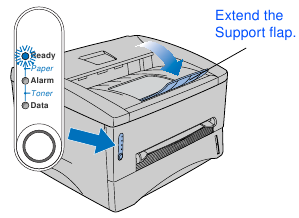
- Face-down Output Tray Support Flap (Support Flap)
- Face-down Output Tray (Top Output Tray)
- Front Cover
- Paper Tray
- Manual Feed Paper Guides
- Manual Feed Slot
- Control Panel

CD-ROM
(including User's Guide)
Quick Setup Guide
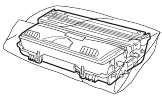
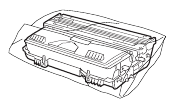
Drum Unit Assembly
(with Toner Cartridge included)
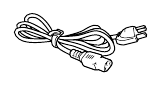
AC Power Cord
Carton components may differ from one country to another.
Save all packing materials and the printer carton.
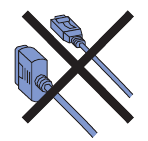
![]()
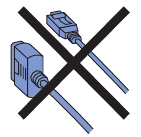
- The interface cable is not a standard accessory. Please purchase the appropriate interface cable for the interface you intend to use (USB or Parallel).
- It's recommended to use a Parallel interface cable or USB interface cable that is not longer than 6 feet (2.0 meters).
- For Parallel interface cable use a shielded interface cable that is IEEE 1284-compliant.
- Do not connect the USB cable to the front of your PC or to the iMac's keyboard.
Control Panel

| Button | Cancel Printing | Press the button one time and the printer will stop printing and eject the paper |
| Reprinting | When the Data LED is off, press and hold the button until all the LEDs light. The printer will reprint the last job. |
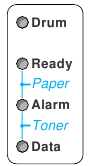
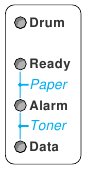
Printer LED Indications
 : Blinking
 : ON
: ON
 : OFF
: OFF
| Printer LED | Sleep / OFF | Warming Up | Ready | Receiving Data | Data Remaining |
| Drum |  | | | | |
| Ready | |  Green |  Green | | |
| Alarm | | | | | |
| Data | | | |  Orange |  Orange |
| Printer LED | Near End of Life | Toner Low | Toner Empty | No Paper/ Paper Jam/ Misfeed | Service Error |
| Drum | Orange | | | | Orange |
| Ready / Paper | | Green | Green | ||
| Alarm / Toner | |  Red |  Red | Red | Red |
| Data | | Orange | Orange | | Orange |
 User's Guide User's Guide | Chapter 5 | Chapter 5 | Chapter 5 | Chapter 6 | Chapter 6 |
Supplied CD-ROM
You can find a variety of information on the CD-ROM.
Windows

Macintosh

- Initial Setup
Instructional movie for printer setup and driver installation. - Install Software
Installs the printer driver and utilities. - Documentation
View the Printer User's Guide and Quick Setup Guide in PDF format. (Viewer included) - Brother Solutions Center
The Brother Solutions Center (http://solutions.brother.com) is a one-stop resource for all your printer needs. Download the latest drivers and utilities for your printers, read the FAQs and troubleshooting tips, or learn about printer solutions. - Maintenance Tutorial
Instructional movie for printer maintenance. - On-Line Registration
Register your product on-line.
Setting Up Your Printer
Insert the CD-ROM into the CD-ROM Drive
For Windows ® Users

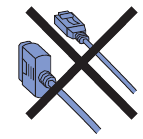
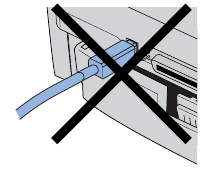
Do NOT connect the interface cable. Connecting the interface cable is done when installing the driver.
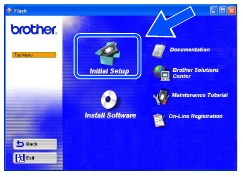
- Insert the CD-ROM into your CD-ROM drive. The opening screen will appear automatically. Follow the on-screen instructions.
![]()
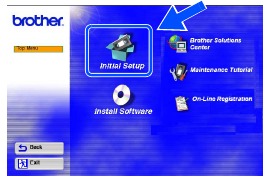
- Click the Initial Setup icon on the menu screen.
![]()
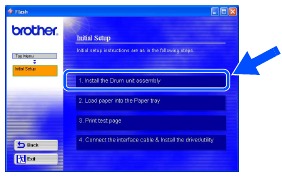
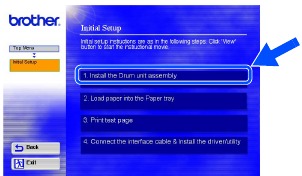
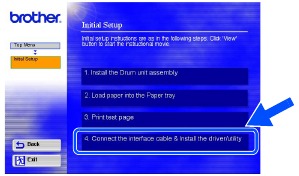
- You can view the Initial Setup instructions and follow steps.
![]()

For Macintosh ® Users
Do NOT connect the interface cable. Connecting the interface cable is done when installing the driver.
- Insert the CD-ROM into your CD-ROM drive. Double-click the Start Here icon or Start Here OS X icon. Follow the on-screen instructions.

- Click the Initial Setup icon on the menu screen.
![]()
- You can view the Initial Setup instructions and follow along from steps.
![]()

Install the Drum Unit Assembly
Do NOT connect the interface cable. Connecting the interface cable is done when installing the driver.

- Open the front cover.

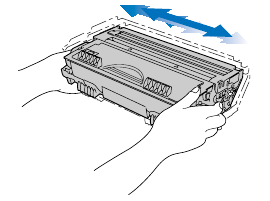
- Unpack the drum unit assembly. Remove the protective part.

- Rock it from side to side several times to distribute the toner evenly inside the assembly.
![]()
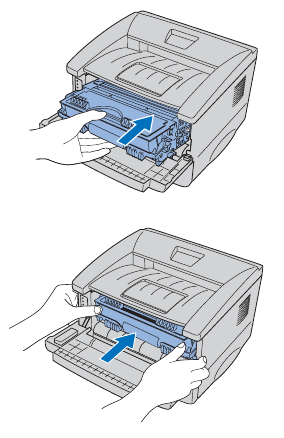
- Put the drum unit assembly into the printer.
![]()
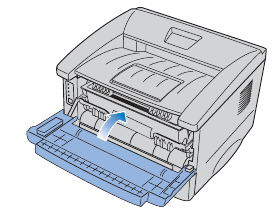
- Close the front cover of the printer.
![]()


Load Paper in the Paper Tray
- Pull the paper tray completely out of the printer.

- While pressing the paper guide release lever, slide the adjusters to fit the paper size. Check that the guides are firmly in the slots.

- Fan the stack of paper well to avoid paper jams and misfeeds.

- Put paper in the paper tray. Check that the paper is flat in the tray and below the maximum paper mark.

- Put the paper tray firmly back in the printer.


Print a Test Page
Do NOT connect the interface cable. Connecting the interface cable is done when installing the driver.
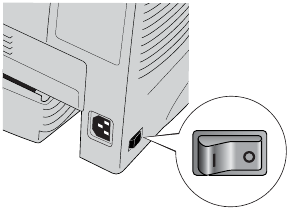
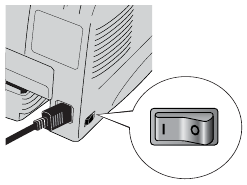
- Make sure that the printer power switch is off.
![]()
- Connet the AC power cord to the printer, and then plug the AC power cord into an AC outlet.

- Turn the power switch on.
![]()
- After the printer has finished warming up, the Ready LED stops blinking and stays green.
![]()
- Press the control panel button. The printer prints a test page. Check that the test page has printed correctly.


Installing the Driver
Follow the appropriate instructions on this page for your operating system and interface cable. The screens for Windows ® in this Quick Setup Guide are based on Windows ® XP. The screens for Mac ® OS X in this Quick Setup Guide are based on Mac ® OS X 10.1.
For USB Interface Cable Users
Installing the Driver and Connecting the Printer to Your PC
![]() If the Found New Hardware Wizard appears on your PC, click the Cancel button.
If the Found New Hardware Wizard appears on your PC, click the Cancel button.

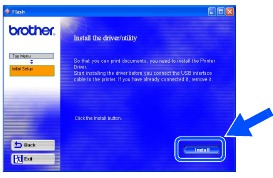
- Make sure the USB interface cable is NOT connected to the printer, and then begin installing the driver. If you have already connected the cable, remove it.
![]()
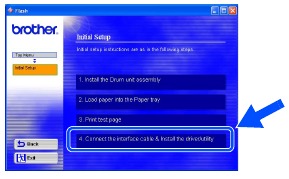
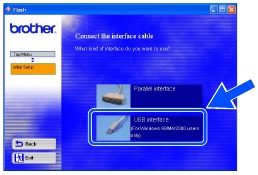
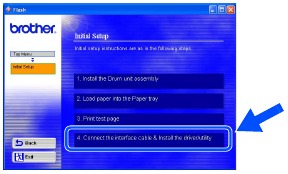
- Click Connect the interface cable & Install the driver/utility from the Initial Setup menu.
![]()
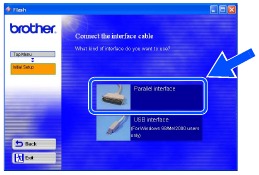
- Select the USB interface.
![]()
- Click the Install button.
![]()
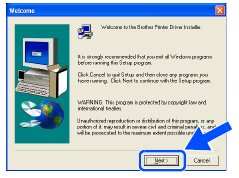
- Click the Next button.
![]()
- When this screen appears, make sure the printer power switch is on. Connect the USB interface cable to your PC, and then connect it to the printer. Click the Next button.

- Click the Finish button.

 For Windows® 98 / Me users: The Setup is now complete.
 For Windows® 2000/XP users: Go to "Setting Your Printer as the Default Printer".
Setting Your Printer as the Default Printer (For Windows ® 2000/XP Users Only)
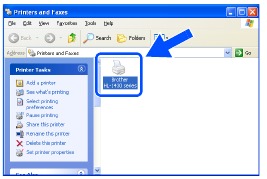
- Click Start and then Printers and Faxes.

- Select the Brother HL-14XX series icon.
![]()
- From the File menu, select Set as Default printer.
![]()


The setup is now complete.
For Parallel Interface Cable Users
Connecting the Printer to Your PC and Installing the Driver
- Click Connect the interface cable & Install the driver/utility from the Initial Setup menu.
![]()
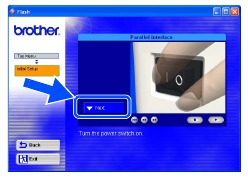
- Select the Parallel interface.
![]()
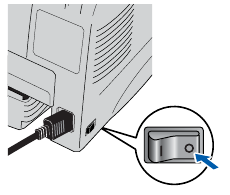
- Turn off the printer power switch.
![]()
- Connect the parallel interface cable to your PC, and then connect it to your printer.

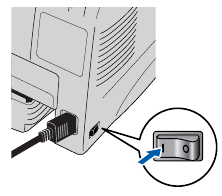
- Turn on the printer power switch.
![]()

 If the Found New Hardware Wizard appears on your PC, click the Cancel button.

- Click the Next button when the movie finishes.
![]()
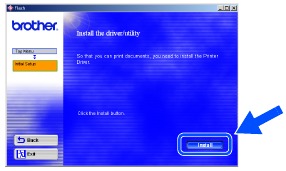
- Click the Install button.
![]()
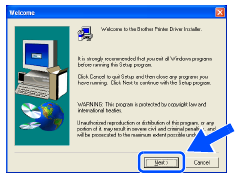
- Click the Next button.
![]()
- Click the Finish button.
![]()
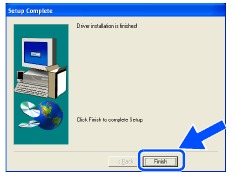
![]() The Setup is now complete.
The Setup is now complete.
For Mac® OS 8.6 to 9.2 Users
Installing the Driver & Connecting the Printer to your Macintosh
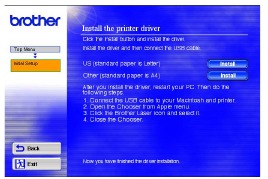
- Click Connect the interface cable & Install the driver/utility from the Initial Setup menu.
![]()
- Follow the on-screen instructions, and restart your Macintosh.
![]()
- Make sure the printer power switch is on.
![]()
- Connect the USB interface cable to your Macintosh, and then connect it to the printer.

 Do not connect the USB cable to the keyboard USB Port or a non-powered USB Hub.

- Open the Chooser from the Apple menu.

- Click the Brother Laser and select HL-14XX series. Close the Chooser.


 The setup is now complete.
For Mac® OS X 10.1 to 10.2 Users
Installing the Driver & Connecting the Printer to your Macintosh
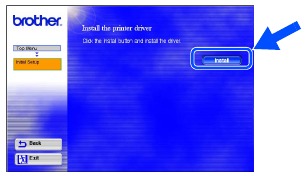
- Click Connect the interface cable & Install the driver/utility from the Initial Setup menu.

- Click the Install button, and follow the on-screen instructions.
![]()
- Make sure the printer power switch is on.
![]()
- Connect the USB interface cable to your Macintosh, and then connect it to the printer.

![]() Do not connect the USB cable to the keyboard USB Port or a non-powered USB Hub.
Do not connect the USB cable to the keyboard USB Port or a non-powered USB Hub.

- Select Applications from the Go menu.

- Open the Utilities folder.

- Open the Print Center icon.

- Click the Add Printer... button.

- Select USB.

- Select HL-14XX series, and then click the Add button.

- Select Quit Printer Center from the Printer Center menu.


 The setup is now complete.
Other Information
Shipment of the Printer
If for any reason you must ship your Printer, carefully package the Printer in the original packing to avoid any damage during transit. It is strongly recommended that you save and use the original packaging. The Printer should also be adequately insured with the carrier.

When shipping the Printer, the DRUM UNIT assembly and TONER CARTRIDGE must be removed from the Printer and placed in the foil bag. Failure to remove the unit and place it in the foil bag during shipping will cause severe damage to the Printer and may VOID THE WARRANTY.
- Turn off the printer power switch, and then unplug the AC power cord.

- Remove the drum unit assembly. Place it in the foil bag and seal the bag completely.
![]()
- Re-pack the printer.
![]()

Options
You can expand the capability of the printer by adding IR-1000.Ir-DA Interface
(Windows ® 95/98/2000/Me and Windows NT ® 4.0 only)
IR-1000
Safety Precautions
To Use the Printer Safely
 | Note |  Hint |  User's Guide |
| Indicates warnings that must be observed to prevent possible personal injury. | Indicates cautions that must be observed to use the printer properly or prevent damage to the printer. | Indicates notes and useful tips to remember when using the printer. | Indicates reference to the User's Guide that is on the CD-ROM we have supplied. |
 There are high voltage electrodes inside the printer. Before replacing internal parts, cleaning the printer or clearing a paper jam, make sure you have turned OFF the power switch and unplugged the power cord from the power outlet. |  |
Do not handle the plug with wet hands. Doing this might cause an electrical shock. |  |
 After you have just used the printer, some internal parts of the printer are extremely hot. When you open the front cover or rear cover of the printer, never touch the shaded parts shown in the illustration. |  Inside the printer (Front View)  Open the Rear cover (Rear View) |
 All models shown may not be available in your country, please check with your local Brother re-seller.
Documents / Resources
References
Download manual
Here you can download full pdf version of manual, it may contain additional safety instructions, warranty information, FCC rules, etc.
Download Brother HL-1430 / HL-1435 - Laser Printer Setup Manual
Advertisement
Thank you! Your question has been received!


Need Assistance?
Do you have a question about the HL-1430 that isn't answered in the manual? Leave your question here.