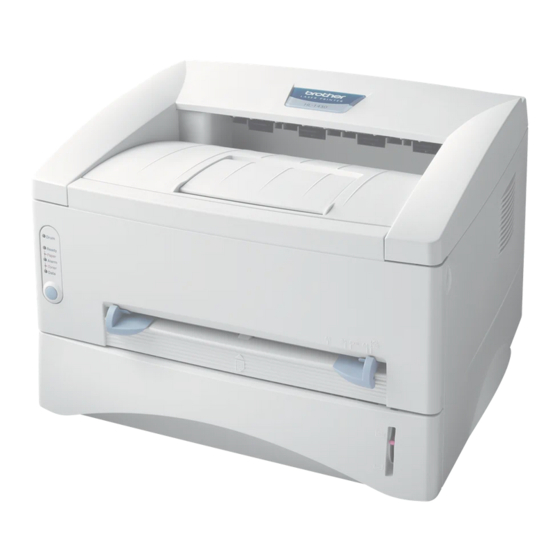
Brother HL-1430 Quick Setup Manual
Brother hl-1430: quick setup
Hide thumbs
Also See for HL-1430:
- User manual (95 pages) ,
- Manual de configuration rapide (23 pages) ,
- User manual
Table of Contents
Advertisement
Read this Quick Setup Guide before using the printer.
Before you can use the printer, you must set up the hardware and install
the driver.
Step 1
Setting Up Your Printer
Step 2
Installing the Driver
USB
Parallel
USB
®
®
page 12
page 14
Mac
Mac
OS 8.6 – 9.2
OS X 10.1 –
page 16
10.2
page 17
Setup is Complete!
For the latest driver and to find the best solution for your problem or question, access the Brother
Solutions Center directly from the CD-ROM/Driver or go to http://solutions.brother.com
Keep this Quick Setup Guide and supplied CD-ROM in a convenient place for quick and easy
reference at all times.
Advertisement
Table of Contents

Related Manuals for Brother HL-1430


Summary of Contents for Brother HL-1430
- Page 1 17 Setup is Complete! For the latest driver and to find the best solution for your problem or question, access the Brother Solutions Center directly from the CD-ROM/Driver or go to http://solutions.brother.com Keep this Quick Setup Guide and supplied CD-ROM in a convenient place for quick and easy...
-
Page 2: To Use The Printer Safely
When you open the front cover or rear cover of the printer, never touch the shaded parts shown in the illustration. All models shown may not be available in your country, please check with your local Brother re-seller. Note Indicates cautions that... -
Page 3: Table Of Contents
Installing the Driver Step 2 For USB Interface Cable Users ... 12 1. Installing the Driver and Connecting the Printer to Your PC 2. Setting Your Printer as the Default Printer (For Windows For Parallel Interface Cable Users ... 14 Connecting the Printer to Your PC and Installing the Driver For USB Interface Cable Users ... -
Page 4: Regulations
A shielded interface cable should be used in order to ensure compliance with the limits for a Class B digital device. Changes or modifications not expressly approved by Brother Industries, Ltd. could void the user's authority to operate the equipment. - Page 5 Wiring information (for UK) Important If the mains plug that is supplied with this printer is not suitable for your plug socket, remove the plug from the mains lead and fit an appropriate three-pin plug. If the replacement plug needs a fuse, fit the same fuse as the original.
-
Page 6: Getting Started
(including User's Guide) Carton components may differ from one country to another. Save all packing materials and the printer carton. The interface cable is not a standard accessory. Please purchase the appropriate interface cable for the interface you intend to use (USB or Parallel). -
Page 7: Control Panel
Data Data User's Guide Cancel Printing Press the button one time and the printer will stop printing and eject the paper Reprinting When the Data LED is off, press and hold the button until all the LEDs light. The printer will reprint the last job. -
Page 8: Supplied Cd-Rom
(Viewer included) 4 Brother Solutions Center The Brother Solutions Center (http://solutions.brother.com) is a one-stop resource for all your printer needs. Download the latest drivers and utilities for your printers, read the FAQs and troubleshooting tips, or learn about printer solutions. -
Page 9: Step 1
Step 1 Setting Up Your Printer Insert the CD-ROM into the CD-ROM Drive ® For Windows Do NOT connect the interface cable. Connecting the interface cable is done when installing the driver. Insert the CD-ROM into your CD-ROM drive. The opening screen will appear automatically. -
Page 10: Install The Drum Unit Assembly
Remove the protective part. Protective part Rock it from side to side several times to distribute the toner evenly inside the assembly. Put the drum unit assembly into the printer. Close the front cover of the printer. Drum unit assembly... -
Page 11: Load Paper In The Paper Tray
Put paper in the paper tray. Check that the paper is flat in the tray and below the maximum paper mark. Put the paper tray firmly back in the printer. Go to the next page Up to here. -
Page 12: Print A Test Page
Do NOT connect the interface cable. Connecting the interface cable is done when installing the driver. Make sure that the printer power switch is off. Connet the AC power cord to the printer, and then plug the AC power cord into an AC outlet. -
Page 13: Installing The Driver
Step 2 Installing the Driver Follow the appropriate instructions on this page for your operating system and interface cable. ® The screens for Windows ® The screens for Mac OS X in this Quick Setup Guide are based on Mac For USB Interface Cable Users ...Go to page 12 For Parallel Interface Cable Users...Go to page 14 For USB Interface Cable Users... -
Page 14: For Usb Interface Cable Users
Step 2 Installing the Driver For USB Interface Cable Users 1. Installing the Driver and Connecting the Printer to Your PC If the Found New Hardware Wizard appears on your PC, click the Cancel button. Make sure the USB interface cable is NOT connected to the printer, and then begin installing the driver. -
Page 15: Setting Your Printer As The Default Printer (For Windows ® 2000/Xp Users Only)
2. Setting Your Printer as the Default Printer ® (For Windows 2000/XP Users Only) Click Start and then Printers and Faxes. Select the Brother HL-14XX series icon. From the File menu, select Set as Default printer. The setup is now complete. -
Page 16: For Parallel Interface Cable Users
Step 2 Installing the Driver For Parallel Interface Cable Users Connecting the Printer to Your PC and Installing the Driver Click Connect the interface cable & Install the driver/utility from the Initial Setup menu. Select the Parallel interface. Turn off the printer power switch. - Page 17 Click the Install button. Click the Next button. Follow the on-screen instructions. Click the Finish button. The Setup is now complete.
-
Page 18: For Usb Interface Cable Users
Do not connect the USB cable to the keyboard USB Port or a non-powered USB Hub. Open the Chooser from the Apple menu. Click the Brother Laser and select HL-14XX series. Close the Chooser. The setup is now complete. -
Page 19: For Mac ® Os X 10.1 To 10.2 Users
For USB Interface Cable Users ® For Mac OS X 10.1 to 10.2 Users Installing the Driver & Connecting the Printer to your Macintosh Click Connect the interface cable & Install the driver/utility from the Initial Setup menu. Click the Install button, and follow the on-screen instructions. - Page 20 For USB Interface Cable Users Open the Print Center icon. Click the Add Printer... button. Select USB. Select HL-14XX series, and then click the Add button. Select Quit Printer Center from the Printer Center menu. The setup is now complete.
-
Page 21: Other Information
The contents of this manual and the specifications of this product are subject to change without notice. Brother reserves the right to make changes without notice in the specifications and materials contained herein and shall not be responsible for any damages (including consequential) caused by reliance on the materials presented, including but not limited to typographical and other errors relating to the publication. -
Page 22: Options
Options Options You can expand the capability of the printer by adding IR-1000. User's Guide Chapter 4. Ir-DA Interface ® (Windows 95/98/2000/Me and ® Windows NT 4.0 only) IR-1000 The IR-1000 connects to the parallel interface for infrared wireless printing. - Page 23 LJ7226001 Printed in China ©2003 Brother Industries, Ltd.