Table of Contents
Advertisement
Quick Links
Advertisement
Table of Contents

Related Manuals for Baumatic BR105


Summary of Contents for Baumatic BR105
- Page 1 BR105, 142 Litres Built-under larder fridge 33U d...
- Page 2 USER MANUAL FOR YOUR BAUMATIC BR105, 142 Litres Built-under larder fridge NOTE This User Instruction Manual contains important information, including safety & installation points, which will enable you to get the most out of your appliance. Please keep it in a safe place so that it is easily available for future reference. for you or any person not familiar with the operation of the appliance.
-
Page 3: Table Of Contents
7 – 10 Dimensions Description of the appliance Description of the product features 9 - 10 Using your Baumatic larder fridge 10 - 12 Before switching on During first use 10 - 11 Switching on the appliance and setting the thermostat... -
Page 4: Environmental Note
Environmental note Note Before discarding an old appliance, switch off and disconnect it from the power supply. Cut off and render any plug useless. Cut the cable off directly behind the appliance to prevent misuse. This should be undertaken by a competent person. Disable the door lock to make sure that children cannot get stuck inside the appliance. -
Page 5: Important Safety Information
Important safety information Your safety is of the utmost importance to Baumatic. Please make sure that you read this instruction booklet before attempting to install or use the appliance. If you are unsure of any of the information contained in this booklet, please contact Customer Care. - Page 6 Child safety o Packaging material should be kept away from children. o Children should not be allowed to touch the controls or play with the appliance. General safety o Do not pull on the power supply cable to remove the plug from your mains supply socket.
-
Page 7: Specifications Of Your Larder Fridge
Specifications of your larder fridge Dimensions of appliance Dimensions of aperture* Height: 818 - 870 mm Height: 820 – 870 mm Width: 596 mm Width: 600 mm Depth: 550 mm Depth: 600 mm (min) o Automatic fridge defrost o Adjustable thermostat o 3 Safety glass shelves o 2 Salad crispers o Bottle rack... -
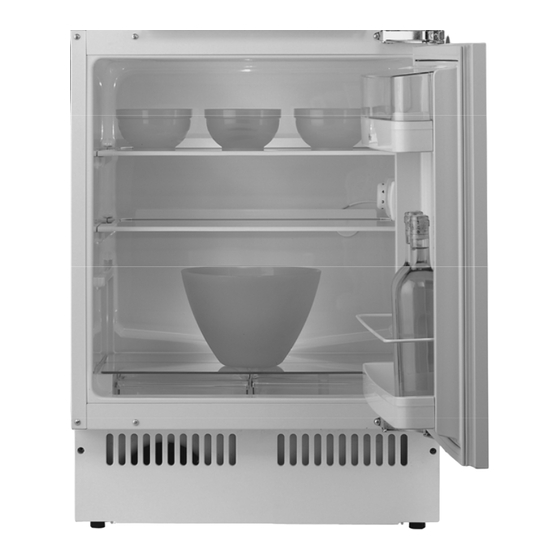
Page 8: Description Of The Appliance
IMPORTANT: When you install your appliance it is important to bear in mind its climatic rating. In order to find out the climatic rating of your appliance, you should check the rating plate. The rating plate is located on the front left edge of the inside of the fridge. -
Page 9: Description Of The Product Features
Description of the product features 1) Shelves o The shelves may be placed in any of the guide slots within the interior of the appliance. They are protected from sliding out. o To remove a shelf: Take off all of the items that are stored on the shelf that you want to remove. -
Page 10: Using Your Baumatic Larder Fridge
Using your Baumatic larder fridge Before switching on o Make sure that it has been installed by a suitably qualified person, information contained Baumatic’s installation instructions. o After delivery, wait for eight hours before connecting the appliance to your mains supply. This will allow any refrigerant gasses that may have been disturbed during the transportation process to settle. -
Page 11: Switching On The Appliance And Setting The Thermostat
Switching on the appliance and setting the thermostat You switch on your appliance by connecting it to your mains supply and setting the thermostat. The thermostat control knob is located on the right hand side of the fridge. o The thermostat automatically regulates the temperature inside of the fridge, depending on what number you have turned the thermostat control knob to:- o Position <0>... -
Page 12: Arranging And Storing Food In Your Refrigerator
Arranging and storing food in your refrigerator o Warm food or evaporating liquids should not be stored in your refrigerator, as this will increase the humidity inside of the appliance. o All foods should be wrapped or covered, this is particularly important if the food has a strong flavour. -
Page 13: Saving Energy When Using Your Refrigerator
o Milk bottles should have a cap on them and be stored on the bottle shelf that sits in the door. o Garlic, potatoes, onions and bananas should only be stored in a refrigerator IF they are stored in airtight containers. -
Page 14: Cleaning And Maintenance
Disposing: If you're going to throw out your old fridge, see if there's a chlorofluorocarbons (CFCs) recycler your area. government department which looks after the environment in your area may be able to help you. Cleaning and maintenance WARNING: PLEASE ENSURE THAT YOUR APPLIANCE IS DISCONNECTED FROM YOUR MAINS... -
Page 15: The Defrost Drain Hole
The defrost drain hole o Defrosting occurs automatically in the refrigerator compartment during operation. defrost water collected evaporating tray and evaporates automatically. o The drain hole should be cleaned periodically with the drain hole cleaner. This will prevent water from collecting in the bottom of the refrigerator, instead of flowing down the defrost drainage channel and drain hole. -
Page 16: Replacing The Light Bulb
Replacing the light bulb WARNING: PLEASE ENSURE THAT YOUR APPLIANCE IS DISCONNECTED FROM YOUR MAINS SUPPLY BEFORE ATTEMPTING TO REPLACE THE LIGHT BULB. o Press the rear end of the bulb cover until the sides release and then lift the bulb cover clear of the bulb. o Change the present light bulb with a new one. -
Page 17: Electrical Connection
Electrical connection YOUR REFRIGERATOR IS INTENDED FOR FITTED AND PERMANENT INSTALLATION. We recommend that the appliance is connected by a qualified electrician, who is a member of the N.I.C.E.I.C. and who will comply with the I.E.E. and local regulations. o Your refrigerator comes supplied with a 13 amp plug fitted. If in future you need to change the fuse in this plug, then a 13 amp ASTA approved (BS 1362) fuse must be used. -
Page 18: Positioning
Positioning o It is advisable that your appliance is only installed in a location where the ambient temperature of the room, corresponds with the climate classification that is stated on the rating plate of your appliance. Your appliance may not function correctly if the ambient temperature falls outside of the following ranges. -
Page 19: Reversing The Door Of Your Appliance
Reversing the door of your appliance This procedure MUST be completed before the furniture door is attached. Any parts that you remove from the appliance whilst reversing the door, should be retained for later use. ARNING- Take care when opening the hinges, they are sprung loaded and there is the risk of injury if they close on your hand. - Page 20 o Insert the retaining screws (1) into the opposite side of the appliance from their original position. These screws should be partially tightened but not fully tightened. o Remove the door retaining screws (2) and then reverse the position of the top and bottom hinge (as shown in the above diagram).
-
Page 21: Aperture Dimensions
perture dimensions The diagram below shows the aperture size that you will need to be able to install your appliance. The appliance must be stood on a level floor. You can us e the levelling feet to take into account any minor unevenness in the floor. - Page 22 Use a spanner to adjust the height of the adjustable feet. If your aperture has a height of 820 mm, then the adjustable feet should be fully tightened. o If your aperture has a height of 870 mm, then the adjustable feet should be set at a height of 50 mm.
-
Page 23: Fitting The Furniture Door To The Appliance
itting the furniture door to the appliance you need the appliance door to open from the other side, then please reverse the door before commencing the installation process. (See “Reversing the door section”). Tools required:- o Tape measure o Sharp pencil o Small flat blad ed screwdriver o Spanner... - Page 24 o Place the mounting bracket (1) on the reverse of the furniture door. o The middle of the mounting bracket should be positioned on the line that you have just drawn. Please note the position of the mounting bracket in the above drawing, to ensure that you have the mounting bracket the correct way up.
- Page 25 c) Hang the furniture door onto the appliance door, making sure that the brackets on the mounting bracket locate over the adjusting bolts. c) Use a screwdriver to adjust the gap on the lower section of the adjusting bolts. The gap should be set to approximately 9 mm (as shown in the above drawing).
- Page 26 f) Open the appliance door. o Use a suitably sized drill bit to drill through the holes in the bracket, into the work top. IMPORTANT: The drill bit should be appropriate for the material that your work top is made from. o Secure the bracket to the underside of the worktop, using the screws provided.
-
Page 27: Troubleshooting
Troubleshooting IMPORTANT: If your refrigerator appears not to be operating properly, before contacting the Customer Care Department, please refer to the checklist below. My fridge does not appear to be working/there is no power to my appliance. o Check that the plug is fully inserted into the power socket. o Check that there is power to your mains supply (e.g. - Page 28 Or any installation other than the one specified by Baumatic Ltd. has been completed. Please refer to the conditions of guarantee that appear on the...
-
Page 29: Baumatic Consumables
BC005 Stainless Steel Cleaner and Protector (250 ml) o BC007 E-Cloth – General Purpose Cloth o BC008 Microwave Cover To order a Baumatic consumable product please call 0123 5437 244 and quote the product code. You can also order online from eshop.baumatic.co.uk... -
Page 30: Technical Data
Technical Data Manufacturer BAUMATIC LTD Model Number BR105 Product Category 1 – Refrigeration Energy Efficiency Class (1) Annual Energy Consumption (2) 117 kWh Storage Volume Fridge 140 litres Compartment Storage Volume Freezer Compartment Star Rating Frost Free Compartments Fridge Temperature Rise Time... -
Page 31: Contact Details
United Kingdom Czech Republic Baumatic Ltd., Baumatic CR s.r.o. Baumatic Buildings, Lípovà 665 6 Bennet Road, 460 01 Liberec 4 Reading, Berkshire Czech Republic RG2 0QX United Kingdom +420 483 577 200 www.baumatic.cz Sales Telephone (0118) 933 6900 Slovakia Sales Fax Baumatic Slovakia, s.r.o.