Table of Contents
Advertisement
Quick Links
Download this manual
See also:
Instruction Manual
Advertisement
Table of Contents

Related Manuals for Baumatic BR11.2A


Summary of Contents for Baumatic BR11.2A
- Page 1 BR11.2A Built-under Fridge with Icebox...
- Page 2 User Manual for your BR11.2A BUILT-UNDER FRIDGE WITH ICEBOX NOTE : This User Instruction Manual contains important information, including safety & installation points, which will enable you to get the most out of your appliance. Please keep it in a safe place so that it is easily available for future reference.
-
Page 3: Table Of Contents
CONTENTS HT MOD 28/02/06 YOUR APPLIANCE’S SPECIFICATIONS …….…….3 SAFETY INFORMATION / ENVIRONMENTAL NOTE .. 4 USING YOUR FRIDGE……………….……………..………5-12 YOUR BR11.2A FRIDGE …………………….………………….5 BEFORE USING YOUR FRIDGE…………….……………….…6 USING YOUR FRIDGE…………………………………….…7-10 CLEANING AND MAINTENANCE……….………………11-12 DEFROSTING ………………………………..……………………13 TIPS FOR SAVING ENERGY …………………………………14 INSTALLING YOUR FRIDGE……………………………...….15 FITTING THE DÉCOR DOOR ………………………………...18... -
Page 4: Adjustable Feet
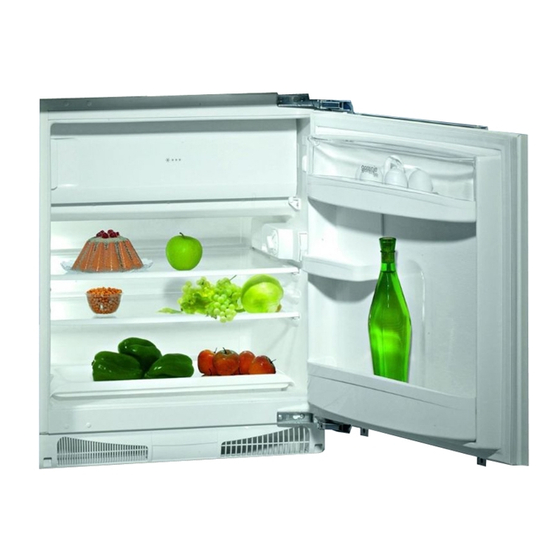
Specifications of your BR11.2A Built-under fridge with Icebox Congratulations on purchasing a Baumatic BR11.2A Built-under Fridge with icebox! Your Fridge has: Gross capacity: 130 litres Net capacity (fridge/ freezer): 105/21 litres Energy efficiency class: A Star rating: **** Adjustable Thermostat... -
Page 5: Electrical Safety
Manufacturer declines all responsibility for any damage due to non- grounding of appliance. DURING THE GUARANTEE PERIOD ONLY BAUMATIC SERVICE ENGINEERS OR AN AUTHORISED AGENT OF • BAUMATIC SHOULD CARRY OUT REPAIRS ON THIS UNIT. DO NOT USE IF THE SUPPLY CORD IS DAMAGED. NEVER TAKE RISKS WITH FIRE! •... - Page 6 Using your Baumatic BR11.2A Built-under Fridge: Your BR11.2A Built-under Fridge with Icebox: that this channel is never clogged. Use a plastic straw to clear away 1 SHELF: The shelves may be any dirt. placed in any of the guide slots 3 CRISPER TRAY &...
- Page 7 NOTE: BEFORE Using your BR11.2A FRIDGE: UPON DELIVERY: When your Fridge has been delivered, you will need to wait approximately 2 hours before turning it on. The fluid of the compressor installed in the appliance will need time to settle. PLEASE DO NOT PLUG IN ANY EARLIER...
- Page 8 USING your Baumatic BR11.2A FRIDGE YOU SWITCH ON YOUR APPLIANCE PLUGGING IT IN & SETTING THE THERMOSTAT inside the Fridge at the upper right- hand side: Your Fridge’s thermostat automatically regulates the inside temperature of the compartments. By rotating the thermostat knob from a low to a higher number position, colder temperatures can be obtained.
- Page 9 USING your Baumatic BR11.2A FRIDGE Reminder: Allow the unit time to settle after delivery. If your plug and power socket are now behind the fridge and you still need to move the unit into place, be especially careful. Remember to leave a safe distance between the back of the fridge and the wall or rear of the unit cabinet.
- Page 10 ARRANGING FOOD IN YOUR FRIDGE • To reduce humidity and the • DO NOT open the consequent increase of frost, refrigerator door too often NEVER place liquids in unsealed or leave it open for long containers in the refrigerator. spells of time. Frost tends to concentrate in •...
-
Page 11: Using Your Fridge
NOTES ON USING YOUR FRIDGE ALWAYS Cover and wrap foods, especially if they are PUNGENT. DO NOT place paper or plastic on the shelves which would • block the flow of air through the grids. NOTE: At the maximum cold setting, with a high outside (ambient) temperature and well-stocked (full or nearly full) compartments, the Fridge’s operation may be continuous, leading to the formation of some frost on the evaporator. -
Page 12: Cleaning And Maintenance
CLEANING / MAINTENANCE NOTE: Before attempting to clean your appliance, UNPLUG IT and make sure you do the following: WE RECOMMEND THAT YOU CLEAN AND MAINTAIN YOUR REFRIGERATOR ONCE A MONTH. Pay particular attention to the sealing rubber bars of the doors. These need to be kept clean for hygienic reasons as well as to allow the door to close properly. - Page 13 CLEANING / MAINTENANCE Your appliance is equipped with a sound alarm which will sound to indicate that it is time to clear this dust from the condenser structure at the back of your appliance. • Disconnect the appliance from the power supply. •...
-
Page 14: Defrosting
DEFROSTING Defrosting occurs fully automatically in the refrigerator compartment during normal operation. The defrosted water collected by the evaporating tray evaporates automatically. However, you will have to manually defrost the freezing compartment (icebox) when the frost and ice layer coating its interior is 3-5mm. You do this by: Turning the Emptying the... -
Page 15: Tips For Energy Savings
TIPS FOR ENERGY SAVINGS Try not to open the door too often, especially when the weather is wet and hot. Once you open the door, be sure to close it as soon as possible. Use higher thermostat settings only if essential and not for constant, long-term use. - Page 16 INSTALLING YOUR BR11.2 REFRIGERATOR NOTE – YOU NEED THE SPACES SHOWN AT LEFT TO INSTALL YOUR APPLIANCE. Ensure there is sufficient space behind the cooling coils at the back of your Fridge Ensure that you are going to be electric stoves and 30 cm from oil or placing your fridge away from heat coal stoves.
- Page 17 INSTALLING YOUR APPLIANCE- CONTINUED Fitting Bar Install the Fitting Bar (shown in the picture below), so that it attaches to the top of the appliance and underneath the top of the cabinetry, indicated by the arrow: *Please be aware that the Fitting Bar is not attached to the appliance and needs to be secured during installation.
- Page 18 INSTALLATION-AMBIENT TEMPERATURE GUIDELINES YOU MUST install this appliance in well ventilated, dry room. Energy use is affected by the ambient temperature. You are therefore advised to: Not expose the appliance to direct sunlight; Not install the appliance next to radiators, cookers or other sources of heat;...
-
Page 19: Fitting The Décor Door
1) Using a 2.8mm Fitting the Décor Door diameter bit, make holes sufficient to attach the rail as NOTE: You need shown on the left. the tools NOTE – door area shown here. below the rail must reach to just below appliance. - Page 20 Fastening your Refrigerator to under the Worktop Drill two holes and attach your fridge to the underside of your worktop as shown in figure at left. Adjusting the feet to level your Appliance Adjust the feet (see picture at right) until your Fridge sits levelly on your floor.
- Page 21 Reversing the swing of the Door Figure 1 – View of doors Figure 2 - View of doorway NOTE: All numbered references apply to both pictures for your convenience. 1) On the hinge-less side of the fridge’s door, remove the caps (1) that cover the hinge bracket holes.
- Page 22 6) Attach the door to the doorway, ensuring that all the holes where the hinges had formerly been screwed into are now covered with the caps you had previously removed. Reversing your Ice Box Door NOTE: Please only carry out this reversal if your appliance is not plugged and heavy amounts of frost are absent from the interior! 1) Open the ice box door.
-
Page 23: Door
Troubleshooting Trace a problem using the table below instead of having to call for help. PROBLEM WHAT TO DO CHECK THAT THE PLUG IS WELL-INSERTED INTO THE POWER SOCKET CHECK THAT THERE IS POWER FROM THE MAINS – THERE MAY BE A BLACKOUT OR YOUR FUSES MAY HAVE BLOWN. -
Page 24: Conditions Of Guarantee
*In addition, your appliance is covered by a 5 year parts warranty. Baumatic Ltd will provide free of charge the parts required to repair the appliance, only if they are fitted by a Baumatic engineer, for any defect that arises due to faulty materials or workmanship within a period of 5 years from the original purchase date. - Page 25 Thank you for buying Baumatic. *Applies to UK, Scotland, Wales & Northern Ireland only. (Republic of Ireland has 1 year labour and 1 year parts warranty only) .
- Page 26 Baumatic Ltd Make-up for your kitchen Headquarters Baumatic Ltd. Baumatic Buildings, 6 Bennet Road, Reading, Berkshire RG2 0QX, United Kingdom Sales Telephone +44 118 933 6900 Sales Fax +44 118 931 0035 Service Telephone +44 118 933 6911 Service Fax...