Table of Contents
Advertisement
Available languages
Available languages
Quick Links
Before attempting to connect, operate or adjust this product, please read these instructions completely.
Printed in Japan
VQT9921
Liquid Crystal Video Monitor
Model
Model BT-LH1500
POWER
MENU/
BLUE
HV
A
B
S
OPTION
EXIT
ENTER
ONLY
DELAY
INPUT SELECT
MENU
PHASE
CHROMA
BRIGHT
CONTRAST
BT-LH1800
M
ULTIFORMAT
BT-
P
P
3
F0502H @
Advertisement
Chapters
Table of Contents

Related Manuals for Panasonic BT-LH1500


Summary of Contents for Panasonic BT-LH1500
- Page 1 Before attempting to connect, operate or adjust this product, please read these instructions completely. Printed in Japan VQT9921 Liquid Crystal Video Monitor Model BT-LH1800 Model BT-LH1500 POWER MENU/ BLUE OPTION EXIT ENTER ONLY DELAY ULTIFORMAT INPUT SELECT MENU PHASE CHROMA...
-
Page 2: For Your Safety
CAUTION: Operation at a voltage other than 120 V AC may re- quire the use of a different AC plug. Please contact either a local or foreign Panasonic authorized ser- vice center for assistance in selecting an alternate AC plug. -
Page 3: Table Of Contents
Contents For Your Safety ... 2 Precautions for Use ... 3 Outline ... 4 Controls and Their Functions ... 5 _ Front View ... 5 _ Rear View... 5 How To Use On Screen Menu ... 6 _ How To Get On Screen Menu ... 6 _ MAIN Menu ... -
Page 4: Outline
Outline BT-LH1800 and BT-LH1500 are thin, light-weight wide-view industrial liquid crystal monitors which are respectively equipped with 18.1-inch and 15-inch screen size liquid crystals. _ Multi-input format compatible Compatible with HD signal input as well as standard NTSC signal and PAL signal. -
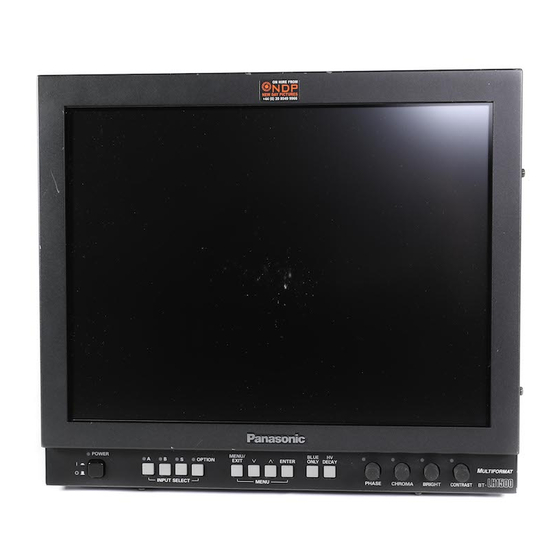
Page 5: Controls And Their Functions
Control and Their Functions Front View POWER MENU/ BLUE OPTION EXIT ENTER ONLY DELAY INPUT SELECT MENU ! Power switch This is the main power switch. With power ON, the upper LED (green) of the switch is lighted. @ Input select button This is the signal input select button. -
Page 6: How To Use On Screen Menu
How To Use On Screen Menu How To Get On Screen Menu MENU/ BLUE OPTION EXIT ENTER ONLY INPUT SELECT MENU When MENU/EXIT button is pushed, the main menu appears on the screen. MAIN menu [MAIN] >MARKER VIDEO CONFIG SYSTEM CONFIG REMOTE CONFIG INPUT SELECT MAINTENANCE... -
Page 7: Video Config
BACKLIGHT Used to adjust the brightness of backlight. Set-value (underlined is default value) 0 – 63 0 – 32 – 63 (BT-LH1500) POSITION Used to set the display position of on screen menu. Set-value (underlined is default value) CENTER (center of screen), LT (top left of screen), RT (top right of screen), LB (bottom left of screen). -
Page 8: Remote Config
How To Use On Screen Menu REMOTE CONFIG [REMOTE CONFIG] >GPI1 GPI2 GPI3 GPI4 GPI5 GPI6 GPI7 GPI8 REMOTE CONFIG menu With REMOTE CONFIG selected, the following menu will appear. GPI1–GPI8 Used to set the pin assignment of REMOTE control terminal. The settable items are same for each terminal. -
Page 9: Maintenance
AUTO With MAINTENANCE selected, the following menu will ap- pear. OPERATION The total operation time of the whole LCD monitor is displayed. The operation time of the LCD panel is displayed. BACKLIGHT The operation time of the backlight is displayed. -
Page 10: Remote Specifications
REMOTE Specifications _ GPI hard specification 8 inputs (refer to D-SUB 9-pin terminal) Pin No. Pin 1–Pin 4 Pin 5 Pin 6–Pin 9 _ ON/OFF operation Each terminal of REMOTE operates its assigned function accord- ing to the setting with GND (Pin 5) shorted (ON) or opened (OFF). _ How to assign the function to each terminal The assignment to each terminal can be freely executed by the On Screen Menu. -
Page 11: Description Of Marker
Description of MARKER _ Select the MARKER displayed by using the on screen menu. [MARKER] >MARKER 16:9 MARKER 4:3 MARKER BACK [GPI] PRESET1 PRESET2 MARKER 16:9 MARKER display selection in case of 16:9 signal input. Set-value (underlined is default value) 4:3/13:9/14:9/95%/93%/88%/80%/OFF MARKER 4:3 MARKER display selection within HD ZOOM in case of 4:3... -
Page 12: Troubleshooting
1. Necessity of periodical maintenance services Backlight as a light source and heat exhaust fan motor are used for the liquid crystal monitor. These parts (consumable) are deteriorated with lapse of time and may cause worsening of the performance or gen- eration of trouble. -
Page 13: Specifications
Power supply: 100 V – 240 V AC, 50 – 60 Hz Power conumption: 0.95 A – 0.40 A (BT-LH1800) 0.66 A – 0.31 A (BT-LH1500) 1 is the safety information. Dimensions: 16-1/4 (W) k 14-15/16 (H) k 3-7/16 (D) - Page 14 PANASONIC BROADCAST & TELEVISION SYSTEMS COMPANY UNIT COMPANY OF MATSUSHITA ELECTRIC CORPORATION OF AMERICA Executive Office: One Panasonic Way 4E-7, Secaucus, NJ 07094 (201) 348-7000 EASTERN ZONE One Panasonic Way 4E-7, Secaucus, NJ 07094 (201) 348-7621 Southeast Region: 1225 Northbrook Parkway, Ste 1-160, Suwanee, GA 30024 (770) 338-6835...
- Page 15 Il est recommandé de lire attentivement ce manuel avant d’utiliser l’appareil. Impremé au Japan VQT9921 Moniteur vidéo à cristaux liquides Modèle BT-LH1800 Modèle BT-LH1500 POWER MENU/ BLUE OPTION EXIT ENTER ONLY DELAY ULTIFORMAT INPUT SELECT MENU PHASE CHROMA BRIGHT CONTRAST...
-
Page 16: Consignes De Sécurit
Canada ou aux États-Unis d’Amérique. PRÉCAUTION: L’utilisation d’une tension de secteur autre que à 120 V C.A. peut exiger une fiche différente. Consulter un centre de service Panasonic authrisé local ou à l’etranger pour le choix de l’adaptateur approprié. - Page 17 Sommaire Consignes de sécurité ... 2 Précautions pour l’utilisation ... 3 Description sommaire de l’équipement ... 4 Les Commandes et leurs fonctions ... 5 _ Vue frontale ... 5 _ Vue arrière ... 5 Comment utiliser les menus sur l’écran ... 6 _ Comment trouver un menu sur l’écran ...
-
Page 18: Description Sommaire De L'équipement
Description sommaire de l’équipement Le BT-LH1800 et le BT-LH1500 sont des moniteurs minces, à cristaux liquides industriels avec un large champ de vision et d’un poids léger et ils sont respectivement équipés d’écrans de 18,1 pouces et de 15 pouces à cristaux liquides. -
Page 19: Les Commandes Et Leurs Fonctions
Les Commandes et leurs fonctions Vue frontale POWER MENU/ BLUE OPTION EXIT ENTER ONLY DELAY INPUT SELECT MENU ! Interrupteur d’alimentation Ceci est l’interrupteur d’alimentation principal. Lorsque l’énergie est sous tension, la DEL supérieure (verte) de l’interrupteur s’allume. @ Touche de sélection d’entrée Ceci est la touche de sélection d’entrée d’un signal. -
Page 20: Comment Utiliser Les Menus Sur L'écran
Comment utiliser les menus sur l’écran Comment trouver un menu sur l’écran MENU/ BLUE OPTION EXIT ENTER ONLY INPUT SELECT MENU Lorsque l’on appuie sur la touche MENU/EXIT (MENU/SOR- TIE), le menu principal apparaît sur l’écran. Menu MAIN (PRINCIPAL) [MAIN] >MARKER VIDEO CONFIG SYSTEM CONFIG... -
Page 21: Configuration Vidéo
BACKLIGHT (RETROÉCLAIRAGE) Utilisé pour régler la luminosité de l’éclairage par l’arrière. Réglage de valeur fixe. 0 – 63 0 – 32 – 63 (BT-LH1500) POSITION Utilisé pour régler la position de l’affichage du menu sur l’écran. Réglage de valeur fixe. -
Page 22: Configuration De La Télécommande
Comment utiliser les menus sur l’écran CONFIGURATION DE LA TÉLÉCOMMANDE [REMOTE CONFIG] >GPI1 GPI2 GPI3 GPI4 GPI5 GPI6 GPI7 GPI8 Menu REMOTE CONFIG Avec REMOTE CONFIG sélectionné, le menu suivant apparaîtra. (Un soulignement représente une valeur implicite.) GPI1–GPI8 Utilisé pour régler l’affectation du contacts du terminal de commande de REMOTE. -
Page 23: Entretien
Comment utiliser les menus sur l’écran SÉLECTION DE L’ENTRÉE _ Montage de l’unité d’entrée SDI [BT-YA200P] [INPUT SELECT] >[LINE A,B/S-VIDEO] NON-STANDARD [SDI] Menu INPUT SELECT SDI (Un soulignement représente une valeur implicite.) Utilisé pour régler le format d’entrée de SDI. Réglage de valeur fixe. -
Page 24: Spécifications De La Télécommande
Spécifications de la TÉLÉCOMMANDE _ Spécifications permanentes de GPI 8 entrées (se référer au terminal à 9 contacts D-SUB) Nx de contacts Contacts 1 – 4 Contacts 5 Contacts 6 – 9 _ Fonctionnement ON/OFF (sous tension/hors tension) Chaque terminal de la TÉLÉCOMMANDE fonctionne selon le réglage avec GND (contacts 5) court-circuité... -
Page 25: Description Des Marqueurs
Description des MARQUEURS _ Sélectionner le MARQUEUR affiché en utilisant le menu de l’écran. [MARKER] >MARKER 16:9 MARKER 4:3 MARKER BACK [GPI] PRESET1 PRESET2 Menu MARKER (Un soulignement représente une valeur implicite.) MARKER 16:9 Sélection de l’affichage du MARQUEUR dans le cas de l’entrée du signal 16:9. -
Page 26: Guide De Dépannage
Guide de dépannage Vérifiez et réglez les points suivants. Si malgré cela, l’appareil ne fonctionne pas, consultez votre revendeur. • Les touches opérationnelles ne fonctionnent pas. Vérifiez que le verrouillage des commandes n’est pas sur “ON” (mise sous tension). # Pour le déverrouillage, réglez CONTROL LOCK dans le menu CONFIGURATION DU SYSTÉME sur “OFF”... -
Page 27: Fiche Technique
Alimentation: CA 100 V – 240 V, 50 – 60 Hz Consommation: 0,95 A – 0,40 A (BT-LH1800) 0,66 A – 0,31 A (BT-LH1500) 1 sont des articles de sécurité Dimensions: 412 (W) k 379 (H) k 86 (P) mm... - Page 28 Panasonic Canada Inc. 5770 Ambler Drive, Mississauga, Ontario L4W 2T3 (905) 624-5010...