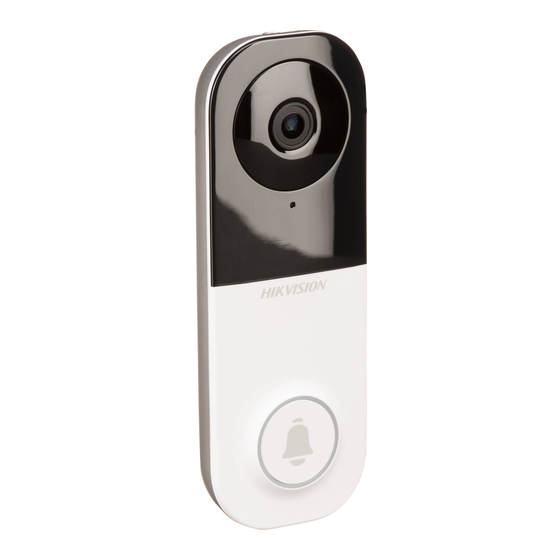
Summary of Contents for HIKVISION DS-HD2
- Page 1 If the QR Code is missing from this space, please scan the QR Code on the actual product. Scan the QR code with the Hik-Connect App to add the device to your account. Please keep it for further reference.
- Page 3 DAMAGES FOR LOSS OF BUSINESS PROFITS, BUSINESS INTERRUPTION, OR LOSS OF DATA OR DOCUMENTATION, IN CONNECTION WITH THE USE OF THIS PRODUCT, EVEN IF HIKVISION HAS BEEN ADVISED OF THE POSSIBILITY OF SUCH DAMAGES. TO THE MAXIMUM EXTENT PERMITTED BY APPLICABLE LAW, IN NO EVENT SHALL HIKVISION’S TOTAL LIABILITY FOR ALL DAMAGES EXCEED...
- Page 4 THAT YOUR USE CONFORMS TO THE APPLICABLE LAW. HIKVISION SHALL NOT BE LIABLE IN THE EVENT THAT THIS PRODUCT IS USED WITH ILLEGITIMATE PURPOSES. IN THE EVENT OF ANY CONFLICTS BETWEEN THE ABOVE AND THE APPLICABLE LAW, THE LATTER PREVAILS.
- Page 5 Due to the product shape and dimensions, the name and address of the importer/ manufacturer are printed on the package. Customer Service: For more information, please visit https://us.hikvision.com/en. Need help? Please visit “https://us.hikvision.com/en” for our local contact details.
-
Page 6: Quick Setup
Quick Setup Get the Hik-Connect App Power Kit Installation Doorbell Installation Doorbell Setup... -
Page 7: Box Contents
Box Contents Doorbell (x1) Mounting Plate (x2) Pick the one for best surveillance angle. Plate Foam (x1) Stabilize the mounting plate when installing it on the rough surface. Power Kit (x1) Drill Bit (x1) Screwdriver (x1) Wire Connector (x4) Mounting Screw (x3) Security Screw (x1) Anchor (x3) Fixing Screw (x2) - Page 8 Basics Terminals MicroSD Card Slot (Behind the cover) Speaker Name Description LED Indicator • Solid Red: Doorbell is starting up. • Fast-flashing Red: Doorbell exception (e.g. MicroSD card error). Blue • Solid Blue: Doorbell is functioning properly. • Fast-flashing Blue: Doorbell is ready for Wi-Fi connection.
-
Page 9: Wiring Overview
If you have a mechanical chime or electronic chime installed in your home, install the power kit and doorbell, and connect the wires as shown in the figure below. Hikvision doorbell with no chime Hikvision doorbell with no chime If no chime is installed, skip power kit installation, install the doorbell, and connect the wires as shown in the figure below. - Page 10 Power Kit Installation The power kit ensures that your doorbell gets the power it needs, so be sure to install it before you install your Doorbell. Shut off the electricity at the breaker that controls doorbell’s Shut off the electricity at the breaker that controls doorbell’s circuit.
- Page 11 Connect the wire harness to the chime Connect the wire harness to the chime’ ’ s terminals named s terminals named TRANS and FRONT. TRANS and FRONT. Insert the existing chime wire and the other end of the wire Insert the existing chime wire and the other end of the wire harness into the wire connector and twist it tightly.
- Page 12 Doorbell Installation Recommended Installation Height: 1.2 m (4 ft) above the ground. Shut off the electricity at the breaker that controls doorbell Shut off the electricity at the breaker that controls doorbell’ ’ s s circuit. circuit. (Optional) (Optional) If the wall is uneven, paste the plate foam to the If the wall is uneven, paste the plate foam to the mounting plate.
- Page 13 If you have a chime installed, follow Option If not, follow Option Option A Connect doorbell to your existing doorbell wires. Connect doorbell to your existing doorbell wires. Fixing Screw U-Shaped Wire Power Supply: 12 to 24 VAC Option B Connect the fuse wire to your existing doorbell wire.
- Page 14 Insert the security screw into the top of the mounting plate to secure the doorbell. Restore the electricity at the breaker. Doorbell is powered on when its indicator flashes blue quickly. If not, make sure your electricity is off and check the wiring. If yes, proceed to doorbell setup.
- Page 15 2. Log in to your Hik-Connect account. 3. On the Home screen, tap “+” on the upper-right corner to go to the Scan QR Code interface. 4. Scan the QR code on the device (or on the front cover of this manual) when the indicator flashes blue.
- Page 16 Install the MicroSD Card (Optional) 1. Remove the cover on the side of the doorbell with the screwdriver. 2. Insert a microSD card (sold separately) into the slot until there is a click. 3. Place the cover back on, and tighten the screws with the screwdriver.
-
Page 17: Troubleshooting
Hik-Connect app. 3. Make sure the chime model used in your home is compatible with the doorbell. Please check the compatibility list on https://us.hikvision.com/en. 4. Power on the doorbell and wait for 10 minutes to 3 hours, and then try again. - Page 18 Your Hikvision product is warranted for a period of one (1) year from the date of purchase against defects in materials and workmanship, or such longer period as may be required by law in the country or state where this product is sold, when used normally in accordance with user manual.


