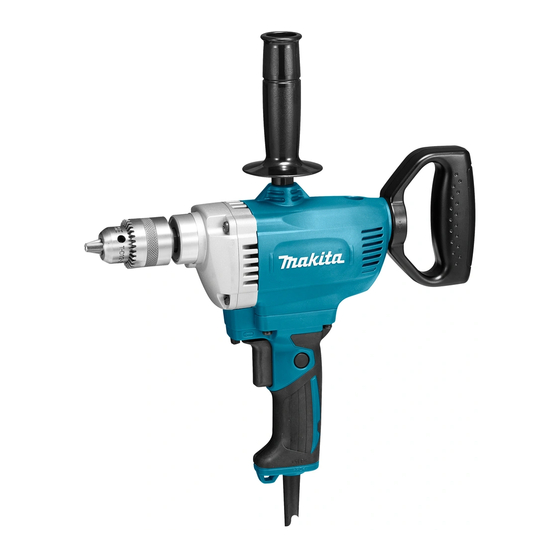
Makita DS4012 Technical Information
Hide thumbs
Also See for DS4012:
- Instruction manual (41 pages) ,
- Instruction manual (21 pages) ,
- Instruction manual (29 pages)
Advertisement
Quick Links
T
T
ECHNICAL INFORMATION
ECHNICAL INFORMATION
Model No.
Description
Model No.
Description
C
ONCEPT AND MAIN APPLICATIONS
Model DS4012 is a 13mm (1/2") Drill with variable speed control and
reverse rotation, and has been developed based on the current models
DS4010 (with variable speed control, and without reverse function) and
DS4011 (without variable speed control, and with reverse function).
The performance of model DS4012 is equivalent to the current model DS4011.
S
pecification
Voltage (V)
110
120
220
230
240
Specification
Chuck capacity: mm (")
Drill chuck type
No load speed: min.
-1
Capacities: mm (")
Reverse switch
Variable speed control by trigger
Double insulation
Power supply cord*
1
Weight according to
EPTA-Procedure 01/2003*
*1 2.0m (6.6ft) for Australia, Brazil
*2 With Top grip
S
tandard equipment
Chuck key
Top grip
Connector plastic case (Type3) (for "J" model only)
Note: The standard equipment may vary by country or model variation.
O
ptional accessories
Depth gauge
Keyless drill chuck set
Keyed drill chuck set
DUR364
DS4012
Cordless Grass Trimmer
13mm (1/2") Drill
Current (A)
Cycle (Hz)
7.2
50/60
8.5
50/60
3.6
50/60
3.5
50/60
3.3
50/60
Model
= rpm
Steel
Wood
: m (ft)
: kg (lbs)
2
Bits
Hole saws
Wrench 9 (for Hole saw)
W
Dimensions: mm (")
Length (L)
Width (W)
Height (H)
Continuous Rating (W)
Output
Input
750
350
N/A
350
750
350
750
350
750
350
DS4012
2 - 13 (1/16 - 1/2)
Keyed
0 - 600
13 (1/2)
36 (1-7/16)
Yes
Yes
Yes
2.5 (8.2)*
1
2.8 (6.2)
Angle attachment
Wrench 17 (for Angle attachment)
OFFICIAL USE
CONFIDENTIAL
for ASC & Sales Shop
PRODUCT
PRODUCT
P 1/ 3
P 1/ 12
L
H
340 (13-3/8)
83 (3-1/4)
390 (15-3/8)
Max. Output (W)
550
550
550
550
550
Advertisement

Summary of Contents for Makita DS4012
- Page 1 Description 13mm (1/2”) Drill ONCEPT AND MAIN APPLICATIONS Model DS4012 is a 13mm (1/2”) Drill with variable speed control and reverse rotation, and has been developed based on the current models Dimensions: mm (") DS4010 (with variable speed control, and without reverse function) and DS4011 (without variable speed control, and with reverse function).
-
Page 2: Necessary Repairing Tools
/ assembling Bearing retainer 22-36 781024-2 Wrench 43 disassembling / assembling Drill chuck S-13 [2] LUBRICATION Apply Makita grease FA. No.2 to the following portions designated with the black triangle to protect parts and product from unusual abrasion. Item No. Description Portion to lubricate... - Page 3 P 3/ 12 epair [3] DISASSEMBLY/ASSEMBLY [3]-1. Armature DISASSEMBLING Disassemble Armature as drawn in Fig. 2. Fig. 2 1. Remove Carbon brushes. 2. Remove four 5x40 Tapping screws, and then 3. Pull out Armature separate Gear housing from Motor housing. from Gear housing.
- Page 4 P 4/ 12 epair [3] DISASSEMBLY/ASSEMBLY [3]-2. Drill chuck DISASSEMBLING Remove Drill chuck as drawn in Fig. 3. Fig. 3 1. Hold 1R139 in Vise, and fit the flats of 2. Open the chuck fully, and then turn M6x22 Flat head Spindle into the groove of 1R139.
- Page 5 P 5/ 12 epair [3] DISASSEMBLY/ASSEMBLY [3]-2. Drill chuck (cont.) ASSEMBLING Assemble Drill chuck as drawn in Fig. 4. Fig. 4 1. Assemble Drill chuck to Spindle by hand until it stops. 2.Hold 1R139 in Vise, and fit the flats of Spindle into Then fasten 1R298 to Drill chuck.
- Page 6 P 6/ 12 epair [3] DISASSEMBLY/ASSEMBLY [3]-3. Spindle, Gear section DISASSEMBLING (1) Remove Drill chuck as illustrated in Fig. 3/ 3A of page 4. (2) Separate Gear housing from Motor housing, and then disassemble Gear section as drawn in Fig. 5. Fig.
- Page 7 P 7/ 12 epair [3] DISASSEMBLY/ASSEMBLY [3]-3. Spindle, Gear section DISASSEMBLING (3) Ball bearing 626LLB can be removed as drawn in Fig. 6. If Ball bearing 626LLB is left in Gear housing complete during the disassembly of gear section, remove Ball bearing 626LLB as drawn in Fig.
- Page 8 P 8/ 12 epair [3] DISASSEMBLY/ASSEMBLY [3]-3. Spindle, Gear section ASSEMBLING Assemble Spindle and Gear section as drawn in Fig. 8. Fig. 8 1. Assemble Ball bearing 626LLB 2. Put Spindle on 1R035. Then, put 1R029 to Gear housing complete. Ball bearing 6202LLB on Spindle.
- Page 9 P 9/ 12 epair [3] DISASSEMBLY/ASSEMBLY [3]-4. Leaf spring ASSEMBLING Assemble two Leaf springs to Handle L as drawn in Fig. 9. Fig. 9 Fit the projections of Leaf spring to the notches of Handle L. Handle L Projections Notches of Motor housing Face the curve tops toward notches of notch Motor housing.
-
Page 10: Circuit Diagram
P 10/ 12 ircuit diagram Fig. D-1 AWG18 AWG18 AWG18 Color index of lead wires' sheath Brush AWG18 Black holder Field view from Blue Armature fan side Field Brown Brush Orange holder Purple AWG18 White AWG18 AWG18 AWG18 Line filter (if used) AWG18 Splice... -
Page 11: Wiring Diagram
P 11/ 12 iring diagram Fig. D-2 Wiring of Field lead wires Field Pass Field lead wires through this hole to Handle section. Motor housing Note: Be careful not to scratch or damage them by the edges. Field lead wires must be tight in Motor housing. - Page 12 P 12/ 12 iring diagram Fig. D-3 Wiring in Handle Put Line filter to the place designated in gray color when it is used. When it is not used, put the slack of Lead wires to the place. Round wall Line filter Put Field lead wires between Boss and Round wall.


