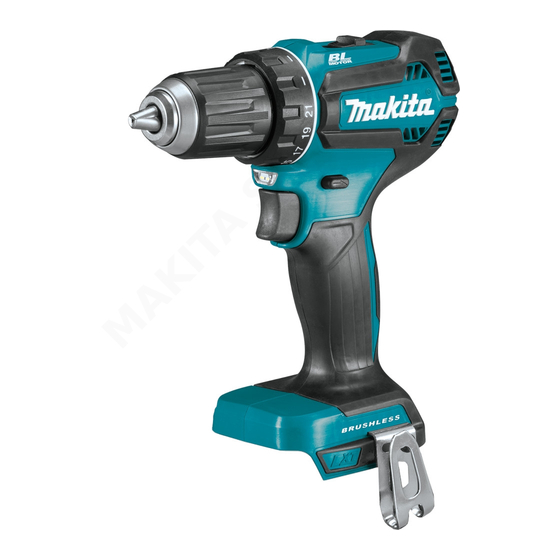
Makita DDF485 Instruction Manual
Hide thumbs
Also See for DDF485:
- Instruction manual (73 pages) ,
- Instruction manual (65 pages) ,
- Instruction manual (77 pages)
Table of Contents
Advertisement
Quick Links
Advertisement
Table of Contents

Summary of Contents for Makita DDF485
- Page 1 INSTRUCTION MANUAL Cordless Driver Drill DDF485 Read before use.
-
Page 2: Specifications
SPECIFICATIONS Model: DDF485 Drilling capacities Steel 13 mm Wood 38 mm Fastening capacities Wood screw 6 mm x 75 mm Machine screw No load speed High (2) 0 - 1,900 min Low (1) 0 - 500 min Overall length 169 mm Rated voltage D.C. -
Page 3: General Power Tool Safety Warnings
Use personal protective equipment. Always SAFETY WARNINGS wear eye protection. Protective equipment such as a dust mask, non-skid safety shoes, hard hat or hearing protection used for appropriate conditions General power tool safety warnings will reduce personal injuries. Prevent unintentional starting. Ensure the WARNING: switch is in the off-position before connecting Read all safety warnings, instruc- to power source and/or battery pack, picking tions, illustrations and specifications provided with this up or carrying the tool. Carrying power tools with... - Page 4 Disconnect the plug from the power source Service and/or remove the battery pack, if detachable, Have your power tool serviced by a qualified from the power tool before making any adjust- repair person using only identical replacement ments, changing accessories, or storing power parts. This will ensure that the safety of the power tools. Such preventive safety measures reduce tool is maintained.
-
Page 5: Tips For Maintaining Maximum Battery Life
SAVE THESE INSTRUCTIONS. To install the battery cartridge, align the tongue on the battery cartridge with the groove in the housing and slip it into place. Insert it all the way until it locks in place CAUTION: Only use genuine Makita batteries. with a little click. If you can see the red indicator on the Use of non-genuine Makita batteries, or batteries that upper side of the button, it is not locked completely. have been altered, may result in the battery bursting causing fires, personal injury and damage. It will CAUTION: Always install the battery cartridge also void the Makita warranty for the Makita tool and fully until the red indicator cannot be seen. If not, charger. -
Page 6: Overheat Protection
Overheat protection Indicating the remaining battery capacity When the tool/battery is overheated, the tool stops automatically. In this situation, let the tool/battery cool before turning the tool on again. Only for battery cartridges with the indicator Overdischarge protection When the battery capacity is not enough, the tool stops automatically. In this case, remove the battery from the tool and charge the battery. Switch action ► 1 . Indicator lamps 2. Check button Press the check button on the battery cartridge to indi- cate the remaining battery capacity. The indicator lamps light up for a few seconds. Indicator lamps Remaining capacity... -
Page 7: Speed Change
Speed change NOTE: When the tool is overheated, the tool stops automatically and the lamp starts flashing. In this case, release the switch trigger. The lamp turns off in one minute. NOTE: Use a dry cloth to wipe the dirt off the lens of the lamp. Be careful not to scratch the lens of lamp, or it may lower the illumination. Reversing switch action ► 1 . -
Page 8: Installing Hook
Adjusting the fastening torque ► 1 . Adjusting ring 2. Graduation 3. Arrow The fastening torque can be adjusted in 22 levels by turning the adjusting ring. Align the graduations with the arrow on the tool body. You can get the minimum fastening torque at 1 and maximum torque at marking. The clutch will slip at various torque levels when set at the number 1 to 21. The clutch does not work at marking. Before actual operation, drive a trial screw into your material or a piece of duplicate material to determine which torque level is required for a particular application. The following shows the rough guide of the relationship between the screw size and graduation. Graduation Machine screw Wood Soft wood – ɸ3.5 x 22 ɸ4.1x 38 –... -
Page 9: Screwdriving Operation
Installing driver bit holder Optional accessory ► 1 . Vent Screwdriving operation ► 1 . Driver bit holder 2. Driver bit CAUTION: Adjust the adjusting ring to the Fit the driver bit holder into the protrusion at the tool foot proper torque level for your work. -
Page 10: Maintenance
To maintain product SAFETY and RELIABILITY, repairs, any other maintenance or adjustment should be performed by Makita Authorized or Factory Service Centers, always using Makita replacement parts. OPTIONAL ACCESSORIES CAUTION: These accessories or attachments are recommended for use with your Makita tool specified in this manual. The use of any other accessories or attachments might present a risk of injury to persons. Only use accessory or attachment for its stated purpose. If you need any assistance for more details regard- ing these accessories, ask your local Makita Service Center. - Page 12 Makita Europe N.V. Jan-Baptist Vinkstraat 2, 3070 Kortenberg, Belgium Makita Corporation 3-11-8, Sumiyoshi-cho, Anjo, Aichi 446-8502 Japan 885654-228 www.makita.com 20180321...


