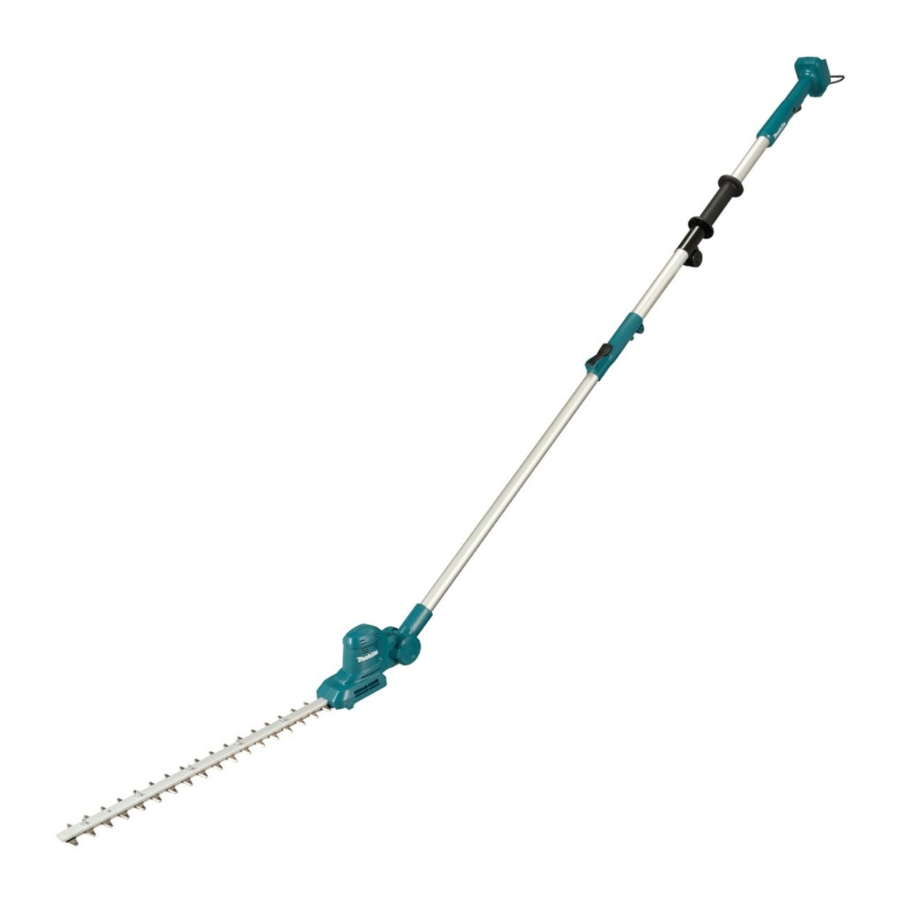
Makita DUN461W Instruction Manual
Cordless pole hedge trimmer
Hide thumbs
Also See for DUN461W:
- Instruction manual (113 pages) ,
- Instruction manual (112 pages) ,
- Instruction manual (89 pages)
Table of Contents
Advertisement
Advertisement
Table of Contents

Related Manuals for Makita DUN461W


Summary of Contents for Makita DUN461W
- Page 1 INSTRUCTION MANUAL Cordless Pole Hedge Trimmer DUN461W Read before use.
-
Page 2: Specifications
SPECIFICATIONS Model: DUN461W Blade length 460 mm Strokes per minute 3,600 min Cutting blade angle 135° (up 60°, down 75°) Overall length 1,889 - 2,511 mm Rated voltage D.C. 18 V Net weight 3.0 - 3.3 kg • Due to our continuing program of research and development, the specifications herein are subject to change without notice. -
Page 3: Safety Warnings
Noise WARNING: Wear ear protection. WARNING: The noise emission during actual The typical A-weighted noise level determined accord- use of the power tool can differ from the declared ing to EN62841-4-2: value(s) depending on the ways in which the tool is Sound pressure level (L ) : 74 dB(A) used especially what kind of workpiece is processed. - Page 4 Personal safety Power tool use and care Stay alert, watch what you are doing and use Do not force the power tool. Use the correct common sense when operating a power tool. power tool for your application. The correct Do not use a power tool while you are tired or power tool will do the job better and safer at the under the influence of drugs, alcohol or med- rate for which it was designed.
-
Page 5: Additional Safety Instructions
Do not use a battery pack or tool that is dam- Always use two hands when operating the pole aged or modified. Damaged or modified batteries hedge trimmer. Hold the pole hedge trimmer with may exhibit unpredictable behaviour resulting in both hands to avoid loss of control. fire, explosion or risk of injury. 10. Always use head protection when operating Do not expose a battery pack or tool to fire or the pole hedge trimmer overhead. - Page 6 Operation 18. Before checking the shear blades, taking care of faults, or removing foreign objects caught Always use two hands to operate the tool. in the shear blades, always switch off the tool Using one hand could cause loss of control and and remove the battery cartridge.
- Page 7 CAUTION: Do not touch the terminals with any con- Only use genuine Makita batteries. ductive material. Use of non-genuine Makita batteries, or batteries that have been altered, may result in the battery bursting Avoid storing battery cartridge in a con- causing fires, personal injury and damage. It will tainer with other metal objects such as also void the Makita warranty for the Makita tool and nails, coins, etc.
-
Page 8: Parts Description
PARTS DESCRIPTION Head Angle adjustment button Lock-lever Thumb nut Front grip Rear grip Battery cartridge Switch trigger Lock-off button Shear blades To install the battery cartridge, align the tongue on the FUNCTIONAL battery cartridge with the groove in the housing and slip it into place. Insert it all the way until it locks in place DESCRIPTION with a little click. If you can see the red indicator as shown in the figure, it is not locked completely. CAUTION: Always be sure that the tool is CAUTION: Always install the battery cartridge switched off and the battery cartridge is removed fully until the red indicator cannot be seen. -
Page 9: Overload Protection
Never use the tool if it starts when adjustment button. you pull the switch trigger without pressing the lock- Move the head slightly until it is locked with a click. off button. Ask your local Makita Service Center for repairs. WARNING: NOTE: Make sure that the head is securely locked Never disable the lock function or before operating the tool. tape down the lock-off button. - Page 10 Adjusting the pipe length ASSEMBLY CAUTION: Always be sure that the tool is CAUTION: Always be sure that the tool is switched off before adjusting the pipe length. switched off and the battery cartridge is removed CAUTION: When adjusting the pipe length, before carrying out any work on the tool.
- Page 11 Prepare the crank and new shear blades. Adjust the crank so that the 2 small holes on the crank are lined up on the alignment line as shown in the figure. ► 1 . Crank 2. Shear blades Remove the blade cover, and then attach it to the new shear blades. Apply a small amount of grease to the periphery of the crank. Attach the washer, gear, and the crank to the pin in order.
- Page 12 Remove the blades and install them again. NOTICE: If the parts other than the shear blades such as the crank are worn out, ask Makita Authorized Service Centers for parts replacement or repairs. Installing or removing the chip...
-
Page 13: Operation
Hold the tool with both hands by holding the front grip NOTICE: Never try to remove the chip receiver and the rear grip. by an excessive force with its claws locked in the grooves of the shear blades. OPERATION Operating the tool WARNING: Do not use the tool near any electrical power lines. -
Page 14: Cleaning The Tool
Store the tool out of the reach CAUTION: When inspecting or maintaining the of children. Store the tool in a place not exposed to tool, always put the tool down. Assembling or adjusting moisture or rain. the tool in an upright position may result in serious injury. To maintain product SAFETY and RELIABILITY, repairs, any other maintenance or adjustment should be performed by Makita Authorized or Factory Service Centers, always using Makita replacement parts. 14 ENGLISH... -
Page 15: Troubleshooting
Remove the battery and ask your local authorized service center for repair. Remove the battery immediately! OPTIONAL ACCESSORIES CAUTION: These accessories or attachments are recommended for use with your Makita tool specified in this manual. The use of any other accessories or attachments might present a risk of injury to persons. Only use accessory or attachment for its stated purpose. If you need any assistance for more details regard- ing these accessories, ask your local Makita Service Center. - Page 16 Makita Europe N.V. Jan-Baptist Vinkstraat 2, 3070 Kortenberg, Belgium Makita Corporation 3-11-8, Sumiyoshi-cho, Anjo, Aichi 446-8502 Japan 885881-227 www.makita.com 20210211...