AEG BPK744L21M User Manual
Hide thumbs
Also See for BPK744L21M:
- User manual (40 pages) ,
- User manual (40 pages) ,
- User manual (32 pages)
Table of Contents
Advertisement
Quick Links
Advertisement
Table of Contents

Related Manuals for AEG BPK744L21M


Summary of Contents for AEG BPK744L21M
- Page 1 BPK744L21M User Manual Oven BPK744R21M USER MANUAL...
-
Page 2: Table Of Contents
16. ENVIRONMENTAL CONCERNS..............39 FOR PERFECT RESULTS Thank you for choosing this AEG product. We have created it to give you impeccable performance for many years, with innovative technologies that help make life simpler – features you might not find on ordinary appliances. Please spend a few minutes reading to get the very best from it. -
Page 3: Safety Information
ENGLISH SAFETY INFORMATION Before the installation and use of the appliance, carefully read the supplied instructions. The manufacturer is not responsible for any injuries or damage that are the result of incorrect installation or usage. Always keep the instructions in a safe and accessible location for future reference. -
Page 4: Safety Instructions
Disconnect the appliance from the power supply • before carrying out any maintenance. If the mains power supply cable is damaged, it must • be replaced by the manufacturer, its Authorised Service Centre or similarly qualified persons to avoid an electrical hazard. - Page 5 ENGLISH be replaced, this must be carried out by our Authorised Service Centre. Cabinet minimum 590 (600) mm • Do not let mains cables touch or height (Cabinet under come near the appliance door or the the worktop minimum niche below the appliance, especially height) when it operates or the door is hot.
- Page 6 The earth cord (green / yellow cable) – do not keep moist dishes and must be 2 cm longer than phase and food in the appliance after you neutral cables (blue and brown cables). finish the cooking. – be careful when you remove or 2.3 Use...
- Page 7 ENGLISH 2.5 Pyrolytic cleaning cleaning operation of all Pyrolytic Ovens and can be also a source for WARNING! low level harmful fumes. Risk of Injury / Fires / • Fumes released from all Pyrolytic Chemical Emissions Ovens / Cooking Residues as (Fumes) in Pyrolytic Mode.
-
Page 8: Installation
3. INSTALLATION 3.1 Building in WARNING! Refer to Safety chapters. www.youtube.com/electrolux www.youtube.com/aeg How to install your AEG/Electrolux Oven - Column installation (*mm) min. 550 min. 560 (*mm) min. 550 min. 560... -
Page 9: Product Description
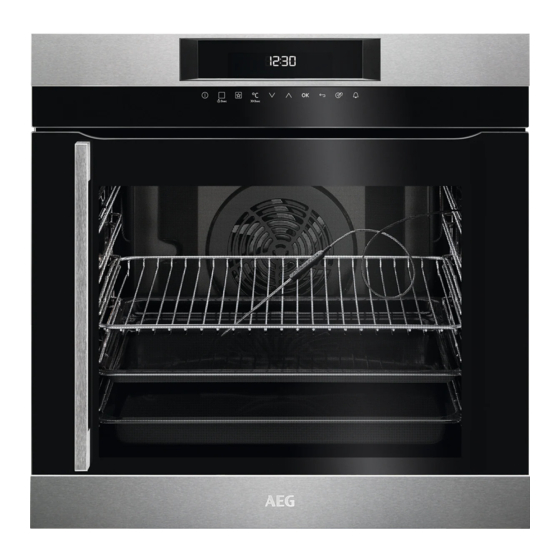
ENGLISH 3.2 Securing the oven to the cabinet 4. PRODUCT DESCRIPTION 4.1 General overview Control panel Electronic programmer Socket for the food sensor Heating element Lamp Shelf support, removable Shelf positions • Trivet The socket for the core For roasting and grilling. temperature sensor is on the side opposite to the door Use the trivet only with... -
Page 10: Control Panel
5. CONTROL PANEL 5.1 Electronic programmer Use the sensor fields to operate the oven. Sensor Function Comment field Display Shows the current settings of the oven. ON / OFF To turn on and off the oven. Heating Functions Press the sensor field to choose the menu: Rec‐... - Page 11 ENGLISH Sensor Function Comment field Time and addi‐ To set different functions. When a heating function tional functions operates, press the sensor field to set the timer or the functions: Function Lock, Favourites, Heat + Hold, Set + Go. You can also change the settings of the core temperature sensor.
-
Page 12: Before First Use
Symbol Function Heat + Hold The function is on. 6. BEFORE FIRST USE 6.1 Initial Cleaning WARNING! Refer to Safety chapters. Step 1 Step 2 Step 3 Clean the oven and the ac‐ Remove all accessories ex‐ cessories with a soft cloth,... - Page 13 ENGLISH 7.2 Setting a heating function Symbol / Menu Application 1. Turn on the oven. item 2. Select the menu: Heating Functions. Used to set the appli‐ 3. Press to confirm. ance configuration. 4. Select a heating function. Basic Settings 5.
- Page 14 7.7 Heating functions Symbol / Menu Description Heating Functions item Adjusts the display Heating func‐ Application contrast by degrees. Display Contrast tion Adjusts the display To bake on up to three brightness by degrees. shelf positions at the Display Bright‐...
- Page 15 ENGLISH Heating func‐ Application Heating func‐ Application tion tion This function is de‐ To speed up the rising signed to save energy of the yeast dough. It during cooking. When prevents dough sur‐ Moist Fan Bak‐ Dough Proving you use this function, face from drying and the temperature in the keeps the dough elas‐...
-
Page 16: Clock Functions
7.8 Assisted Cooking recommendations refer to "Energy Efficiency" chapter, Energy Saving. 8. CLOCK FUNCTIONS 8.1 Clock functions table 5. Press any symbol to stop the signal. 8.3 Heat + Hold Clock function Application Conditions for the function: To set a countdown •... -
Page 17: Automatic Programmes
ENGLISH 9. AUTOMATIC PROGRAMMES 1. Turn on the oven. WARNING! 2. Select the menu: Assisted Cooking. Refer to Safety chapters. Press 3. Select the dish with the function: 9.1 Recipes with Recipe Weight Automatic. Press Automatic 4. Press to set the food This oven has a set of recipes you can weight. - Page 18 (minimum 120 °C) 9. Press to turn off the oven. and the operating modes. The oven WARNING! calculates the end time in approximately The food sensor is hot. 30 minutes. There is a risk of burns. 6. To change the core temperature, press 10.2 Inserting accessories...
-
Page 19: Additional Functions
ENGLISH Step 1 Pull out the right and left hand Step 2 Put the wire shelf on the tele‐ telescopic runners. scopic runners and carefully push them into the oven. 10.4 Trivet and Grill- / Roasting pan Step 1 Put the trivet into a deep pan. Step 2 Put the deep pan on the recommended shelf position. - Page 20 9. Do step 7 again as necessary. If the Pyrolysis function 10. Press and hold to save. works, the door is locked You can overwrite a memory position. and the symbol of a key When the display shows the first free comes on in the display.
-
Page 21: Hints And Tips
ENGLISH 11.7 Cooling fan When the oven operates, the cooling fan (°C) turns on automatically to keep the surfaces of the oven cool. If you turn off 120 - 195 the oven, the cooling fan can continue to operate until the oven cools down. 200 - 245 11.8 Safety thermostat 250 - maximum... - Page 22 If you use two baking trays at the same deep pan. To prevent the smoke time, keep one empty level between condensation, add water each time after them. it dries up. Cooking meat and fish Cooking times Use a deep pan for very fatty food to...
- Page 23 ENGLISH Conventional True Fan Cooking Cooking CAKES (min) (°C) (°C) Buns, preheat 12 - 20 Baking tray the empty oven Eclairs 25 - 35 Baking tray Eclairs, two 2 and 4 35 - 45 Baking tray levels Plate tarts 45 - 70 Cake mould, Ø...
- Page 24 Conventional True Fan Cook‐ Cooking FLANS (min) (°C) (°C) Pasta flan, preheating is not needed 40 - 50 Vegetable flan, preheating is not nee‐ 45 - 60 Quiches 50 - 60 Lasagne 180 - 190 180 - 190 25 - 40...
- Page 25 ENGLISH Conventional True Fan Cooking Cooking MEAT (min) (°C) (°C) Whole duck 120 - 150 Whole goose 150 - 200 Rabbit, cut in pieces 60 - 80 Hare, cut in pieces 150 - 200 Whole pheasant 90 - 120 Use the second shelf position. Conventional True Fan Cooking Cooking...
- Page 26 GRILL (kg) (min) (min) 1st side 2nd side Burgers, 6 20 - 30 Fish fillet, 4 pieces 12 - 14 10 - 12 Toasted sandwiches, 4 - 6 5 - 7 Toast, 4 - 6 2 - 4 2 - 3 12.4 Turbo Grilling...
- Page 27 ENGLISH 2. Put the meat in the roasting pan or directly on the wire shelf. Put a tray below the wire shelf to collect fat. FISH Always cook without a lid while using (STEAMED) (°C) (min) this function. 3. Use: Food Sensor. Refer to "Using Whole fish, 1 - 1.5 210 - 220 40 - 60...
- Page 28 (kg) Defrosting Further defrosting time (min) time (min) Cream 2 x 0.2 80 - 100 10 - 15 Cream can also be whipped when still slightly frozen in pla‐ ces. Trout 0.15 25 - 35 10 - 15 Strawberries...
- Page 29 ENGLISH Set the temperature to 60 - 70 °C. FRUIT VEGETA‐ (min) (min) BLES Cooking Continue to time until cook at Plums 8 - 10 simmering 100 °C Apricots 8 - 10 Mixed pickles 50 - 60 5 - 10 Apple slices 6 - 8 Kohlrabi /...
- Page 30 Ceramic Dark, non-reflective Dark, non-reflective Dark, non-reflective 8 cm diameter, 28 cm diameter 26 cm diameter 28 cm diameter 5 cm height 12.11 Moist Fan Baking For the best results follow suggestions listed in the table below. (°C) (min)
- Page 31 ENGLISH (°C) (min) Macaroons, 24 baking tray or dripping 25 - 35 pieces Muffins, 12 baking tray or dripping 30 - 40 pieces Savory pastry, 20 baking tray or dripping 25 - 30 pieces Short crust bis‐ baking tray or dripping 25 - 35 cuits, 20 pieces Tartlets, 8 pieces baking tray or dripping...
- Page 32 (°C) (min) Apple Conven‐ Wire shelf 2 70 - 90 pie, 2 tional tins Ø20 Cooking Apple True Fan Wire shelf 2 70 - 90 pie, 2 Cooking tins Ø20 Sponge Conven‐ Wire shelf 2 40 - 50 Preheat the oven...
-
Page 33: Care And Cleaning
ENGLISH (°C) (min) Beef bur‐ Grill Wire shelf max. 20 - 30 Put the wire shelf ger, 6 and drip‐ on the fourth level pieces, ping pan and the dripping 0.6 kg pan on the third level of the oven. Turn the food halfway through the cooking time. - Page 34 Step 1 Turn off the oven and wait un‐ til it is cold. Step 2 Loosen the screw. Pull the front of the shelf support away from the side wall. Step 3 Pull the rear end of the shelf support away from the side wall and remove it.
- Page 35 ENGLISH When the cleaning ends: Turn off the oven and Clean the cavity with a soft Remove the residue from the wait until it is cold. cloth. bottom of the cavity. 13.4 How to remove and The direction in which you install: Door open the door depends on your oven model.
-
Page 36: Troubleshooting
When the oven door is clean, install the glass panels in the opposite sequence. The middle glass panel (B) has a decorative frame. In some models, the glass panel (A) has screen printings. In others, it is transpar‐ ent. The screen-printing zone must face the inner side of the door. - Page 37 ENGLISH Problem Possible cause Remedy The oven does not heat up. The oven is turned off. Turn on the oven. The oven does not heat up. The clock is not set. Set the clock. The oven does not heat up. The necessary settings are Make sure that the settings not set.
-
Page 38: Energy Efficiency
Serial number (S.N.) ......... 15. ENERGY EFFICIENCY 15.1 Product Information Sheet according to UK Ecodesign and Energy Labelling Regulations Supplier's name BPK744L21M 949495704 Model identification BPK744R21M 949495703 Energy Efficiency Index 81.2 Energy efficiency class Energy consumption with a standard load, conven‐... -
Page 39: Environmental Concerns
ENGLISH Residual heat Keep food warm If a programme with the Duration or End Choose the lowest possible temperature Time selection is activated and the setting to use residual heat and keep a cooking time is longer than 30 min, the meal warm. - Page 40 www.aeg.com/shop...