AEG BPK744L21M User Manual
Hide thumbs
Also See for BPK744L21M:
- User manual (40 pages) ,
- User manual (40 pages) ,
- User manual (32 pages)
Table of Contents
Advertisement
Advertisement
Table of Contents

Related Manuals for AEG BPK744L21M


Summary of Contents for AEG BPK744L21M
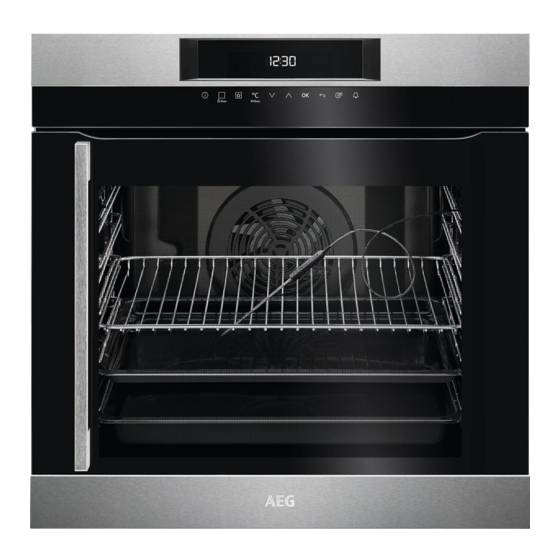
- Page 1 BPK744L21M User Manual BPK744R21M Oven USER MANUAL...
-
Page 2: Table Of Contents
15. ENERGY EFFICIENCY..................... 36 FOR PERFECT RESULTS Thank you for choosing this AEG product. We have created it to give you impeccable performance for many years, with innovative technologies that help make life simpler features you might not find on ordinary appliances. Please spend a few minutes reading to get the very best from it. -
Page 3: Safety Information
ENGLISH SAFETY INFORMATION Before the installation and use of the appliance, carefully read the supplied instructions. The manufacturer is not responsible for any injuries or damages that are the result of incorrect installation or usage. Always keep the instructions in a safe and accessible location for future reference. -
Page 4: Safety Instructions
Always use oven gloves to remove or put in • accessories or ovenware. Before carrying out any maintenance, disconnect the • appliance from the power supply. Ensure that the appliance is switched off before • replacing the lamp to avoid the possibility of electric shock. -
Page 5: Electrical Connection
ENGLISH 2.2 Electrical connection 2.3 Use WARNING! WARNING! Risk of fire and electrical Risk of injury, burns and shock. electrical shock or explosion. • All electrical connections should be • This appliance is for household use made by a qualified electrician. only. -
Page 6: Pyrolytic Cleaning
2.5 Pyrolytic cleaning • Discoloration of the enamel or stainless steel has no effect on the performance of the appliance. Risk of Injury / Fires / • Use a deep pan for moist cakes. Fruit Chemical Emissions (Fumes) juices cause stains that can be in Pyrolitic Mode. -
Page 7: Product Description
ENGLISH 2.7 Disposal • Fumes released from all Pyrolytic Ovens / Cooking Residues as described are not harmful to humans, WARNING! including infants or persons with Risk of injury or suffocation. medical conditions. • Disconnect the appliance from the 2.6 Internal light mains supply. -
Page 8: Control Panel
4. CONTROL PANEL 4.1 Electronic programmer Use the sensor fields to operate the appliance. Sensor Function Comment field Display Shows the current settings of the appliance. ON / OFF To turn on and off the appliance. Heating Functions Press the sensor field to choose the menu: Assis- or Assisted Cook- ted Cooking or Heating Functions. - Page 9 ENGLISH Sensor Function Comment field Time and addi- To set different functions. When a heating func- tional functions tion operates, press the sensor field to set the tim- er or the functions: Function Lock, Favourites, Heat + Hold, Set + Go. Minute Minder To set the function: Minute Minder.
-
Page 10: Before First Use
Symbol Function Heat + Hold The function is active. 5. BEFORE FIRST USE the display brightness and the time of WARNING! the day. Refer to Safety chapters. 1. Press to set the value. 5.1 Initial Cleaning 2. Press to confirm. - Page 11 ENGLISH Sym- Menu item Application Favourites Contains a list of favourite cooking programmes created by the user. Pyrolysis Pyrolytic cleaning. Basic Settings Used to set the appliance configuration. Specials Contains a list of additional heating functions. Submenu for: Basic Settings Sym- Submenu Description...
-
Page 12: Heating Functions
Sym- Submenu Description Factory Settings Resets all settings to factory settings. 6.3 Heating Functions Heating function Application True Fan Cooking To bake on up to three shelf positions at the same time and to dry food. Set the temperature 20 - 40 °C lower than for the function: Conventional... -
Page 13: Residual Heat
ENGLISH Heating function Application Plate Warming To preheat plates for serving. Preserving To make vegetable preserves such as pickles. Drying To dry sliced fruit (e.g. apples, plums, peaches) and vegetables (e.g. tomatoes, zucchini, mush- rooms). Dough Proving For controlled rising of yeast dough before bak- ing. -
Page 14: Clock Functions
7. CLOCK FUNCTIONS 7.1 Clock functions table Clock function Application Minute Minder To set a countdown (max. 2 h 30 min). This function has no effect on the operation of the appliance. You can also activate it when the appliance is deactivated. -
Page 15: Automatic Programmes
ENGLISH The function stays on if you change the 1. When the cooking time ends, an heating functions. acoustic signal sounds. Press any symbol. 7.4 Time Extension The display shows the message. 2. Press to activate or to cancel. The function: Time Extension makes the 3. -
Page 16: Using The Accessories
8.3 Assisted Cooking with 1. Activate the appliance. 2. Select the menu: Assisted Cooking. Recipe Automatic Press to confirm. This appliance has a set of recipes you 3. Select the category and dish. Press can use. The recipes are fixed and you to confirm. -
Page 17: Inserting The Accessories
ENGLISH The appliance calculates an approximate end time. The end time is different for the different quantities of the food, the set oven temperatures (minimum 120 °C) and the operating modes. The appliance calculates the end time in approximately 30 minutes. 6. -
Page 18: Additional Functions
You can use the trivet to roast larger pieces of meat or poultry on one shelf position. °C 1. Put the trivet into the deep pan so that the supports of the wire shelf point up. 2. Put the wire shelf on the telescopic runners and carefully push them into the appliance. - Page 19 ENGLISH 10.3 Function Lock 4. Press to confirm. The display shows the first free memory This function prevents an accidental position. change of the heating function. You can 5. Press to confirm. activate it only when the appliance 6. Enter the name of the programme. operates.
-
Page 20: Hints And Tips
10.5 Automatic Switch-off – when the appliance is activated. – if you touch a symbol during the For safety reasons the appliance turns off night brightness (apart from ON / automatically after some time if a heating OFF), the display goes back to... -
Page 21: Cooking Times
ENGLISH • Clean the moisture after each use of • Leave the meat for approximately 15 the appliance. minutes before carving so that the • Do not put the objects directly on the juice does not seep out. appliance floor and do not put •... - Page 22 Food Conventional Cooking True Fan Cooking Time (min) Comments Tempera- Shelf posi- Tempera- Shelf posi- ture (°C) tion ture (°C) tion Sponge 50 - 60 In a 26 cm cake cake mould Christmas 90 - 120 In a 20 cm...
- Page 23 ENGLISH Food Conventional Cooking True Fan Cooking Time (min) Comments Tempera- Shelf posi- Tempera- Shelf posi- ture (°C) tion ture (°C) tion Eclairs - 2 and 4 35 - 45 In a baking two levels tray Plate tarts 45 - 70 In a 20 cm cake mould...
- Page 24 Food Conventional Cooking True Fan Cooking Time (min) Comments Tempera- Shelf posi- Tempera- Shelf posi- ture (°C) tion ture (°C) tion Vegetable 45 - 60 In a mould flan 50 - 60 In a mould Quiches 180 - 190...
- Page 25 ENGLISH Food Conventional Cooking True Fan Cooking Time (min) Comments Tempera- Shelf posi- Tempera- Shelf posi- ture (°C) tion ture (°C) tion Goose 150 - 200 Whole Rabbit 60 - 80 Cut in pieces Hare 150 - 200 Cut in pieces Pheasant 90 - 120...
-
Page 26: Turbo Grilling
Food Quantity Tempera- Time (min) Shelf posi- ture (°C) tion Pieces Quantity 1st side 2nd side (kg) Fish fillet max. 12 - 14 10 - 12 Toasted 4 - 6 max. 5 - 7 sandwiches Toast 4 - 6 max. - Page 27 ENGLISH Lamb Food Quantity (kg) Temperature Time (min) Shelf position (°C) Leg of lamb, 1 - 1.5 150 - 170 100 - 120 1 or 2 roast lamb Saddle of lamb 1 - 1.5 160 - 180 40 - 60 1 or 2 Poultry Food...
-
Page 28: Slow Cooking
Food Temperature Time (min) Shelf position (°C) Apple cake 150 - 160 75 - 85 White bread 180 - 190 50 - 60 11.10 Slow Cooking Always cook without a lid when you use this function. Use this function to prepare lean, tender pieces of meat and fish with core 1. - Page 29 ENGLISH Food Quantity Defrosting Further defrost- Comments (kg) time (min) ing time (min) Butter 30 - 40 10 - 15 Cream 2 x 2.0 80 - 100 10 - 15 Cream can also be whip- ped when still slightly fro- zen in places.
-
Page 30: Core Temperature Sensor Table
11.13 Drying the door and let it cool down for one night to complete the drying. • Cover trays with grease proof paper or baking parchment. • For a better result, stop the oven halfway through the drying time, open... -
Page 31: Care And Cleaning
ENGLISH Food Food core temperature (°C) Trout / Sea bream 65 - 70 Tuna fish / Salmon 65 - 70 12. CARE AND CLEANING 1. Pull the front of the shelf support WARNING! away from the side wall. Refer to Safety chapters. 12.1 Notes on cleaning •... -
Page 32: Cleaning The Oven Door
12.5 Cleaning the oven door CAUTION! If there are other appliances The oven door has four glass panels. You installed in the same can remove the internal glass panels to cabinet, do not use them at clean them. the same time as the CAUTION! function: Pyrolysis. -
Page 33: Troubleshooting
ENGLISH 12.6 Replacing the lamp 3. Clean the door with a wet sponge and rub it dry with a soft cloth. Do Put a cloth on the bottom of the interior not use steel wool, acids or abrasive of the appliance. It prevents damage to cleaning agents because they can the lamp glass cover and the cavity. - Page 34 Problem Possible cause Remedy The oven does not heat up. The automatic switch-off is Refer to "Automatic switch- activated. off". The oven does not heat up. The Child Lock is on. Refer to "Using the Child Lock". The oven does not heat up.
-
Page 35: Installation
ENGLISH We recommend that you write the data here: Model (MOD.) ......... Product number (PNC) ......... Serial number (S.N.) ......... 14. INSTALLATION 14.2 Securing the appliance to WARNING! the cabinet Refer to Safety chapters. 1. Open the appliance door. 14.1 Building In 2. -
Page 36: Energy Efficiency
15. ENERGY EFFICIENCY 15.1 Product Fiche and information according to EU 65-66/2014 Supplier's name BPK744L21M Model identification BPK744R21M Energy Efficiency Index 81.2 Energy efficiency class Energy consumption with a standard load, conven- 0.93 kWh/cycle tional mode Energy consumption with a standard load, fan-forced 0.69 kWh/cycle... -
Page 37: Environmental Concerns
ENGLISH Moist Fan Baking When you use Moist Fan Baking, the Function designed to save energy during lamp automatically deactivates after 30 cooking. It operates in such a way that seconds. the temperature in the oven cavity may You may activate the lamp again but this differ from the temperature indicated on action will reduce the expected energy the display during a cooking cycle and... - Page 38 www.aeg.com...
- Page 39 ENGLISH...
- Page 40 www.aeg.com/shop...