
Related Manuals for AEG DVB-T 4545


Summary of Contents for AEG DVB-T 4545
- Page 1 DVB-T/HD 4545 Bedienungsanleitung/Garantie Istruzioni per l’uso • Instruction Manual DVB-T/HD Receiver Ricevitore DVB-T/HD • DVB-T/HD Receiver PERFECT IN FORM AND FUNCTION...
-
Page 2: Table Of Contents
Inhalt Deutsch Inhalt Übersicht der Bedienelemente ........Seite Bedienungsanleitung ............. Seite Inhaltsverzeichnis ............Seite Technische Daten ............. Seite Garantiebedingungen ............ Seite Garantieabwicklung ............Seite ITALIANO Contenuto Posizione dei comandi ..........pagina Manuale dell’utente ..........pagina Specifiche tecniche ........... pagina ENGLISH Contents Location of controls ............ -
Page 3: Übersicht Der Bedienelemente
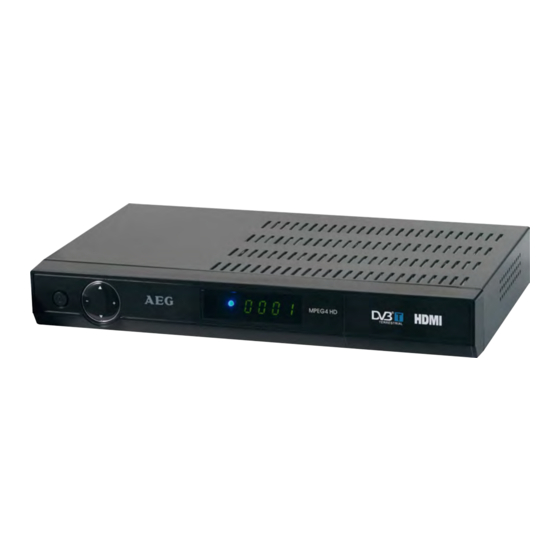
Übersicht der Bedienelemente Posizione dei comandi • Location of controls Abb. 1/ Fig. 1 Abb. 2/ Fig. 2 Abb. 3/ Fig. 3... -
Page 4: Bedienungsanleitung
Deutsch Vorwort • Wenn das Netzkabel beschädigt ist, müssen Sie den Receiver von Fachpersonal reparieren lassen bevor Sie Diese Bedienungsanleitung hilft Ihnen beim ihn erneut verwenden. Es besteht sonst die Gefahr eines Stromschlags. • bestimmungsgemäßen, • Überlassen Sie Wartungsarbeiten stets qualifiziertem •... -
Page 5: Kinder Und Gebrechliche Personen
Deutsch Übersicht der Bedienelemente WARNUNG: • Zu Ihrer Sicherheit sollten die Batteriepole beim Geräteteile (Abb. 1 / Abb. 2) Transport mit Klebestreifen überdeckt werden. 1 Netzschalter • Falls eine Batterie ausläuft, die Flüssigkeit nicht in 2 Programmwahltasten ( / ) die Augen oder Schleimhäute reiben. -
Page 6: Inhaltsverzeichnis
Deutsch Inhaltsverzeichnis USB Menü ..................13 USB Information ...............13 Übersicht der Bedienelemente ..........3 USB Formatieren ...............13 Vorwort ...................4 Update ..................13 Sicherheitshinweise ..............4 Reinigen..................13 Der elektrische Anschluss ............4 Störungsbehebung ..............13 Der richtige Standort ..............4 Technische Daten ..............14 Der richtige Umgang mit Batterien ........4 Konformitätserklärung ............14 Kinder und gebrechliche Personen ..........5 Garantiebedingungen .............14... -
Page 7: Receiver Aufstellen Und Anschließen
Deutsch Receiver aufstellen und anschließen Antenne anschließen (Abb. 2/6) HINWEIS: • Wählen Sie einen geeigneten Standort für das Gerät. Bitte stellen Sie sicher, dass ein Empfang von DVB-T Geeignet wäre eine trockene, ebene, rutschfeste Fläche, Signalen in Ihrem Wohngebiet zur Verfügung steht. In- auf der Sie das Gerät gut bedienen können. -
Page 8: Allgemeine Bedienung
Deutsch LCN: Wählen Sie die Einstellung „Aus“. Favoritenliste einblenden Bei eingeschalteter LCN Funktion Diese Funktion ist nur möglich, wenn Sie zuvor im Menü werden, sofern von den Fernsehsen- „Kanalverwaltung“ Programme der Favoritenliste hinzuge- dern unterstützt, die Regionalsender fügt haben. (Siehe Seite 12) aus Ihrer Region, unabhängig von •... -
Page 9: Epg (Elektronischer Programmführer)
Deutsch Benutzen Sie die Taste PROG+ bzw. PROG-, um eine Seite • Um die Daten in die Timerliste zu übernehmen, drü- vor- bzw. zurückzublättern. cken Sie die Taste OK. • Beim Erreichen der Startzeit: • Um den Videotext wieder auszuschalten, drücken Sie - schaltet sich das Gerät ein. -
Page 10: Pvr Funktion
Deutsch Dieses Gerät ist nach dem letzten Stand der technischen PVR Funktion Entwicklung im USB Bereich entwickelt worden. Die große Bei angeschlossenem USB Speichermedium haben Sie die Anzahl von verschiedenen Speichermedien jeglicher Art Möglichkeit Sendungen aufzuzeichnen. die heute angeboten werden, erlauben es leider nicht, eine volle Kompatibilität mit allen Speichermedien zu gewähr- HINWEIS: leisten. -
Page 11: Navigation Und Auswahl
Deutsch Untermenü: Unter jedem Hauptmenü-Eintrag finden Sie Gehen Sie folgendermaßen vor, um das Passwort zu die zugehörigen Untermenüeinträge. ändern: • Geben Sie das aktuelle Passwort mit den Zifferntas- Navigation und Auswahl ten der Fernbedienung ein. • Bestätigen Sie Ihre Eingabe mit der Taste OK. •... -
Page 12: Audio-Einstellungen
Deutsch Es wird also nicht die gesamte Fläche des Wide- Im Kanalverwaltungsmenü können Sie die Programme zu Screen-Fernsehers zur Wiedergabe verwendet. Ihrer Favoritenliste hinzufügen, sperren, verschieben und o Auto: Sofern vom Wiedergabegerät unterstützt, löschen. wird das optimale Seitenverhältnis automatisch eingestellt. Favoriten erstellen (Favoriten) •... -
Page 13: Programme Löschen
Deutsch • Wählen Sie bei der Sicherheitsabfrage „Ja“ und bestäti- ACHTUNG: gen mit der Taste OK. Verwenden Sie keine lösungsmittelhaltigen Reinigungs- mittel wie Benzin oder Verdünnung. Diese Mittel können Programme löschen (Löschen) die Oberfläche des Gehäuses beschädigen. Sie können Sender komplett aus der Programmtabelle •... -
Page 14: Technische Daten
Deutsch Konformitätserklärung Symptome Ursache Lösung Schlechtes Bild, Die Antenne Richten Sie die Hiermit erklärt die Firma ETV – Elektro-Technische Blockierfehler. ist nicht richtig Antenne aus. Vertriebsgesellschaft mbH, dass sich das Gerät DVB-T/HD ausgerichtet. 4545 in Übereinstimmung mit den grundlegenden Die Fernbedie- Die Batterien sind Ersetzen Sie die Anforderungen, der europäischen Richtlinie für elekt-... -
Page 15: Garantieabwicklung
Deutsch Garantieabwicklung Haben Sie Fragen zur Bedienung, zur Inbetriebnahme oder zum Anschluss? Gern hilft Ihnen unser Serviceteam weiter. Sollte Ihr Gerät innerhalb der Garantiezeit einen Mangel Sie erreichen uns Mo.- Do. 8:30 – 17:00 Uhr und Fr. 8:30 – aufweisen, bitten wir Sie, uns Ihren Garantieanspruch mit- 14:00 Uhr unter folgender Rufnummer: zuteilen. -
Page 16: Osd Menü-Übersicht
Deutsch OSD Menü-Übersicht Hauptmenü Untermenü Einstellungen Systemeinstellung OSD Sprache Land Zeitzone Zeitzone Sommerzeit Passwort ändern Auto Standby Systeminformation Werkseinstellung Video-Einstellung TV-System NTSC HD-Ausgang 1080i 720p 576p/480p 576i/480i Auto Bildformat 16:9 Auto Scart-Ausgang CVBS Audio-Einstellung L/R Modus Links Rechts Stereo SPDIF Installation Manuelle Suche Automatische Suche... - Page 17 ITALIANO Introduzione • Il lavoro di manutenzione dovrebbe essere effettuato solo da uno tecnico qualificato. La mancata osservanza Questo manuale utente funge da guida per usare il Ricevi- di ciò potrebbe mettere in pericolo l’utente e gli altri. tore Digitale DVB-T/HD 4545, noto come il “ricevitore”, •...
-
Page 18: Posizione Dei Comandi
ITALIANO 10 SPDIF (Uscita Audio Digitale Coassiale) ATTENZIONE: 11 Jack TV SCART • Non smaltire le batterie con la spazzatura domestica. 12 Jack VCR SCART Si prega di portare le batterie esaurite presso un centro di raccolta apposito o presso un rivenditore. Telecomando (Fig. -
Page 19: Uso Previsto
ITALIANO Componenti del ricevitore .............18 Uso previsto Telecomando ................18 Il Ricevitore Digitale DVB-T/HD 4545, è progettato per Uso previsto ................19 ricevere le stazioni terrestri digitali per la visione privata. È A proposito del Ricevitore DVB-T/HD .........19 progettato esclusivamente per questo scopo e può essere Impostare e collegare il ricevitore ........19 usato solo per questo. -
Page 20: Collegamento Con Un Cavo Hdmi
ITALIANO NOTA: IMPORTANTE! REGISTRAZIONE USANDO IL NOTA: REGISTRATORE VIDEO Il manuale utente del’apparecchio TV vi dice come • Prima di registrare, impostare il volume del ricevitore passare al canale AV. al massimo usando il telecomando. • Durante la registrazione, non è necessario che usiate Iniziare le impostazioni di funzione sul vostro ricevitore, poiché... -
Page 21: Selezione Programma
ITALIANO Selezione programma Televideo • Usando i pulsanti PROG+/PROG- o / sul ricevitore, • Premere TTX, per richiamare il televideo. far scorrere i canali memorizzati. • Inserire la pagina del televideo richiesta usando i • Usando i pulsanti con i numeri, potete immettere pulsanti numerici. -
Page 22: Visualizza / Cancella Le Trasmissioni Memorizzate
ITALIANO Il menu “Selezione Programmi” (sintonizzazione automa- Porta USB tica di un nuovo programma) viene visualizzato. Attraverso la porta USB, è possibile riprodurre dati video • Scegliete tra le seguenti modalità di registrazione nella di immagini. È anche possibile registrare un dispositivo di me- riga “New Reservation”: Singolo, Giornaliero, moria USB collegato. -
Page 23: Funzione Pvr
ITALIANO Funzione PVR • Nel sottomenu, comunque, usare i pulsanti PROG+/ PROG- per spostarsi. Se i dispositivi USB sono collegati, avete la possibilità di • Selezionare una voce del menu con il pulsante OK. registrare i programmi. • Scegliere un’opzione usando anche il pulsante OK. L’opzione scelta viene ora evidenziata. -
Page 24: Video Settings
ITALIANO • Premere OK di nuovo. zione (si prega di fare riferimento al manuale utente • Confermare la vostra nuova password inserendola dell’unità di riproduzione). di nuovo. Audio Settings • Premere OK di nuovo. La nuova password è salvata. • Auto Standby: se il ricevitore non viene usato per 3 •... -
Page 25: Bloccare I Canali
ITALIANO • Usando i pulsanti PROG+/PROG-, scegliere il canale • Premere EXIT dopo che tutti i canali scelti sono stati che desiderate aggiungere alla lista di preferiti. selezionati. • Confermare la vostra selezione con OK. Il simbolo del • Scegliere “Sì” quando è pronto e confermare con OK. cuore appare dietro il canale. -
Page 26: Specifiche Tecniche
ITALIANO Risoluzione problemi Ingresso sintonizzatore Jack .................... Coassiale Sintomi Causa Soluzione Gamma di frequenza....... VHF: 170 MHz ~ 230 MHz .......UHF: 470 MHz ~ 860 MHz Lo schermo non L’alimentazione Collegare il cavo all’ali- Ampiezza di banda ...........7/8 MHz type si illumina. -
Page 27: Panoramica Del Menu Osd
ITALIANO Panoramica del menu OSD Home Menu Sottomenu Settings Impostazioni di sistema Lingua OSD Country Spento Acceso Zona Oraria Zona Oraria Orario Legale Cambia Password Auto Standby Spento Acceso Informazioni di Sistema Reset di Fabbrica Video Settings Sistema TV NTSC HD Output 1080i 720p... -
Page 28: User Manual
ENGLISH Foreword • In the event of a fault, disconnect the receiver from the power source. This user manual serves as a guide to using the Digital • The mains plug must be easily accessible in order that Receiver DVB-T/HD 4545, known as the “receiver”, the receiver can be disconnected easily and quickly from the mains in the event of an emergency. - Page 29 ENGLISH Children and the Infirm 6 TTX: Activates the video text. / : Fast rewind or forward. • For the safety of your children do not leave packaging : Stops playback. (plastic bags, cardboard, styrofoam etc.) lying around 9 EXIT: Exit menu or menu item. within easy reach.
- Page 30 ENGLISH Display channel list ..............31 The receiver provides the option of receiving digital pro- Display Favourites list ..............32 gramming through a fixed aerial. INFO Button ..................32 If the receiver is at the centre of the broadcast area, you RECALL button (Swap function) ..........32 have the option of using a passive or active DVB-T aerial.
-
Page 31: Display Channel List
ENGLISH Connecting an Audio Digital Receivers (Fig. 2/10) • Using the PROG+ or PROG- buttons, select the re- quired option. If you want to use the 5-channel audio transmission (Dolby The following options are available: Digital Sound/AC3), you must connect your audio digital OSD Language: Select the preferred language of the receiver to the coaxial output of the receiver. -
Page 32: Display Favourites List
ENGLISH • Select a channel with the PROG+/PROG- buttons and Page 100 is the contents page for all video text providers. confirm using the OK button. The receiver switches to Use the PROG+ or PROG- buttons to scroll forward or the selected channel. -
Page 33: Display / Delete Stored Broadcasts
ENGLISH Music, photo, video. NOTE: • To change the data specified by the broadcaster (start, NOTE: end time etc.), select the corresponding rows with • Only the selected file types are displayed. the PROG+/PROG- buttons. • By pressing the USB button, you can also access •... -
Page 34: Record / Delete Files
ENGLISH • Country: Set the country in which you are using the NOTE: receiver. • Whilst a PVR is recording, you cannot switch to • LCN: Select “Off”. another channel position. If the LCN Function is switched on, the regional chan- •... -
Page 35: Audio Settings
ENGLISH • Picture format: Here you can match the output of the Channel Manager receiver to the aspect ratio of your playback unit. Here you can manage TV and radio channels. o 4:3: Select this option if using a 4:3 TV set for NOTE: playback. -
Page 36: Delete Channels
ENGLISH • Confirm your selection with OK. The channel is moved. CAUTION: • Press EXIT after all required channels have been sorted. Do not use solvent-based cleaning agents such as • Select “Yes” when prompted and confirm with OK. benzine or thinners. These materials may damage the surface of the housing. -
Page 37: Technical Specifications
ENGLISH Technical Specifications Receiver Dimensions (L x W x H) .......260 x 168 x 39 mm Weight (without packaging) ..........0.83 kg Operating temperature ..........0 ºC to +40 ºC Meaning of the “Wheelie Bin” Symbol Storage temperature ...........-40 ºC to +65 ºC Take care of our environment, do not dispose of electrical Tuner Input appliances via the household waste. -
Page 38: Osd Menu Overview
ENGLISH OSD Menu Overview Home Menu Submenu Settings System Setup OSD Language Country Time Zone Time Zone Summer Time Change Password Auto Standby System Information Factory Reset Video Settings TV System NTSC HD Output 1080i 720p 576p/480p 576i/480i Auto Screen Ratio 16:9 Auto Scart Output... - Page 42 DVB-T/HD 4545 GARANTIE-KARTE Garantiebewijs • Carte de garantie Certificato di garanzia • Tarjeta de garantia Cartão de garantia • Guarantee card Garantikort • Karta gwarancyjna • Záruční list Garancia lap • Гарантийная карточка DVB-T/HD 4545 24 Monate Garantie gemäß Garantie-Erklärung • 24 maanden garantie overeenkomstig schriftelijke garantie •...