Table of Contents
Advertisement
All operators must fully read and understand
this operator's manual before using the chipper.
Keep this manual for future reference.
MANUFACTURER: HANSA NEW ZEALAND
+64 7 849 4749
www.hansaproducts.com
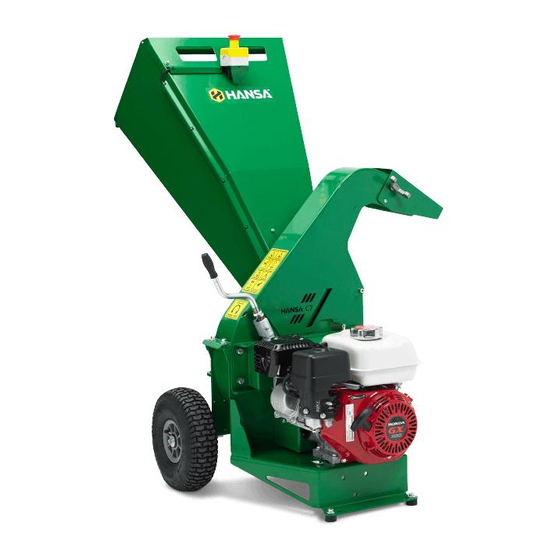
Operation, maintenance and safety manual
info@hansaproducts.co.nz
REST OF WORLD:
Please refer to
www.hansaproducts.com
a current list of our authorised dealers and
contact details relevant to your territory
for
Advertisement
Table of Contents

Related Manuals for Hansa C7


Summary of Contents for Hansa C7
- Page 1 Operation, maintenance and safety manual All operators must fully read and understand this operator’s manual before using the chipper. Keep this manual for future reference. MANUFACTURER: HANSA NEW ZEALAND REST OF WORLD: Please refer to www.hansaproducts.com +64 7 849 4749 info@hansaproducts.co.nz...
-
Page 2: Table Of Contents
..................................... 20 OLT TORQUE SPECIFICATIONS ..................................20 HANSA GLOBAL INDUSTRIAL LIMITED WARRANTY ........................21 DECALS ....................................... 23 SOUND OUTPUT INFORMATION ..............................24 EC DECLARATION OF CONFORMITY ............................25 Hansa C7eu O&M Manual - OM-019 Revision A 03/09/2018 © Hansa Chippers 2018... -
Page 3: What Can My Hansa Chipper Process
What can my Hansa chipper process? Intended uses of the chipper The Hansa C7 chipper is built to process organic material including wooden branches not exceeding 70 mm in diameter. It is designed for intermittent use by the suburban gardener. - Page 4 Box 2 contains: ✓ The inlet chute ✓ A fastener pack containing parts required for assembly ✓ The outlet chute; packed into a separate cardboard box ✓ Documentation (Hansa operations manual, warranty card and Honda motor manual) Documentation Inlet chute Outlet chute...
-
Page 5: Assembly
Assembly Assemble the chipper body Place the cardboard block underneath the chipper body - this makes it easier to attach the wheels. Hansa C7eu O&M Manual - OM-019 revision B 03/09/2018 © Hansa Chippers 2018... - Page 6 Fix the outlet chute to the chipper body by tightening the cap screws (item no. 6) and nyloc nuts (item no. 7) using a 6 mm Allen key and 13 mm spanner. Hansa C7eu O&M Manual - OM-019 revision B 03/09/2018 © Hansa Chippers 2018...
- Page 7 Attach the swivel handle (item no. 3) to the engagement handle using a 14mm spanner. Ensure the spring washer (item no. 1) is placed on the thread of the engagement handle before tightening it. Hansa C7eu O&M Manual - OM-019 revision B 03/09/2018 © Hansa Chippers 2018...
-
Page 8: Safety
Do NOT extend hands/arms past the rubber flap Use a stick to push materials into the inlet chute Do NOT push the stick beyond the rubber flap Hansa C7eu O&M Manual - OM-019 revision B 03/09/2018 © Hansa Chippers 2018... -
Page 9: Operation
That all screws, nuts, bolts, and other fasteners are properly secured That all chipper components are in place and in good condition If any parts are worn or damaged, contact Hansa for replacements That fuel and engine oil levels are above the minimum levels... -
Page 10: Safe Operating Procedure
Exhaust fumes contain carbon monoxide which is poisonous, colourless, odourless, and tasteless Operate the chipper wearing loose clothing and untied long hair Stand at a higher level than the base of the chipper when feeding material into it Hansa C7eu O&M Manual - OM-019 revision B 03/09/2018 © Hansa Chippers 2018... -
Page 11: Starting Procedure
Before proceeding, ensure the ‘safe setup procedure’ has been followed on page 7 of this manual. Choke lever (“on” position) Ensure emergency stop disengaged. Turn the choke lever, fuel lever, and engine switch to the “on” position. Fuel lever (“on” position) Hansa C7eu O&M Manual - OM-019 revision B 03/09/2018 © Hansa Chippers 2018... - Page 12 This must be done slowly to allow the cutting rotor to pick up speed; otherwise the engine may stall. Hansa C7eu O&M Manual - OM-019 revision B 03/09/2018 © Hansa Chippers 2018...
-
Page 13: Shutdown Procedure
Processing fibrous material The C7 can process palm fronds, flax, cabbage tree leaves and other similar fibrous material. The machines cutting disk is cantilevered (supported on the engine side with two bearings), therefore there is no risk of anything fibrous wrapping around the shaft and working its way into the bearings. -
Page 14: Petrol
Water can rust the steel body of the chipper Transportation The C7 is designed to be moved by one person using both handles at the top of the inlet chute to lean the chipper backwards and transfer its weight onto the Handles wheels. -
Page 15: Troubleshooting
Do NOT attempt to repair the chipper unless you are competent to do so WARNING! Do NOT open the housing unless the engine and cutting rotor have completely stopped. Hansa C7eu O&M Manual - OM-019 revision B 03/09/2018 © Hansa Chippers 2018... -
Page 16: Maintenance
Blunt knives result in damage to the chipper How to re-sharpen the knives If you don’t have a surface grinder or are unsure how to re-sharpen the knives, contact a professional saw doctor or Hansa to arrange re-sharpening. WARNING! Be careful when working around the sharp knives. Be aware that even though the engine is switched off, the cutting means can still move. - Page 17 Measure the width of the knife and check that it will be at least 35 mm after sharpening. If the knives will be shorter than 35 mm, then the knives should be replaced. Please contact your nearest Hansa dealer. MIN 35 mm Sharpen the knives Sharpen the knives on a surface grinder.
- Page 18 WARNING! Every time the knife clamping bolts are torqued up to 22 Nm and loosened off again, the life of the bolts is reduced. The knife clamping bolts must be replaced at most after every six sharpens. Contact Hansa for replacement bolts (m8x30 countersunk bolts of grade 12.9 or higher).
-
Page 19: Engine Servicing
Adjustment turning the top nut anticlockwise and the bottom nut block clockwise. Then move both locking nuts upward along the Adjustment thread. nuts Hansa C7eu O&M Manual - OM-019 revision B 03/09/2018 © Hansa Chippers 2018... -
Page 20: Belt Replacement
If a belt change is necessary, follow these steps: Using a 6 mm Allen key, unbolt and remove the pulley guard (3 x M8 cap screws). Note: Engine not shown in this view. Hansa C7eu O&M Manual - OM-019 revision B 03/09/2018 © Hansa Chippers 2018... - Page 21 Note that after replacing a belt, the tension of the new belt will quickly change as the belt initially wears into the pulley system. Recheck the belt tension after two hours of operation after belt replacement. Hansa C7eu O&M Manual - OM-019 revision B 03/09/2018 © Hansa Chippers 2018...
-
Page 22: Tyre Pressure
70 mm Feed type Gravity fed, self-feeding Inlet chute opening 130 x 150 mm Discharge System Discharge height 845 mm Outlet chute type Fixed chute with deflector Hansa C7eu O&M Manual - OM-019 revision B 03/09/2018 © Hansa Chippers 2018... -
Page 23: Hansa Global Industrial Limited Warranty
HANSA offers a special extended warranty period (“Extended Warranty”) to new HANSA products purchased from an authorised HANSA dealer. The Extended Warranty period is set out below. In order to take advantage of the Extended Warranty you must: 1. Register your HANSA product through the HANSA warranty registration process and identify your HANSA product by its machine serial number. - Page 24 General 1. Your rights: a. HANSA will recognise any implied rights and remedies that are available to you at law in the applicable territory and that cannot be excluded by HANSA. b. In New Zealand, Hansa Products Ltd will recognise your statutory rights under the Consumers Guarantee Act 1993 (provided that you are a consumer for the purposes of that Act).
-
Page 25: Decals
Side of housing next to engagement arm Belt guard hazard Rotor housing front, next to the belt guard Rotor and housing safety Top face of outlet chute Hansa C7eu O&M Manual - OM-019 revision B 03/09/2018 © Hansa Chippers 2018... -
Page 26: Sound Output Information
Outlet deflector Guaranteed sound power level Back of rotor housing Sound output information The sound output level and the sound pressure level from the Hansa C7 have been measured in accordance with the testing provisions: Directive 2000/14/EC EN ISO 3744:2010... -
Page 27: Ec Declaration Of Conformity
ISO 11684:1995 ISO 13857:2008 EN 13683:2003 EN 50581:2012 Signed for and on behalf of: Hansa Products Ltd ________________________ Martin Vogel, Managing Director Hamilton, New Zealand September 10 2017 Hansa C7eu O&M Manual - OM-019 revision B 03/09/2018 © Hansa Chippers 2018...