Table of Contents
Advertisement
All operators must fully read and understand
this operator's manual before using the chipper.
Keep this manual for future reference.
HANSA NEW ZEALAND
+64 7 849 4749
www.hansaproducts.co.nz
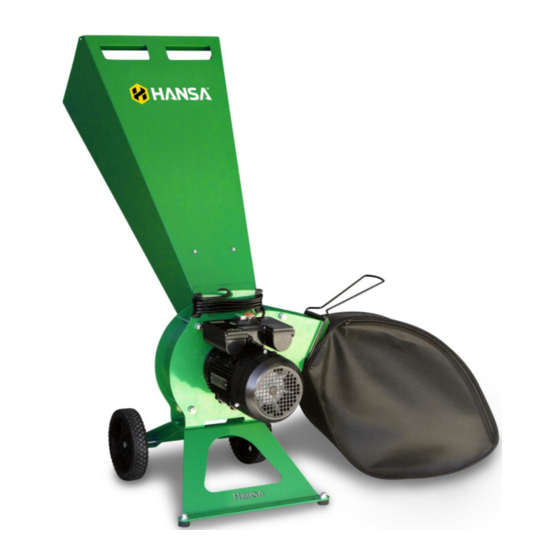
Operation, maintenance and safety manual
info@hansaproducts.co.nz
HANSA AUSTRALIA
1800 426 722
www.hansaproducts.com.au
info@hansaproducts.com.au
Advertisement
Table of Contents

Related Manuals for Hansa C3e


Summary of Contents for Hansa C3e
- Page 1 Operation, maintenance and safety manual All operators must fully read and understand this operator’s manual before using the chipper. Keep this manual for future reference. HANSA NEW ZEALAND HANSA AUSTRALIA +64 7 849 4749 info@hansaproducts.co.nz 1800 426 722 info@hansaproducts.com.au www.hansaproducts.co.nz...
-
Page 2: Table Of Contents
..................................15 EINSTALL THE KNIVES ..................................... 18 OLT TORQUE SPECIFICATIONS ..................................18 DECALS ....................................... 19 HANSA CHIPPER INDUSTRIAL LIMITED WARRANTY ........................20 COMMISSIONING CHECKLIST AND REGISTRATION ........................20 Hansa C3e O&M Manual - OM-004 Revision H 09/07/2019 © Hansa Chippers 2019... -
Page 3: Safety
Ambient Conditions Only use the C3e in an environment that is between -5°C and 40°C. Do not use the C3e in the rain or in wet environments. Work area safety a) Keep work area clean and well lit. Cluttered or dark areas invite accidents. -
Page 4: Machine Use And Care
Feeding material Cuts and scrapes Wear safety gloves Wear tight fitting long sleeves and pants to cover bare skin when Hansa C3e O&M Manual - OM-004 Revision H 09/07/2019 © Hansa Chippers 2019... -
Page 5: What Can My Hansa Chipper Process
Intended uses of the chipper The Hansa C3e chipper is built to process organic material including wooden branches not exceeding 40 mm in diameter. It is designed for intermittent use by the suburban gardener. Do NOT use the chipper for any other purpose. -
Page 6: Receiving Your Hansa Chipper
You may receive your chipper assembled from your dealer or it may be packaged in two boxes. Assembly takes approximately 30 minutes, two people working together will make the assembly easier. Chipper components Note: Your Hansa C3e may not come with the chip catcher bag. The chip catcher bag must be purchased separately. Tools required for assembly (not supplied) •... -
Page 7: Assembling Your Chipper
Wheels and cardboard block Chipper body Box 2 contains: ✓ The inlet chute ✓ A fastener pack containing parts required for assembly ✓ Documentation (Hansa operations manual, warranty card and Honda motor manual) Documentation Inlet chute Contents in box 2 Fastener pack Item no. -
Page 8: Attach The Wheels
Slide the axle shaft through the holes in the base of the chipper body. Screw the nyloc nut onto the end of the axle shaft. Tighten the axle shaft using an 18 mm and 13 mm spanner. Hansa C3e O&M Manual - OM-004 Revision H 09/07/2019 © Hansa Chippers 2019... -
Page 9: Fit The Inlet Chute
(item no. 2), spring washers (item no. 3), and nuts (item no. 4). Ensure that the heavy washer is touching the chipper body (top) and the spring washer is touching the nut (bottom). Hansa C3e O&M Manual - OM-004 Revision H 09/07/2019 © Hansa Chippers 2019... -
Page 10: Attach The (Optional) Chip Catcher Bag
It is helpful (but not required) to keep a wooden stick handy, approx. 50 mm diameter x 600 mm long for: • Pushing in short, brushy and very leafy materials • Keeping the inlet chute clear Hansa C3e O&M Manual - OM-004 Revision H 09/07/2019 © Hansa Chippers 2019... -
Page 11: Safe Setup Procedure
That the inlet chute and housing are clear of any leftover material That all chipper components are in place and in good condition If any parts are worn or damaged, contact Hansa for replacements That all labels are in good condition and easily legible ... -
Page 12: Power Supply
Power supply The C3e requires a 220-240V AC 50Hz earthed power connection. The C3e is rated at 8.4 A. It is recommended that the C3e is only connected to a power socket which is protected by a circuit-breaker that would activate with a residual current not more than 30 mA. -
Page 13: Start/Stop
Processing fibrous material The C3e can process palm fronds, flax, cabbage tree leaves and other similar fibrous material. The machines cutting disk is cantilevered (supported on the engine side with two bearings), therefore there is no risk of anything fibrous wrapping around the shaft and working its way into the bearings. -
Page 14: Transportation
Transportation The C3e is designed to be moved by one person using both handles at the top of the inlet chute to lean the chipper backwards and transfer its weight onto the wheels. The chipper can then be wheeled to and from the work location. The chip catcher bag should be removed from the chipper when transporting or moving to avoid damage to the bag. -
Page 15: Maintenance
Blunt knives result in damage to the chipper How to re-sharpen the knives: If you don’t have a surface grinder or are unsure how to re-sharpen the knives, contact a professional saw doctor or Hansa to arrange re-sharpening. WARNING! Be careful when working around the sharp knives. Be aware that even though the power source is unplugged, the cutting means can still move. -
Page 16: Remove The Knife For Sharpening
Open the cutting rotor housing by removing the four housing bolts using two 16 mm spanners. Using a nylon hammer (or suitable alternative), gently dislodge the housing from its grooves and remove it. Hansa C3e O&M Manual - OM-004 Revision H 09/07/2019 © Hansa Chippers 2019... -
Page 17: Sharpen The Knives
Note: When the knives are sharpened, material is removed from the knives, affecting the distribution of weight in the rotor. The rotor must be balanced appropriately after knife sharpening, as per the method outlined below: Hansa C3e O&M Manual - OM-004 Revision H 09/07/2019 © Hansa Chippers 2019... - Page 18 Hansa C3e O&M Manual - OM-004 Revision H 09/07/2019 © Hansa Chippers 2019...
- Page 19 WARNING! Every time the knife clamping bolts are torqued up to 22 Nm and loosened off again, the life of the bolts is reduced. The knife clamping bolts must be replaced at most after every six sharpens. Contact Hansa for replacement bolts (m8x25 countersunk bolts of grade 12.9 or higher).
-
Page 20: Bolt Torque
Feed System Chipping capacity 40 mm Feed type Gravity fed, self-feeding Inlet chute opening 100 x 130 mm Discharge System Discharge height 450 mm Outlet chute type Fixed Hansa C3e O&M Manual - OM-004 Revision H 09/07/2019 © Hansa Chippers 2019... -
Page 21: Decals
Decals Decal Description Location General machine safety and inlet chute considerations Side of inlet chute Outlet safety Housing front (next to outlet) Hansa C3e O&M Manual - OM-004 Revision H 09/07/2019 © Hansa Chippers 2019... -
Page 22: Hansa Chipper Industrial Limited Warranty
HANSA offers a special extended warranty period (“Extended Warranty”) to new HANSA products purchased from an authorised HANSA dealer. The Extended Warranty period is set out below. In order to take advantage of the Extended Warranty you must: 1. Register your HANSA product through the HANSA warranty registration process and identify your HANSA product by its machine serial number. - Page 23 General 1. Your rights: a. HANSA will recognise any implied rights and remedies that are available to you at law in the applicable territory and that cannot be excluded by HANSA. b. In New Zealand, Hansa Products Ltd will recognise your statutory rights under the Consumers Guarantee Act 1993 (provided that you are a consumer for the purposes of that Act).
-
Page 24: Commissioning Checklist And Registration
Commissioning checklist and registration It is the retailers’ responsibility to ensure that this chipper is correctly commissioned for use, and that the purchase is registered with Hansa Chippers so as to provide the owner with the full benefit of the warranty policy.