ZyXEL Communications LTE Series User Manual
Hide thumbs
Also See for LTE Series:
- User manual (179 pages) ,
- User manual (235 pages) ,
- User manual (210 pages)

Related Manuals for ZyXEL Communications LTE Series


Summary of Contents for ZyXEL Communications LTE Series
- Page 1 User’s Guide LTE Series Default Login Details Version 1.00_2.00 Ed 4, 3/2020 LAN IP Address http://192.168.1.1 Login admin Password See the Zyxel Device label Copyright © 2020 Zyxel Communications Corporation...
- Page 2 Related Documentation • Quick Start Guide The Quick Start Guide shows how to connect the Zyxel Device. • More Information Go to support.zyxel.com to find other information on the Zyxel Device LTE Series User’s Guide...
-
Page 3: Document Conventions
Icons Used in Figures Figures in this user guide may use the following generic icons. The Zyxel Device icon is not an exact representation of your Zyxel Device. Zyxel Device Generic Router Switch Server Firewall USB Storage Device Printer LTE Series User’s Guide... -
Page 4: Table Of Contents
User Account ............................245 Remote Management ........................248 TR-069 Client ............................253 Time Settings ............................255 E-mail Notification ..........................258 Log Setting ............................261 Firmware Upgrade ..........................264 Backup/Restore ..........................266 Diagnostic ............................269 Troubleshooting ..........................271 LTE Series User’s Guide... - Page 5 Contents Overview Appendices .............................278 LTE Series User’s Guide...
-
Page 6: Table Of Contents
Quick Start ............................44 3.1 Overview ............................44 3.2 Quick Start Setup ..........................44 3.3 Time Zone ............................44 3.4 The Internet Connection Setup ..................... 45 3.4.1 Successful Internet Connection ..................45 3.4.2 Unsuccessful Internet Connection ..................46 LTE Series User’s Guide... - Page 7 5.1 Connection Status Overview ......................71 5.1.1 Connectivity .......................... 71 5.1.2 System Info ..........................72 5.1.3 Cellular Info ..........................74 5.1.4 WiFi Settings ........................... 78 5.1.5 Guest WiFi Settings ........................ 79 5.1.6 LAN ............................81 Chapter 6 Broadband............................83 LTE Series User’s Guide...
- Page 8 7.11.3 WiFi Security Overview ...................... 120 7.11.4 Signal Problems ......................... 122 7.11.5 BSS ............................122 7.11.6 Preamble Type ........................123 7.11.7 WiFi Protected Setup (WPS) ..................... 123 Chapter 8 Home Networking ..........................131 8.1 Overview ............................131 LTE Series User’s Guide...
- Page 9 10.3.1 Add/Edit Port Triggering Rule ................... 168 10.4 DMZ .............................. 169 10.5 ALG ............................... 170 10.6 Address Mapping ........................171 10.6.1 Address Mapping Screen ....................171 10.6.2 Add New Rule Screen ...................... 172 10.7 Sessions ............................173 LTE Series User’s Guide...
- Page 10 13.7.2 Guidelines For Security Enhancement With Your Firewall ..........193 13.7.3 Security Considerations ....................193 Chapter 14 MAC Filter ............................195 14.1 MAC Filter Overview ........................195 14.2 MAC Filter ............................ 195 14.2.1 Add New Rule ........................196 Chapter 15 Parental Control ..........................197 LTE Series User’s Guide...
- Page 11 18.1 Log Overview ..........................223 18.1.1 What You Can Do in this Chapter ................... 223 18.1.2 What You Need To Know ....................223 18.2 System Log ..........................224 18.3 Security Log ..........................224 Chapter 19 Traffic Status .............................226 LTE Series User’s Guide...
- Page 12 25.1 System Overview ........................244 25.2 System ............................244 Chapter 26 User Account............................245 26.1 User Account Overview ......................245 26.2 User Account ..........................245 26.2.1 User Account Add/Edit ....................246 Chapter 27 Remote Management ........................248 27.1 Overview ............................. 248 LTE Series User’s Guide...
- Page 13 32.1 Overview ............................. 264 32.2 Firmware Upgrade ........................264 Chapter 33 Backup/Restore ..........................266 33.1 Backup/Restore Overview ......................266 33.2 Backup/Restore .......................... 266 33.3 Reboot ............................267 Chapter 34 Diagnostic............................269 34.1 Diagnostic Overview ........................269 34.2 Ping/TraceRoute/Nslookup Test ....................269 LTE Series User’s Guide...
- Page 14 35.6 UPnP ............................. 275 35.7 SIM Card ............................276 35.8 Cellular Signal ..........................276 Part III: Appendices ..................278 Appendix A Customer Support ..................... 279 Appendix B IPv6..........................285 Appendix C Legal Information ...................... 292 Index ..............................300 LTE Series User’s Guide...
-
Page 15: User's Guide
User’s Guide... -
Page 16: Introduction
LAN port to work as a WAN port. IP Passthrough Available when the fourth LAN port doesn’t act as an Ethernet WAN port. USB for File Sharing External Antennas PoE Injector Wall Mount Pole Mount Firmware 1.00 2.00 2.00 1.00 Version LTE Series User’s Guide... - Page 17 • Address Resolution Protocol (ARP) • Firewall that uses Stateful Packet Inspection (SPI) technology • Protects against Denial of Service (DoS) attacks • Filter of LAN MAC address, LAN IP address and URLs • Local and remote device management LTE Series User’s Guide...
-
Page 18: Application For The Zyxel Device
Your Zyxel Device provides shared Internet access by connecting to an LTE network. A computer can connect to the Zyxel Device’s PoE injector or a LAN port for configuration via the Web Configurator. See Table 1 on page 16 for the feature differences. LTE Series User’s Guide... - Page 19 Note: For LTE5388-M804 / LTE5398-M904 / LTE3316-M604, convert LAN port number one as a WAN port first. See Section 6.4 on page 90 for more information about the Network Setting > Broadband > Ethernet WAN screen. LTE Series User’s Guide...
-
Page 20: Wan Priority (Lte3301-Plus / Lte5388-M804 / Lte5398-M904 / Lte3316-M604)
Zyxel Device to its factory default settings. If you backed up an earlier configuration file, you would not have to totally re-configure the Zyxel Device. You could simply restore your last configuration. Write down any information your ISP provides you. LTE Series User’s Guide... -
Page 21: Front And Bottom Panels
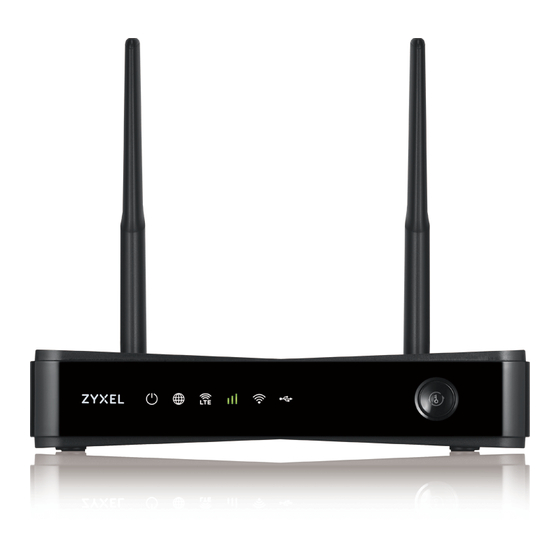
The LED indicators are located on the front (LTE7240-M403 / LTE3301-PLUS / LTE5388-M804 / LTE5398-M904 / LTE3316-M604)/ the bottom panel (LTE7461-M602 / LTE7480-M804 / LTE7480-S905 / LTE7490-M904)/ the rear panels (LTE5388-M804 / LTE5398-M904 / LTE3316-M604). Front & Top Panels Figure 4 Front Panel (LTE3301-PLUS) Figure 5 Front Panel (LTE7240-M403) LTE Series User’s Guide... - Page 22 Chapter 1 Introduction Figure 6 Front Panel (LTE5388-M804 / LTE5398-M904) Figure 7 Top Panel (LTE5388-M804 / LTE5398-M904) Figure 8 Front Panel (LTE3316-M604) Figure 9 Top Panel (LTE3316-M604) LTE Series User’s Guide...
- Page 23 Chapter 1 Introduction Bottom / Rear /Side Panels Figure 10 Rear Panel (LTE3301-PLUS) Figure 11 Bottom Panel (LTE7240-M403) Figure 12 Bottom Panel (LTE7461-M602 / LTE7480-M804 / LTE7480-S905 / LTE7490-M904) Figure 13 Rear Panel (LTE5388-M804 / LTE5398-M904) LTE Series User’s Guide...
-
Page 24: Leds (Lights)
Blinking The Zyxel Device is booting or self-testing. The Zyxel Device is not receiving power. Internet White There is Internet connection. Blinking The Zyxel Device is sending or receiving IP traffic. There is no Internet connection. LTE Series User’s Guide... - Page 25 The Zyxel Device is not receiving power. ETHERNET Green The Zyxel Device has a successful 10/100/1000 Mbps Ethernet connection with a device on the Local Area Network (LAN). The Zyxel Device does not have an Ethernet connection with the LAN. LTE Series User’s Guide...
- Page 26 There is no Internet connection. LTE/3G Signal Strength Green The signal strength is excellent. Orange The signal strength is fair. The signal strength is poor. Blinking There is no LTE/3G signal or the signal strength is below the poor level. LTE Series User’s Guide...
- Page 27 This indicates either 5G and 2.4G WPS are both on or the 5G WPS is on. Green The 2.4G wireless LAN is on, but the Zyxel Device is not sending/receiving data through the wireless LAN. Blinking The Zyxel Device is ready and the 2.4G WPS is on. LTE Series User’s Guide...
-
Page 28: Panel Ports & Buttons
Connect the power adapter and press the POWER button to start the Zyxel Device. Reboot Press the RESET button for more than 2 seconds but less than 5 seconds, it will cause the system to reboot. LTE Series User’s Guide... -
Page 29: Turning On/Off Wifi
find the optimal LTE signal strength and manage your LTE7461-M602 / LTE7480-M804 / LTE7480-S905 / LTE7490-M904). Figure 17 LTE3301-PLUS WiFI/WPS Button Figure 18 LTE7240-M403 WiFi Button Figure 19 LTE7461-M602 / LTE7480-M804 / LTE7480-S905 / LTE7490-M904 WiFi Button LTE Series User’s Guide... - Page 30 Once WiFi is turned on, the LED turns green. • Make sure the POWER LED is on and not blinking. Press the WiFi or WiFi/WPS button for 2 seconds. For LTE3316-M604: Once WiFi is turned on, the WLAN LED turns green/white. LTE Series User’s Guide...
-
Page 31: The Reset Button
This means that you will lose all configurations that you had previously saved. The password will be reset to the default (see the Zyxel Device label) and the IP address will be reset to 192.168.1.1. LTE Series User’s Guide... - Page 32 Chapter 1 Introduction Figure 22 Reset Button (LTE3301-PLUS) Figure 23 Reset Button (LTE7240-M403) Figure 24 Reset Button (LTE7461-M602 / LTE7480-M804 / LTE7480-S905 / LTE7490-M904) Figure 25 Reset Button (LTE5388-M804 / LTE5398-M904) LTE Series User’s Guide...
-
Page 33: Wall Mounting
If not using screw anchors, use a screwdriver to insert the screws into the wall. Do not insert the screws all the way in - leave a gap of about 0.5 cm. Make sure the screws are fastened well enough to hold the weight of the Zyxel Device with the connection cables. LTE Series User’s Guide... - Page 34 Chapter 1 Introduction Align the holes on the back of the Zyxel Device with the screws on the wall. Hang the Zyxel Device on the screws. Figure 27 Wall Mounting Example Figure 28 Wall Mounting Screw Specifications LTE Series User’s Guide...
-
Page 35: The Web Configurator
Note: The first time you enter the password, you will be asked to change it. Make sure the new password must contain at least one uppercase letter, one lowercase letter and one number. The Connection Status screen appears. Use this screen to configure basic Internet access and wireless settings. LTE Series User’s Guide... - Page 36 Chapter 2 The Web Configurator Figure 30 Connection Status LTE Series User’s Guide...
-
Page 37: Web Configurator Layout
• B - Widget Icon • C - Main Window 2.2.1 Settings Icon Click this icon ( to see the side bar and navigation panel. 2.2.1.1 Side Bar The side bar provides some icons on the right hand side. LTE Series User’s Guide... - Page 38 Theme: Click this icon to select a color that you prefer and apply it to the Web Configurator. Language: Select the language you prefer. Restart: Click this icon to reboot the Zyxel Device without turning the power off. Logout: Click this icon to log out of the Web Configurator. LTE Series User’s Guide...
- Page 39 Use this screen to configure LAN TCP/IP settings, and other advanced Networking properties. Static DHCP Use this screen to assign specific IP addresses to individual MAC addresses. UPnP Use this screen to turn UPnP and UPnP NAT-T on or off. LTE Series User’s Guide...
- Page 40 Use this screen to change settings that depend on the country you are Call Rule Use this screen to add, edit, or remove speed-dial numbers for outgoing calls. Call History Use this screen to view a call history list. System Monitor LTE Series User’s Guide...
- Page 41 Auto Configuration Server (ACS) using TR-069. Time Time Use this screen to change your Zyxel Device’s time and date. Email Email Notification Use this screen to configure up to two mail servers and sender addresses Notification on the Zyxel Device. LTE Series User’s Guide...
-
Page 42: Widget Icon
Use the menu items in the navigation panel on the right to open screens to configure the Zyxel Device’s features. Figure 33 Navigation Panel 2.2.2 Widget Icon Click this icon ( ) in the lower left corner to arrange the screen order. LTE Series User’s Guide... - Page 43 Chapter 2 The Web Configurator Figure 34 Widget Icon Select a block and hold it to move around. Click the Check icon ( ) in the lower left corner to save the changes. Figure 35 The Screen Oder LTE Series User’s Guide...
-
Page 44: Quick Start
Click Let’s Go to proceed with settings on time zone and wireless networks. It will take you a few minutes to complete the settings on the Wizard screens. You can click Skip to leave the Wizard screens. Figure 36 Wizard - Home 3.3 Time Zone Select the time zone of your location. Click Next. LTE Series User’s Guide... -
Page 45: The Internet Connection Setup
3.4 The Internet Connection Setup Select the Internet connection mode of the Zyxel Device. Click Next to continue. Figure 38 Wizard - Internet 3.4.1 Successful Internet Connection The Zyxel Device has Internet access. Figure 39 Wizard - Successful Internet Connection LTE Series User’s Guide... -
Page 46: Unsuccessful Internet Connection
Click Network Setting > Wireless to open the General screen. Then select Enable in the Wireless field. Or, Press the WiFi button located under the RESET button (see Section 1.5.4 on page 31 for the location and for how long the wireless function is turned on) for one second. LTE Series User’s Guide... -
Page 47: Quick Start Setup-Finish
Chapter 3 Quick Start 3.6 Quick Start Setup-Finish Your Zyxel Device saves your settings and attempts to connect to the Internet. LTE Series User’s Guide... -
Page 48: Tutorials
• PIN Configuration - create a secure wireless network simply by entering a wireless client's PIN (Personal Identification Number) in the Zyxel Device’s interface. See Section 4.2.2 on page 50. This is the more secure method, since one device can authenticate the other. LTE Series User’s Guide... -
Page 49: Push Button Configuration (Pbc)
The following figure shows you an example to set up wireless network and security by pressing a button on both Zyxel Device and wireless client (the Android smartphone in this example). Figure 42 Example WPS Process: PBC Method Wireless Client WITHIN 2 MINUTES SECURITY INFO COMMUNICATION LTE Series User’s Guide... -
Page 50: Pin Configuration
This may take up to two minutes. Then the wireless client is able to communicate with the Zyxel Device securely. The following figure shows you the example to set up wireless network and security on Zyxel Device and wireless client (ex. the Android smartphone in this example) by using PIN Method. LTE Series User’s Guide... -
Page 51: Connect To The Zyxel Device's Wifi Network
START WITHIN 2 MINUTES Authentication by PIN SECURITY INFO COMMUNICATION 4.3 Connect to the Zyxel Device’s WiFi Network In this example, you’ve configured the Zyxel Device’s WiFi Network to the following settings. SSID SSID_Example LTE Series User’s Guide... - Page 52 Click the WiFi icon in your computer’s system tray. The Wireless Network Connection screen displays. Click the refresh button to update the list of the available wireless APs within range. Select SSID_Example and click Connect. LTE Series User’s Guide...
- Page 53 The following screen displays if WPS is enabled on the Zyxel Device but you didn’t press the WPS button. Click Connect using a security key instead. Type the security key in the following screen. Click OK. Check the status of your wireless connection in the screen below. LTE Series User’s Guide...
-
Page 54: Use Multiple Ssids On The Zyxel Device
For example, you may set up three wireless networks (A, B and C) in your office. A is for workers, B is for guests and C is specific to a VoIP device in the meeting room. 4.4.1 Configure Security Settings of Multiple SSIDs The Zyxel Device is in router mode by default. LTE Series User’s Guide... - Page 55 SSID_Worker. Configure the screen as follows. In this example, you enable Intra-BSS Traffic for SSID_Worker to allow wireless clients in the same wireless network to communicate with each other. Click OK. LTE Series User’s Guide...
- Page 56 Chapter 4 Tutorials Click the Modify/Edit icon of the second entry to configure wireless and security settings for SSID_VoIP. Configure the screen as follows. In this example, you do not enable Intra-BSS Traffic for SSID_VoIP. Click LTE Series User’s Guide...
- Page 57 10 Click the Modify/Edit icon of the third entry to configure wireless and security settings for SSID_Guest. 11 Configure the screen as follows. In this example, you enable Intra-BSS Traffic for SSID_Guest to allow wireless clients in the same wireless network to communicate with each other. Click OK. LTE Series User’s Guide...
-
Page 58: Make A Voip/Volte Phone Call
(Vo3G), contact your ISP to make sure that your SIM card supports VoLTE (Vo3G). Log into the Web Configurator. Go to the Configuration > Voice > Voice Mode screen. Select Enable in the Voice Mode screen to activate the VoIP/VoLTE service. Click Apply. LTE Series User’s Guide... -
Page 59: Configure A Firewall Rule
Click Configuration > Security > Firewall to open the General screen. Select IPv4 Firewall/IPv6 Firewall to enable the firewall, and click Apply. Open the Access Control screen to create a rule. Click Add New ACL Rule to set up a rule. LTE Series User’s Guide... -
Page 60: Configure Mac Filter
Go to the Configuration > Security > MAC Filter screen. Click Add New Rule. Type the Host Name and the corresponding MAC Address that you want to block in the MAC Filter screen. Select the Active check box and click Apply. LTE Series User’s Guide... -
Page 61: Upgrade Firmware On The Zyxel Device
Click Browse and select a .bin file to upload. Click Upload. This process may take up to two minutes to finish. After two minutes, log in again and check your new firmware version in the Status screen. LTE Series User’s Guide... -
Page 62: Back Up A Configuration File
You can upload a previously saved configuration file from your computer to your Zyxel Device to restore that previous configuration. Go to the Maintenance > Backup/Restore screen. Click Browse in Restore Configuration section, and select the configuration file that you want to upload. Click Upload. LTE Series User’s Guide... -
Page 63: Connect To The Internet
If your SIM has a PIN Code, enter this code in the Broardband > Cellular SIM screen. Use the Home screen to check the Internet Status (IPv4) or Internet Status (IPv6). If it shows Connected this means your Internet connection is up. LTE Series User’s Guide... -
Page 64: Configure Dhcp
Static DHCP List so they have the same IP address everytime they connect to your network. To add a device to your Static DHCP List: Log into the Zyxel Device’s Web Configurator. Go to Network Setting > Home Networking > Static DHCP screen. LTE Series User’s Guide... -
Page 65: Configure Static Route For Routing To Another Network
In the following figure, router R is connected to the Zyxel Device’s LAN. R connects to two networks, N1 (192.168.1.x/24) and N2 (192.168.10.x/24). If you want to send traffic from computer A (in N1 network) to LTE Series User’s Guide... - Page 66 B. This tutorial uses the following example IP settings: Table 12 IP Settings in this Tutorial DEVICE / COMPUTER IP ADDRESS The Zyxel Device’s LAN 192.168.1.1 192.168.1.34 R’s N1 192.168.1.253 R’s N2 192.168.10.2 192.168.10.33 LTE Series User’s Guide...
- Page 67 Type 192.168.1.253 (R’s N1 address) in the Gateway IP Address field. Click OK. Now B should be able to receive traffic from A. You may need to additionally configure B’s firewall settings to allow specific traffic to pass through. LTE Series User’s Guide...
-
Page 68: Access The Zyxel Device Using Ddns
4.14.2 Configure DDNS on Your Zyxel Device Configure the following settings in the Network Setting > DNS > Dynamic DNS screen. • Select Enable Dynamic DNS. • Select www.DynDNS.com as Service Provider. • Type zyxelrouter.dyndns.org in the Host Name field. LTE Series User’s Guide... -
Page 69: Test The Ddns Settings
Open a web browser on the computer (using the IP address a.b.c.d) that is connected to the Internet. Type http://zyxelrouter.dyndns.org and press [Enter]. The Zyxel Device’s login page should appear. You can then log into the Zyxel Device and manage it. LTE Series User’s Guide... -
Page 70: Technical Reference
Technical Reference... -
Page 71: Connection Status
) will appear. Click the Edit icon, and you’ll see there are several icon choices for you to select. Enter a name in the Device Name field for a connected device. Click to enable Internet Blocking for a connected device. Click Save to save your changes. LTE Series User’s Guide... -
Page 72: System Info
Use this screen to view the basic system information of the Zyxel Device. Figure 47 System Info Click the Arrow icon ( ) to view more information on the status of your firewall and interfaces (WAN, LAN, and WLAN). LTE Series User’s Guide... - Page 73 This field displays the first DNS server address assigned by the ISP. server Secondary DNS This field displays the second DNS server address assigned by the ISP. server Primary DNSv6 This field displays the first DNS server IPv6 address assigned by the ISP. server LTE Series User’s Guide...
-
Page 74: Cellular Info
Use this screen to view the LTE connection details and LTE signal strength value that you can use as reference for positioning the Zyxel Device, as well as SIM card and module information. Figure 49 Cellular Info Click the Arrow icon ( ) to view the more information on the LTE connection. LTE Series User’s Guide... - Page 75 Shows Disable if the service provider lets you use the SIM without inputting a PIN. PIN Remaining This is how many more times you can try to enter the PIN code before the ISP blocks your SIM Attempts card. IP Passthrough Status LTE Series User’s Guide...
- Page 76 This shows the LTE channel bandwidth from base station to LTE device. According to 3GPP (MHz) specifications, the bandwidths defined by the standard are 1.4, 3, 5, 10, 15, and 20 MHz. The wider the bandwidth the higher the throughput. LTE Series User’s Guide...
- Page 77 PLMN ID (MCC+MNC) and LAC uniquely identifies the LAI (Location Area ID) [3GPP-TS.23.003]. This parameter is for UMTS or GPRS. The value is ‘0’ (zero) if the Current Access Technology is not UMTS or GPRS. The value is ‘N/A’ if there is no network connection. LTE Series User’s Guide...
-
Page 78: Wifi Settings
Otherwise, it’s not. You can use this screen or the QR code on the upper right corner to check the SSIDs (WiFi network name) and passwords of the main wireless networks. If you want to show or hide your WiFi passwords, click the Eye icon ( Figure 51 WiFi Settings LTE Series User’s Guide... -
Page 79: Guest Wifi Settings
Otherwise, it’s not. You can use this screen or the QR code on the upper right corner to check the SSIDs (WiFi network name) and passwords of the guest wireless networks. If you want to show or hide your WiFi passwords, click the Eye icon ( LTE Series User’s Guide... - Page 80 Select this check box to hide the SSID in the outgoing beacon frame so a station cannot name obtain the SSID through scanning using a site survey tool. Note: Disable WPS in the Network Setting > Wireless > WPS screen to hide the SSID. Save Click Save to save your changes. LTE Series User’s Guide...
-
Page 81: Lan
Beginning IP This field specifies the first of the contiguous addresses in the IP address pool. Address Ending IP This field specifies the last of the contiguous addresses in the IP address pool. Address DHCP Server State LTE Series User’s Guide... - Page 82 DHCP server program. DHCP leases addresses, for a period of time, which means that past addresses are “recycled” and made available for future reassignment to other systems. Days/Hours/ Enter the lease time of the DHCP server. Minutes Save Click Save to save your changes. LTE Series User’s Guide...
-
Page 83: Broadband
• Use the Cellular Band screen to view or edit an LTE WAN interface. You can also configure the WAN settings on the Zyxel Device for Internet access (Section 6.2 on page 84). • Use the Cellular PLMN screen to display available Public Land Mobile Networks (Section 6.8 on page 94). LTE Series User’s Guide... -
Page 84: What You Need To Know
Use this screen to change your Zyxel Device’s Internet access settings. The summary table shows you the configured WAN services (connections) on the Zyxel Device. Use information provided by your ISP to configure WAN settings. Click Network Setting > Broadband to access this screen. LTE Series User’s Guide... -
Page 85: Add/Edit Internet Connection
Click the Edit or Modify icon to configure the WAN connection. Click the Delete icon to remove the WAN connection. 6.2.1 Add/Edit Internet Connection Click the Edit or Modify icon to open the following screen. Use this screen to configure a WAN connection. LTE Series User’s Guide... - Page 86 This shows the connection is in Routing or Bridge mode. If the Zyxel Device is in routing mode, your ISP gives you one IP address only and you want multiple computers to share an Internet account. LTE Series User’s Guide...
- Page 87 Click this switch to have the Zyxel Device use the WAN interface of this connection as the system Gateway default gateway. When the switch goes to the right , the function is enabled. Otherwise, it is not. LTE Series User’s Guide...
- Page 88 Address Primary DNS Enter the first IPv6 DNS server address assigned by the ISP. Server Secondary DNS Enter the second IPv6 DNS server address assigned by the ISP. Server IPv6 Routing Feature LTE Series User’s Guide...
-
Page 89: Wan Backup
WAN connection fails. Primary WAN This field displays the connection the Zyxel Device would use first when the wired WAN connection fails. You can choose Ethernet or Cellular as the primary WAN connection for your Zyxel Device. LTE Series User’s Guide... -
Page 90: Ethernet Wan
WAN connection has priority over the DSL connection. Click Apply to save your changes back to the Zyxel Device. Click Network Setting > Broadband > Ethernet WAN to display the following screen. Figure 61 Network Setting > Broadband > Ethernet WAN LTE Series User’s Guide... -
Page 91: Cellular Wan
4G roaming is to use your mobile device in an area which is not covered by your service provider. Enable roaming to ensure that your Zyxel Device is kept connected to the Internet when you are traveling outside the geographical coverage area of the network to which you are registered. LTE Series User’s Guide... -
Page 92: Cellular Sim Configuration
Entering the wrong PIN code 3 consecutive times locks the SIM card after which you need a PUK (Personal Unlocking Key) from the service provider to unlock it. Click Network Setting > Broadband > Cellular SIM. The following screen opens. LTE Series User’s Guide... -
Page 93: Cellular Band Configuration
SIM card or select the type of the network (4G, 3G, or 2G) to which you want the Zyxel Device to connect. Click Network Setting > Broadband > Cellular Band. The following screen opens. LTE Series User’s Guide... -
Page 94: Cellular Plmn Configuration
Auto Selection to have the Zyxel Device connect to the service provider using the default settings on the SIM card or manually view available PLMNs and select your service provider. Click Network Setting > Broadband > Cellular PLMN. The screen appears as shown next. Figure 65 Network Setting > Broadband > Cellular PLMN LTE Series User’s Guide... - Page 95 Figure 66 Network Setting > Broadband > Cellular PLMN > Manual Scan Warning Click Scan to check for available PLMNs in the area surrounding theZyxel Device, and then display them in the network list. Select from the network list and click Apply. LTE Series User’s Guide...
- Page 96 This shows the type of network the ISP provides. PLMN This shows the PLMN number. Apply Click Apply to save your changes back to the Zyxel Device. Cancel Click Cancel to exit this screen without saving. LTE Series User’s Guide...
-
Page 97: Ip Passthrough
IP Passthrough IP Passthrough allows a LAN computer on the local network of the Zyxel Device to have access to web services using the public IP address. When IP Passthrough is configured, all traffic is forwarded to the LAN computer and will not go through NAT. LTE Series User’s Guide... - Page 98 MAC selecting Fixed in the previous field. Note: This field will show upon selecting Fixed in the previous field. Apply Click this to save your changes. Cancel Click this to exit this screen without saving. LTE Series User’s Guide...
-
Page 99: Wireless
However, wireless networking is different from that of most traditional radio communications in that there are a number of wireless networking standards available with different methods of data encryption. LTE Series User’s Guide... -
Page 100: General Settings
Zyxel Device’s SSID, channel or security settings, you will lose your wireless connection when you press Apply. You must change the settings of your wireless computer to match the new settings on the Zyxel Device. Click Network Setting > Wireless to open the General screen. LTE Series User’s Guide... - Page 101 802.11b/g/n WiFi clients while 5GHz is used by IEEE 802.11a/ac WiFi clients. WiFi Click Enable to enable the wireless LAN in this field. Channel Use Auto to have the Zyxel Device automatically determine a channel to use. LTE Series User’s Guide...
-
Page 102: No Security
Select No Security to allow wireless stations to communicate with the access points without any data encryption or authentication. Note: If you do not enable any security on your Zyxel Device, your network is accessible to WiFi any wireless networking device that is within range. LTE Series User’s Guide... -
Page 103: More Secure (Wpa2-Psk)
The following table describes the labels in this screen. Table 30 Wireless > General: More Secure: WPA2-PSK LABEL DESCRIPTION Security Level Select More Secure to enable WPA2-PSK data encryption. Security Mode WPA2-PSK is the default security mode. LTE Series User’s Guide... -
Page 104: Guest/More Ap
BSSs simultaneously. You can then assign varying security types to different SSIDs. Wireless clients can use different SSIDs to associate with the same access point. Figure 73 Network Setting > Wireless > Guest/More AP LTE Series User’s Guide... -
Page 105: More Ap Edit
Use this screen to create a guest wireless network and configure its security settings. Click the Modify icon in the More AP screen. The following screen displays. Click Network Setting > Wireless > More AP Edit. LTE Series User’s Guide... - Page 106 The following table describes the labels in this screen. Table 32 Network Setting > Wireless > More AP Edit LABEL DESCRIPTION WiFi Network Setup WiFi Click Enable to enable the wireless LAN in this field. Security Level LTE Series User’s Guide...
- Page 107 See the following sections for more details about this field. Generate password Select this option to have the Zyxel Device automatically generate a password. The automatically password field will not be configurable when you select this option. LTE Series User’s Guide...
-
Page 108: Mac Authentication
MAC (Media Access Control) address, which consists of six pairs of hexadecimal characters, for example: 00:A0:C5:00:00:02. You need to know the MAC addresses of the device you want to allow/deny to configure this screen. LTE Series User’s Guide... - Page 109 Select Deny to block access to the Zyxel Device. MAC addresses not listed will be allowed to access the Zyxel Device. Select Allow to permit access to the Zyxel Device. MAC addresses not listed will be denied access to the Zyxel Device. MAC address List LTE Series User’s Guide...
-
Page 110: Wps
Click Network Setting > Wireless > WPS. The following screen displays. Click this switch and it will turn blue. Click Apply to activate the WPS function. Then you can configure the WPS settings in this screen. LTE Series User’s Guide... - Page 111 Use this section to set up a WPS network by entering the PIN of the client into the Zyxel Device. Click this switch to make it turn blue. Click Apply to activate WPS method 2 on the Zyxel Device. LTE Series User’s Guide...
-
Page 112: Wmm
Click Network Setting > Wireless > WMM to display the following screen. Figure 78 Network Setting > Wireless > WMM Note: WMM cannot be disabled if 802.11 mode includes 802.11n or 802.11ac. LTE Series User’s Guide... -
Page 113: Others Screen
Click Network Setting > Wireless > Others. The screen appears as shown. Section 7.11.2 on page 120 for detailed definitions of the terms listed here. Figure 79 Network Setting > Wireless > Others LTE Series User’s Guide... - Page 114 Select Off to disable 802.11 protection. The transmission rate of your Zyxel Device might be reduced in a mixed-mode network. This field displays Off and is not configurable when you set 802.11 Mode to 802.11b Only. LTE Series User’s Guide...
-
Page 115: Wlan Scheduler
When the switch turns blue , the function is enabled. Otherwise, it’s not. Add New Rule Click this to configure a new WLAN scheduler rule. This is the index number of the entry. LTE Series User’s Guide... -
Page 116: Add/Edit Rules
Click Add New Rule in the WLAN Scheduler screen, or click the Edit icon next to a scheduling rule, and the following screen displays. Use this screen to create a scheduling rule to permit Internet traffic from each wireless network interface. Figure 81 Network Setting > Wireless > WLAN Scheduler > Add New Rule LTE Series User’s Guide... -
Page 117: Channel Status
AP count; other factors about the channels are also considered. Click Network Setting > Wireless > Channel Status. The screen appears as shown. Click Scan to scan wireless LAN channels. You can view the results in Channel Status screen. LTE Series User’s Guide... -
Page 118: Technical Reference
Normally, a WiFi network operates in an “infrastructure” type of network. An “infrastructure” type of network has one or more access points and one or more WiFi clients. The WiFi clients connect to the access points. LTE Series User’s Guide... - Page 119 When you create a network, you must select a channel to use. Since the available unlicensed spectrum varies from one country to another, the number of available channels also varies. LTE Series User’s Guide...
-
Page 120: Additional Wireless Terms
For example, if your mother owns a 1970 Dodge Challenger and her favorite movie is LTE Series User’s Guide... - Page 121 Some wireless devices, such as scanners, can detect WiFi networks but cannot use WiFi networks. These kinds of wireless devices might not have MAC addresses. Hexadecimal characters are 0, 1, 2, 3, 4, 5, 6, 7, 8, 9, A, B, C, D, E, and F. LTE Series User’s Guide...
-
Page 122: Signal Problems
A and B can access the wired network and communicate with each other. When Intra- BSS traffic blocking is enabled, wireless station A and B can still access the wired network but cannot communicate with each other. LTE Series User’s Guide... -
Page 123: Preamble Type
7.11.7 WiFi Protected Setup (WPS) Your Zyxel Device supports WiFi Protected Setup (WPS), which is an easy way to set up a secure WiFi network. WPS is an industry standard specification, defined by the WiFi Alliance. LTE Series User’s Guide... - Page 124 Take the following steps to set up a WPS connection between an access point or wireless router (referred to here as the AP) and a client device using the PIN method. LTE Series User’s Guide...
- Page 125 If you cannot connect, check the list of associated WiFi clients in the AP’s configuration utility. If you see the WiFi client in the list, WPS was successful. The following figure shows a WPS-enabled WiFi client (installed in a notebook computer) connecting to the WPS-enabled AP via the PIN method. LTE Series User’s Guide...
- Page 126 If the registrar is already part of a network, it sends the existing information. If not, it generates the SSID and WPA(2)-PSK randomly. The following figure shows a WPS-enabled client (installed in a notebook computer) connecting to a WPS-enabled access point. LTE Series User’s Guide...
- Page 127 The following figure shows a sample network. In step 1, both AP1 and Client 1 are unconfigured. When WPS is activated on both, they perform the handshake. In this example, AP1 is the registrar, and Client 1 LTE Series User’s Guide...
- Page 128 In step 3, you add another access point (AP2) to your network. AP2 is out of range of AP1, so you cannot use AP1 for the WPS handshake with the new access point. However, you know that Client 2 supports the registrar function, so you use it to perform the WPS handshake instead. LTE Series User’s Guide...
- Page 129 If this happens, open the access point’s configuration interface and look at the list of associated clients (usually displayed by MAC address). It does not matter if the access point LTE Series User’s Guide...
- Page 130 Check the MAC addresses of your WiFi clients (usually printed on a label on the bottom of the device). If there is an unknown MAC address you can remove it or reset the AP. LTE Series User’s Guide...
-
Page 131: Home Networking
The subnet mask specifies the network number portion of an IP address. Your Zyxel Device will compute the subnet mask automatically based on the IP address that you entered. You do not need to change the subnet mask computed by the Zyxel Device unless you are instructed to do otherwise. LTE Series User’s Guide... -
Page 132: Lan Setup
Use this screen to set the Local Area Network IP address and subnet mask of your Zyxel Device. Configure DHCP settings to have the Zyxel Device or a DHCP server assign IP addresses to devices. Click Network Setting > Home Networking to open the LAN Setup screen. LTE Series User’s Guide... - Page 133 Chapter 8 Home Networking Figure 90 Network Setting > Home Networking > LAN Setup LTE Series User’s Guide...
- Page 134 Zyxel Device works as a DNS relay. LAN IPv6 Mode Setup IPv6 Active Use this field to Enable or Disable IPv6 activation on the Zyxel Device. When IPv6 activation is used, the following fields need to be set: LTE Series User’s Guide...
- Page 135 Proxy - Select this if the DHCP clients use the IP address of this interface and the Zyxel Device works as a DNS relay. Otherwise, select None if you do not want to configure IPv6 DNS servers. LTE Series User’s Guide...
-
Page 136: Static Dhcp
Use this screen to change your Zyxel Device’s static DHCP settings. Click Network Setting > Home Networking > Static DHCP to open the following screen. Figure 91 Network Setting > Home Networking > Static DHCP LTE Series User’s Guide... - Page 137 IP Address Enter the IP address that you want to assign to the computer on your LAN with the MAC address that you will also specify if you select Manual Input in the previous field. LTE Series User’s Guide...
-
Page 138: Upnp
Select Enable to activate UPnP. Be aware that anyone could use a UPnP application to open the Web Configurator's login screen without entering the Zyxel Device's IP address (although you must still enter the password to access the Web Configurator). UPnP NAT-T State LTE Series User’s Guide... -
Page 139: Technical Reference
Private IP Addresses Every machine on the Internet must have a unique address. If your networks are isolated from the Internet, for example, only between your two branch offices, you can assign any IP addresses to the LTE Series User’s Guide... -
Page 140: Turn On Upnp In Windows 7 Example
Make sure the computer is connected to the LAN port of the Zyxel Device. Turn on your computer and the Zyxel Device. Click the start icon, Control Panel and then the Network and Sharing Center. Click Change Advanced Sharing Settings. LTE Series User’s Guide... -
Page 141: Auto-Discover Your Upnp-Enabled Network Device
Before you follow these steps, make sure you already have UPnP activated on the Zyxel Device and in your computer. Make sure your computer is connected to the LAN port of the Zyxel Device. Open Windows Explorer and click Network. Right-click the Zyxel Device icon and select Properties. LTE Series User’s Guide... - Page 142 Figure 95 Network Connections In the Internet Connection Properties window, click Settings to see port mappings. Figure 96 Internet Connection Properties You may edit or delete the port mappings or click Add to manually add port mappings. LTE Series User’s Guide...
- Page 143 Click OK. Check the network icon on the system tray to see your Internet connection status. Figure 99 System Tray Icon To see more details about your current Internet connection status, right click the network icon in the system tray and click Open Network and Sharing Center. Click Local Area Network. LTE Series User’s Guide...
-
Page 144: Turn On Upnp In Windows 10 Example
Make sure the computer is connected to the LAN port of the Zyxel Device. Turn on your computer and the Zyxel Device. Click the start icon, Settings and then Network & Internet. Click Network and Sharing Center. LTE Series User’s Guide... - Page 145 Under Domain, select Turn on network discovery and click Save Changes. Network discovery allows your computer to find other computers and devices on the network and other computers on the network to find your computer. This makes it easier to share files and printers. LTE Series User’s Guide...
-
Page 146: Auto-Discover Your Upnp-Enabled Network Device
Before you follow these steps, make sure you already have UPnP activated on the Zyxel Device and in your computer. Make sure your computer is connected to the LAN port of the Zyxel Device. Open File Explorer and click Network. Right-click the Zyxel Device icon and select Properties. LTE Series User’s Guide... - Page 147 Figure 101 Network Connections In the Internet Connection Properties window, click Settings to see port mappings. Figure 102 Internet Connection Properties You may edit or delete the port mappings or click Add to manually add port mappings. LTE Series User’s Guide...
- Page 148 Figure 105 System Tray Icon To see more details about your current Internet connection status, right click the network icon in the system tray and click Open Network & Internet settings. Click Network and Sharing Center and click the Connections. LTE Series User’s Guide...
-
Page 149: Web Configurator Easy Access In Windows 7
IP address of the Zyxel Device first. This comes helpful if you do not know the IP address of the Zyxel Device. Follow the steps below to access the Web Configurator. Open Windows Explorer. Click Network. LTE Series User’s Guide... - Page 150 Right-click the icon for your Zyxel Device and select View device webpage. The Web Configurator login screen displays. Figure 108 Network Connections: My Network Places Right-click the icon for your Zyxel Device and select Properties. Click the Network Device tab. A window displays with information about the Zyxel Device. LTE Series User’s Guide...
-
Page 151: Web Configurator Easy Access In Windows 10
Chapter 8 Home Networking Figure 109 Network Connections: My Network Places: Properties: Example 8.9 Web Configurator Easy Access in Windows 10 Follow the steps below to access the Web Configurator. Open File Explorer. Click Network. LTE Series User’s Guide... - Page 152 Right-click the icon for your Zyxel Device and select View device webpage. The Web Configurator login screen displays. Figure 111 Network Connections: Network Infrastructure Right-click the icon for your Zyxel Device and select Properties. Click the Network Device tab. A window displays information about the Zyxel Device. LTE Series User’s Guide...
- Page 153 Chapter 8 Home Networking Figure 112 Network Connections: Network Infrastructure: Properties: Example LTE Series User’s Guide...
-
Page 154: Routing
LAN devices within an Intranet are transferring files or packets, especially when there are more than two Internet connections in your home or office network. Click Network Setting > Routing to open the Static Route screen. LTE Series User’s Guide... -
Page 155: Add/Edit Static Route
Click Add New Static Route in the Static Route screen, the following screen appears. Configure the required information for a static route. Note: The Gateway IP Address must be within the range of the selected interface in Use Interface. LTE Series User’s Guide... - Page 156 If you want to configure bound interface, choose an interface through which the traffic is sent. You must have the WAN interfaces already configured in the Broadband screen. Click this to save your changes. Cancel Click this to exit this screen without saving. LTE Series User’s Guide...
-
Page 157: Dns Route
Click the Delete icon to remove a DNS route from the Zyxel Device. 9.3.1 Add/Edit DNS Route Click Add New DNS Route in the DNS Route screen, use this screen to configure the required information for a DNS route. LTE Series User’s Guide... -
Page 158: Policy Route
For example, you can use policy-based routing to direct traffic from specific users through specific connections or distribute traffic across multiple paths for load sharing. Policy-based routing is applied to outgoing packets before the default routing rules are applied. LTE Series User’s Guide... - Page 159 This is the WAN interface through which the traffic is routed. Modify Click the Edit icon to edit this policy. Click the Delete icon to remove a policy from the Zyxel Device. A window displays asking you to confirm that you want to delete the policy. LTE Series User’s Guide...
-
Page 160: Add/Edit Policy Route
Select a WAN interface through which the traffic is sent. You must have the WAN interface(s) already configured in the Broadband screens. Cancel Click Cancel to exit this screen without saving. Click OK to save your changes. LTE Series User’s Guide... -
Page 161: Rip Overview
Select the check box to set the Zyxel Device to not send the route information to the default Gateway gateway. Cancel Click Cancel to exit this screen without saving. Apply Click Apply to save your changes back to the Zyxel Device. LTE Series User’s Guide... -
Page 162: Network Address Translation (Nat)
(the inside global address) before forwarding the packet to the WAN side. When the response comes back, NAT translates the destination address (the inside global address) back to the inside local address before forwarding it to the original inside host. LTE Series User’s Guide... -
Page 163: Port Forwarding Overview
IP address of 192.168.1.36 to a fourth (D in the example). You assign the LAN IP addresses and the ISP assigns the WAN IP address. The NAT network appears as a single host on the Internet. Figure 121 Multiple Servers Behind NAT Example LTE Series User’s Guide... -
Page 164: Port Forwarding
Create or edit a port forwarding rule. Specify either a port or a range of ports, a server IP address, and a protocol to configure a port forwarding rule. Click Add New Rule in the Port Forwarding screen or the Edit icon next to an existing rule to open the following screen. LTE Series User’s Guide... - Page 165 Select or clear this field to turn the port forwarding rule on or off. Service Name Select a service to forward or select User Defined and enter a name in the field to the right. WAN Interface Select the WAN interface for which to configure NAT port forwarding rules. LTE Series User’s Guide...
-
Page 166: Port Triggering
LAN can use the service in the same manner. This way you do not need to configure a new IP address each time you want a different LAN computer to use the application. For example: LTE Series User’s Guide... - Page 167 Note: The sum of trigger ports in all rules must be less than 1000 and every open port range must be less than 1000. When the protocol is TCP/UDP, the ports are counted twice. Figure 125 Network Setting > NAT > Port Triggering LTE Series User’s Guide...
-
Page 168: Add/Edit Port Triggering Rule
This screen lets you create new port triggering rules. Click Add New Rule in the Port Triggering screen or click a rule’s Edit icon to open the following screen. Use this screen to configure a port or range of ports and protocols for sending out requests and for receiving responses. LTE Series User’s Guide... -
Page 169: Dmz
Use this screen to specify the IP address of a default server to receive packets from ports not specified in the Port Triggering screen. The DMZ (DeMilitarized Zone) is a network between the WAN and the LAN that is accessible to devices on both the WAN and LAN with firewall protection. Devices on the WAN LTE Series User’s Guide... -
Page 170: Alg
NAT Application Layer Gateway (ALG) in the Zyxel Device. Application Layer Gateway (ALG) allows certain applications such as File Transfer Protocol (FTP), Session Initiation Protocol (SIP), or file transfer in Instant Messaging (IM) applications to pass through the Zyxel Device. LTE Series User’s Guide... -
Page 171: Address Mapping
The following table describes the fields in this screen. Table 58 Network Setting > NAT > Address Mapping LABEL DESCRIPTION Rule Name This is the name of the rule. Local Start IP This is the starting Inside Local IP Address (ILA). LTE Series User’s Guide... -
Page 172: Add New Rule Screen
To add or edit an address mapping rule, click Add New Rule or the Modify icon in the Address Mapping screen to display the screen shown next. Figure 130 Network Setting > NAT > Address Mapping > Add New Rule LTE Series User’s Guide... -
Page 173: Sessions
Use the Sessions screen to limit the number of concurrent NAT sessions each client can use. Click Network Setting > NAT > Sessions to open the Sessions screen. Figure 131 Network Setting > NAT > Sessions LTE Series User’s Guide... - Page 174 With heavy peer to peer application use, lower this number to ensure no single client uses too many of the available NAT sessions. Cancel Click Cancel to restore your previously saved settings. Apply Click Apply to save your changes. LTE Series User’s Guide...
-
Page 175: Dynamic Dns Setup
Enabling the wildcard feature for your host causes *.yourhost.dyndns.org to be aliased to the same IP address as yourhost.dyndns.org. This feature is useful if you want to be able to use, for example, www.yourhost.dyndns.org and still reach your hostname. LTE Series User’s Guide... -
Page 176: Dns Entry
You can manually add or edit the Zyxel Device’s DNS name and IP address entry. Click Add New DNS Entry in the DNS Entry screen or the Edit icon next to the entry you want to edit. The screen shown next appears. LTE Series User’s Guide... -
Page 177: Dynamic Dns
11.3 Dynamic DNS Dynamic DNS can update your current dynamic IP address mapping to a hostname. Configure a DDNS service provider on your Zyxel Device. Click Network Setting > DNS > Dynamic DNS. The screen appears as shown. LTE Series User’s Guide... - Page 178 Current Dynamic This shows the IP address your Dynamic DNS provider has currently associated with the hostname. Cancel Click Cancel to exit this screen without saving. Apply Click Apply to save your changes. LTE Series User’s Guide...
-
Page 179: Usb Service
This is the name given to a set of computers that are connected on a network and share resources such as a printer or files. Windows automatically assigns the workgroup name when you set up a network. LTE Series User’s Guide... -
Page 180: Before You Begin
Use this screen to set up file sharing through the Zyxel Device. The Zyxel Device’s LAN users can access the shared folder (or share) from the USB device inserted in the Zyxel Device. To access this screen, click Network Setting > USB Service. LTE Series User’s Guide... - Page 181 Click this to set up a new share on the Zyxel Device. Active Select this to allow the share to be accessed. Status This field shows the status of the share : The share is not activated. : The share is activated. LTE Series User’s Guide...
-
Page 182: Add New Share
Please note that you need to set up your shares in the USB before enabling file sharing in the Zyxel Device. Also, spaces and the following special characters listed in the brackets ["`<>^$|&;\/:*?'] are not allowed for the USB share name. Figure 137 Network Setting > USB Service > File Sharing > Add New Share LTE Series User’s Guide... -
Page 183: The Add New User Screen
USB device, click the Add New Account button in the Network Setting > USB Service > User Account screen. Please see Chapter 26 on page 245, for detailed information about User Account screen. LTE Series User’s Guide... -
Page 184: Firewall
Internet Control Message Protocol (ICMP) is a message control and error-reporting protocol between a host server and a gateway to the Internet. ICMP uses Internet Protocol (IP) datagrams, but the messages are processed by the TCP/IP software and directly apparent to the application user. LTE Series User’s Guide... -
Page 185: Firewall
A higher firewall level means more restrictions on the Internet activities you can perform. Click Security > Firewall > General to display the following screen. Use the slider to select the level of firewall protection. LTE Series User’s Guide... - Page 186 This setting allows traffic to the Internet and also allows someone from the Internet to access services on your local network. This would be used with Port Forwarding, Default Server. Apply Click this to save your changes. Cancel Click this to restore your previously saved settings. LTE Series User’s Guide...
-
Page 187: Protocol (Customized Services)
Click this to edit a customized service. 13.4.1 Add Customized Service Add a customized rule or edit an existing rule by specifying the protocol and the port numbers. Click Add New Protocol Entry in the Protocol screen to display the following screen. LTE Series User’s Guide... -
Page 188: Access Control (Rules)
Note the order in which the rules are listed. Click Security > Firewall > Access Control to display the following screen. Note: The ordering of your rules is very important as rules are applied in turn. Figure 142 Security > Firewall > Access Control LTE Series User’s Guide... -
Page 189: Add New Acl Rule Screen
Use this screen to configure firewall rules. In the Access Control screen, select an index number and click Add New ACL Rule or click a rule’s Edit icon to display this screen and refer to the following table for information on the labels. LTE Series User’s Guide... - Page 190 Address. If not, select a detected device. Destination IP Address If you selected Specific IP Address in the previous item, enter the destination device’s IP address here. Otherwise this field will be hidden if you select the detected device. LTE Series User’s Guide...
-
Page 191: Dos
Internet access becomes unavailable. Use the DoS screen to activate protection against DoS attacks. Click Security > Firewall > DoS to display the following screen. Figure 144 Security > Firewall > DoS LTE Series User’s Guide... -
Page 192: Firewall Technical Reference
These rules specify which computers on the WAN can access which computers or services on the LAN. Note: You also need to configure NAT port forwarding (or full featured NAT address mapping rules) to allow computers on the WAN to access devices on the LAN. LTE Series User’s Guide... -
Page 193: Guidelines For Security Enhancement With Your Firewall
Note: Incorrectly configuring the firewall may block valid access or introduce security risks to the Zyxel Device and your protected network. Use caution when creating or deleting firewall rules and test your rules after you configure them. Consider these security ramifications before creating a rule: LTE Series User’s Guide... - Page 194 FTP servers. Does this rule conflict with any existing rules? Once these questions have been answered, adding rules is simply a matter of entering the information into the correct fields in the Web Configurator screens. LTE Series User’s Guide...
-
Page 195: Mac Filter
You can choose to enable or disable the filters per entry; make sure that the check box under Active is selected if you want to use a filter. Select Security > MAC Filter. The screen appears as shown. Figure 145 Security > MAC Filter LTE Series User’s Guide... -
Page 196: Add New Rule
12:34:56:78:9a:bc. Delete Click the Delete icon to delete an existing rule. Cancel Click Cancel to restore your previously saved settings. Apply Click Apply to save your changes. LTE Series User’s Guide... -
Page 197: Parental Control
Table 74 Parental Control > Parental Control LABEL DESCRIPTION Parental Control Select Enable to activate parental control. Add New PCP Click this if you want to configure a new parental control rule. This shows the index number of the rule. LTE Series User’s Guide... - Page 198 Click the Edit icon to go to the screen where you can edit the rule. Click the Delete icon to delete an existing rule. Cancel Click Cancel to exit this screen without saving. Apply Click Apply to save your changes back to the Zyxel Device. LTE Series User’s Guide...
-
Page 199: Add New Parental Control Rule
Figure 148 Parental Control > Parental Control > Add New PCP The following table describes the fields in this screen. Table 75 Parental Control > Parental Control > Add New PCP LABEL DESCRIPTION General Active Select Enable to activate this parental control rule. LTE Series User’s Guide... - Page 200 Click Add to show a screen to enter the URL of web site or URL keyword to which the Zyxel Device blocks or allows access. Click OK to save your settings back to the Zyxel Device. Cancel Click Cancel to return to the previous screen without saving any changes. LTE Series User’s Guide...
-
Page 201: Certificates
You can import the following certificates to your Zyxel Device: • Web Server - This certificate secures HTTP connections. • SSH- This certificate secures remote connections. Click Security > Certificates to open the Local Certificates screen. Figure 149 Security > Certificates > Local Certificates LTE Series User’s Guide... -
Page 202: Create Certificate Request
Use this screen to have the Zyxel Device generate a certification request. To create a certificate signing request, you need to enter a common name, organization name, state/province name, and the two-letter country code for the certificate. LTE Series User’s Guide... -
Page 203: View Certificate Request
The Signing Request contains the certificate signing request value that you will copy upon submitting the certificate request to the CA (certificate authority). Click the View icon in the Local Certificates screen to open the following screen. LTE Series User’s Guide... - Page 204 You can copy and paste the certificate into an email to send to friends or colleagues or you can copy and paste the certificate into a text editor and save the file on a management computer for later distribution. Private Key This field displays the private key of this certificate. LTE Series User’s Guide...
-
Page 205: Trusted Ca
Click the View icon to open a screen with an in-depth list of information about the certificate (or certification request). Click the Remove icon to delete the certificate (or certification request). You cannot delete a certificate that one or more features is configured to use. LTE Series User’s Guide... -
Page 206: Import Trusted Ca Certificate
Use this screen to view in-depth information about the certification authority’s certificate. The certificate text box is read-only and can be distributed to others. Click Security > Certificates > Trusted CA to open the Trusted CA screen. Click the View icon to open the View Certificate screen. LTE Series User’s Guide... -
Page 207: Certificates Technical Reference
This section provides some technical background information about the topics covered in this chapter. Certification Authorities A Certification Authority (CA) issues certificates and guarantees the identity of each certificate owner. There are commercial certification authorities like CyberTrust or VeriSign and government certification authorities. LTE Series User’s Guide... -
Page 208: Verify A Certificate
MD5 or SHA1 algorithms. The following procedure describes how to check a certificate’s fingerprint to verify that you have the actual certificate. Browse to where you have the certificate saved on your computer. LTE Series User’s Guide... - Page 209 Use a secure method to verify that the certificate owner has the same information in the Thumbprint Algorithm and Thumbprint fields. The secure method may vary based on your situation. Possible examples would be over the telephone or through an HTTPS connection. LTE Series User’s Guide...
-
Page 210: Voice
• Use the Call History screen to view a call history list(Section 17.6 on page 220). 17.2 Voice Mode Use this screen to enable VoIP or VoLTE services on the Zyxel Device. To access this screen, click Voice > Voice Mode. LTE Series User’s Guide... -
Page 211: Sip
VoIP calls, you need to enable and configure a SIP account, and then map it to a phone port. The SIP account contains information that allows your Zyxel Device to connect to your VoIP service provider. To access this screen, click Voice > SIP > SIP Account. LTE Series User’s Guide... -
Page 212: Sip Account Entry Edit
Account Number This shows the SIP number. Modify Click the Modify icon to configure the SIP account. 17.3.2 SIP Account Entry Edit You can configure a SIP account. To access this screen, click the Modify icon. LTE Series User’s Guide... - Page 213 Enter your SIP number. In the full SIP URI, this is the part before the @ symbol. You can use up to 127 printable ASCII characters. Authentication User Name Enter the user name for registering this SIP account, exactly as it was given to you. You can use up to 95 printable ASCII characters. LTE Series User’s Guide...
- Page 214 Active Incoming Select this to have the phone not ring for incoming calls with caller ID deactivated. Anonymous Call Block Click this to save your changes. Cancel Click this to exit this screen without saving. LTE Series User’s Guide...
-
Page 215: Sip Service Provider
SIP service provider. Click Voice > SIP > SIP Service Provider and then click the Modify icon next to a profile of SIP service provider settings to open the following screen. LTE Series User’s Guide... - Page 216 Enter the IP address or domain name of the SIP server provided by your VoIP service provider. You can use up to 95 printable ASCII characters. It does not matter whether the SIP server is a proxy, redirect or register server. LTE Series User’s Guide...
- Page 217 Enter the SIP outbound proxy server’s listening port, if your VoIP service provider gave you one. Otherwise, keep the default value. Use DHCP Option 120 first Select this to have the Zyxel Device use DHCP Option 120 first. LTE Series User’s Guide...
- Page 218 Select this to have the Zyxel Device query your ISP’s DNS server for a list of any available SIP servers that it maintains. This is useful if your static SIP server experiences difficulties, making it hard for your IP phone users to make SIP calls. LTE Series User’s Guide...
-
Page 219: Phone
SIP numbers that contain letters. Once you have configured a speed dial rule, you can use a shortcut (the speed dial number, #01 for example) on your phone's keypad to call the phone number. To access this screen, click Voice > Call Rule. LTE Series User’s Guide... -
Page 220: Call History
Zyxel Device received, dialed and missed calls and a call history list. You can also view detailed information on each outgoing and incoming call. 17.6.1 Call History Screen To access this screen, click Voice > Call History. LTE Series User’s Guide... -
Page 221: Call Summary Screen
The Zyxel Device logs calls to or from your SIP addresses. This screen allows you to view the summary of received, dialed and missed calls. To access this screen, click Voice > Call History > Call Summary. Figure 165 Voice > Call History > Call Summary LTE Series User’s Guide... - Page 222 This displays how many calls originated from you that day. Incoming Calls This displays how many calls you received that day. Missing Calls This displays how many incoming calls were not answered that day. Total Duration This displays how long all calls lasted that day. LTE Series User’s Guide...
-
Page 223: Log
SEVERITY Emergency: The system is unusable. Alert: Action must be taken immediately. Critical: The system condition is critical. Error: There is an error condition on the system. Warning: There is a warning condition on the system. LTE Series User’s Guide... -
Page 224: System Log
Use the Security Log screen to see the security-related logs for the categories that you select. You can filter the entries by selecting a severity level and/or category. Click System Monitor > Log > Security Log to open the following screen. LTE Series User’s Guide... - Page 225 This field displays the severity level of the log that the device is to send to this syslog server. Category This field displays the type of the log. Messages This field states the reason for the log. LTE Series User’s Guide...
-
Page 226: Traffic Status
Click System Monitor > Traffic Status to open the WAN screen. The figures in this screen show the number of bytes received and sent through the Zyxel Device’s WAN interface. The table below shows packet statistics for each WAN interface. Figure 168 System Monitor > Traffic Status > WAN LTE Series User’s Guide... -
Page 227: Lan Status
This indicates the number of received packets dropped on this interface. 19.3 LAN Status Click System Monitor > Traffic Status > LAN to open the following screen. This screen allows you to view packet statistics for each LAN or WLAN interface on the Zyxel Device. LTE Series User’s Guide... - Page 228 Data This indicates the number of received packets on this interface. Error This indicates the number of frames with errors received on this interface. Drop This indicates the number of received packets dropped on this interface. LTE Series User’s Guide...
-
Page 229: Arp Table
MAC address, swaps the sender and target pairs, and unicasts the answer directly back to the requesting machine. ARP updates the ARP table for future reference and then sends the packet to the MAC address that replied. LTE Series User’s Guide... -
Page 230: Arp Table
This is the MAC address of the device with the listed IP address. Device This is the type of interface used by the device. You can click the device type to go to its configuration screen. LTE Series User’s Guide... -
Page 231: Routing Table
The table below shows IPv4 and IPv6 routing information. The IPv4 subnet mask is ‘255.255.255.255’ for a host destination and ‘0.0.0.0’ for the default route. The gateway address is written as ‘*’(IPv4)/‘::’(IPv6) if none is set. LTE Series User’s Guide... - Page 232 This indicates the destination IPv4 address or IPv6 address and prefix of this route. Gateway This indicates the IPv4 address or IPv6 address of the gateway that helps forward this route’s traffic. Subnet Mask This indicates the destination subnet mask of the IPv4 route. LTE Series User’s Guide...
- Page 233 The metric represents the "cost of transmission." A router determines the best route for transmission by choosing a path with the lowest "cost." The smaller the number, the lower the "cost." Interface This indicates the name of the interface through which the route is forwarded. LTE Series User’s Guide...
-
Page 234: Wlan Station Status
The RSSI (Received Signal Strength Indicator) field shows the WiFi signal strength of the station’s wireless connection. The normal range is -30dBm to -79dBm. If the value drops below -80dBm, try moving the associated wireless station closer to the Zyxel Device to get better signal strength. LTE Series User’s Guide... - Page 235 4 means the Zyxel Device is receiving a very good WiFi signal. 3 means the Zyxel Device is receiving a weak WiFi signal. 2 means the Zyxel Device is receiving a very weak WiFi signal. 1 means the Zyxel Device is not receiving a WiFi signal. LTE Series User’s Guide...
-
Page 236: Voip Status
Device automatically tries to register the SIP account when you turn on the Device or when you activate it. Inactive - The SIP account is not active. You can activate it in VoIP > SIP > SIP Account. LTE Series User’s Guide... - Page 237 Incoming Call in the Call Type filed, this field will show the type SIP. FXS - As for the other cases: Outgoing Call and Internal Call, this field will show the corresponding local phone port type: FXS, the legacy analog phone port on the device. LTE Series User’s Guide...
- Page 238 This field displays the SIP number that you use to make calls on this phone port. Incoming Number This field displays the SIP number that you use to receive calls on this phone port. Hook Status This field displays whether the phone is in the on or off hook status. LTE Series User’s Guide...
-
Page 239: Cellular Wan Status
To open this screen, click System Monitor > Cellular WAN Status. Cellular information is available on this screen only when you insert a valid SIM card in the Zyxel Device. Figure 174 System Monitor > Cellular WAN Status LTE Series User’s Guide... - Page 240 This displays the International Mobile Subscriber Identity (IMSI) of the installed SIM card. An IMSI is a unique ID used to identify a mobile subscriber in a mobile network. ICCID Integrated Circuit Card Identifier (ICCID). This is the serial number of the SIM card. LTE Series User’s Guide...
- Page 241 This shows the LTE channel bandwidth from base station to LTE device. According to 3GPP (MHz) specifications, the bandwidths defined by the standard are 1.4, 3, 5, 10, 15, and 20 MHz. The wider the bandwidth the higher the throughput. LTE Series User’s Guide...
- Page 242 PLMN ID (MCC+MNC) and LAC uniquely identifies the LAI (Location Area ID) [3GPP-TS.23.003]. This parameter is for UMTS or GPRS. The value is ‘0’ (zero) if the Current Access Technology is not UMTS or GPRS. The value is ‘N/A’ if there is no network connection. LTE Series User’s Guide...
- Page 243 PMI is for transmission modes 4 (closed loop spatial multiplexing), 5 (multi-user MIMO), and 6 (closed loop spatial multiplexing using a single layer). PMI determines how cellular data are encoded for the antennas to improve downlink rate. LTE Series User’s Guide...
-
Page 244: System
Type a host name for your Zyxel Device. Enter a descriptive name of up to 16 alphanumeric characters, not including spaces, underscores, and dashes. Domain Name Type a Domain name for your host Zyxel Device. Cancel Click Cancel to abandon this screen without saving. Apply Click Apply to save your changes. LTE Series User’s Guide... -
Page 245: User Account
This displays the name of the account used to log into the Zyxel Device Web Configurator. Retry Times This displays the number of times consecutive wrong passwords can be entered for this account. 0 means there is no limit. LTE Series User’s Guide... -
Page 246: User Account Add/Edit
Type your new system password (up to 256 characters). Note that as you type a password, the screen displays a (*) for each character you type. After you change the password, use the new password to access the Zyxel Device. LTE Series User’s Guide... - Page 247 Log, Traffic Status, ARP Table, Routing Table, Cellular WAN Status, User Account, Remote Management, Time, Email Notification, Log Setting, Firmware Upgrade, Backup/Restore, Reboot, Diagnostic. Cancel Click Cancel to restore your previously saved settings. Click OK to save your changes. LTE Series User’s Guide...
-
Page 248: Remote Management
Network Setting > Broadband > Cellular IP Passthrough screen. Use this screen to configure the interfaces through which services can access the Zyxel Device. Click Maintenance > Remote Management to open the following screen. Figure 179 Maintenance > Remote Management LTE Series User’s Guide... -
Page 249: Mgmt Services For Ip Passthrough
Zyxel Device without going through NAT. Make sure to enable IP Passthrough in Network Setting > Broadband > Cellular IP Passthrough. See Section 6.9 on page 97 for details. Click Maintenance > Remote Management > MGMT Services for IP Passthrough to open the following screen. LTE Series User’s Guide... -
Page 250: Trust Domain
If specific services from the trusted hosts are allowed access but the trust domain list is empty, all public IP addresses can access the Zyxel Device from the WAN using the specified services. Figure 181 Maintenance > Remote Management > Trust Domain LTE Series User’s Guide... -
Page 251: Add Trust Domain
LAN computer behind the Zyxel Device without going through NAT. Make sure to enable IP Passthrough in Network Setting > Broadband > Cellular IP Passthrough. See Section 6.9 on page 97 details. Click Maintenance > Remote Management > Trust Domain for IP Passthrough to open the following screen. LTE Series User’s Guide... -
Page 252: Add Trust Domain
Enter a public IPv4/IPv6 IP address which is allowed to access the service on the Zyxel Device from the WAN. Cancel Click Cancel to restore your previously saved settings. Click OK to save your changes back to the Zyxel Device. LTE Series User’s Guide... -
Page 253: Client
You can use a management server to remotely set up the Zyxel Device, modify settings, perform firmware upgrades as well as monitor and diagnose the Zyxel Device. Click Maintenance > TR-069 Client to open the following screen. Figure 185 Maintenance > TR-069 Client LTE Series User’s Guide... - Page 254 You can choose a local certificate used by TR-069 client. The local certificate should be used by TR-069 imported in the Security > Certificates > Local Certificates screen. client Apply Click Apply to save your changes. Cancel Click Cancel to restore the screen’s last saved settings. LTE Series User’s Guide...
-
Page 255: Time Settings
Zyxel Device is physically located, and configure Daylight Savings settings if needed. To change your Zyxel Device’s time and date, click Maintenance > Time. The screen appears as shown. LTE Series User’s Guide... - Page 256 This displays the date of your Zyxel Device. Each time you reload this screen, the Zyxel Device synchronizes the date with the time server. Time and Date Setup Time Protocol This displays the time protocol used by your Zyxel Device. LTE Series User’s Guide...
- Page 257 Germany for instance, you would select 2 in the Hour field because Germany's time zone is one hour ahead of GMT or UTC (GMT+1). Cancel Click Cancel to exit this screen without saving. Apply Click Apply to save your changes. LTE Series User’s Guide...
-
Page 258: E-Mail Notification
This displays the server name or the IP address of the mail server. Address User name This displays the user name of the sender’s mail account. Port This field displays the port number of the mail server. Security This field displays the protocol used for encryption. LTE Series User’s Guide... -
Page 259: E-Mail Notification Edit
Enter the e-mail address that you want to be in the from/sender line of the e-mail notification Address that the Zyxel Device sends. If you activate SSL/TLS authentication, the e-mail address must be able to be authenticated by the mail server as well. LTE Series User’s Guide... - Page 260 Select STARTTLS to upgrade a plain text connection to a secure connection using SSL/TLS. Cancel Click this button to begin configuring this screen afresh. Click this button to save your changes and return to the previous screen. LTE Series User’s Guide...
-
Page 261: Log Setting
Local File to store logs on the Zyxel Device. Select Local File and Remote to store logs on both the Zyxel Device and the syslog server. To change your Zyxel Device’s log settings, click Maintenance > Log Setting. The screen appears as shown. LTE Series User’s Guide... - Page 262 Select Local File and Remote to have the Zyxel Device save the log file on the Zyxel Device itself and send it to an external syslog server. Note: A warning appears upon selecting Remote or Local File and Remote. Just click OK to continue. LTE Series User’s Guide...
- Page 263 Select the categories of System Logs that you want to record. Security Log Select the categories of Security Logs that you want to record. Apply Click Apply to save your changes. Cancel Click Cancel to restore your previously saved settings. LTE Series User’s Guide...
-
Page 264: Firmware Upgrade
(Hypertext Transfer Protocol) and may take up to three minutes. After a successful upload, the Zyxel Device will reboot. Click Maintenance > Firmware Upgrade to open the following screen. Do NOT turn off the Zyxel Device while firmware upload is in progress! Figure 190 Maintenance > Firmware Upgrade LTE Series User’s Guide... - Page 265 After two minutes, log in again and check your new firmware version in the Status screen. If the upload was not successful, an error screen will appear. Click OK to go back to the Firmware Upgrade screen. LTE Series User’s Guide...
-
Page 266: Backup/Restore
33.2 Backup/Restore Click Maintenance > Backup/Restore. Information related to factory defaults, backup configuration, and restoring configuration appears in this screen, as shown next. Figure 192 Maintenance > Backup/Restore LTE Series User’s Guide... -
Page 267: Reboot
System Reboot allows you to reboot the Zyxel Device remotely without turning the power off. You may need to do this if the Zyxel Device hangs, for example. This does not affect the Zyxel Device's configuration. Click Maintenance > Reboot. Click Reboot to have the Zyxel Device reboot. LTE Series User’s Guide... - Page 268 Chapter 33 Backup/Restore Figure 194 Maintenance > Reboot LTE Series User’s Guide...
-
Page 269: Diagnostic
Figure 195 Maintenance > Diagnostic > Ping/Trace Route/Nslookup The following table describes the fields in this screen. Table 117 Maintenance > Diagnostic LABEL DESCRIPTION Ping/ The result of tests is shown here in the info area. TraceRoute Test TCP/IP LTE Series User’s Guide... - Page 270 Click this button to perform the IPv6 trace route function. This determines the path a packet takes to the specified host. Nslookup Click this button to perform a DNS lookup on the IP address or host name. LTE Series User’s Guide...
-
Page 271: Troubleshooting
Make sure you’ve pressed the POWER button to turn on the Zyxel Device. If the problem continues, contact the vendor. For LTE7240-M403/LTE7461-M602/LTE7480-S905 Make sure you are using the PoE injector and cable (Power over Ethernet, PoE) included with the Zyxel Device. LTE Series User’s Guide... -
Page 272: Zyxel Device Access And Login
• If you changed the IP address and have forgotten it, see the troubleshooting suggestions for forgot the IP address for the Zyxel Device. Check the hardware connections, see the Quick Start Guide. Make sure your Internet browser does not block pop-up windows and has JavaScript and Java enabled. LTE Series User’s Guide... -
Page 273: Internet Access
Section 6.6 on page 92), the account has expired, it became loose (remove and reinsert it - refer to the Quick Start Guide) or it's missing (stolen). Section 35.7 on page 276 for possible SIM card problems. LTE Series User’s Guide... - Page 274 (refer to I cannot see or access the Login screen in the Web Configurator in this chapter). Note: Since your Zyxel Device is an outdoor-type, inclement weather like rain and hot weather may affect LTE signals. LTE Series User’s Guide...
-
Page 275: Usb Device Connection
The Local Area Connection icon for UPnP disappears in the screen. Restart your computer. I cannot open special applications such as white board, file transfer and video when I use the MSN Messenger. Wait more than three minutes. Restart the applications. LTE Series User’s Guide... -
Page 276: Sim Card
This is because the Zyxel Device can ‘lock’ onto the previous cellular site even when the new cellular site is at a much better signal level and quality. LTE Series User’s Guide... - Page 277 It is possible that the current serving cellular site has become over utilized or is out-of-service. As the network design and topology changes, so will the experience change, either for the better or for the worse. LTE Series User’s Guide...
-
Page 278: Part Iii: Appendices
Appendices Appendices contain general information. Some information may not apply to your Zyxel Device. -
Page 279: Appendix A Customer Support
• Brief description of the problem and the steps you took to solve it. Corporate Headquarters (Worldwide) Taiwan • Zyxel Communications Corporation • https://www.zyxel.com Asia China • Zyxel Communications (Shanghai) Corp. Zyxel Communications (Beijing) Corp. Zyxel Communications (Tianjin) Corp. • https://www.zyxel.com/cn/zh/ India • Zyxel Technology India Pvt Ltd • https://www.zyxel.com/in/en/ Kazakhstan •... - Page 280 • Zyxel Singapore Pte Ltd. • http://www.zyxel.com.sg Taiwan • Zyxel Communications Corporation • https://www.zyxel.com/tw/zh/ Thailand • Zyxel Thailand Co., Ltd • https://www.zyxel.com/th/th/ Vietnam • Zyxel Communications Corporation-Vietnam Office • https://www.zyxel.com/vn/vi Europe Belarus • Zyxel BY • https://www.zyxel.by Belgium • Zyxel Communications B.V. • https://www.zyxel.com/be/nl/...
- Page 281 Appendix A Customer Support • https://www.zyxel.com/be/fr/ Bulgaria • Zyxel България • https://www.zyxel.com/bg/bg/ Czech Republic • Zyxel Communications Czech s.r.o • https://www.zyxel.com/cz/cs/ Denmark • Zyxel Communications A/S • https://www.zyxel.com/dk/da/ Estonia • Zyxel Estonia • https://www.zyxel.com/ee/et/ Finland • Zyxel Communications • https://www.zyxel.com/fi/fi/ France •...
- Page 282 • Zyxel Communications Poland • https://www.zyxel.com/pl/pl/ Romania • Zyxel Romania • https://www.zyxel.com/ro/ro Russia • Zyxel Russia • https://www.zyxel.com/ru/ru/ Slovakia • Zyxel Communications Czech s.r.o. organizacna zlozka • https://www.zyxel.com/sk/sk/ Spain • Zyxel Communications ES Ltd • https://www.zyxel.com/es/es/ Sweden • Zyxel Communications • https://www.zyxel.com/se/sv/ Switzerland •...
- Page 283 Appendix A Customer Support Turkey • Zyxel Turkey A.S. • https://www.zyxel.com/tr/tr/ • Zyxel Communications UK Ltd. • https://www.zyxel.com/uk/en/ Ukraine • Zyxel Ukraine • http://www.ua.zyxel.com South America Argentina • Zyxel Communications Corporation • https://www.zyxel.com/co/es/ Brazil • Zyxel Communications Brasil Ltda. • https://www.zyxel.com/br/pt/ Colombia •...
- Page 284 Appendix A Customer Support Middle East • Zyxel Communications Corporation • https://www.zyxel.com/me/en/ North America • Zyxel Communications, Inc. - North America Headquarters • https://www.zyxel.com/us/en/ Oceania Australia • Zyxel Communications Corporation • https://www.zyxel.com/au/en/ Africa South Africa • Nology (Pty) Ltd. • https://www.zyxel.com/za/en/...
-
Page 285: Appendix B Ipv6
54 bits 64 bits Global Address A global address uniquely identifies a device on the Internet. It is similar to a “public IP address” in IPv4. A global unicast address starts with a 2 or 3. LTE Series User’s Guide... - Page 286 The following table describes the multicast addresses which are reserved and cannot be assigned to a multicast group. Table 120 Reserved Multicast Address MULTICAST ADDRESS FF00:0:0:0:0:0:0:0 FF01:0:0:0:0:0:0:0 FF02:0:0:0:0:0:0:0 FF03:0:0:0:0:0:0:0 FF04:0:0:0:0:0:0:0 FF05:0:0:0:0:0:0:0 FF06:0:0:0:0:0:0:0 FF07:0:0:0:0:0:0:0 FF08:0:0:0:0:0:0:0 FF09:0:0:0:0:0:0:0 FF0A:0:0:0:0:0:0:0 FF0B:0:0:0:0:0:0:0 FF0C:0:0:0:0:0:0:0 FF0D:0:0:0:0:0:0:0 LTE Series User’s Guide...
- Page 287 IA_NA before the lifetimes expire. After T1, the client sends the server (S1) (from which the addresses in the IA_NA were obtained) a Renew message. If the time T2 is reached and the server LTE Series User’s Guide...
- Page 288 A neighbor being “reachable” means it responds to a neighbor solicitation message (from the host) with a neighbor advertisement message. • Neighbor advertisement: A response from a node to announce its link-layer address. LTE Series User’s Guide...
- Page 289 Done message to the router or switch. The router or switch then sends a group-specific query to the port on which the Done message is received to determine if other devices connected to this port should remain in the group. LTE Series User’s Guide...
- Page 290 Click Close to exit the Local Area Connection Status screen. Select Start > All Programs > Accessories > Command Prompt. Use the ipconfig command to check your dynamic IPv6 address. This example shows a global address (2001:b021:2d::1000) obtained from a DHCP server. LTE Series User’s Guide...
- Page 291 IPv4 Address... : 172.16.100.61 Subnet Mask ... : 255.255.255.0 Default Gateway ..: fe80::213:49ff:feaa:7125%11 172.16.100.254 LTE Series User’s Guide...
-
Page 292: Appendix C Legal Information
The contents of this publication may not be reproduced in any part or as a whole, transcribed, stored in a retrieval system, translated into any language, or transmitted in any form or by any means, electronic, mechanical, magnetic, optical, chemical, photocopying, manual, or otherwise, without the prior written permission of Zyxel Communications Corporation. Published by Zyxel Communications Corporation. All rights reserved. - Page 293 Käesolevaga kinnitab Zyxel seadme seadmed vastavust direktiivi 2014/53/EL põhinõuetele ja nimetatud direktiivist (Estonian) tulenevatele teistele asjakohastele sätetele. Ελληνικά ΜΕ ΤΗΝ ΠΑΡΟΥΣΑ Zyxel ∆ΗΛΩΝΕΙ ΟΤΙ εξοπλισμός ΣΥΜΜΟΡΦΩΝΕΤΑΙ ΠΡΟΣ ΤΙΣ ΟΥΣΙΩ∆ΕΙΣ ΑΠΑΙΤΗΣΕΙΣ ΚΑΙ ΤΙΣ ΛΟΙΠΕΣ ΣΧΕΤΙΚΕΣ (Greek) ∆ΙΑΤΑΞΕΙΣ ΤΗΣ Ο∆ΗΓΙΑΣ 2014/53/EE. LTE Series User’s Guide...
- Page 294 The regulatory limits for maximum output power are specified in EIRP. The EIRP level (in dBm) of a device can be calculated by adding the gain of the antenna used (specified in dBi) to the output power available at the connector (specified in dBm). LTE Series User’s Guide...
- Page 295 This transmitter must be at least 20 cm from the user and must not be co-located or operating in conjunction with any other antenna or transmitter. CANADA (LTE7461-M602) The following information applies if you use the product within Canada area. LTE Series User’s Guide...
- Page 296 Lorsqu'il y a lieu, les types d'antennes (s'il y en a plusieurs), les numéros de modèle de l'antenne et les pires angles d'inclinaison nécessaires pour rester conforme à l'exigence de la p.i.r.e. applicable au masque d'élévation, énoncée à la section 6.2.2.3 du CNR-247, doivent être clairement indiqués. LTE Series User’s Guide...
- Page 297 Quando questo prodotto raggiunge la fine della vita di servizio portarlo a una stazione di riciclaggio. Al momento dello smaltimento, la raccolta separata del vostro prodotto e/o della sua batteria aiuta a risparmiare risorse naturali e a proteggere l'ambiente e la salute umana. LTE Series User’s Guide...
- Page 298 Various symbols are used in this product to ensure correct usage, to prevent danger to the user and others, and to prevent property damage. The meaning of these symbols are described below. It is important that you read these descriptions thoroughly and fully understand the contents. LTE Series User’s Guide...
- Page 299 You can download the latest firmware at www.zyxel.com. If you cannot find it there, contact your vendor or Zyxel Technical Support at support@zyxel.com.tw. To obtain the source code covered under those Licenses, please contact your vendor or Zyxel Technical Support at support@zyxel.com. LTE Series User’s Guide...
-
Page 300: Index
CAs configuration verifying fingerprints backup configuration Certification Authority, see CA Backup/Restore screen certifications Band Configuration Screen viewing Basic Service Set, see BSS channel, wireless LAN blinking LEDs client list Broadband configuration LTE Series User’s Guide... - Page 301 Firmware Upgrade screen domain name system, see DNS firmware upload firmware version thresholds check DoS protection blocking fragmentation threshold 114, 120 enable dynamic DNS unusable wildcard Dynamic Host Configuration Protocol, see DHCP DYNDNS wildcard General wireless LAN screen LTE Series User’s Guide...
- Page 302 Mac filter Neighbor Discovery Protocol managing the device ping good habits prefix using FTP. See FTP. prefix length MGMT Services screen 248, 249 unspecified address MSN Messenger IPv6 firewall problem Multi_WAN Remote Management TR-069 traffic LTE Series User’s Guide...
- Page 303 Routing Table screen 232, 234 unusable RPPCs Ping test RTS threshold 114, 120 Ping/TraceRoute/Nslookup screen PLMN Configuration Screen PoE injector 18, 271 port forwarding rule add/edit security Port Forwarding screen network Port Triggering wireless LAN add new rule LTE Series User’s Guide...
- Page 304 UPnP screen firmware UPnP-enabled Network Device version auto-discover 141, 146 passwords status 74, 81 wireless LAN time status Wide Area Network, see WAN warranty note Web Configurator Telnet easy access unusable web configurator LTE Series User’s Guide...
- Page 305 108, 121 preamble 115, 120 RADIUS server RTS/CTS threshold 114, 120 security SSID status 123, 126 example limitations push button Wireless tutorial wizard setup Internet WMM screen 123, 126 example limitations example push button WPS screen LTE Series User’s Guide...