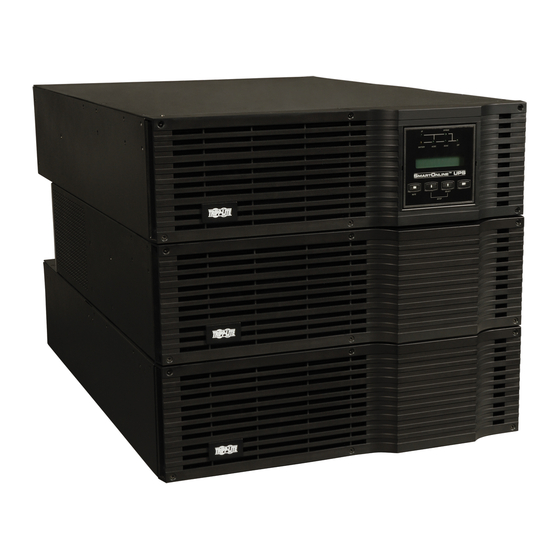
Tripp Lite BP240V10RT3U Owner's Manual
Tripp lite smartonline owner's manual
Hide thumbs
Also See for BP240V10RT3U:
- Owner's manual (96 pages) ,
- Specifications (3 pages) ,
- Owner's manual (20 pages)
Advertisement
Table of Contents
- 1 Important Safety Warnings
- 2 Single Unit Installation
- 3 Back-To-Back Installation
- 4 Ups Front Panel Controls
- 5 Ups Rear Panel
- 6 Operation
- 7 Startup Self-Test
- 8 Failed Self-Test
- 9 Normal Operation
- 10 On Battery Alarm
- 11 Year Limited Warranty
- 12 Ultimate Lifetime Insurance Policy
- 13 Specifications
- Download this manual
See also:
Owner's Manual
Important Safety Warnings
Mounting
Features
Connection
Operation
Service/Warranty and Insurance
Specifications
Español/Français/Deutsch
Owner's Manual
SmartOnline
Tower/Rackmount Power Protection
SU6000RT3UPM • SU10KRT3UPM
Tower/Rackmount UPS Systems
SU6000XFMR • SU10KXFMR
Tower/Rackmount Isolation Transformers
BP240V7RT3U • BP240V10RT3U
Tower/Rackmount Battery Packs
1111 W. 35th Street • Chicago, IL 60609 USA
Customer Support: (773) 869-1234 • Application Services: (773) 869-1236
Copyright ©2002 Tripp Lite. All rights reserved.
™
www.tripplite.com
2
3
6
9
13
16
17
18/35/52
Advertisement
Table of Contents

Related Manuals for Tripp Lite BP240V10RT3U


Summary of Contents for Tripp Lite BP240V10RT3U
- Page 1 SU6000XFMR • SU10KXFMR Tower/Rackmount Isolation Transformers BP240V7RT3U • BP240V10RT3U Tower/Rackmount Battery Packs 1111 W. 35th Street • Chicago, IL 60609 USA Customer Support: (773) 869-1234 • Application Services: (773) 869-1236 www.tripplite.com Copyright ©2002 Tripp Lite. All rights reserved. ™ 18/35/52...
-
Page 2: Important Safety Warnings
Equipment Connection Warnings • Do not use Tripp Lite UPS Systems in life support applications in which a malfunction or failure of a Tripp Lite UPS System could cause failure or significantly alter the performance of a life support device. -
Page 3: Single Unit Installation
Mounting Your equipment may be rackmounted in 4-post rack enclosures using the included rack shelves and the following suggested mounting procedures, which should be used instead of the procedures described in your Owner's Manual (if any). These procedures are for common enclosure types and may not be appropriate for all rack enclosures. -
Page 4: Back-To-Back Installation
Mounting continued Back-to-Back Installation Connect the shelved sections from two UPSRMRII kits (A) to the unshelved sections (B) using the included screws and nuts (C). Note: Two unshelved sections will be left over. Leave the screws slightly loose so that the shelves can be adjusted in the next step. - Page 5 Mounting continued 2-Post (Telecom) Installation Mount the shelved sections (A) of your UPSRMRII kit on the back side of your rack. Mount them in the lowest available space of your rack with with the screws, nuts and washers provided (B). Note that the support ledges should face inward. Attach mounting ears (C) to the front mounting holes of your equipment (D) using the screws provided (E).
-
Page 6: Ups Front Panel Controls
Features Familiarize yourself with the location and function of the front and rear panel features before installing and operating your UPS. UPS Front Panel Controls The UPS Front Panel Controls can be rotated in its mounting to match your tower or rackmount installation. To rotate the controls, insert a flathead screwdriver into the Access Slots (12) and gently lever the controls out. - Page 7 Features continued UPS Rear Panel ACC. RS-232 DRY CONTACT Isolation Transformer Rear Panel SU6000XFMRRT3U Series: AGSM6000SDRT3U Output: 100/120/200/208/220/230/240V~ 50/60Hz, 6000VA, 4200W Input: 200/208/220/230/240V~ 50/60Hz, 30A Battery Pack Rear Panel AC OUTPUT BREAKER AC OUTPUT (Output) OUTPUT BREAKER AC TO UPS TRANSFORMER BREAKER PROTECT...
-
Page 8: Ups Rear Panel
Unscrew and remove the cover plate above the block for access. 3. External Battery Connector: Use this to connect one or more Tripp Lite Battery Packs to the UPS. Remove the cover plate for access. The UPS will not operate without a connection to a charged battery pack. Refer to the Battery Pack owner’s manual for connection instructions and safety warnings. - Page 9 Connection Notes on Hardwiring Wiring must be done by a qualified electrician. The UPS may be installed on its own or connected to an isolation transformer. Both applications require the UPS to be connected to a battery pack. When making wiring connections, observe the cable connection regulations appropriate to your area [e.g. National Electrical Code (NEC) in the U.S.] at all times.
- Page 10 Connection continued Installation—With Isolation Transformer Hardwire your isolation transformer’s UPS connector to your UPS’s input and output. Remove the tops of the boxes covering the UPS’s and transformer’s input and output terminals. Pass the free end of the isolation transformer’s UPS connector through the UPS’s cover box’s knockout, then connect it to the UPS’s input and output terminals according to the labels on the wires and the terminals.
- Page 11 DB9 serial port. See the Dry Contact Interface Table and Diagram to decipher the signals from this port, or install Tripp Lite’s PowerAlert software onto the computer from the CD provided, or download the most recent version of PowerAlert from www.tripplite.com.
- Page 12 Connection continued Turn input to the UPS ON If the UPS is connected to a transformer, turn the transformer’s UPS and Load Breakers ON. Turn the UPS’s Input Circuit Breaker ON. Press the UPS’s ON button until you hear a beep to begin inverter operation. If your AC input is not providing power normally, you may “cold start”...
-
Page 13: Operation
Failed Self-Test If a problem is detected during the self-test, the LCD will display a error message. If your UPS displays any of the following messages in its LCD, call Tripp Lite Technical Support at (773) 869-1234 for service. STARTED WITH... -
Page 14: Normal Operation
Operation continued Normal Operation During normal operation, the first line of your LCD Display shows which operating mode your UPS is in: Online, Economy, On Battery, or Bypass. Online mode: The UPS provides AC power while utility power is available and switches to On Battery mode instantly (zero transfer time) if AC power is interrupted. - Page 15 Operation continued Bypass Messages While in Bypass Mode, the UPS monitors its input voltage and passes that input power along to connected equipment. The UPS will not provide battery backup in Bypass Mode. If the output voltage deviates from an acceptable range (between 15% higher and 20% lower than nominal), the UPS displays the condition on its LCD and stops supplying output power to its load.
-
Page 16: Year Limited Warranty
10 days of purchase. The warranties of all TRIPP LITE surge suppressors are null and void if they have been connected to the output of any UPS system. The warranties of all TRIPP LITE UPS Systems are null and void if a surge suppressor has been connected to its output receptacles. -
Page 17: Specifications
Specifications Specifications are for UPS, Isolation Transformer, and one battery pack. Model Input UPS Input Voltage Transformer Input Voltage Input Frequency Input Current Inrush Current Power Factor (Full Load) Efficiency (Full Load/On-Line) UPS Circuit Breaker Transformer Circuit Breaker Output Watts (Power Factor: 0.7) Waveform (On-Line) Waveform (On-Battery) Output Voltage (RMS)