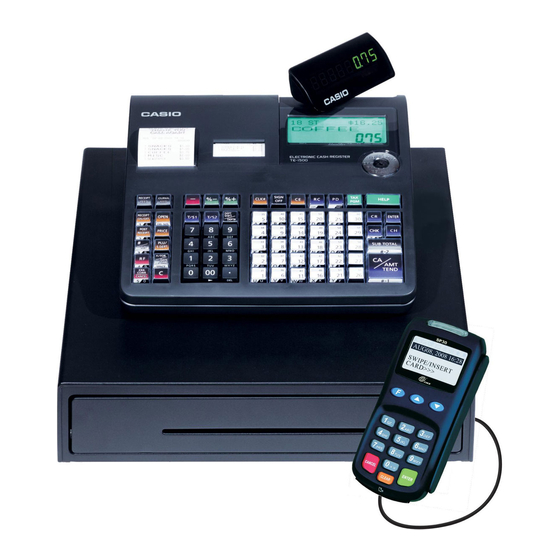
Casio TE-1500 Setup Manual
Credit/debit/gift/eft card interface
Hide thumbs
Also See for TE-1500:
- User manual (96 pages) ,
- Service manual (74 pages) ,
- User manual (6 pages)
Table of Contents
Advertisement
Advertisement
Table of Contents

Related Manuals for Casio TE-1500


Summary of Contents for Casio TE-1500
- Page 1 Setup Guide Casio & PAX Credit/Debit/Gift/EFT Card Interface...
-
Page 2: Table Of Contents
Content Page # TE-1500/TK-1550 Software Upgrade 3 - 6 Equipment Setup 7- 8 Programming 8 - 14 Network Commands TE-2200/TE-2400 Software Upgrade 16 - 18 Equipment Setup Programming 20 -25 Network Commands QT-6100/QT-6600 PAX Setup 27 - 31 Equipment Setup QT-6100 &... - Page 3 In order to interface the PAX SP-30 terminal to the TE-1500/TK-1550 a new IPL, SE2000_XXXX_IPL.RAC IPL file (XXXX=IPL version), must be loaded. There are two (2) ways to upgrade the IPL in the TE-1500/TK-1550 via the RAC 12B card or the PC using the RAC TOOL software.
- Page 4 Reasons for loading an IPL would be: 1. Upgrading the software version in the machine 2. Enhancement was made in the software A couple of points to be aware of when using the RAC-12 card and loading an IPL: 1. Loading a new IPL into a machine will erase all programming 2.
- Page 5 6) When inserting the RAC Card the arrow on the card should be facing up as shown below: Into RAC Card slot in machine 7) Enter 44449999 and depress SUBTOTAL 8) Next enter 30 and depress SUBTOTAL 9) At this time the machine will proceed to load the IPL off the RAC Card and the following will appear on the display: APLI IPL Erasing...
- Page 6 Once a machine has the desired IPL there is the ability to load the IPL from a machine to a RAC-12B card using following the steps: Load IPL from Machine to RAC-12 Card 1) Turn Mode key to “OFF” position and hold down the Journal Feed key and turn the Mode Lock key to the “PGM”...
- Page 7 (component & equipment failure). 1) On the right hand side of your Casio cash register where power cord comes out there is a cover. Between the cash drawer and the cabinet there is a small slot, put your fingers in this slot to pull the cover off.
-
Page 8: Programming
4) The second connector on the SP-30’s attached cable is a RJ-45 connector used to connect the SP-30 to the Internet connection. Power to the SP-30 is supplied by the Casio cash register, there is no external power supply for the PAX device. - Page 9 Program Communication Port The first item to program is the communication port that the PAX device is connected to (COM #1). By default, when the new IPL is loaded into the machine COM #1 is configured to operate with the PAX SP-30. Below is the programming key sequence to program the COM port.
- Page 10 1) Turn the mode lock key on the cash register to the PGM position 2) Enter “4” from the numeric keyboard and hit the Subtotal key TE-1500 Keyboard Function Key Programming Valid Function Keys and Function Codes for Credit/Debit Operations: Any finalize key maybe used as a tendering key (Charge, Check &...
- Page 11 Key Operation to Assign Function Keys to the Keyboard NOTE: The three (3) online processing tender keys above are the CREDIT, CHECK and CHARGE keys Function Key Status Settings The tender keys must be defined whether they are credit or debit transaction keys.
- Page 12 General Function Programming There are several programming options available for online payment applications. This section will list each of those options. 1. Debit Cash Back 2. Credit Card Manual Entry Option 3. Hospitality Options There is a program option to allow over-tendering on a debit card transaction for the purpose of getting cash back.
- Page 13 g: D1 = (in this bit the sum of each feature is entered in D1) i. 1 = Tip format (a tip, total with tip and signature line printing ii. 2 = Demo Mode (testing and demonstrations purposes this bit set the PAX SP-30 in Demo Mode) iii.
- Page 14 RAC-12B card cannot be used. An existing program would have to be uploaded to the Casio CV-10 or CV-11 programming software and then files individually sent to the machine, except the Special Character file, after the IPL upgrade.
-
Page 15: Network Commands
Network Commands The network commands are key sequences designed to communicate with the PAX device for various functions. Below is the list of commands and key sequences: All commands can be executed in either X or Z mode lock position. Executing in X or Z position turn the Mode Lock key to that position. -
Page 16: Software Upgrade
The IPL version number for the PAX settings is 1.31bPAX. Mode Lock Positions The Casio cash register has a seven (7) position mode lock switch located below the operator display as shown below: The grey program key is required to program the steps mentioned below in the PGM position. - Page 17 Loading a new IPL into a machine will erase any existing program in the TE- 2200/2400. Suggestion is to backup the customer program first before loading the new IPL. A Compact Flash card can have both an IPL and multiple customer programs.
- Page 18 4) When inserting the Compact Flash Card the label should be facing up 5) Enter 44449999 and depress SUBTOTAL 6) Next enter 20 and depress SUBTOTAL 7) At this time the machine will proceed to load the IPL off the CF Card with numbers incrementing on the display indicating the new IPL is being loaded.
-
Page 19: Equipment Setup
4) The second connector on the SP-30’s attached cable is a RJ-45 connector used to connect the SP-30 to the Internet connection. Power to the SP-30 is supplied by the Casio COM ports, there is no external power supply for the PAX device. -
Page 20: Programming
TE-2200 & TE-2400 Programming The following pages will contain the Electronic Payment Processing setup parameters for the Casio ECR’s. By default this IPL will have COM 2 programmed to look for the PAX device. Program Communication Port The first item to program is the communication port that the PAX device is connected to (COM #1 or COM #2). - Page 21 NOTE: Upon the Subtotal key depression the cash register will go out the COM port designated above and look for the credit card device. The cash register will display “INITIALIZING PAX”. If the cash register connects with the credit card device then “PAX Initialized”...
- Page 22 Function Key Programming Valid Function Keys and Function Codes for Credit/Debit Operations: Any finalize key maybe used as a tendering (Charge, Check & Credit) Function Name Function Code Function Description Gift Card Tender Key Debit/EBT Tender Key Credit Tender Key Manual Account Entry 105 Manual entry of CC number Add Gift Card...
- Page 23 Example - To program the standard credit function key to be a credit card electronic payment key: PGM Mode Enter 3 and depress Subtotal Enter 10000 and depress the CREDIT function key Depress Subtotal to end the process Note: After performing the above process in REG mode if a transaction is entered and the CREDIT key is depressed and the cash drawer opens without a SWIPE CARD message on the operator display then it means the key was not...
- Page 24 The sequence to program these values are: 1. Turn the mode lock key on the cash register to the PGM position 2. Enter “3” from the numeric keyboard and hit the Subtotal key 3. Enter 2022 and depress the Subtotal key (this setting or address has a 8- digit entry D8 ~ D1 a.
- Page 25 Or an existing program would have to be uploaded to the Casio CV-10 or CV-11 programming software and then files individually sent to the machine, except the Special Character file, after the IPL upgrade.
-
Page 26: Network Commands
Network Commands The network commands are key sequences designed to communicate with the PAX device for various functions. Below is the list of commands and key sequences: All commands can be executed in either X or Z mode lock position. Executing in X or Z position turn the Mode Lock key to that position. -
Page 27: Pax Setup
The most efficient way to load a new IPL (Initial Program Load) into the QT series machines is using the Compact Flash card option. The QT-6100 can use up to a 2GB and the QT-6600 up to a 4GB sized card. Casio strongly suggests using either a SanDisk or Kingston brand cards. - Page 28 CF Card Operations 1. If the QT terminal being upgraded to the new IPL has an established customer program the first thing to be done is backup the program 2. Press the CF Card button from the above screen and follow the screen sequence below:...
- Page 29 Loading the IPL from CF Card to QT On the QT-6100 to the right of the CF Card slot there is a round cut out with a recessed RED reset button. On the QT-6600 this RED reset button is above the CF Card slot Turn the power OFF (the power switch is located on the left side of the terminal behind the display) Make sure the CF Card with the IPL file is in the card slot...
- Page 30 9. Enter the machine number of the terminal and hit the YES key 10. Arrow down to the YES prompt at the bottom of the screen and hit the YES key 11) Make sure on the Check System that only MC #01 is the only terminal with “MASTER”...
- Page 31 Load Customer Program from Card to Machine Before loading the original customer program a particular file (Special Characters) needs to be blocked from loading due changes made in that file that pertain to the PAX interface. Those changes and explanation will be discussed later in the document.
-
Page 32: Equipment Setup
4. Depress the CF Card button 5. Select Data Restore and the list of customer programs on the card will appear, highlight the desired program and hit the YES key Connecting Your Equipment NOTE: Before connecting anything to the cash register unplug the cash register’s power source. -
Page 33: Qt-6100 & Qt-6600 Programming
Programming The following pages will contain the Electronic Payment Processing setup parameters for the QT-6100 and QT-6600. The COM port must be configured in order for the ECR to communicate with the PAX device and process Credit/Debit/Gift/EBT card transactions. QT-6100 & QT-6600 Memory Allocation One file in PGM 5, File 805, needs to be allocated to at least 200. - Page 34 Program Communication Port The first item to program is the communication port that the PAX device is connected (COM #2 or #3). Below is the programming sequence for the COM port the PAX is connected. pe a quote from the document or the summary of an interesting point.
- Page 35 NOTE: Upon selecting Flag Clear the QT will go out the COM port designated above and look for the PAX device. The QT will display “INITIALIZING Inline Credit ”. The PAX device display will also display “Initializing”. If an error occurs in the initialization process make sure the PAX device is in the READY state or check the I/O Parameter programming.
- Page 36 Function Key Function Code Function Description Charge Tender Key Check Tender Key Credit Tender Key #/Expiration Manual entry of CC number Charge Tip Adding a tip amount to a finalized CC Add Gift Card Add a balance to existing Gift card Issue Gift Card Issue a new Gift Card NOTE: You can program as many tender keys as you need on the keyboard to...
- Page 37 Function Key Status Settings The tender keys must be defined whether they are credit or debit transaction keys. Description Program Setting Credit Debit Gift Card Discover Check EBT Food Stamp EBT Cash Issue Gift Card D1 = 1 General Function Programming There are several programming options available for the PAX interface.
- Page 38 1. Depressing the Mode key and then the PGM 3 button on the Mode Screen 2. Select Machine Features/General Features/Communications 3. Depressing the PAGE DOWN key twice will display new features related to the PAX interface: PAX Cash Back Amount Lines 1 ~ 4 – There are four (4) lines to input the listing digit amount for cash back on debit card transaction.
- Page 39 Special Character File There is one important entry required in the Special Character programming and that is the PAX software version number. One item to be aware of is the Special Character file on this new IPL has been expanded on both the QT-6100 and QT- 6600.
-
Page 40: Network Commands
Network Commands The network commands are key sequences designed to communicate with the PAX device for various functions. Below is the list of commands and key sequences: All commands are executed in Manager Mode/Credit Commands (option #14) 1. Initialize PAX Device – This is another method of initializing the communication between the PAX and the QT rather than doing a Flag Clear.