Casio TE-1500 User Manual
Hide thumbs
Also See for TE-1500:
- Setup manual (40 pages) ,
- User manual (6 pages) ,
- Service manual (74 pages)
Table of Contents
Advertisement
Advertisement
Chapters
Table of Contents

Related Manuals for Casio TE-1500


Summary of Contents for Casio TE-1500
- Page 1 ELECTRONIC CASH REGISTER TE-1500 USER'S MANUAL...
- Page 2 Use a soft, dry cloth to clean the exterior of the cash register. Never use benzene, thinner, or any other volatile agent. Never try to open the cash register or attempt your own repairs. Take the cash register to your authorized CASIO dealer for repairs.
- Page 3 Operation of a CASIO cash register is simple enough to be mastered without special training. Everything you need to know is included in this manual, so keep it on hand for reference. Consult your CASIO dealer if you have any questions about points not specifically covered in this manual.
- Page 4 AC plug from the power outlet. Continued use creates the danger of shorting, fire and electric shock. • Attempting to repair the register yourself is extremely dangerous. Contact CASIO service representative. Never try to take the register apart or modify it in any way. High-voltage components inside the register create the danger of fire and electric shock.
- Page 5 Continued use of a damaged power cord can cause deterioration of the insulation, exposure of internal wiring, and shorting, which creates the danger of electric shock and fire. • Contact CASIO service representative whenever the power cord or plug requires repair or maintenance. Caution! Do not place the register on an unstable or uneven surface.
- Page 6 Introduction & Contents Introduction & Contents ..................2 Getting Started ....................10 1. Load the memory protection batteris and Paper rolls ..........10 2. Install receipt / journal paper..................11 3. Plug the cash register into a wall outlet..............13 4.
- Page 7 Preparing and using discounts .................... 36 Programming discounts ....................36 Registering discounts ..................... 36 Discount for items and subtotals ......................36 Preparing and using reductions ................... 37 Programming for reductions ................... 37 To program preset reduction amount ....................37 Registering reductions ....................37 Reduction for items and subtotal ......................
- Page 8 Introduction & Contents Programming other descriptors ..................58 Report descriptor ..........................58 Grand total, special character ....................... 59 Report title ............................. 59 Machine feature program ....................60 General control program ....................60 Programming procedure ........................60 Program data (by address code) ......................60 Address code 02 (machine number) ................
- Page 9 Troubleshooting ....................86 When an error occurs ......................86 When the register does not operate at all ................88 Clearing a machine lock up ....................88 In case of power failure ....................... 89 When the L sign appears on the display ................89 User Maintenance and Options ................
- Page 10 Getting Started This chapter shows how to setup the cash register and get it ready to operate. Please read this chapter even if you have used a cash register before. 1. Load the memory protection batteris and Paper rolls Load the two memory protection batteries 1.
- Page 11 2. Install receipt / journal paper. Platen arm Platen Printer Important! Take away the head protection sheet from the printer and close the platen arm. Caution! (in handling the thermal paper) • Never touch the printer head and the platen. •...
- Page 12 Getting Started To install journal paper Step 1 Remove the printer cover. Step 7 Step 2 Slide the leading end of Open the platen arm. the paper into the groove on the spindle of the take- up reel and wind it onto the reel two or three turns.
- Page 13 3. Plug the cash register into a wall outlet. Be sure to check the sticker (rating plate) on the side of the cash register to make sure that its voltage matches that of the power supply in your area. 4. Insert the mode key marked “PGM” into the mode switch. 5.
- Page 14 Getting Started 8. Tax table programming Programming automatic tax calculation Important! After you program the tax calculations, you also have to individually specify which departments (page 32) and PLUs (page 33) are to be taxed. For this cash register to be able to automatically register state sales tax, you must program its tax tables with tax calculation data from the tax table for your state.
- Page 15 8. Tax table programming (continued) Programming Canadian tax table 6 3s 6 ~ 6 12^34 X2/Z2 Tax table No. Tax rate 6^25 6.25%: Tax table 1: Tax table 2: Tax table 3: Mode Switch Tax table 4: Skip to set “Round off / Add-on”. : : ;...
- Page 16 Getting Started 9. Select watermark on receipt. Turn the mode switch to “PGM”, enter <0> or <1>, and press the <CH>, <ST> Example: no watermark with watermark NOTE: 6200 and s in the PGM 7 mode After completion of register programming, enter (PGM mode ⇒...
- Page 17 10. Department unit price programming Maximum 6-digit unit price can be set to the department. Refer to page-32. Tax calculation status can be set to the department. Refer to page-32. 11. PLU unit price programming Maximum 6-digit unit price can be set to the PLU. Refer to page-33.
-
Page 18: Table Of Contents
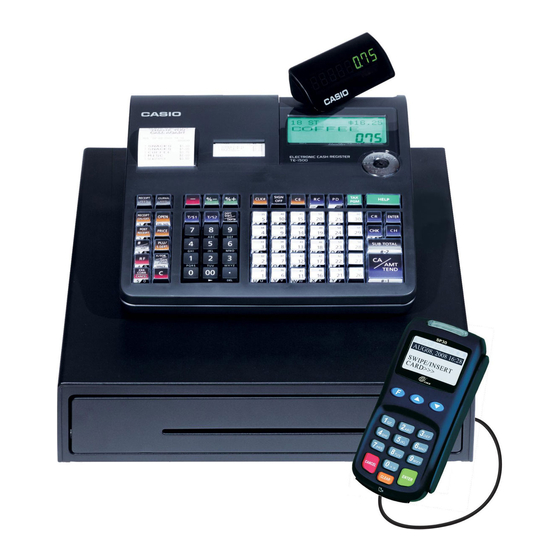
Getting Started 14. Advanced operations and Setups Using clerk functions ........46 Single item cash sales ........47 Currency exchange function ......48 Premium ............50 Department / PLU name selection / set ..52 Preset message /graphic selection / set ..52 Character manual input ........ - Page 20 Introducing the Register General guide This part of the manual introduces you to the cash register and provides a general explanation of its various parts. display drawer keyboard pop-up display printer cover take-up reel main operator customer Pop-up display Take-up reel (customer display) Main display Roll paper...
- Page 21 Mode switch Use the mode keys to change the position of the mode switch and select the mode you want to use. Mode Mode Name Description Switch Periodic sale Used to obtain periodic sales reports without resetting total X2/Z2 X2/Z2 read/reset data or while resetting all total data.
- Page 22 Introducing the Register Display Display panel Main display 3 ST $123.45 PRETZEL 1"34 TOTAL CHANGE AMOUNT Customer display 1"34...
- Page 23 Displays Main Display Pop-up (customer) display (alphanumeric + numeric display) (numeric display) Item registration (by department/PLU) 3 ST $12.34 DEPT001 TOTAL CHANGE AMOUNT Repeat registration 6 ST $19.84 PLU0001 "50 "50 TOTAL CHANGE AMOUNT Totalize operation CASH $20.00 TOTAL CHANGE AMOUNT 1 Item count and subtotal 5 Number of repeats...
- Page 24 Introducing the Register Keyboard SIGN RECEIPT JOURNAL — % – HELP CLK # FEED FEED DEPT RECEIPT T/S 1 T/S 2 SHIFT OPEN ENTER ON/OFF DEPT# POST PRICE RECEIPT PLU/ SUBTOTAL S DEPT X/FOR DATE TIME ERR.CORR 0 00 TEND CANCEL f, j B Paid out key...
- Page 25 T Non-add / No sale key " L Department keys Non-add key: Use this key to print reference number (to Use these keys to register items to departments. identify a personal check, credit card, etc.) during a M Charge key transaction, use this key after some numerical entries.
- Page 26 Basic Operations and Setups How to read the printouts • The journal / receipts are records of all transactions and operations. • The contents printed on receipts and journal are almost identical. • You can choose the journal skip function. If the journal skip function is selected, the cash register will print the total amount of each transaction, and the details of premium, discount and reduction operations only, without printing department and PLU item registra- tions on the journal.
- Page 27 How to use your cash register The following describes the general procedure you should use in order to get the most out of your cash register. BEFORE business hours… • Check to make sure that the cash register is plugged in securely. Page 13 •...
- Page 28 Basic Operations and Setups Before business hours Checking the time and date You can show the time or date on the display of the cash register whenever X2/Z2 there is no registration being made. Mode switch To display and clear the date/time OPERATION DISPLAY 06-15-2008 (SUN)
- Page 29 Preparing and using department keys Registering department keys The following examples show how you can use the department keys in X2/Z2 various types of registrations. Mode switch Single item sale Example 1 OPERATION RECEIPT Department No./ Unit price $1.00 — unit price ————————...
- Page 30 Basic Operations and Setups Multiplication OPERATION RECEIPT — Quantity/result Unit price $1.00 ———————— —— Quantity Item Quantity (4-digit integer/3-digit decimal) ———————— —— Dept. ————————————— Payment Cash $20.00 20-F Split sales of packaged items OPERATION RECEIPT Unit price 4 for $10.00 —...
- Page 31 Programming department keys To program a unit price for each department Different setting Same setting X2/Z2 : : : : : : 6 1s 6 Appropriate Mode switch Unit price * In case of shifting upper department, press } key here. To program the tax calculation status for each department Tax calculation status This specification defines which tax table should be used for automatic tax calculation.
- Page 32 Basic Operations and Setups Registering department keys by programming data X2/Z2 Mode switch Preset price OPERATION RECEIPT — Department No./ " Unit price ($1.00) unit price preset ————————— Item Quantity ————————— Dept. ————————————— Payment Cash $1.00 Preset tax status OPERATION RECEIPT Tax status Unit price ($2.00)
- Page 33 Preparing and using PLUs This section describes how to prepare and use PLUs. CAUTION: Before you use PLUs, you must first program the unit price and tax status. Programming PLUs To program a unit price for each PLU To new (not sequencial) PLU Different setting to the next PLU Same setting X2/Z2...
- Page 34 Basic Operations and Setups Registering PLUs The following examples show how you can use PLUs in various types of X2/Z2 registrations. Mode switch PLU single item sale OPERATION RECEIPT Unit price ($2.50) — PLU No./unit price preset ————————— PLU code Item Quantity —————————...
- Page 35 Split sales of packaged item OPERATION RECEIPT Unit price (5for$20.00) — Quantity/result preset —————————— Quantity being purchased Item Quantity (4-digit integer/3-digit decimal) —————————— —————————————— Package quantity Payment Cash $15.00 (4-digit integer/3-digit decimal) 15-F Open PLU OPERATION RECEIPT Unit price $32.80 ——————————...
- Page 36 Basic Operations and Setups Preparing and using discounts This section describes how to prepare and register discounts. Programming discounts To program a rate to the p key : : : : 6 1s 6 6 p 6 s X2/Z2 Preset rate Example: 10.0% 2 5.5% 2 Mode switch...
- Page 37 Preparing and using reductions This section describes how to prepare and register reductions. Programming for reductions You can use the m key to reduce single item or subtotal amounts. To program preset reduction amount : : : : : : X2/Z2 6 1s 6 6 m 6 s...
- Page 38 Basic Operations and Setups Registering credit and check payments The following examples show how to register credits and payments by check. X2/Z2 Mode switch Check OPERATION RECEIPT 11-! Dept. 1 $11.00 — Reference No. Item ————————— Quantity ————————————— 1234N Number 1234 Reference —————————————...
- Page 39 Shifting the taxable status of an item By pressing “Tax Shift” key, you can shift the taxable status of an item. X2/Z2 Mode switch Calculation merchandise subtotal OPERATION DISPLAY Dept. 1 $4.00 ————————— TOTAL CHANGE Item 1 Quantity ————————— "00 2-"...
- Page 40 Basic Operations and Setups Registering returned goods in the REG mode The following example shows how to use the R key in the REG mode to X2/Z2 register goods returned by customers. Mode switch OPERATION RECEIPT 235! Dept. 1 $2.35 Item 1 —————————...
- Page 41 Registering money received on account The following example shows how to register money received on account. X2/Z2 This registration must be performed out of a sale. Mode switch OPERATION RECEIPT 7--r Received amount $700.00 Amount can be up to 8 digits. Registering money paid out The following example shows how to register money paid out from the register.
- Page 42 Basic Operations and Setups Making corrections in a registration There are three techniques you can use to make corrections in a registration. X2/Z2 $To correct an item that you input but not yet registered. $To correct the last item you input and registered. $To cancel all items in a transaction.
- Page 43 To correct an item you input and registered OPERATION RECEIPT 2-" " — — Clearance — — — Correction of PLU No. — — — Correction of open PLU unit price 10-: — — Corrected items are not printed on receipt (in case of programming “Buffered receipt —...
- Page 44 Basic Operations and Setups To cancel all items in a transaction OPERATION RECEIPT 2-" Pressing s key is necessary to cancel the transaction.
- Page 45 Printing the daily sales reset report This report shows daily sales totals. OPERATION REPORT X2/Z2 Mode switch — Date/time — Taxable 1 amount — Machine No./consecutive No. — Tax 1 amount — Taxable 2 amount — Report title — Tax 2 amount —...
-
Page 46: Using Clerk Functions
Advanced Operations Using clerk functions Enable clerk feature Please follow the below procedure to enable clerk feature. 63s 6 2722 400000000a Mode switch Assigning a clerk You can assign clerks by using clerk number. Clerk number key Clerk sign on OPERATION RECEIPT Signing clerk 1 on:... - Page 47 Single item cash sales A department key or PLU programmed with single item sale status finalizes the transaction as soon as it is registered. The single item sales function can only be used for cash sales. Example 1 OPERATION RECEIPT —...
-
Page 48: Currency Exchange Function
Advanced Operations and Setups Currency exchange function When <CE> key is pressed, a current subtotal including tax is converted directly into foreign currency and the result is displayed, and the subsequent finalization is handled using the foreign currency. The currency exchange function is released by finalizing a transaction, partial tender operation, receipt issuance, or by pressing <SUBTOTAL>. - Page 49 Partial tender in a foreign currency * Pre-programmed exchange rate: ¥ 100 = $0.9524 Important! Partial tender in a foreign currency can be registered using only. Other finalization keys cannot be used, but the remaining tender can be finalized using any finalize key. OPERATION DISPLAY RECEIPT...
-
Page 50: Premium
Advanced Operations and Setups Premium Example OPERATION RECEIPT Dept. 1 $1.00 ———————— —— Item 1 Quantity ———————— —— Premium ————————————— Dept. 1 $2.00 Item 2 ———————— —— Quantity ————————————— Subtotal Premium (15%) ————————————— Payment Cash $8.17... - Page 52 Advanced Operations and Setups Programming department / PLU descriptors and preset messages in the list In this chapter, the procedures to choose department / PLU descriptors and preset messages from the preset list are described. Read help receipt, so that you can set the descriptors and messages easily. How to choose and set the department / PLU descriptors in the list 1.
-
Page 53: Character Manual Input
Character manual input This chapter shows the procedures to program department / PLU descriptors, store messages, key descriptos, report title, total descriptor (such as gross total, net total...) and clerk name. The characters you entered by the character keyboard or multi-tapping keyboard, can be programmed. The “Entering characters”... - Page 54 Advanced Operations and Setups Entering characters by multi tapping When you enter characters by this method, you need to press each key repeatedly until the desired character appears. Multi tapping keyboard SIZE SUBTOTAL SPACE PQRS WXYZ TEND 1 Alphabet keys 2 Double size letter key Used input to characters.
- Page 55 Programming descriptors and messages by entering characters The following descriptors and messages can be programmed; • Report descriptor (such as gross total, net total, cash in drawer…) • Grand total • Special character (such as mode symbol, taxable symbol…) • Read/reset report title •...
- Page 56 Advanced Operations and Setups Programming department / function key descriptor To other key 62s 6 a 6 s Appropriate key Character See “Entering characters” section, Mode switch on page 53, 54. *1 Appropriate key: In case of shifting department, press <DEPT SHIFT> key first. Function key Contents Initial character...
- Page 57 Programming message To a new message record To the next message record : : D S 62s 6 6 a 6 s Characters See “Entering characters” section, Memory Mode switch on page 53, 54. Receipt message Refer to “(message control)” on page 64. Memory Contents Initial character...
- Page 58 Advanced Operations and Setups Programming other descriptors To other program code To the next memory No. : : : : 62s 6 6 a 6 s Characters See “Entering characters” section, on page 53, 54. Mode switch Memory Program code Report descriptor Memory Program...
- Page 59 Grand total, special character Memory Program Contents Initial character Yours code main currency symbol (2), @ (2), No. (2), split pricing (2), not used (4), sub currency symbol (2) No. of item sold (2), No. of customer (2), not used (6),multiplication display (2) multiplication (6) not used (6) taxable symbol 1 (3 each) for tax 1, tax 2, tax 3, tax 4 taxable symbol 3 (3 each) for tax 1/2, tax 1/3, not used, not used, tax 2/3...
- Page 60 Advanced Operations and Setups Machine feature program General control program Programming procedure : : : : 6 3s 6 Mode switch Address code Program data (2 digits) (Max. 10 digits) Program data (by address code) Address code 02 (machine number) Description Choice Program code...
- Page 61 Address code 05 (print control for receipt) Description Choice Program code Initial value Yes = 0 Print total line during finalization. No = 1 (a+b) (a+b) 1 = 0 Time system: 2 = 2 1 24 hour system, 2 12 hour system No = 0 Buffered receipt print Yes = 2...
- Page 62 Advanced Operations and Setups Address code 08 (print control for fixed total report) Description Choice Program code Initial value Yes = 0 Print gross sales total on fixed total report ( No = 1 Yes = 0 Print net sales total on fixed total report ( No = 2 (a+b+c) (a+b+c)
- Page 63 Address code 14 (currency exchange control) Description Choice Program code Initial value Significant Monetary mode of CECA1 and CECK1 in fixed total report: number (0 ~ 9) 1 = 0 Decimal for CECA1 and CECK1 in fixed total report: 2 = 1 1 Period = 0, 2 Comma = 1 (a+b) (a+b)
- Page 64 Advanced Operations and Setups Address code 16 (print control for grand total) Description Choice Program code Initial value No = 0 Print consecutive number range of the day on daily fixed total report. Yes = 1 Always “00000” Yes = 0 Print grand total on daily sales reset report.
- Page 65 Address code 27 (clerk control) Description Choice Program code Initial value No = 0 Enable clerk function. Yes = 4 Always “00000000” Address code 30 (thermal printer control) Description Choice Program code Initial value No = 0 Print preset receipt message and graphic Yes = 1 Print preset receipt message and graphic: (a+b)
- Page 66 Advanced Operations and Setups Key function program Department key/PLU program (Batch feature programming) Programming procedure Department key To another key Appropriate Mode switch Program data *: In case of shifting department, press <DEPT SHIFT> key first. To a new (not sequential) PLU Different program to the next PLU 6 3s 6 6 a 6s...
-
Page 67: Pgm 6 3S
Department key/PLU program (Individual feature programming) Programming procedure Department key To another key Same program Appropriate Mode switch Program data Address code *: In case of shifting department, press <DEPT SHIFT> key first. To a new (not sequential) PLU Different program to the next PLU Same program : :66s PLU No. -
Page 68: Single Item Control: Normal Receipt = 0, Single Item Receipt
Advanced Operations and Setups Program data (by address code) Address code 11 (link) Description Choice Program code : : : Significant Link group record number: (000 ~ 999) numbers Always “0” : : : Significant Link department record number: (000 ~ 999) numbers (only for PLU) Address code 15 (high amount limit) - Page 69 Transaction key program Programming procedure To another transaction key 6 3s 6 Transaction Program data Mode switch Program data <CASH>, <CHARGE>, <CHECK> Description Choice Program code No = 0 Prohibit entry of a partial payment Yes = 1 No = 0 Prohibit the entry of the amount tendered.
- Page 70 Advanced Operations and Setups <REDUCTION (MINUS)> Description Choice Program code Taxable status: See page 68. No = 0 Allow credit balance. (–, CPN only) Yes = 1 No = 0 Always “00” Yes = 2 High digit limitation (HDL) for manually entered unit price (“9”...
- Page 71 <CURRENCY EXCHANGE> Description Choice Program code Define amount symbol. (0, 1 ~ 2) Significant number (“0” means local currency symbol.) Significant Define foreign currency totalizer. (0, 1 ~ 2) number (“0” treats as “1”.) Significant Rounding: number Round off = 0, cut off = 1, round up = 2 Always “0”...
- Page 72 Advanced Operations and Setups <CREDIT> Description Choice Program code No = 0 Prohibit entry of a partial payment Yes = 1 No = 0 Prohibit the entry of the amount tendered. (a+b+c) Yes = 2 No = 0 Force entry of the amount tendered. Yes = 4 No = 0 Print VAT breakdown.
-
Page 73: Commission
Clerk other programming Programming procedure (individual) To a new (not sequential) clerk To the next clerk 6 3s 6 07s 6 a 6 s Record No. Mode switch Address code Program data Program data Address code 67 (Clerk control) Description Choice Program code No = 0... - Page 74 Advanced Operations and Setups Printing read/reset reports • Daily sales read report (“X” mode) You can print read reports at any time during the business day without affecting the data stored in the cash register's memory. • Daily sales reset report (“Z” mode) You should print reset reports at the end of the business day.
- Page 75 To print daily read reports You can select the appropriate report shown in the display. OPERATION DISPLAY 1. Turn to X mode. X NEXT:RC DAILY X X2/Z2 TOTAL CHANGE AMOUNT Mode switch 2. Select report you want to get by the <RC> key. X NEXT:RC X NEXT:RC X NEXT:RC...
- Page 76 Advanced Operations and Setups To print daily reset reports You can select the appropriate report shown in the display. OPERATION DISPLAY 1. Turn to Z mode. Z NEXT:RC DAILY Z X2/Z2 TOTAL CHANGE AMOUNT Mode switch 2. Select report you want to get by the <RC> key. Z NEXT:RC Z NEXT:RC Z NEXT:RC...
-
Page 77: Daily Read Report
Read / reset report sample Daily report — Discount total — Report title — Refund key — Rounding total — Department report title/reset counter — Report code — Cancellation — Department name/No. of items — Taxable 1 amount — Sales ratio/amount —... -
Page 78: Plu Report
Advanced Operations and Setups Flash report — Read symbol/report title — Report code — Main currency declared amount — Difference — Gross total — Net total — Cash in drawer PLU report — Read symbol/report title — Report code — PLU name/No. of items —... -
Page 79: Group Report
Group report — Read symbol/report title — Report code — Group No./No. of items — Sales ratio/group amount — Group total No. of items — Group total amount... - Page 80 Advanced Operations and Setups • Periodic sales read report (“X2” mode) You can print read reports at any time during the business day without affecting the data stored in the cash register's memory. • Periodic sales reset report (“Z2” mode) You should print reset reports at the end of the business day.
- Page 81 — Report title — Department report title/reset counter — Report code — Function key report title/reset counter — Report code — Department Name/No. of items — Sales ratio/amount — Function key count/amount — Total No. of items — Total amount —...
- Page 82 Advanced Operations and Setups Reading the cash register's program To print unit price/rate program (except PLU) OPERATION REPORT 1. Turn to PGM mode. 2. Enter <1> and press <ST> key. — Program read symbol 3. Press <ST> key. — Transaction key unit price or rate —...
- Page 83 To print the machine program (except PLU) OPERATION REPORT 1. Turn to PGM mode. 2. Enter <3> and press <ST> key. 3. Press <ST> key. — Program read symbol — Clerk detail link program — Transaction key program — Key character/rec-#/file-# Arrangement program —...
- Page 84 Advanced Operations and Setups To print the PLU unit price OPERATION REPORT 1. Turn to PGM mode. — Program read symbol 2. Enter <6> and press <ST> key. 3. Enter <104> and press <ST> key. — PLU range — PLU descriptor/rec-#/04 4.
-
Page 86: Troubleshooting
Troubleshooting This section describes what to do when you have problems with operation. When an error occurs Errors are indicated by an error codes. When this happens, you can usually find out what the problem is as illustrated below. Press C and check the appropriate section of this manual for the operation you want to perform. Error Message Meaning... -
Page 87: Drawer Does Not Open
Troubleshooting Error Message Meaning Action code Scanning PLU direct maintenance/batch maintenance PLU maintenance file Terminate the maintenance. E101 file becomes full. full. Press <#2> to exit PLU code is not existed in the file. Enter proper PLU code. E103 PLU Code is not exist. Input the PLU Code Scanning PLU file full Modify the designated item. -
Page 88: Yes
Perform the following check whenever the cash register enter an error condition as soon as you switch it on. The results of this check are required by service personnel, so be sure to perform this check before you contact a CASIO representative for servicing. Start Is register plugged in? Plug in the power cord. - Page 89 Troubleshooting In case of power failure If the power supply to the cash register is cut by a power failure or any other reason, simply wait for power to be restored. The details of any ongoing transaction as well as all sales data in memory are protected by the memory backup batteries.
- Page 90 User Maintenance and Options To replace journal paper X2/Z2 Step 1 Set the mode switch to the REG position and remove the printer cover. Step 2 Step 6 Press to feed about 20 Slide the printed journal cm of paper. from the take-up reel.
- Page 91 Step 4 Load new paper. Go to the step 3 described on page 11 of this manual. Options P-5880T roll paper WT-89 wetproof cover The optional wetproof cover protects the keyboard from moisture damage. Consult your CASIO dealer for details.
- Page 92 Specifications Input method Entry: 10-key system, buffer memory 8 keys (2-key roll over) Department: Full key system Display Main: Amount 10 digits (zero suppression); No. of repeats, total, change, transaction indicator Descriptor 16 digits × 2 lines; item descriptor, No. of items, mode, clerk name Customer: Amount 8 digits (zero suppression) Printer...
- Page 93 Index alphabet key 53, 54 error correct 24 backlight 65 feed 24 bottom message 26 fixed total report 45 flash report 78 function key 56 cancel 24, 44 function key report 45 CAPS key 53 cash 24, 69 cash in drawer 45 general control program 60 change 29 grand total 45, 59...
- Page 94 Index right cursor key 54 roll paper 20 negative price 66, 68 net total 45 no sale 41 shift key 53 non-add / no sale 70 sign off 24, 46 non-add / no sale 25 sign on 46 single item 29, 34, 47, 66, 68 space key 54 OFF mode 20 special character 59...
- Page 95 LIMITED WARRANTY: ELECTRONIC CASH REGISTERS This product, except the battery, is warranted by Casio to the original purchaser to be free from defects in material and workmanship under normal use for a period, from the data of purchase, of one year for parts and 90 days for labor. For one year, upon proof of purchase, the product will be repaired or replaced (with the same or a similar model) at Casio's option, at a Casio Authorized Service Center without charge for parts.
- Page 96 CASIO COMPUTER CO., LTD. MO0712-A Printed in Indonesia 6-2, Hon-machi 1-chome Shibuya-ku, Tokyo 151-8543, Japan TE-1500*E...