Table of Contents
Advertisement
Quick Links
Advertisement
Table of Contents

Related Manuals for Honeywell MAXPRO


Summary of Contents for Honeywell MAXPRO
- Page 1 ® MAXPRO Operator’s Guide Document 800-09356V2 – 02/2012...
- Page 2 This page is intentionally left blank...
- Page 3 Added the following: • Changed the CONFIGURATION screen on p .13 • Changed the storage capacity of MAXPRO NVR SE on p.9 • Added the PAL version of MAXPRO NVR SE system diagram January 27, 2012 Updated the whole guide with MAXPRO NVR S/W Only release...
- Page 4 This page is intentionally left blank...
-
Page 5: Table Of Contents
OGGING ON USING ROFILES MAXPRO NVR ....... . 19 OGGING ON TO . - Page 6 EFAULT ETTINGS MAXPRO NVR ..... . . 37 ONFIGURING ......37...
- Page 7 ........63 IDEO ECORDING MAXPRO NVR ....63 BOUT THE ECORDING ETTINGS FOR .
- Page 8 .........79 ONTEXT MENU OPTIONS MAXPRO NVR ... . 81 EARCHING...
-
Page 9: Bout Maxpro® Nvr
............® This guide introduces the MAXPRO NVR. ® MAXPRO NVR is a Network Video Recorder (NVR) based on MAXPRO VMS platform. MAXPRO NVR is offered in the following two variants. • Single-box solution •... -
Page 10: Maxpro Nvr Single - Box Solution
® MAXPRO NVR is a Network Video Recorder (NVR) based on MAXPRO VMS platform. MAXPRO NVR is offered as a Single-box solution, and is available in the following two editions. • MAXPRO NVR XE (Xpress Edition) - entry level NVR supporting up to 16 IP cameras. -
Page 11: Maxpro Nvr Software -Only Solution
Supporting Honeywell's High definition (HD) cameras and broad integration with third party IP cameras and encoders, the MAXPRO NVR family is a powerful HD IP recording and security monitoring system for a variety of applications. MAXPRO NVR software ensures flexibility for end user IT departments when choosing NVR hardware in deploying a recording solution, but end users find it as easy as a DVR to configure and operate. - Page 12 MAXPRO NVR software supports industry standard keyboards such as UltraKey Plus and UltraKey Lite over Ethernet. XPORT MAXPRO NVR software supports exporting clips and still images in simple .wmv and .bmp formats. The clips can be signed with digital signatures for further analysis. MAIL OTIFICATION MAXPRO NVR software supports e-mail notification on camera, system and operator events.
-
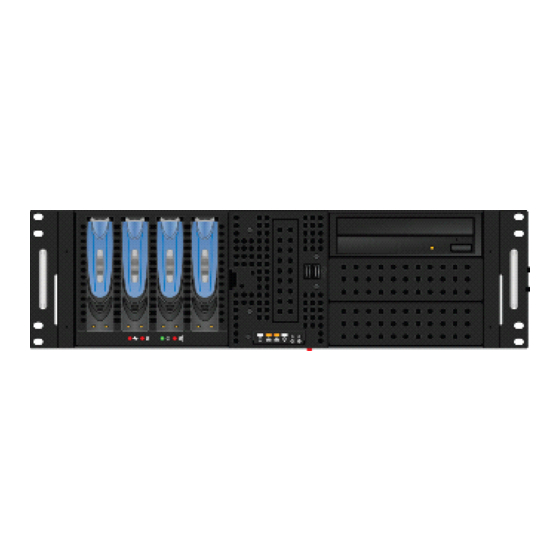
Page 13: Maxpro Nvr Single-Box Solution System Architecture
............MAXPRO NVR SE SYSTEM DIAGRAM (PAL VERSION) The following figure illustrates the PAL version of MAXPRO NVR SE (Standard Edition system digram). -
Page 14: Maxpro Nvr Xe System Diagram
A B O U T M A X P R O ® N V R MAXPRO NVR Single-box Solution System Architecture MAXPRO NVR XE SYSTEM DIAGRAM The following figure illustrates the MAXPRO NVR XE (Xpress Edition) system diagram. MAXPRO NVR Operator’s Guide... -
Page 15: Maxpro Nvr Software-Only Solution System Architecture
............MAXPRO NVR S TANDALONE YSTEM RCHITECTURE The following figure illustrates the MAXPRO NVR standalone system architecture. MAXPRO NVR D ISTRIBUTED YSTEM RCHITECTURE The following figure illustrates the MAXPRO NVR distributed system architecture. - Page 16 A B O U T M A X P R O ® N V R MAXPRO NVR Software-Only Solution System Architecture This page is intentionally left blank MAXPRO NVR Operator’s Guide...
-
Page 17: Maxpro Nvr Wizard
........MAXPRO NVR Wizard is an easy three-step procedure to live video. This wizard automatically starts each time you power-on the MAXPRO NVR system. - Page 18 IP address. For example. if a camera is restarted, and a new IP is associated to the camera, then the MAXPRO NVR software automatically detects the changed IP address and synchronizes it to the camera so that live viewing and recording is not disturbed.
- Page 19 “NO” corresponding to Auto Add Discovered Camera in the CONFIGURATION page. Use the ADD button to add discovered cameras of your choice to the MAXPRO NVR software. Select the check boxes corresponding to a camera from the discovered list, and click ADD to add the cameras.
- Page 20 Step 3 - The INSTALLATION page displays. • Click LAUNCH. The MAXPRO NVR Log On dialog displays. Please wait while the system logs you on automatically as a Windows Logged-In User. MAXPRO NVR launches and the Viewer tab displays. The Devices window on the left pane lists all the discovered network cameras.
-
Page 21: Licensing Information
Honeywell’s boxed solutions, come pre-licensed or included with all camera licenses, and this varies for MAXPRO NVR SE and MAXPRO NVR MAXPRO NVR software comes with all the required software applications and a license for 32 channels allowing for up to 32 cameras as your system grows. -
Page 22: Registration And Licensing
Viewing the Version and License Information of MAXPRO NVR Figure 1-2 License Management Console MAXPRO NVR setup comes with a 60 day trial period and enables you to add up to 32 cameras and 10 clients. You must purchase the license to continue using MAXPRO NVR. EGISTRATION AND... -
Page 23: Logging On And Familiarization
You can set a profile as the default profile. When a profile is set as default, you do not need to select the profile each time you log on to MAXPRO NVR. You can also modify and delete profiles. -
Page 24: Saving A Server Address In A Profile
Windows user name and password. If the Windows Logged-In User check box is cleared, the MAXPRO NVR user name and password is used for authentication. If there is no profile set as default, then select the Profile corresponding to the MAXPRO NVR server to which you want to connect. -
Page 25: Setting The Default Profile
ROFILE To set the default profile Select the profile you want to set as default before logging on to MAXPRO NVR. In the User menu (the name of the currently logged in user is displayed as the user menu on the top right of each screen), click Profiles and select Set Default Profile. The profile is set as the default profile. -
Page 26: Editing The Ports
In the router’s port forwarding section we need to map the ports for each of the services running in the NVR’s. An internet MAXPRO NVR client can connect to a NVR, by specifying the public IP address given to the router and corresponding ports mapped in the port forwarding table in the router . - Page 27 L O G G I N G O N A N D F A M I L I A R I Z A T I O N Logging on using Profiles Figure 2-4 Port Forwarding Scenario 1 In the above figure: MAXPRO NVR 1 and MAXPRO NVR 2 have the default port numbers, 20007, 26026, 10000 configured for the following services respectively. • Trinity Server •...
-
Page 28: Logging Off
MAXPRO NVR from an external MAXPRO NVR Client. OGGING OFF You can log off from MAXPRO NVR from the User menu. The name of the currently logged in user is displayed as the User menu on the top right of each screen. -
Page 29: Amiliarizing With The Maxpro Nvr User Nterface
............The user interface of MAXPRO NVR is easy-to-use because of its intuitive icons and user- friendly features. - Page 30 When a part of the camera name is typed in the text box, the Intellisense search displays the list of cameras that are connected to the MAXPRO NVR in the Devices window. For example, if you are searching for Camera 2 connected to MAXPRO NVR, then type Ca in the text box.
- Page 31 L O G G I N G O N A N D F A M I L I A R I Z A T I O N Familiarizing with the MAXPRO NVR User Interface Component Description Image/Clip window Click to display a floating window that lists the images and clips in a tree structure.
- Page 32 L O G G I N G O N A N D F A M I L I A R I Z A T I O N Familiarizing with the MAXPRO NVR User Interface Component Description Views window A floating window that lists the salvo views. The View window consists of My Salvo views and Shared Salvo views.
-
Page 33: Configurator Tab
L O G G I N G O N A N D F A M I L I A R I Z A T I O N Familiarizing with the MAXPRO NVR User Interface ONFIGURATOR TAB The following figure illustrates the Configurator tab. -
Page 34: Search Tab
Selecting Cameras associated to the Recorder Selecting the Date and Time Selecting the Events Search results window Figure 2-3 Search tab You can search for recorded video and events in MAXPRO NVR from the Search tab. MAXPRO NVR Operator’s Guide... -
Page 35: Report Tab
To select the video rendering option Click the Preferences option in the user menu. The Preferences dialog box displays. By default, the General Settings tab is selected. MAXPRO NVR Operator’s Guide... -
Page 36: Pausing The Video Rendering
To select the tab which pauses video rendering Click the Preferences option in the User menu. The Preferences dialog box displays. By default, the General Settings tab is selected. MAXPRO NVR Operator’s Guide... -
Page 37: Settings For Alarm Preview Pane
Note: You can view video related to alarms for the cameras connected to MAXPRO NVR. For Pre Alarm, Post Alarm, and On Alarm, the video is played only when the video recording pertaining to the date and time of alarm is available. -
Page 38: Setting The Alarm Threshold Value
You can configure the time interval for the exported snapshot. To configure the time interval for the exported snapshot Click the Preferences option in the User menu. The Preferences dialog box displays. By default, the General Settings tab is selected. MAXPRO NVR Operator’s Guide... -
Page 39: Configuring The Osd Settings
Click Apply in the Preferences dialog box. Click OK to close the Preferences dialog box. ONFIGURING THE IMELINE ETTINGS To configure the timeline settings Click the Preferences option in the User menu. The Preferences dialog box displays. Click the Timeline Settings tab. MAXPRO NVR Operator’s Guide... -
Page 40: Configuring The Diagnostic Settings
Click OK to close the Preferences dialog box. ONFIGURING THE EFAULT ETTINGS To apply the default settings Click Reset to apply default settings while setting preferences. Click System Defaults to apply the system default settings while setting preferences. MAXPRO NVR Operator’s Guide... -
Page 41: Configuring Maxpro Nvr
........Configuring MAXPRO NVR involves the following tasks. -
Page 42: Event Recording Settings
Select a new User based Recording Time as applicable. The user based recording is the recording initiated by the user manually and is applicable for all the cameras connected to MAXPRO NVR. Note: To start user based recording, right-click the panel displaying live video and click Start Recording. -
Page 43: Holidays /Exceptions Settings
ANAGEMENT ETTINGS Disk Management helps you to configure the disk settings for saving the recorded video. All the drives available on the MAXPRO NVR system are automatically added in the Disk Management page. To configure the Disk Management settings Click the Configurator tab. The System page displays by default. - Page 44 C O N F I G U R I N G M A X P R O N V R All the drives available on the MAXPRO NVR system are listed. Note: By default, the check boxes corresponding to all the drives except C:\ are selected.
- Page 45 Click Add Drive to add a fixed drive or a network drive. • The fixed drive that you are adding must be available on the MAXPRO NVR system, else an “Invalid Drive” text displays in the Total Space (GB) column.
-
Page 46: Configuring The Cameras
To remove a drive, select the check box corresponding to the drive, and then click Delete. ONFIGURING THE CAMERAS Cameras are sources for a video input in MAXPRO NVR. The maximum number of cameras that can configured in MAXPRO NVR is 32. DDING THE CAMERAS To add cameras Click the Configurator tab. - Page 47 Note: Change this only if the password has been changed on the camera. • Video Channel Number - Displays the video channel number for the camera. Click to open the Camera Advanced Settings pane. MAXPRO NVR Operator’s Guide...
- Page 48 FPS is a measure of how much information is used to store and display motion video. The term applies to digital video. Each frame is a still image; displaying frames in quick succession creates the illusion of motion. MAXPRO NVR Operator’s Guide...
- Page 49 Select the Continuous Recording clip deletion duration. RTSP S ETTINGS Real Time Streaming Protocol (RTSP) is a control protocol for streaming video over the Internet. For the camera type “Generic RTSP”, you must specify the following RTSP settings. MAXPRO NVR Operator’s Guide...
-
Page 50: Updating The Cameras
Click the Camera tab to navigate to the Camera page. The list of cameras configured are displayed. Select the row corresponding to the camera you want to modify. Change the settings such as camera name, IP address, and so on. MAXPRO NVR Operator’s Guide... -
Page 51: Deleting The Cameras
ARTY AMERAS The Third party PSIA, ONVIF and AXIS cameras that are discovered in the MAXPRO NVR user interface do not display the model name. However, the Camera Type field associated to the ONVIF, PSIA, and AXIS cameras displays “ONVIF DEVICE”, “PSIA DEVICE” and “No Streamer Type”... -
Page 52: Configuring The Schedules
After adding the camera(s), you can view the model name(s) from the Camera Type drop down in the left pane of the Camera page. To add Third Party PSIA/ONVIF cameras in MAXPRO NVR through Discovery After the discovery, the check boxes corresponding to all the cameras are selected by default. - Page 53 C O N F I G U R I N G M A X P R O N V R Click the Schedule tab to navigate to the Schedule page. By default MAXPRO NVR supports the following 4 default schedules: 24 x 7, Weekday, DayTime, and NightTime.
-
Page 54: Deleting A Schedule
In this example, if a motion is detected by the camera, the door automatically opens. In MAXPRO NVR, the inputs and outputs of a camera are configured by default in the database while adding a camera. MAXPRO NVR has a specialized interface that lists the inputs and outputs associated to the configured cameras. -
Page 55: Configuring The Sequences
You can create a sequence to display video that is captured from different cameras connected to MAXPRO NVR. Note: You can add a maximum of 50 sequences in MAXPRO NVR. To create a sequence Click the Configurator tab. The System page displays by default. -
Page 56: Updating A Sequence
Click the Configurator tab. The System page displays by default. Click the Sequence tab to navigate to the Sequence page. Select the check box corresponding to the sequence you want to update. You can change the sequence name, dwell time and sequence of the cameras. MAXPRO NVR Operator’s Guide... -
Page 57: Deleting A Sequence
You can add a user by providing a unique user name and a password. Only the “admin” user can add a new user in MAXPRO NVR. After you add a new user, you can assign a role to it. To add a user Click the Configurator tab. - Page 58 To remove an input event, under the Associated List, select a check box corresponding to the input event and then click <. The selected input event appears under the Available List. • Click << to disassociate all the input events to the Available List. MAXPRO NVR Operator’s Guide...
-
Page 59: Updating A User
Change the settings such as user name, user description, and so on. Click Save. ELETING A You can remove a user from MAXPRO NVR. When you delete a user, all the associations made to the user are also removed. To delete a user Click the Configurator tab. - Page 60 C O N F I G U R I N G M A X P R O N V R This page is intentionally left blank MAXPRO NVR Operator’s Guide...
-
Page 61: Monitoring A Site
Playing Recorded Video using the Timeline. ENLARGED DISPLAY You can double-click a panel to maximize its size and view an enlarged display of the video. Double-click the panel again to restore the panel to its original size. MAXPRO NVR Operator’s Guide... - Page 62 PTZ effects on the video display, and perform color correction on the video display. You can also move the camera to a preset position, save a preset position, and start recording video. See Video Control Options in the Panel Toolbars. MAXPRO NVR Operator’s Guide...
-
Page 63: Salvo View
You can save a salvo view after you realign the cameras using the Save option on the Salvo Bar. You can also use the Save As option to save an existing salvo view with a different name. The context menu options on the salvo bar include Create Salvo View, and FullScreen. MAXPRO NVR Operator’s Guide... -
Page 64: Surrounding Cameras
• Hover the mouse over the panel displaying video from the camera. A panel toolbar appears. Click in the panel toolbar. The surrounding cameras salvo layout starts displaying video from the camera and the associated cameras. MAXPRO NVR Operator’s Guide... -
Page 65: Live Video
Alternatively, you can click in the toolbar on the top of the salvo layout. Digital PTZ enable digital PTZ. See Panning, Tilting, and Zooming for information on digital PTZ. MAXPRO NVR Operator’s Guide... -
Page 66: Playing A Sequence
Click the Viewer tab. Click the Sequences window. Double-click the sequence you want to play or select the sequence, and then click Play Sequence. You can drag and drop the sequence on a panel in the salvo layout. MAXPRO NVR Operator’s Guide... -
Page 67: Video Recording And Viewing
In the Configurator tab, you can configure the settings to record video for the cameras connected to MAXPRO NVR. Three types of record settings are available for the cameras connected to MAXPRO NVR. They are user activated, scheduled/ background recording, and motion detected recording. -
Page 68: Imeline
(See Playing Recorded Video using Mark In and Mark Out Points in the Timeline) to play a selected part of video repeatedly. Clips of the video recorded in MAXPRO NVR can be created from marked points in the timeline. -
Page 69: Viewing Thumbnails
Skip time intervals using the time jump control Skipping enables you to easily locate the portion you want to view in a video recording. This is particularly useful when the video recording spans across a long time interval. MAXPRO NVR Operator’s Guide... -
Page 70: Context Menu Options
BMP format. See Saving Images. Save Image As save the frame displayed in the panel in different image formats such as JPG, PNG, and GIF. Saving Images. MAXPRO NVR Operator’s Guide... -
Page 71: Playing Recordedv Ideo Using Mark N And
A mark out point needs to be added after each mark in point. LAYING IDEO FROM THE To play video from the loop To select the loop, click anywhere between the mark in and mark out points. MAXPRO NVR Operator’s Guide... -
Page 72: T O Stop Playing Video
Type your comments and click OK. The comments are saved and appear as ToolTip when you hover the mouse over the bookmark. Note: To edit the comments, right-click the bookmark and click Edit Comments in the context menu. Modify the comments in the dialog box and click OK. MAXPRO NVR Operator’s Guide... -
Page 73: Browsing From One Bookmark To The Other
Right-click the bookmark you want to delete. A context menu appears. Click Remove Bookmark in the context menu. • Click to select the bookmark you want to delete and then click the icon or press the DELETE key. MAXPRO NVR Operator’s Guide... -
Page 74: Video Control
The drop-down list is disabled when digital PTZ is enabled. You need to disable the digital PTZ feature to select a preset. See Panning, Tilting, and Zooming for information on enabling and disabling the digital PTZ feature. MAXPRO NVR Operator’s Guide... -
Page 75: Panning , Tilting , And Zooming
You can pan, tilt, and zoom (PTZ) the video displayed in a panel. Using the digital PTZ feature in MAXPRO NVR, you can perform panning and tilting on live and recorded video and clips. The digital PTZ feature when enabled allows you to perform panning and tilting on the video display that is zoomed or enlarged. -
Page 76: Zooming The Video Display
Zoom the video display. Center-click anywhere on the video panel. A point along with left, right, up, and down arrows appear. Move the mouse in the required direction to pan and tilt. Center-click again to stop panning and tilting. MAXPRO NVR Operator’s Guide... -
Page 77: Images And Clips
Select Save Image to save the image in.BMP format. Alternatively, you can click the toolbar on top of the salvo layout. The images are saved in the ImagesAndClips folder at the location in the hard drive in which MAXPRO NVR files are installed. For example, X:\Program Files\Honeywell\TrinityFramework\ImagesAndClips. Here, X: is the hard drive. -
Page 78: Naming Convention For Clips
Under Stream, select the required Format. Type the Job Name or retain the default name assigned by MAXPRO NVR. Select the Location (folder in which you want to save the clip). You can click select another folder location. -
Page 79: Viewing Images And Clips
LIPS From the Images/Clip window, you can view the images and clips saved in the ImagesAndClips folder at the location in the hard drive in which MAXPRO NVR files are installed. To view the list of saved images and clips Click the Viewer tab, and then click the Images/Clip tab. -
Page 80: Deleting Images And Clips
To delete an image or clip Click the Viewer tab. Expand the folder in which the image or clips is saved in the Images/Clip window. Right-click the image or clip which you want to delete. A context menu appears. Click Delete. MAXPRO NVR Operator’s Guide... -
Page 81: Alarms
To acknowledge an alarm Click the Viewer tab, and then click Alarm tab. Click to select the alarm you want to acknowledge in the Alarm window. The unacknowledged alarms are listed in the first table in the Alarm window. MAXPRO NVR Operator’s Guide... -
Page 82: Context Menu Options
See Setting Preferences for more information. Receive Both list both alarms and events in the Alarm window. Alarms and Events LEARING ACKNOWLEDGED ALARMS You can clear the acknowledged alarms after taking the necessary action. MAXPRO NVR Operator’s Guide... -
Page 83: Context Menu Options
You can stop receiving the alarms momentarily and start receiving again when needed. Clear on Ack automatically clear the alarms when they are acknowledged. MAXPRO NVR Operator’s Guide... - Page 84 Events whose severity level is greater than or equal to the alarm severity threshold value are listed. See Setting Preferences for more information. Receive Both Alarms and Events to list both alarms and events in the Alarm window. MAXPRO NVR Operator’s Guide...
-
Page 85: Searching Recorded
........You can search for video recorded from cameras connected to MAXPRO NVR. You can filter the search for recorded video based on search conditions like video recorded today, yesterday, and others. -
Page 86: Playingv
Last 30 Days - video recorded in MAXPRO NVR in the last 30 days. • On - video recorded on a particular date in MAXPRO NVR. The From box to select the date is enabled when you select On. •... - Page 87 Select the required filter string and click on the filter button. You can toggle between the Filter On and Off mode using the option or right-click , and select between Filter ON and Filter OFF. The hot key to activate Intellisense search is F4. MAXPRO NVR Operator’s Guide...
- Page 88 S E A R C H I N G R E C O R D E D V I D E O I N M A X P R O N V R This page is intentionally left blank MAXPRO NVR Operator’s Guide...
-
Page 89: Generating Reports
For example, creating clips, adding bookmarks, and other actions performed by a user. You can select the users and the list of activities you want to view while generating the report. MAXPRO NVR Operator’s Guide... -
Page 90: Vent History Eport
Video Inputs in the Device Types box, all the camera names appear in the Devices box. Under Custom Events, select the IO Alarms check box to include the input and output alarms. MAXPRO NVR Operator’s Guide... - Page 91 To select all the events in the Selected Events box, click In the Event Severity list, select the severity of the event. Click Generate Report. The event history report is generated and appears in the display area. MAXPRO NVR Operator’s Guide...
-
Page 92: Perator Log Eport
In the Output type box, select the type of operator log report you want to generate. You can select Tabular to view the operator log report in a table or Graphical to view the operator log report in a graph. MAXPRO NVR Operator’s Guide... - Page 93 G E N E R A T I N G R E P O R T S Generating the Operator Log Report Click Generate Report. The operator log report is generated and appears in the display area. MAXPRO NVR Operator’s Guide...
-
Page 94: Aving The
(zoom in) and reduce (zoom out) the report view. close the current view. MAXPRO NVR Operator’s Guide... - Page 95 This page is intentionally left blank...
- Page 96 Document 800-09356V2 – 02/2012 © 2011 Honeywell International Inc. All rights reserved. No part of this publication may be reproduced by any means without written permission from Honeywell. The information in this publication is believed to be accurate in all respects. However, Honeywell cannot assume responsibility for any consequences resulting from the use thereof.