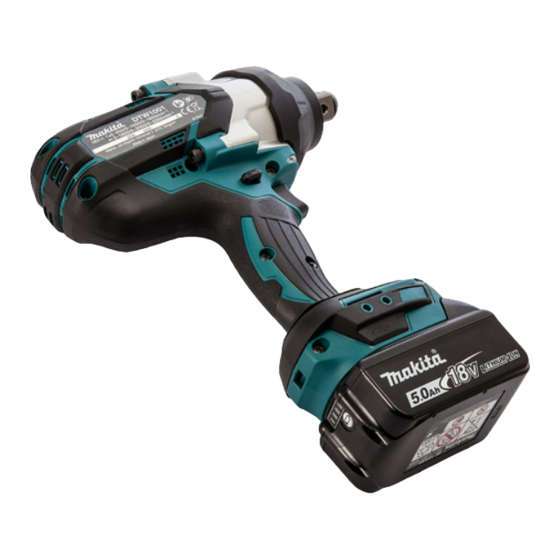
Makita DTW1001 Instruction Manual
Cordless impact wrench
Hide thumbs
Also See for DTW1001:
- Instruction manual (112 pages) ,
- Instruction manual (41 pages) ,
- Instruction manual (76 pages)
Table of Contents
Advertisement
Quick Links
Advertisement
Table of Contents

Summary of Contents for Makita DTW1001
- Page 1 INSTRUCTION MANUAL Cordless Impact Wrench DTW1001 DTW1002 DTW800 Read before use.
-
Page 2: Specifications
• Weight, with battery cartridge, according to EPTA-Procedure 01/2003 Symbols Noise The following show the symbols used for the equip- The typical A-weighted noise level determined accord- ment. Be sure that you understand their meaning before ing to EN60745: use. Model DTW1001 Sound pressure level (L ) : 98 dB(A) Read instruction manual. Sound power level (L ) : 109 dB (A) Uncertainty (K) : 3 dB(A) Model DTW1002 Only for EU countries Sound pressure level (L... -
Page 3: Ec Declaration Of Conformity
Do not use a power tool while you are tired or The technical file in accordance with 2006/42/EC is under the influence of drugs, alcohol or med- available from: ication. A moment of inattention while operating Makita, Jan-Baptist Vinkstraat 2, 3070, Belgium power tools may result in serious personal injury. 13.5.2015 Use personal protective equipment. Always wear eye protection. Protective equipment such as dust mask, non-skid safety shoes, hard hat, or... - Page 4 jewellery or long hair can be caught in moving parts. This will ensure that the safety of the power parts. tool is maintained. If devices are provided for the connection of Follow instruction for lubricating and chang- ing accessories. dust extraction and collection facilities, ensure these are connected and properly used. Use of Keep handles dry, clean and free from oil and dust collection can reduce dust-related hazards.
-
Page 5: Installing Or Removing Battery Cartridge
Insert it all the way until it locks in place also void the Makita warranty for the Makita tool and with a little click. If you can see the red indicator on the charger. - Page 6 Lithium-ion batteries with a star marking are equipped NOTE: Depending on the conditions of use and the with a protection system. This system automatically ambient temperature, the indication may differ slightly cuts off power to the tool to extend battery life. from the actual capacity. The tool will automatically stop during operation if the tool and/or battery are placed under one of the following Switch action conditions:...
- Page 7 Reversing switch action ► 1 . Button To turn on the lamp status, press the button ► 1 . Reversing switch lever one second. To turn off the lamp status, press the but- for one second again. CAUTION: Always check the direction of With the lamp status ON, pull the switch trigger to turn rotation before operation. on the lamp. To turn off, release it. The lamp goes out approximately 10 seconds after releasing the switch CAUTION: Use the reversing switch only after trigger.
- Page 8 (3/8″ - 5/8″) (1/2″ - 3/4″) (3/8″ - 5/8″) (1/2″ - 5/8″) (3/8″ - 1/2″) Installing or removing impact socket ASSEMBLY Only for Model DTW1001,DTW1002 (optional CAUTION: accessory) Always be sure that the tool is switched off and the battery cartridge is removed CAUTION: Make sure that the impact socket before carrying out any work on the tool.
- Page 9 Use only the drill bit/socket adapter shown in the figure. until it locks into place. Tap it lightly if required. Do not use any other drill bit/socket adapter. To remove the impact socket, simply pull it off. For impact socket with O-ring and pin Only for Model DTW1001 ► 1 . Drill bit 2. Sleeve To install the drill bit, pull the sleeve in the direction of the arrow and insert the drill bit into the sleeve as far as it will go. Then release the sleeve to secure the drill bit.
-
Page 10: Installing Hook
Ring Only for Model DTW800 Hold the tool firmly and place the impact socket over the bolt or nut. Turn the tool on and fasten for the proper fastening time. The proper fastening torque may differ depending upon ► 1 . Bracket 2. Ring 3. Screws the kind or size of the bolt, the material of the workpiece to be fastened, etc. The relation between fastening The ring is convenient for hanging the tool with hoist. torque and fastening time is shown in the figures. First, place the rope through the ring. Then hang the tool up to the air with hoist. CAUTION: Before using the ring, always make sure that the bracket and ring are secured... - Page 11 Model DTW1001 Model DTW1002 Proper fastening torque for standard bolt Proper fastening torque for standard bolt N•m N•m (kgf•cm) (kgf•cm) (8160) (8160) M30(1-1/4″) M30(1-1/4″) M30(1-1/4″) M30(1-1/4″) (6120) (6120) M24(1″) M24(1″) (4080) (4080) M24(1″) M24(1″) (2040) (2040) 1. Fastening time (second) 2. Fastening torque 1.
-
Page 12: Maintenance
(2040) NOTICE: Never use gasoline, benzine, thinner, alcohol or the like. Discoloration, deformation or cracks may result. To maintain product SAFETY and RELIABILITY, repairs, any other maintenance or adjustment should be performed by Makita Authorized or Factory Service 1. Fastening time (second) 2. Fastening torque Centers, always using Makita replacement parts. 12 ENGLISH... -
Page 13: Optional Accessories
OPTIONAL ACCESSORIES CAUTION: These accessories or attachments are recommended for use with your Makita tool specified in this manual. The use of any other accessories or attachments might present a risk of injury to persons. Only use accessory or attachment for its stated purpose. If you need any assistance for more details regard- ing these accessories, ask your local Makita Service Center. - Page 16 Makita Jan-Baptist Vinkstraat 2, 3070, Belgium Makita Corporation Anjo, Aichi, Japan 885444-229 www.makita.com 20150811...


