Advertisement
Structural Diagram
Package Lists

Device Specifications
| Model No. S26 | |
| Display Technology | LCD |
| Resolution | Native 1920x1080P |
| Installation Type | FrontRear/Ceiling/Desktop |
| Product Size | 234x192x94mm |
| Input Interface | HDMI/USB/AV/3.5mm audio |
| Light Source | LED |
| Focus | Manual |
| Aspect Ratio | 16:9/4:3 |
| Product Weight | 1.6kg |
| Output Interface | Audio out |
Multimedia Supported Files
| Files | Support | Doesn't Support |
| Audio Format | MP3, AAC, WAV, WMA, M4A, OGG, FLAC | Dolby AC3, DTS, Divx, VCI, RM, RMVB, FLV, etc |
| Image Format | JPG, PNG, BMP, JPEG | |
| Video Format | MP4t MKV, WMV, 3GP, MPG, TP, TS, DAT, TRP | MSVC / CRAM, MP42, GMC, IV32, RLE, cvid, RV20, DivX, RM. RMVB, VC1, FLV |
| File Format | TXT, XLSX, DOCX |
If play the above files, the projector still can't work properly, please don't hesitate to contact us via support02@wimiusvcom.
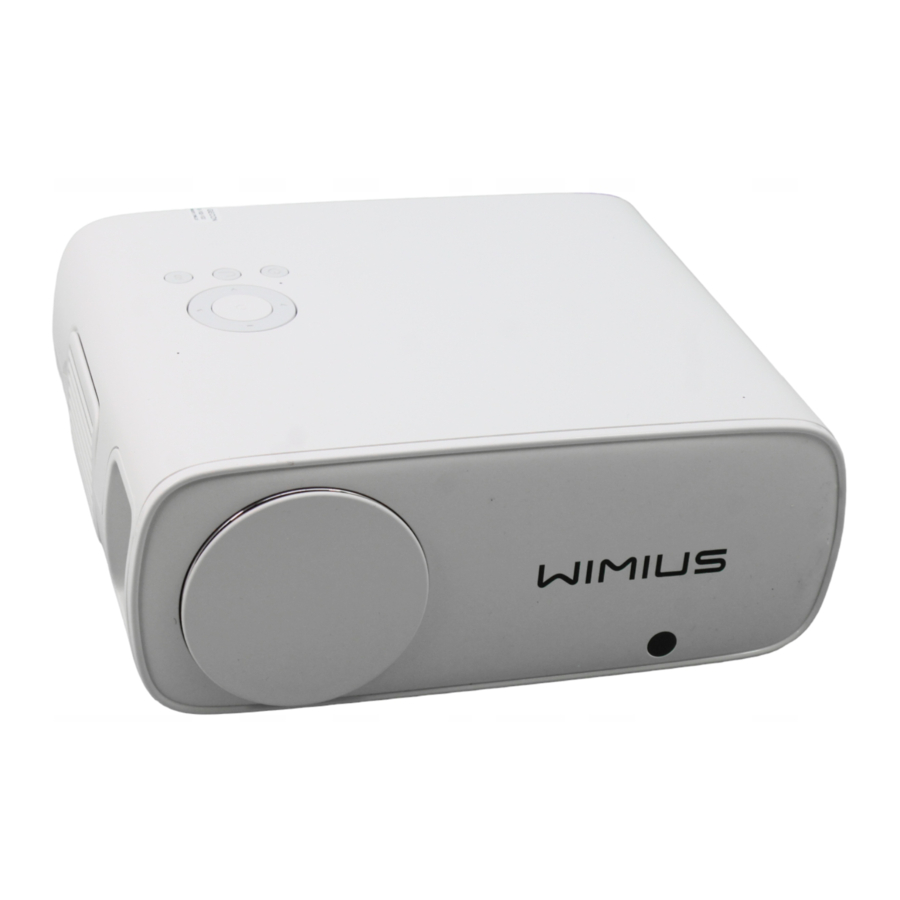
Product Overview

- Arrow Keys /Confirm
- Power
- Back
- Source
- Earphone/3.5mm Audio Out
- Audio, Video Input
- USB Input
- HDMI Input
Remote Control

- Power
- Signal Source
- Arrow keys
- Menu
- Home page
- Volume+
- Volume-
- Mute
- Flip
- Confirm
- Back
- Previous
- Next
Note:
- Install 2 pieces Of AAA batteries(not included) into the remote before using it. Do not combine new batteries with old ones in remote controller, which can cause operation failure due to insufficient power supply.
- When using the remote control, please make sure that the signal transmitter of the remote controller aims at infrared signal of the projector.
- When you are not using the remote controller for a long period. Please take out the batteries to prevent it from leakage.
Installation
Installing the Device
Keep the projector vertical and towards the mid of projector screen, keep the projection Image fiat on the screen.
- To adjust the tilt base, unscrew the support rod at the bottom of the projector, see below picture.
- For Ceiling mount, there are 4 holes at the bottom of the projector (M5*6mm). Please slowly unscrew the 4 black rubbers, then you can find the holes for ceiling mount, see below picture.
![]()

NOTE: The hanging bracket or ceiling mount stand is not packaged.
| Adjust the height of the projector |
| Fix with M5*6MM Screws |
| Dismantle it to clean the screen inside |
How to clean the Black Spot
Please Kindly Note: Any electrical appliances will automatically inhale dust during operation, so man dust falls into the projector lens, it will have "Black dots" in the screen, it will make bad enjoyment to your use!
The S26 has special clean door to help you clean the inner lens, it will greatly extend your use lifespan and enhance the movie enjoyment!

Tear off the bottom label, dismantle the Dusting Mouth Cover with a screwdriver(lncluded).
Method 1: Use the cold wind to blow the dusting mouth.

Method 2:(The most effective method): Use the cleaning swab (Included) to reach inside to clean the inner screen.(We offer cleaning video!)

NOTE: Please contact our e-mail support02@wimius.com for a video if you need detailed steps!
Unit Setting
Select Projection Mode to obtain a front and upward Image:
Menu>Settings>Projection Image Setting>Projection Mode.
Press arrow key to select and press "OK" to confirm.

- Front-Desktop

- Rear

- Front-Ceiling

- Rear-Ceiling


The projector can be hanged on the ceiling with special hanger fame, and placed on the stable desk to project the image according to the operating environment and requirements.
Note: Keep the projector at a height where its lens is axial symmetry to the screen. If it is not possible, use the keystone correction ring to adjust the image.
Projection Distance&Size

Recommended projection distance: 2.4-3M.
- The image size depends on the distance beueen projector and screen. there may be 3% measure difference among above listed data.
- The recommended projection distance varies with different projection contents. Please adjust the distance between the wall/ screen and the projector properly as needed.
- Ambient darkness will improve the darity of the projected images.
Starting the Device
Power On/Power Off
- First connect the power cord to the projector, plug it tightly.
- Once the projector is plugged in, it will be in Standby mode.
- If not use for a long time or encounter thunder and lightning, please unplug the power cord.
Power on: Press the button *  "on the projector or on the remote control to tum on the projector.
Power off: Press the power button on the remote control again to tum the projector
Language Setting
Language Change:
- First enter the settings in the upper right comer of the main menu.
- Then select the language setting option in 'Other Setting", and choose the language you want.


Keystone Correction & Focus & Digital Zoom
To get the clearest pictures: Firstly use the remote control to adjust the keystone correction to make image rectangle and flat on the screen, then slowly rotate the focus lens to make the picture clear.
Note: Keep the projector vertical with projector screen and keep it on the same level.

- Keystone Correction
- Focusing
Keystone Correction
Menu>Settings>Projection Image Setting>Keystone Advanced.
- The projector has both vertical keystone and 4-point keystone, you can not only adjust the image vertically, but also adjust four points to make the image rectangle.
- Vertical keystone±50°: adjust the the screen angels with the arrow keys vertically, until the guides are adjusted to a rectangle.

- 4-Point keystone: adjust the screen with the arrow keys until the guides are adjusted to a rectangle.

When the center circle for roundness image best proportion.
"OK" - Select
"![]() " - Adjust
" - Adjust
"![]() " - Back
" - Back
"![]() " - Reset
" - Reset


 " - Adjust
 " - Back
 " - Reset
 Note: The projected image may be bury or difficult to see, this is due to lack of focus adjustment with the lens, please follow the processes below to adjust the focus.
Focus

Rotate the focus ring slowly At the same time, check the resolution point carefully. The best focus point for the lens would be where the image most clear.
Note: If it is still blurry, please contact the seller support e-mail for help!
The E-mail: support02@wimius.com
Digital Zoom
Menu>Settings>Projection Image Setting>Digital Zoom.
You can reduce the display size from 100% to 1% propotionally.
Note: Before adjusting the display sizet the "Keystone Advanced" shall be selected to "Front" mode.

Signal Source & Multimedia Connection

Signal source selection
Press the remote control signal source key "S", enter the signal source menu Interface. use the direction key and the confirmation key to select the signal source.
- HDMI equipment connecting
- HDMI interface can be connected with the computer and other with VGA HDMI output interface device.
- Choose the media signal channel: "HDMI"
- AV Connection
Use AV cable for connecting as follows, choose the "AV" source input![]()
- USB Connection
- Insert the USB flash driver into the USB port and choose the corresponding files( video or pictures), then press "Play/ Pause" button(OK) to display or stop.
- Audio Out Connection
User can connect the projector to an external speaker or headphones via 35mm earphone jack![]()
WireIess Connection
Important Tips for Wireless Connection:
- The fluency of screen mirroring with wireless connection will be affected by the network environment. A bandwidth of 100Mbit or more is recommended when using screen mirroring.
- Make sure your mobile device is close to the projector when using wireless connection. A distance within 1 meter is recommended.
- Some mobile devices may not support screen mirroring due to the compatibility.
- If the projected image freezes when you switch the screen mirroring interfaces, please long press "OK" button for 5 seconds on the projector/ remote to do a reset, and the reset process will complete in 2 minutes, please wait patiently.
- Any questions, please feel free to contact WIMiUS support02@wirnius.com.
Screen Mirroring (For iOS System)
Note: Both mobile phone and projector are connected to the same WiFi/hotspot
On the projector:
- Select 'Settings" in the upper right corner on the main menu, click into it and select "WiFi Setting".


- Turn on the WiFi function and scan, search for home WiFi/H0tspot, When the WiFi name appears in the search list, select it to connect

- Return to the main menu, click "iOS Cast".


On your iOS device:
- Click into the WiFi settings and make sure your phone is connected to the same Wi-Fi network or Hotpot as the projector.
![]()
- Activate the "Screen Mirroring/AirPlay Mirroring" of your iOS mobile device and then search for the projector device, tap to connect it
![]()
![]()
- The display of your iOS mobile device will be projected to the wall/ screen via Home WiFi network data after a successful connection.


Screen Mirroring (For Android System)
To activate this function, your Android device must support Multi-Screen/Wireless display. Names may differ from different devices.
There are two methods for screen projection on Android phones. The first is to connect the phone and the projector to the same WiFi or hotspot; the second is to connect the phone to the projector's WiFi directly.
Method 1: connecting the phone and the projector to the same WiFi or hotspot.
Note: Both mobile phone and projector are connected to the same WiFi/h0tspot.
On the projector:
- Select "Settings" in the upper right corner on the main menu, click into it and select "WiFi Setting"
![]()
- Tum on the WiFi function and scan, search for home WiFi/Hotspot. When the WiFi name appears in the search list, select it to connect.
- Return to the main menuj click "Miracast"


On your Android phone:
- Click into the WiFi settings and make sure your phone is connected to the same Wi-Fi network or Hotpot as the projector.
- Activate Multi-Screen function on your Android device and find the projector device, tap to connect it.
- The display of your Android mobile device will be projected to the wall/screen via Home WiFi network data after a successful connection,
Method 2: Connecting the phone to the projector's WiFi directly.
On the projector
- On the main menu, click "Miracast"
Note: If the projector was connected to the home WiFi, please disconnect it first and then enter the "Miracast".
On your Android phone:
- Click into the WiFi settings, no need to connect to any WiFi, just tum on the WiFi function.
- Activate Multi-Screen function on your Android device and find the projector device, tap to connect it.
- The display of your Android mobile device will be projected to the wall/ screen via cellular data after a successful connection.
Bluetooth Connection
Tips: S26 Projector only can connect with Bluetooth headsets, Bluetooth speakers and Airpods, not allow to connect Bluetooth keyboards or Bluetooth phones.
How to Connect Bluetooth Devices
- Select "Settings" in the upper right corner on the main menu, dick into it and select "Bluetooth Setting".

- Tum on the Bluetooth function and Search for Bluetooth device.

- When the desired Bluetooth device name appears in the search list then select it to connect.
Any questions please tell free to contact WiMiUS via support02@wimius.com


Tips:
- The Bluetooth function has distance requirement, please keep the distance by 8ft.
- The Bluetooth function can only connect one Bluetooth speaker during the use.
- If you cannot find the Bluetooth device, please re-star your Bluetooth device and re-search again. Or you can contact our offlc: ial e-mail for support.
Main Menu Function
Factory Reset
Restore factory settings: Clear all date, restore all system settings and custom items.
Menu>Settings>System Update>Restore Factory.

System upgrade
Online Update: Download Update Files online.
Menu>Settings>System Update>Online Update.
Local Update: Use USB connection to provide Update Files.
Menu>Settings>System Update>Local Update.
Note: When the projector is in normal use, please do not upgrade at will.
Scheduled Shutdown
If it's needed, scheduled shutdown could be set.
Menu>Settings>Other Setting>Scheduled Shutdown.

Power On Option
Standby: When plugged into power supply, the projector will not trun on directly.
Direct When plugged into power supply, the projector will trun on directly.
Menu>Settings>Other Setting>Power On Option.

FAQ
Common problems can be found in the table below, we suggest you read the manual careful by first time use. If there is any question, that you couldn't solve with this manual, please contact us.
| Questions | Solutions |
| Can't play video in App Netflix, Hulu, Prime video | Those APPs are limited with HDCP. This model doesnt support this function. So it cant suppofl these Apps. |
| Wi-Fi connection is not stable |
|
| Indicator light is off when plug into power supply |
|
| Press the power button on the remote control and the projector does not turn on |
|
| No image on the screen |
|
| Picture right, no sound |
|
| It will shut off automatically after turn on for a while |
|
| Can't find devices when connected with hard drive or flash drive? |
|
| Can't play the movies |
|
Warnings
- High brightness lamp! Please don't look directly into the lamp.
- Adjusting the contrast, brightness and focal length according to different input signals is the key to make the picture clear; otherwise, the picture will be blurred;
- There is high voltage inside the projector. Please don't open the cover and touch the internal parts of the machine.
Precautions
- Clean
When cleaning this projector, please pull out the power cable. Use a wet cloth to clean, don't use any detergent that may damage the unit - Accessory
Please use our recommended accessory or it will damage the projector. - Correct environment
Do not place the projector in a wet environment, like a damp basement or near the swimming pool, etc. - Ventilation
The ventilation is equipped for the projector to work stably. Do not put anything around the vents. Or it will cause the projector to heat up. - Power
Please make sure the power is within the required power range. - Thunder
For thunder day, please unplug the power cable from the projector. - Repair
Due to high voltage inside, please do not open or try to repair the projector by yourself. Don't disassemble the projector without our suggestion, otherwise, any warranty will be invalid. Seek help from an authorized agent or qualified professionals when needed. - Keep away from heat device
Please make sure the projector is far away from any heat devices which will![]() damage the projector.
damage the projector.
Contact US
Thank you for your purchase with WiMiUS S26 video projector.
Any questions, please feel free to contact us, so that we can service you further.
Email Subject: Model No. + Order Number + Projector Issue.
Email: support02@wimius.com (optimal)

Documents / ResourcesDownload manual
Here you can download full pdf version of manual, it may contain additional safety instructions, warranty information, FCC rules, etc.
Advertisement
Thank you! Your question has been received!


Need Assistance?
Do you have a question about the S26 that isn't answered in the manual? Leave your question here.