Advertisement
Available languages
Available languages
Quick Links
Advertisement
Chapters

Related Manuals for Wimius K5


Summary of Contents for Wimius K5
- Page 1 K5 PROJECTOR Support email: Support@wimius.com Website:www.wimius.com...
- Page 3 LANGUAGE English 01-16 Français 17-34 Espanol 35-50 51-67 Germany Italian 68-87 日本語 68-87...
-
Page 4: Table Of Contents
CONTENT Warning and Safety Precautions------------------------------------------------------------ Accessory and Projector Structure--------------------------------------------------------- Remote Structure------------------------------------------------------------------------------- Focus and Keystone Correction------------------------------------------------------------- Connecting with WiFi--------------------------------------------------------------------------- Connect with Bluetooth Speaker------------------------------------------------------------ Other Connections------------------------------------------------------------------------------ Installing the Projector------------------------------------------------------------------------- Main Functions of the Menu------------------------------------------------------------------ FAQ-------------------------------------------------------------------------------------------------... - Page 5 Thank you for purchasing WiMiUS K5 wifi bluetooth video projector. Please read this manual carefully before you use the projector. If any questions during using it, feel free to contact us at support@wimius.com. We sincerely hope this projector can make your life more colorful.
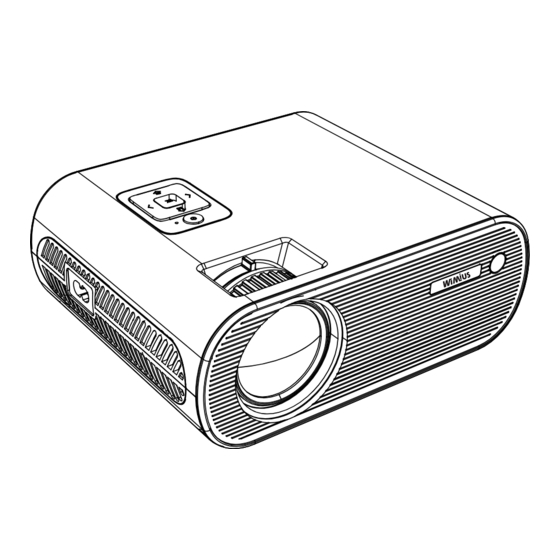
- Page 6 Projector*1 AV Cable*1 Power Cable*1 Remote Controller*1 User Manual*1 Projector Support Base*1 Projector Overview Lens IR Receiver Power cable Socket...
- Page 7 1.3.5mm audio output 2.AV port 3.HDMI port 4. USB port*2 5.IR receiver 6.Speaker 7. Ventilation inlet Note: please refer to the product appearance, this figure is for reference only. Control Panel Keystone correction knob Manual Focus Control Panel Power/Return...
- Page 8 Tripod Stand thread Support Base thread Remark: The adjustable support base can assure the max projection angle by 15°, The best display effect will be obtained by projection angle of 0°~ 8°. Remote control Power Button Menu Backward Forward...
-
Page 9: Focus And Keystone Correction
Specifications Model No.: K5 Imaging System Light source Projection distance 1.2-6.0m Projection size 36-200” Native 1280*720, Color 16.8M full color Resolution Support 1080P Full HD Keystone Correction ±15° Input Interface AV\USB\HDMI Aspect Ratio 16:9 /4:3 Power: 110-240V~50/60HZ Output Interface 3.5mm audio out... - Page 10 Incorrect installation Correct installation Incorrect installation 2.Adjust the focus ring to make the picture clear. Keystone Correction Focus ring Focus...
- Page 11 Trapezoid correction Note: It is normal when sharpness in the central, blur in the 10% edge for the lcd projector, due to the keystone correction function. Signal source menu operation Before using the projector to play videos, please press“S”through remote control and choose the corresponding signal source to confirm.
- Page 12 For iOS system Method 1: Setting with cellular data 1.Turn on the projector, select “Screen Mirroring” as the input source. It will enter the interface of Screen Mirroring for iOS system. See below. RKcast-XXXXXX 192.168.XX.XX DIVICE 2.Go to the settings of your iOS mobile device and connect it to the Wi-Fi of RKcast-XXXXXX (password: 12345678).
- Page 13 Method 2: Setting with Home Wifi 1.Select RKcast-XXXXXX from the searching results to connect. Wi-Fi of RKcast-XXXXX (password: 12345678) 2.Visit 192.168.XX.XX (please put in the IP showed on the screen) from a browser on your mobile device, tap WiFi AP >Scan, select your router’s Wi-Fi and enter the right password, then tap Connect to continue.
- Page 14 5.Swipe up the screen of your iOS mobile device and tap “Screen Mirroring” to search for the projector, then select RKcast-XXXXX from the searching results to connect. For Android System To activate this function, your android device must support Multi-Screen/Wireless display.
-
Page 15: Connect With Bluetooth Speaker
3.Your router' s Wi-Fi will be displayed on interface of Screen. See below. Mi 10 4.Get back to the Wi- Fi setting of the android phone, then connect it to the same router's Wi-Fi. 5.Activate Multi-Screen function in your Android device to search for the projector, then select RKcast-XXXXX from the searching results to connect. - Page 16 Via HDMI Cable(Not Included) Connecting with Sound bar ① Use the 3.5mm audio cable to connect with sound bar. ② Turn on the projector and the sound bar. Then it will work. ③ More details, please contact seller at support@wimius.com.
- Page 17 Connecting with DVD ①Use the AV cable coming with the projector to connect with DVD. ②Turn on the projector and DVD player. USB Multimedia Connecting ① Insert the USB drive to corresponding interface. ② Choose the video or picture to play.
-
Page 18: Installing The Projector
Installing the projector Ceiling mount There is a hole in the bottom of the projector for ceiling mount. Ceiling mount hole Main Function of the Menu Picture Menu... - Page 19 Function Picture Menu included To adjust the “Contrast/Brightness/Col- Picture Mode Standard/soft/vivid/ user or/Sharpness/Tint” of the image To adjust the color temperature Color temperature medium/warm/User/Cool (red/green/blue) Aspect ratio let you configure how Auto/4:3/16:9 Aspect Ratio images are displayed Reduce the image’s noise,make clear...
- Page 20 Note: In the Sound mode “User” interface, you can adjust the “Treble/Bass” of the image by using the +- button on the remote control in the “0-100” range. Audio Output, you can search the external speaker to connect via the static mode.
-
Page 21: Faq
Those APPs are limited with HDCP. This model doesn’t support this function. So it can’t support these APPs. Amazon Prime Email us at support@wimius.com for a video to clean it. Black spot, dust on the screen · Please check whether the network of your phone is well. - Page 22 Catalogue Avertissement et Précautions de Sécurité ----------------------------------------------- Accessoires et Structure du Projecteur---------------------------------------------------- Télécommande---------------------------------------------------------------------------------- Correction Trapézoïdale et Mise Au Point------------------------------------------------ Connexion avec les smartphones et iPad ----------------------------------------------- Connexion Avec Haut-Parleur Bluetooth-------------------------------------------------- Autres Connexions------------------------------------------------------------------------------ Installation Du Projecteur--------------------------------------------------------------------- Fonctions Principales Du Menu-------------------------------------------------------------...
- Page 23 Merci d'avoir acheté notre vidéoprojecteur WiMiUS K5. Veuillez lire attentivement ce manuel avant d'utiliser ce vidéoprojecteur. Si vous avez des questions, veuillez nous contactez aux adresses ci-dessous : support@wimius.com Nous espérons que ce vidéoprojecteur apportera plus de couleur dans votre vie.
- Page 24 Projecteur*1 3en1 Câble AV * 1 Câble d'alimentation * 1 Télécommande * 1 Mode d’emploi * 1 Base de support du projecteur * 1 Vue d’ensemble du Produit Objectif Receptor IR Interface du câble d'alimentation...
- Page 25 1.Sortie audio 3,5mm 2.Port AV 3.Port HDMI 4.Port USB*2 5.Récepteur IR 6.Haut-parleur 7. Entrée de ventilation Remarque: Veuillez-vous référer à l'apparence du produit, cette figure est un exemple.only. Panneau de Configuration Bague de correction trapézoïdale Bague de Mise au point(manuel)
-
Page 26: Télécommande
Filetage pour la fixation du trépied Pied réglable Remarque: Le pied de vis réglable vous permet de régler l'angle de projection(- maximum de 15°), le meilleur effet d'affichage sera obtenu par un angle de projection de 0° à 8°. -
Page 27: Correction Trapézoïdale Et Mise Au Point
Spécifications Modèle: K5 Système d'imagerie LCD Source de Lumière LED Distance de projection 1.2-6.0m Taille de projection 36-200” 1280*720 Natif, Supp- 16.8M pleine Couleur Résolution orte Full HD 1080P couleur Correction trapézoïdale ±15°manuel Interface d'entrée AV\USB\HDMI Ratio d'aspect 16:9 /4:3... - Page 28 Mauvaise installation Installation correcte Mauvaise installation 2.Ajustez l’anneau de mise au point pour que l’image soit net. Bague de correction trapézoïdale Bague de mise au point Mise au point...
-
Page 29: Connexion Avec Les Smartphones Et Ipad
Correction trapézoïdale Note: Il est normal que l'image soit floue au niveau des bords si une correction trapézoïdale est appliquée. Operation Du Menu De La Source De Signal Après avoir inséré votre dispositif, appuyez le bouton “S’’ sur la télécommande et puis choisissez la source de signal correspondante pour confirmer. - Page 30 Pour Le Système iOS Méthode 1 : Réglage avec des données cellulaires 1.Activer le projecteur, sélectionnez « Screen Mirroring » comme la source d’entrée. Aller dans l’interface de Screen Mirroring du projecteur pour le système iOS. Voir ci-des- sous.
- Page 31 Méthode 2: Réglage avec Home WiFi 1.Sélectionnez RKcast-XXXXXX à partir des résultats de recherche pour vous connecter. Wi-Fi de RKcast-XXXXX (mot de passe: 12345678) 2.Visitez 192.168.XX.XX (s’il vous plaît mettre dans l’IP affiché sur l’écran) à partir d’un navigateur sur votre appareil mobile, appuyez sur WiFi AP >Scan, sélectionnez le Wi-Fi de votre routeur et entrez le bon mot de passe, puis appuyez sur Connect pour continuer.
- Page 32 5.Faites glisser l’écran de votre appareil mobile iOS et appuyez sur « Screen Mirroring » pour rechercher le projecteur, puis sélectionnez RKcast-XXXXX à partir des résultats de recherche pour vous connecter. Pour Le System Android Pour activer cette fonction, votre appareil Android doit prendre en charge l’affichage multi-écran/sans fil.
-
Page 33: Connexion Avec Haut-Parleur Bluetooth
3.Le Wi-Fi de votre routeur sera affiché sur l’interface de Screen. Voir ci-dessous. Mi 10 4.Revenez au paramètre Wi-Fi du téléphone Android, puis connectez-le au Wi-Fi du même routeur. 5.Activez la fonction Multi-Screen dans votre appareil Android pour rechercher le projecteur, puis sélectionnez RKcast-XXXXX à... - Page 34 Connexion avec la barre de son ① Utilisez un câble audio de 3,5 mm pour vous connecter à la barre de son. ② Allumez le projecteur et la barre de son. ③ Plus de détails, contactez Notre service technique à support@wimius.com.
- Page 35 Connexion en RCA Pour un lecteur de DVD ① Utilisez le câble AV avec le projecteur pour vous connecter au DVD. ② Allumez le projecteur et le lecteur DVD. Connexion multimédia USB ① Insérez la clé USB à l’interface correspondante.
-
Page 36: Installation Du Projecteur
Installation Du Projecteur Montage en plafond Il y a un trou de vis dans le bas du projecteur pour le montage au plafond. Trou de montage de plafond Fonction Principale Du Menu Menu d’Image... - Page 37 Function Image Menu inclus Pour ajuster le « Contraste/Luminos- Mode image Standard/soft/vivid/ utilisateur ité/Couleur/Netteté/Teinte » de l’image Pour ajuster la température de la Température des Moyen/Chaud/Utilisateur/Cool couleur (rouge/vert/bleu) couleurs Ratio d’aspect vous permet de configurer Auto/4:3/16:9 Rapport d’aspect la façon dont les images sont affichées Réduisez le bruit de l’image, faites...
- Page 38 Note: -Dans l’interface « Utilisateur » du mode de Son, vous pouvez régler le « Treble/Bass » de l’image en utilisant le bouton +- sur la télécommande de la plage de « 0-100 ». -Sortie audio, vous pouvez rechercher le haut-parleur externe pour vous connecter via le mode statique.
- Page 39 Netflix, Hulu, Amazon Prime via Veuillez le connecter à un PC ou un TV Stick via le port HDMI smartphone pour les lire. Envoyez-nous un e-mail à support@wimius.com pour une vidéo Tache noire, poussière sur l’écran pour le nettoyer. ·...
- Page 40 Tabla de contenidos Advertencias y precauciones de seguridad --------------------------------------------- Accesorios y descripción general del proyector ---------------------------------------- Mando a distancia ------------------------------------------------------------------------------ Corrección de enfoque y trapecio----------------------------------------------------------- Conexión con WiFi ----------------------------------------------------------------------------- Conexión con altavoz Bluetooth------------------------------------------------------------- Otras conexiones-------------------------------------------------------------------------------- Instalación del proyector---------------------------------------------------------------------- Funciones principales del menú-------------------------------------------------------------...
- Page 41 Gracias por comprar el proyector de video bluetooth wifi WiMiUS K5. Lea este manual detenidamente antes de utilizar el proyector. tiene alguna pregunta durante uso, dude contactarnos support@wimius.com. Esperamos sinceramente que este proyector pueda hacer su vida más colorida.
- Page 42 Proyector * 1 Cable AV * 1 Cable de alimentación * 1 Mando a distancia * 1 Manual del usuario * 1 Base de soporte del proyector * 1 Descripción General Del Proyector Receptor de Lente infrarrojos Interfaz de cable de alimentación...
- Page 43 1. Salida de audio de 3,5 mm 2. Puerto AV 3. Puerto HDMI 4. Puerto USB * 2 5. Receptor de infrarrojos 6. Altavoz 7. Entrada de ventilación Nota: Consulte la apariencia del producto, esta figura es solo para referencia.
- Page 44 Rosca base del soporte Rosca para Trípode Observación: La base de soporte ajustable puede asegurar el ángulo de proyección máximo en 15 °, el mejor efecto de visualización se obtendrá con un ángulo de proyección de 0 ° ~ 8 °.
- Page 45 Especificaciones Modelo: K5 Sistema de imágen Fuente de luz Tamaño de Distancia de proyección 1.2-6.0m 36-200” proyección Nativa 1280 * 720, Color 16.8M todo color Resolución Soporte Full HD 1080P Corrección trapezoidal ±15° Interfaz de entrada AV\USB\HDMI Relación de aspecto...
- Page 46 Instalación incorrecta Instalación correcta Instalación incorrecta 2.Ajustar el anillo de enfoque para aclarar la imagen. Corrección trapezoidal Anillo de enfoque Foco...
- Page 47 Corrección trapezoidal Nota: Es normal obtener mayor nitidez en el centro, el desenfoque en el borde del 10% para el proyector lcd, debido a la función de corrección trapezoidal. Utilización del menú de fuente de señal Antes de usar el proyector para reproducir videos, presione "S" a través del mando a distancia y elija la fuente de señal correspondiente para confirmar.
- Page 48 Para Dispositivos iOS Método 1: Configuración con datos móviles 1. Encienda el proyector, seleccione “Screen Mirroring” como fuente de entrada. 2. Ingresará a la interfaz de Screen Mirroring para dispositivos iOS. Ver abajo. RKcast-XXXXXX 192.168.XX.XX DIVICE 2. Vaya a la configuración de su dispositivo móvil iOS y conéctelo al Wi-Fi de RKcast-XXXXXX (contraseña: 12345678).
- Page 49 Método 2: Configuración con Wifi doméstico 1. Seleccione RKcast-XXXXXX en los resultados de búsqueda para conectarse. Wi-Fi de RKcast-XXXXX (contraseña: 12345678) 2. Visite 192.168.XX.XX (la IP que se muestra en la pantalla) desde un navegador en su dispositivo móvil, toque WiFi AP> Escanear, seleccione el Wi-Fi de su router e ingrese la contraseña correcta, luego toque Conectar para continuar.
- Page 50 5.Deslice hacia arriba la pantalla de su dispositivo móvil iOS y toque "Screen Mirroring" para buscar el proyector, luego seleccione RKcast-XXXXX de los resultados de búsqueda para conectarse. Para el sistema Android Para activar esta función, su dispositivo Android debe ser compatible con la pantalla multipantalla / inalámbrica.
- Page 51 3.El Wi-Fi de su router se mostrará en la interfaz de la pantalla. Ver abajo. Mi 10 4. Vuelva a la configuración de Wi-Fi del teléfono Android, luego conéctelo al Wi-Fi del mismo router. 5. Active la función de pantalla múltiple en su dispositivo Android para buscar el proyector, luego seleccione RKcast-XXXXX en los resultados de búsqueda para conectarse.
- Page 52 Conexión con la barra de sonido ① Utilice el cable de audio de 3,5 mm para conectar con la barra de sonido. ② Encienda el proyector y la barra de sonido. Ya funcionará. ③ Para más detalles, comuníquese con el vendedor en support@wimius.com.
- Page 53 Conexión con DVD ① Utilice el cable AV que viene con el proyector para conectarlo con un DVD. ② Encienda el proyector y el reproductor de DVD. Conexión multimedia USB ① Inserte la unidad USB en la interfaz correspondiente.
- Page 54 Instalación Del Proyector Montaje en el techo Hay un orificio en la parte inferior del proyector para el montaje en el techo. Orificio de montaje en el techo Función Principal Del Menú Menú de imagen...
- Page 55 Función imagen Menú Para ajustar el “Contraste / Brillo / Modo de imagen Estándar/suave/vívido/usuario Color / Nitidez / Tinte” de la imagen Para ajustarla temperatura del color Temperatura de Media / cálida / Usuario / Frío (rojo / verde / azul) color La relación de aspecto le permite config-...
- Page 56 Nota: En la interfaz de "Usuario" del modo de sonido, puede ajustar “Agudos / Graves” de la imagen usando el botón + - en el mando a distancia en el rango “0-100”. Salida de audio, puede buscar el altavoz externo para conectarse a través del modo estático.
- Page 57 No se pueden reproducir videos en la admite esta función. Por lo tanto, no puede admitir estas aplicación Netflix, Hulu, Amazon Prime aplicaciones. Envíenos un correo electrónico a support@wimius.com para Mancha negra, polvo en la pantalla obtener un video para limpiarlo. ·...
- Page 58 Katalog Warn- und Sicherheitsvorkehrungen------------------------------------------------------- Zubehör- und Projektorstruktur-------------------------------------------------------------- Fernstruktur--------------------------------------------------------------------------------------- Fokus- und Trapezkorrektur------------------------------------------------------------------ Verbindung mit Wifi----------------------------------------------------------------------------- Verbindung mit Bluetooth Lautsprecher--------------------------------------------------- Andere Verbindungen-------------------------------------------------------------------------- Installation des Projektors--------------------------------------------------------------------- Hauptfunktion des Menüs--------------------------------------------------------------------- FAQ-------------------------------------------------------------------------------------------------...
- Page 59 Vielen Dank, dass Sie sich für unseren WiMiUS K5 WiFi Bluetooth Videoprojektor entschie- den haben. Bitte lesen Sie dieses Handbuch sorgfältig durch, bevor Sie den Beamer verwenden. Wenn Sie während der Verwendung Fragen haben, wenden Sie sich bitte an support@wimius.com.
- Page 60 Projektor * 1 AV-Kabel * 1 Netzkabel * 1 Fernbedienung * 1 Benutzerhandbuch * 1 Projektor-Support-Basis * 1 Projektorübersicht Lens IR Empfänger Netzkabelbuchse...
- Page 61 1.3,5 mm Audioausgang 2.AV-Anschluss 3.HDMI-Port 4.USB-Anschluss * 2 5.IR Empfänger 6.Lautsprecher 7.Lüftungseinlass Hinweis: Bitte beziehen Sie sich auf das Erscheinungsbild des Produkts. Diese Abbildung dient nur als Referenz. Schalttafel Trapezkorrekturknopf Manueller Fokus Schalttafel Power / zurück Kontrollleuchte Menü / oben Rechts / Lautstärke-...
- Page 62 Unterstützung Basisgewinde Stativfußgewinde Bemerkung: Der verstellbare Stützfuß kann den maximalen Projektionswinkel von 15° gewährleisten. Der beste Anzeigeeffekt wird bei einem Projektionswin- kel von 0°~ 8° erzielt. Fernbedienung Ein- / Ausschalter Menü Rückwärts Vorwärts Home / Spielen Pfeiltasten Eingeben Menü...
- Page 63 Spezifikationen Modell-Nr.: K5 Bildgebungssystem Lichtquelle Projektionsentfernung 1.2-6.0m Projektionsgröße 36-200” Native 1280 * 720, unte- Farbe 16.8M vollfarbig Auflösung rstützt 1080P Full HD Schlussstein-Korrektur ±15° AV\USB\HDMI Eingangsschnittstelle Seitenverhältnis 16:9 /4:3 Leistung 110-240V~50/60HZ 3.5mm Audio Ausgangsschnittstelle Projektgewicht 1.2kg Ausgang Diagramm zur Projektionsgröße Entfernung Bildschirmgröße...
- Page 64 Falsche Installation Richtige Installation Falsche Installation 2.Stellen Sie den Fokusring ein, um das Bild klar zu machen. Trapezkorrektur Fokusring Fokus...
- Page 65 Trapezkorrektur Hinweis: Es ist normal, dass die Schärfe in der Mitte aufgrund der Trapezkorrek- turfunktion die 10% -Kante des LCD-Projektors verwischt. Menübetrieb der Signalquelle Bevor Sie den Projektor zum Abspielen von Videos verwenden, wählen Sie bitte die entsprechende Signalquelle Ihres Geräts aus.
- Page 66 Für iOS-System Methode 1: Einstellung mit Mobilfunkdaten 1.Schalten Sie den Projektor ein und wählen Sie als Eingangsquelle „Screen Mirroring“. Es wird die Oberfläche von Screen Mirroring für iOS-System aufgerufen. Siehe unten. RKcast-XXXXXX 192.168.XX.XX DIVICE 2.Gehen Sie zu den Einstellungen Ihres iOS-Mobilgeräts und verbinden Sie es mit dem Wi-Fi von RKcast-XXXXXX (Passwort: 12345678).
- Page 67 Methode 2: Einstellung mit Home Wifi 1.Wählen Sie RKcast-XXXXXX aus den Suchergebnissen aus, um eine Verbindung herzus- tellen. Wi-Fi von RKcast-XXXXX (Passwort: 12345678) 2.Tippen Sie in einem Browser auf Ihrem Mobilgerät auf 192.168.XX.XX (geben Sie die auf dem Bildschirm angezeigte IP ein) WiFi AP> Scannen, wählen Sie das Wi-Fi Ihres Routers aus, geben Sie das richtige Passwort ein und tippen Sie anschließend auf Verbinden, um...
- Page 68 5.Wischen Sie den Bildschirm Ihres iOS-Mobilgeräts auf und tippen Sie auf „Bildschirm- spiegelung“, um nach dem Projektor zu suchen. Wählen Sie dann RKcast-XXXXX aus den Suchergebnissen aus, um eine Verbindung herzustellen. Für Android-System Um diese Funktion zu aktivieren, muss Ihr Android-Gerät die Multi-Screen / Wireless-An- zeige unterstützen.
- Page 69 3. Das WLAN Ihres Routers wird auf der Benutzeroberfläche des Bildschirms angezeigt. Siehe unten. Mi 10 4. Kehren Sie zur WLAN-Einstellung des Android-Telefons zurück und verbinden Sie es mit dem WLAN desselben Routers. 5. Aktivieren Sie die Multi-Screen-Funktion in Ihrem Android-Gerät, um nach dem Projektor zu suchen, und wählen Sie dann RKcast-XXXXX aus den Suchergebnissen aus, um eine...
- Page 70 Via HDMI Cable(Not Included) Verbindung mit Soundbar ① Verwenden Sie das 3,5-mm-Audiokabel, um eine Verbindung mit der Soundbar herzus- tellen. ② Schalten Sie den Projektor und die Soundbar ein. Dann wird es funktionieren. ③ Weitere Informationen erhalten Sie vom Verkäufer unter support@wimius.com.
- Page 71 Verbindung mit DVD ① Verwenden Sie das mit dem Projektor gelieferte AV-Kabel, um eine DVD anzuschließen. ② Schalten Sie den Projektor und den DVD-Player ein. Verbindung mit USB-Multimedia ① Stecken Sie das USB-Laufwerk in die entsprechende Schnittstelle. ② Wählen Sie das abzuspielende Video oder Bild aus.
- Page 72 Installation des Projektors Deckenmontage Im Boden des Projektors befindet sich ein Loch für die Deckenmontage. Deckenmontageloch Hauptfunktion des Menüs Bildmenü...
- Page 73 Funktion Bild Menü inbegriffen Zum Einstellen von „Kontrast / Helligkeit / Bildmodus Standard/weich/lebendig/Benutzer Farbe / Schärfe / Farbton“ des Bildes Einstellen der Farbtemperatur (rot / Farbtemperatur Mittel / Warm / Benutzer / Kühl grün / blau) Mit dem Seitenverhältnis können Sie Seitenverhältnis...
- Page 74 Hinweis: In der Benutzeroberfläche des Soundmodus „Benutzer“ können Sie die „Höhen / Bässe“ des Bildes mit der Taste + - auf der Fernbedienung im Bereich „0-100“ einstellen. Audioausgang, Sie können den externen Lautsprecher durchsuchen, um eine Verbindung über den statischen Modus herzustellen.
- Page 75 Es kann kein Video bei App Netflix, Dieses Modell unterstützt diese Funktion nicht. Es kann also Hulu, Amazon Prime abgespielt diese APPs nicht unterstützen werden Senden Sie eine E-Mail an support@wimius.com, um ein Video Schwarzer Fleck, Staub auf dem zum Reinigen zu erhalten Bildschirm ·...
- Page 76 Indice Avvertenze e precauzioni di sicurezza---------------------------------------------------- Struttura degli accessori del proiettore---------------------------------------------------- Messa a fuoco e correzione trapezoidale------------------------------------------------- Connessione WiFi------------------------------------------------------------------------------- Connessione altoparlante Bluetooth------------------------------------------------------- Altre connessioni-------------------------------------------------------------------------------- Montaggio proiettore--------------------------------------------------------------------------- Funzioni principali del menu------------------------------------------------------------------ FAQ-------------------------------------------------------------------------------------------------...
- Page 77 Grazie per l’ acquisto del videoproiettore WiMius k5 wifi bluetooth. Si prega di leggere attentamente questo manuale d’uso prima di utilizzare il proiettore. In caso di domande durante l’utilizzo, si prega di contattarci all’ indirizzo mail: support@wimius.com. Avvertenze 1.Lampada ad alta luminosità! Si prega di non guardare direttamente nella lampada.
- Page 78 Proiettore *1 Cavo Av *1 Cavo di alimentazione *1 Telecomando *1 Manuale d’uso *1 Perno di supporto proiettore *1 Panoramica del proiettore Lente IR ricevitore Presa per il cavo di alimentazione...
- Page 79 1 Uscita Jack audio 3.5 mm 2 Ingresso AV 3 Ingresso HDMI 4 Due porte USB 5 IR ricevitore 6 Tv Tuner analogico 7 Altoparlante Note: Please refer to the product appearance, this figure is for reference only. Panello di controllo...
- Page 80 Ingresso per cavalletto treppiede Ingresso perno di supporto Nota: Il perno di supporto regolabile può garantire un angolo di proiezione massimo di 15, per ottenere una buona visualizzazione dell’ immagine consiglia- mo un angolo di proiezione di 0°~ 8°.
-
Page 81: Messa A Fuoco E Correzione Trapezoidale
Specifiche Modello : K5 Sistema di immagini LCD Sorgente luminosa LED Dimensioni di Distanza di proiezione 1.2-6.0 metri 36-200” proiezione 16.8 milioni di 1280*720, supporto Colori Risoluzione nativa colori 1080P Full HD Correzione Interfaccia di ±15° AV\USB\HDMI trapezoidale ingresso... - Page 82 Installazione errata Le Corretta installazione Installazione errata Le immagini sinistra-destra L’ immagini sono immagini sinistra-destra sono piccole rettangolari sono piccole 2. Regolare la rotellina di messa a fuco per rendere l’ immagine più chiara. Correzione trapezoidal RotelRot Rotellina messa a fuoco...
- Page 83 Trapezoid correction Nota: E’ normale quando la nitidezza è al centro e la sfocatura dei bordi del 10% per il proiettore lcd, a causa della funzione di correzione trapezoidale. Funzionamento del menu della sorgente del segnale Prima di utilizzare il proiettore per riprodurre video, premere S tramite telecoman- do e scegliere la sorgente del segnale corrispondente per confermare.
- Page 84 Per sistema iOs Primo metodo: impostazione con dati cellulari 1.Accendere il proiettore, selezionare Screen Mirroring come sorgente di ingresso. Entrerai nell’ interfaccia Screen Mirroring per il sistema iOS. Vedere la figura sottostante. RKcast-XXXXXX 192.168.XX.XX DIVICE 2 Accedere alle impostazioni del tuo dispositivo mobile iOS e collegarlo al WiFi di RKcast-XXXXXX (password:12345678).
- Page 85 Secondo metodo: impostazione con rete WiFi domestica 1.Selezionare RKcast-XXXXXX dai risultati della ricerca per connettersi. WiFi di Rk cast-XXXXXX (password: 12345678). 2.Visitare la pagina 192.168.XX.XX ( inserire l’ IP mostrato sullo schermo) dal browser sul tuo dispositivo mobile, cliccare AP WiFi- Scansione, selezionare il Wifi del router e inserire la password corretta, dopo cliccare connetti per continuare.
- Page 86 5. Scorrere verso l’ alto lo schermo del tuo dispositivo mobile iOS e toccare Screen Mirror- ing per cercare il proiettore, dopo selezionare RK cast-XXXXXX dai risultati della ricerca per connettersi. Per sistema Android Per attivare questa funzione, il tuo dispositivo Android deve supportare la visualizzazione Multi-Screen/Wireless.
-
Page 87: Connessione Altoparlante Bluetooth
3.Il WiFi del router verrà visualizzato sull’ interfaccia dello schermo. Vedere la figura sottostante. Mi 10 4 Tornare alle impostazioni WiFi del telefono Android, dopo collegalo al WiFi dello stesso router. 5 Attivare la funzione Multi-Screen nel dispositivo Android per cercare l proiettore, dopo selezionare RK cast-XXXXXX dai risultati della ricerca per connettersi. - Page 88 Collegamento con la soundbar ① Utilizzare il cavo audio da 3.5 mm per collegare la sound bar. ② Accendere il proiettore e la soundbar. ③ Per maggiori informazioni e dettagli, si prega di contattare il venditore al seguente indiriz- zo support@wimius.com.
- Page 89 Accendere il proiettore e il lettore DVD Connessione Multimediale USB ① Inerire l ‘unità USB nell’ interfaccia corrispondente. ② Scegliere il video o l’ immagine da riprodurre. Nota: il proiettore supporta solo chiavetta USB 2.0 e video 1080P 30 FPS. Il file dell’ unità...
-
Page 90: Montaggio Proiettore
Montaggio del proiettore Montaggio a soffitto Nella parte inferiore del proiettore è situato un foro per il montaggio a soffitto. Ceiling mount hole Funzione principale del menu Immagine del Menu... - Page 91 Immagine Menu Funzioni Modalità di Standard/soft/vivido/utente Per regolare il contrasto/luminosità/colore/nitidez- immagine Media/calda/utente/Fredda za dell’ immagine Per regolare la temperatura del colore Temperatura Media/calda/utente/Fredda rosso/verde/blu del colore Le proporzioni consentono di configurare la Proporzioni Auto/4:9/16:9 modalità di visualizzazione delle immagini.
- Page 92 Nota: Nell’ interfaccia dell’ utente della modalità audio, è possibile regolare Alti/Bassi utilizzando il pulsante - sul telecomando nella gamma 0-100. Time Menu Timer di spegnimento: è possibile utilizzare questa funzione per impostare il timer di spegnimento del proiettore. Intervallo di regolazione di spegnimento 10min/20min/30min/60min /90min/120min/ 180min/240min.
-
Page 93: Faq
· Il formato del video è corretto? · I file sono danneggiati? Non posso riprodurre i film · Il dispositivo è guasto? Puoi consigliarmi un supporto da Si prega di contattarci via email : support@wimius.com soffitto per questo proiettore? Contatti Website: www.wimius.com Email : Support@wimius.com... - Page 94 カタログ 警告および安全上の注意-------------------------------------------------------------------- 付属品と製品仕様----------------------------------------------------------------------------- リモコンと仕様-------------------------------------------------------------------------------- フォーカスと台形補正----------------------------------------------------------------------- WiFi接続----------------------------------------------------------------------------------------- Bluetooth接続---------------------------------------------------------------------------------- 他の機器との接続----------------------------------------------------------------------------- インストール----------------------------------------------------------------------------------- メニュー----------------------------------------------------------------------------------------- FAQ-------------------------------------------------------------------------------------------------...
- Page 95 WiMiUS K5 プロジェクターをお買い上げいただき誠にありがとうございます。 本機を安全に正 しく使用していただくため、 ご使用の前にこの取扱説明書をよくお読みください。 取扱説明書は、 いつでも見られる所に大切に保存してください。 万一ご使用中にわからないこ とや故障ではないかと思ったときにお読みください。 弊 社 製 品 に 関 し て ご 不 明 な 点 や ご 質 問 、 ご 要 望 な ど ご ざ い まし た ら 、 メ ー ル (...
- Page 96 プロジェクター 本体* 1 電源コード* 1 3in1 AVケーブル* 1 リモコン* 1 取り扱い説明書* 1 調整ネジ* 1 製品仕様 レンズ IR信号受信 電源コードソケッ ト...
- Page 97 1.3.5㎜音声端子 2.AV端子 3.HDMIケーブル 4.USB端子*2 5.IR信号受信 6.スピーカー 7.換気口 注意 : 製品の外観を参照してください。 この図は参照用です。 矢印キー 台形補正ダイヤル フォーカスダイヤル コントロールパネル 電源/戻り インジケーターライト メニュー/選択 選択/音量- 選択/音量+ 決定ボタン ソースボタン/選択 ...
- Page 98 三脚スタンド用 調整ネジ用 注意 : 調整ネジの最大投影角度は15° にサポートで、 良い投影効果のため、 0° 〜8° の投影 角度をお勧めです。 リモコン 電源スイッチ 消音 巻戻し 早送り 再生/停止 矢印キー 決定 メニュー ソース 戻り 音量- 音量+ 注意 : 1.リモコンを使用する時はIR信号受信に向ける必要があります。 ( AAAバッテリーが 別途購入する必要があります) 2.電池の液漏れによる腐食を防ぐため、 長期間使用しない場合は電池を取り出して ください。...
- Page 99 仕様書 モデル番号: K5 イメージングシステム LCD 光源 投影距離 投影サイズ 1.2-6.0m 36-200” 1280*720、 リアル解像度 LEDカラー 16.8M Full Color 1080Pfull HD対応 台形補正 入力端子 ±15° AV\USB\HDMI アスペク ト 電源 16:9 /4:3 110-240V~50/60HZ 出力端子 3.5mm音声端子 重量 1.2kg 投影サイズ 投射距離 画面サイズ 1.2m 36’’ 2.5m 70’’ 3.5m 100’’...
- Page 100 正しい写し方 間違った写し方 正しい写し方 2.フォーカスダイヤルで画像を鮮明に調整します。 台形補正ダイヤル フォーカスダイヤル フォーカス...
- Page 101 台形補正 注意 : LCDプロジェクターは台形補正機能により、 中心はリアで、 10%ぐらい縁のと ころはぼやけることは普通です。 信号源設定 プロジェクターを使用してビデオを再生する前に、 リモコンで 「S」 を押し、 対応する 信号源を選択して確認してください。 スマホやiPadとの接続 無線接続 注意: 1.ワイヤレスで画面ミラーリングするとき、 ネッ トワークは画像の滑らかさに影響を 与えます。 100Mbps以上ネッ トワークをお勧めします。 ワイヤレスで画面ミラーリン グするときは、 デバイスをプロジェクターの近くに置いてください。 1メートル以内の 距離をお勧めします。 。 2. HDCPの制限により、 スマホでnetflix、 hulu、 disneyは再生できません。...
- Page 102 方法1 1.プロジェクターの電源を入れ、 入力ソースの 「スクリーンミラーリング」 を選択します。 iOSシステムのスクリーンミラーリングのインターフェースに入ります。 下記参照。 RKcast-XXXXXX 192.168.XX.XX DIVICE 2.iOSデバイスのWIFI設定の画面にRKcast-XXXXXXのWi-Fi (パスワード : 12345678) に接続し ます。 ( この前に感嘆符は無視してく ださい ! ) 3.iOSデバイスのコントロールセンターの画面に 「画面ミラーリング」 / 「Airplay」 を開き、 本機のデ バイス名を選択します。...
- Page 103 方法 2: 自宅WIFIに接続方法 1.iOSデバイスでRKcast-XXXXXXのWi-Fi (パスワード : 12345678) を接続します。 2.携帯のブラウザで192.168.XX.XX (画面に表示されているIPを入力してください) にアクセスし、 WiFi APをクリックして自宅のwi-fiを選択してパスワードを入力し、 [接 続]をクリックして続行します。 3.自宅Wi-Fiがインターフェースの画面に表示されます。 下記参照。 Mi 10 4.iOSデバイスのWi-Fi設定に戻り、 同じ自宅のwi-fiに接続します。 5.iOSデバイスのコントロールセンター画面に 「画面ミラーリング」 / 「Airplay」 を開き、 本機のデ バイス名を選択します。...
- Page 104 Androidシステムの場合 この機能を使用するには、 Androidデバイスが画面ミラーリングをサポートする必要 があります。 方法 1: 1.プロジェクターの電源を入れ、 入力ソースは 「画面ミラーリング」 を選択して、 画面ミラーリングのインターフェイスに入ります。 下記参照。 2. AndroidデバイスでRKcast-XXXXXXのWi-Fi (パスワード : 12345678) を接続しま す。 3.Androidデバイスのコントロールセンターに 「画面ミラーリング」 を開き、 本機のデ バイス名を選択します。 方法2: 自宅WIFIに接続方法 1.プロジェクターの電源を入れ、 入力ソースは 「画面ミラーリング」 を選択して、 画面ミラーリングのインターフェイスに入ります。 2.Androidデバイスで自宅Wi-Fiに接続します。 ...
- Page 105 3.Androidデバイスのコントロールセンターに 「画面ミラーリング」 を開き、 本機のデ バイス名を選択します。 Mi 10 Bluetoothスピーカーと接続する 「サウンド」 モデルの下の[オーディオ出力]の[スタティック]に入り、 Bluetoothデバイ スを検索します。...
- Page 106 BTP-P33 MENU 他の機器との接続 PC、 fire TV stickとの接続 ① HDMIケーブルでプロジェクターをPCに接続します。 ② 「HDMI」 信号源を選択します。 注意 : macbookに接続するには、 HDMI to type Cケーブルが必要です。 プロジェクターはパソコンと接続の設定 (Fn + F * [ファンクションキー]) DVD Player Computer Laptop Via HDMI Cable(Not Included) サウンドバーとの接続 ① 3.5mmオーディオケーブルでサウンドバーに接続します。 ②プロジェクターとサウンドバーの電源をオンにしてから、 動作します。 ③詳細は、 support @ wimius.comで弊社にお問い合わせください。...
- Page 107 DVDとの接続 ① プロジェクターに付属のAVケーブルでDVDに接続します。 ②プロジェクターとDVDプレーヤーの電源をオンにします。 USB接続 ①USBメモリーに挿入します。 ②再生するビデオまたは画像を選択します。 PS : プロジェクターはUSB2.0スティ ックと1080P30FPSビデオのみにサポートします。 USBメモリーファイルシステムは、 exFATではなくFAT32 / NTFSである必要があります。 マルチメディアファイルの仕様 画像ファイルサポート サポート ファイル拡張子 JEPG, PNG, BMP .jpg/.png/.bmp オーディオファイルサポート サポート ファイル拡張子 MPEG1, MPEG2, LPCM, .avi/.ts/.dat/.vob/.wmv/.mkv/.mp3/.mp4/.m4a サポートしてないファイル: Dolby AC3/AAC, DTS, WMA, DivX, VC1, RM, RMVB, FLVなど ビデオファイルサポート(Bit Rate up to 30~40 Mbs) ファイル拡張子 サポート .dat/.ts/.mp4/.mpg/mpeg/.avi/.mkv/.mov/.as- MPEG1, MPEG2, H.263, H.264, f/.flv/.3gp/.3gpp/.tp AVS, VC1, MJPEG, RV30, RV40, HEVC サポートしていないファイル:MSVC/CRAM, ...
- Page 108 インストール ①パッケージには用意してあるネジでプロジェクターの底部のネジ穴に取り付けて、 より良い 投影角度ができます。 ②天吊りの場合はプロジェクターの底に天吊り用の穴があります。 以下の写真に参照してくだ さい。 天井取り付け穴 主なメニュー設定 画像設定...
- Page 109 メニュー 画像 機能 画像の 「コン トラス ト/明るさ/シャープネス/ 画像モード 標準/ソフト/鮮やか/ユーザー 色合い」 を調整する 色温度を調整する (赤/緑/青) 色温度 ミデ ィ アム/ウォーム/ユーザー/クー アスペク ト比 ル 自動/ 4 : 3/16 : 9 画像のノイズを減らす ノイズ緩和 自動/ 4 : 3/16 : 9 オフ/低/中/高/デフォルト シーンに応じて画像を反転する 投影モード フロント/リア/天井のフロント/天 再生中の画像サイズ (縦および横) を調整...
- Page 110 注意 : サウンドモードの 「ユーザー」 インターフェースに、 リモコンの+-ボタンを使用して 「0-100」 の範 囲で画像の 「高音/低音」 を調整できます。 オーディオ出力のスタティ ックモードで外部スピーカーを検索できます。 スリープタイマー設定 スリープタイマー : この機能を使用して、 プロジェクターのスリープ時間を設定できます。 時間調整 範囲 「OFF / 10分/ 20分/ 30分/ 60分/ 90分/ 120分/ 180分/ 240分」 オプション設定...
- Page 111 · ファイルが壊れていますか。 映画を再生できない · デバイスが壊れていますか。 · 画像をはっきり見えるには、 以下の3つの手順に従ってく ださい。 プロジェクターを特にスクリーンに設置してく ださい。 · 画像がぼやける 台形補正を調整して、 画像を長方形にします。 · フォーカスダイヤルを調整して、 画像をはっきりさせます。 · WiMiUS K5 プロジェクターをお買い上げいただき誠にありがとうございます。 本機を安全に正しく 使用してい ただく ため、 ご使用の前に、 この取扱説明書をよく お読みく ださい。 弊社製品に関してご不明な点やご質問、 ご要望などございましたら、 メール (support@wimius.com ) にてお Website: www.wimius.com Email : Support@wimius.com...