Advertisement
- 1 Accessories
- 2 Product Overview
- 3 How to clean the Black Spots
- 4 Remote Control
- 5 Specifications
- 6 Operating Instructions
- 7 Connecting with Smartphones and iPad
- 8 Connecting with Bluetooth Speaker
- 9 Other Connections
- 10 Main Menu Function
- 11 FAQ
- 12 Safety Precautions
- 13 Contact us
- 14 Documents / Resources
Accessories

- Projector x 1
- Projector Case x 1
- Remote Control x 1
- Power Cable x 1
- AV Cable x 1
- HDMI Cable x 1
- Lens Cover x 1
- Cleaning Kit x 1
- User Manual x 1
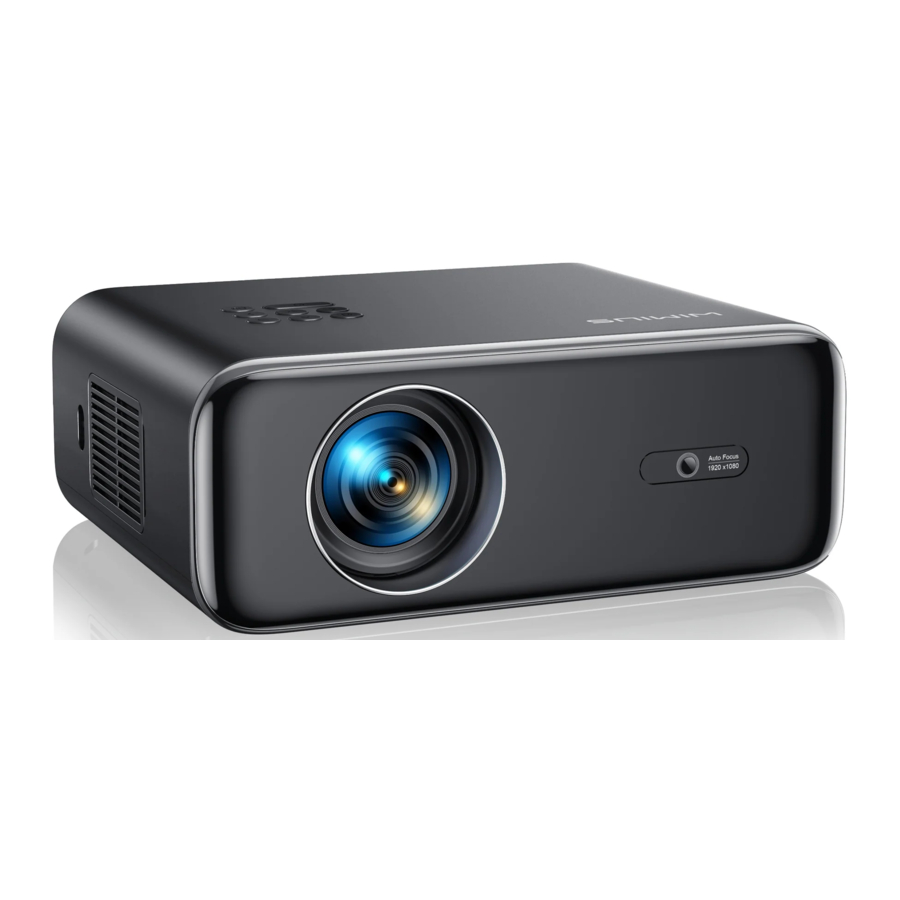
Product Overview
Projector can input high-definition video signal and composite video signal, and support stereo audio signal input and output. Please refer to the following figure to connect the projector and other audio equipment according to your own needs.

- Focus Lens
- IR receiver
- Auto Focus signal window
- Air outle
- Power socket
- Air inlet
- Speaker (left)
- USB ports
- HDMI ports
- AV port
- 3.5mm audio output
- IR receiver
- Speaker (right)


- Signal source
- Up
- Return
- Left
- Right
- Down
- Power Button
- OK
- Level-stand adjustment (to adjust projection angle)
- Bottom case (open to clean the internal screen)
- Projector mount holes (M5*16mm)
Note: For Ceiling mount, please slowly remove the 4 black rubbers, then you can find the holes for ceiling mount. The screw size is M5*16mm.

How to clean the Black Spots

Open the dusting mouth cover rotation with a screwdriver.
Method 1
Extert yourself to flap the body of projector.

Method 2
Use the cold wind to blow the dusting mouth.

Remote Control

- Signal indicator light
- Power
- Signal source
- Arrow keys
- Menu
- Auto focus and keystone correction
- Volume +
- Volume -
- Mute
- Homepage
- Confirm key
- Return key
- Manual focusing +
- Manual focusing -
Note: Batteries are not supplied in the package, you must purchase two additional AAA batteries by yourself.
To avoid battery leakage corrosion, please take the batteries out if not use it for a long time.
Specifications
| Model No.: P62 | |||
| Imaging System | LCD | Power | AC100-240V/50-60Hz |
| Light Source | LED | Dimension | 25.7*20*10.3CM |
| Color | 16.8M Full Color | Resolution | Native 1920*1080 Full HD |
| Projection Distance | 1.5-7m | Input Interface | HDMI*2/VGA/AV/USB*2 |
| Projection Size | 50-300" | Zoom Function | 100%-50% |
| Aspect Ratio | 16:9 /4:3/Auto | Output Interface | AUDIO OUT |
| Keystone Correction | Auto/Manual | Focus | Auto/Manual |
| Projection Size Chart | |||
| Distance | Screen Size | Distance | Screen Size |
| 1.5m | 35'' | 3.9m | 120'' |
| 1.7m | 50'' | 5.5m | 180'' |
| 2.4m | 72'' | 7.0m | 300'' |
| 3.3m | 100'' | ||
Please refer to the following table to adjust your picture size and distance.
Optimum projection distance: 3m
Please allow ± 3% to the image sizes in the table above. If the distance is less than min data and more than max data, the image could be blurry.
Operating Instructions
- To get a better watching, please use this projector while drawing the curtain or in a dark room.
- Please use the projector carefully, dropping or crashing may damage parts or result in blurred images and abnormal displaying.
Getting Started
- Remove the lens cap, connect the projector with the power through power supply cable, it starts work.
- Then boot screen appears, like the picture.
![]()

Focus and Auto Keystone Correction
- Auto Focus and Keystone Correction.
Please place the projector horizontally face to wall first, turn on and then it will automatically focus the picture based on the projection distance from the screen and adjust the picture to a rectangle. Or press "![]() "Auto focus and keystone correction key directly.
"Auto focus and keystone correction key directly.
If the picture is blurry, press the focus button ''F+'' ''F-'' on the remote control to adjust the lens focus, tap or long press the adjustment button until the picture is clear. - How to Use Projection Settings
Select the settings icon in the upper right corner![]() of the main interface, and then press the "OK" key on the remote control to enter the settings interface and select "Projection Image Setting". After entering the interface, select the mode you want in the projection settings, then adjust the keystone as you want.
of the main interface, and then press the "OK" key on the remote control to enter the settings interface and select "Projection Image Setting". After entering the interface, select the mode you want in the projection settings, then adjust the keystone as you want.
![]()
 "Auto focus and keystone correction key directly.
- Manual Keystone
After going into"Manual Keystone", you can set "4-point Keystone"as your need: Horizontal Value ±96, Vertical Value from±54
Just click "OK" button to pick the point you want adjust at first, and then press the button "![]() " or "
" or " ![]() " to set the value needed as shown below.
" to set the value needed as shown below.

- Digital Zoom
With the zoom value at 100%-50%, Just click "OK" button enter, and then press the button "![]() " or "
" or " ![]() " to set the value needed as shown below. (Note: The zoom value will be affected by the value of four-point keystone correction)
" to set the value needed as shown below. (Note: The zoom value will be affected by the value of four-point keystone correction) - Correction setting
Trapezoidal Correction Reset: Press ''OK'',the image will restore to the original keystone correction settings.

 " or "
  " to set the value needed as shown below.
 " or "
  " to set the value needed as shown below. (Note: The zoom value will be affected by the value of four-point keystone correction)
- Connect input devices and then choose signal source button to choose corresponding signal source ( HDMI1, HDMI2, AV,etc)
For the USB devices, no need to choose the signal source. The machine will detect them automatically.
Just operate through the remote control: Press "![]() " and then press "
" and then press " ![]() " or "
" or " ![]() " to choose the corresponding signal input channel, then press "OK'' to confirm.
" to choose the corresponding signal input channel, then press "OK'' to confirm.

 " and then press "
  " or "
  " to choose the corresponding signal input channel, then press "OK'' to confirm.
Connecting with Smartphones and iPad
Note: This projector support only Wireless Connection, wired connection is not possible.
PS: The fluency of screen mirroring with wireless connection will be affected by the network environment. A bandwidth of 100Mbit or more is recommended when using screen mirroring. Make sure your mobile device is closed to the projector when using wireless connection. A distance within 1 meter is recommended.
How to Use WiFi Settings
Select the settings icon in the upper right corner of the main interface, and then press the "OK" key on the remote control to enter the settings interface and select "WiFi Setting".
For IOS System
Setting with Home Wi-Fi
Attention: Your device and the projector should be in the same Home WiFi.
- Turn on the WiFi Setting of projector.
![]()
- Choose your Home WiFi to connect and enter the right password, then click "Done" to Connect, please wait 3-5 seconds to establish the connection. Once connected, it will remember the password of the connected WiFi.
- Turn on the WiFi setting of your iOS device, then connect it the same Home WiFi as the projector.
- Then click "iOS Cast"
![]() as the Input Source of your projector.
as the Input Source of your projector. - Swipe up the screen of your iOS mobile device and tap "Airplay" to search for the projector, then select "WiMiUSP62Projector" from the searching results to connect.
- On your iOS device, open Control Center and Tap Screen Mirroring
![]()
- Looking for devices that can be mirrored on.
![]()
- Select BirdCast-0c71 from the list
![]()
- On your iOS device, open Control Center and Tap Screen Mirroring
- Succeed.

 as the Input Source of your projector.


For Android System
To activate this function, your android device must support Multi-Screen/Wireless Display. Name of "Multi-Screen" may vary depending on various brands of Android devices.
Method 1: Setting with mobile internet

- Turn on the projector, select "Miracast"
![]() as the Input Source.
as the Input Source. - Turn on the"Multi-Screen/Wireless Display" of your Android device.
- Select"WiMiUS-P62Projector" from the searching results to connect.
- Succeed.
 as the Input Source.
Connecting with Bluetooth Speaker
- Turn on your Bluetooth Speaker.
- Turn on the Bluetooth Setting of your projector.
![]()
- Seclect your Bluetooth speaker to connect.
- Succeed.

Compatible with Bluetooth speakers, Bluetooth Headphones, iPhone Airpods, Bluetooth Earbuds, Bluetooth Earphones.
Other Connections
Supported multimedia playback formats
| Picture Format | JPG, PNG, BMP, JPEG |
| Audio Format | MP3, AAC, WAV, WMA, M4A, OGG, FLAC |
| Video Format | MP4, MKV, WMV, 3GP, MPG, TP, TS, F4V, DAT, FLV, TRP |
| File Format | TXT, EXCEL, WORD, PPTX |
Connecting with PC
- Connect projector with PC by HDMI cable.
- Choose the media signal channel:"HDMI"
USB Multimedia Connecting
For the USB devices, no need to choose the signal source. The machine will detect them automatically.
- Select the required category "movie", "music", "photo" or "Office Suite" in the main interface, and press the "OK"key on the remote control to enter the corresponding category.
- According to the programs to choose:"photos" "music" "movie" or "Office Suite".
- Choose the file you want to play, press the key "OK" to play or pause the file. (You cannot enter the required category without connecting a USB disk.)
- Note: For the "Office Suite" option, you can play, demo PPT files.
Connecting with MacBook or Mac Book Air
- Choose the media signal channel:"HDMI"
- Use a Type-C to HDMI adapter to connect your MacBook, or a Mini Display to HDMI adapter to connect with your MacBook Air (adapter not included).
Connecting with Sound bar
- Use the 3.5mm audio cable coming with the projector to connect with sound bar.
- Turn on the projector and the sound bar, select [ AV ] as the signal source
- More details, please contact seller at support01@wimius.com.
Connecting with DVD

- Use the 3-in-1 AV cable, connect the colorful female connectors to your DVD player's RCA cable.
- Connect the black connector to the AV port of the projector, enter the home page to select [ AV ] as the signal source.
Connecting with fire TV Stick
- Plug the TV stick into HDMI port of the projector.
- Choose the media signal channel:"HDMI"
- P.S: It only supports 1080P TV stick, not 4K TV stick.
Connecting with XBOX/PS4
- Choose the media signal channel:"HDMI"
- Use HDMI cable connect to XBOX/PS4
Main Menu Function
- Picture Mode
Only when you play the video, you can set the "Picture Mode".
Press "![]() " and then select the setting
" and then select the setting ![]() on the remote control to make some personal settings.
on the remote control to make some personal settings.

 on the remote control to make some personal settings.
| Menu | Menu included | Function |
| Picture Mode | User/Standard/Vivid/Sport/ Movie/Game/Energy Saving | To adjust the "Brightness/ Contrast/Saturation/Sharpness" of the image |
| Color Temperature | User/Cool/Standard/Warm | To adjust Red/Blue/Green gain |
| Display Mode | 16:9/4:3/Auto/Full | To adjust Aspect ratio |
- Sound Mode
Only when you play the video, you can set the "Sound Mode".
![]()

| Sound Mode | Menu included | Function |
| Sound Mode | User/Standard/Vivid/Sport/ Movie/Music/News | Adjust the mode of sound |
| Equalizer Detail | 120/500/1.5K/5K/10K Hz | Adjust the tone |
- Projection Image Setting
![]()


| Projection | Menu included | Function |
| Projection Mode | Front-Desktop / Rear-Desktop / Front-Ceiling / Rear-Ceiling | Choose the projection methods, flip the image |
| Manual Keystone | 4-point Keystone correction | Adjust 4 conners of the projection image |
| Digital Zoom | Reduce Display 100%-50% | Reduce the size of image size |
| Correction Setting | Trapezoidal Correction Reset | Auto trapezoidal correction |
| Power onAuto Keystone correction | On/off | |
| Power on Auto Focus | On/off |
- System Update
![]()


| System Update | Menu included | Function |
| Picture Mode | User/Standard/Vivid/Sport/ Movie/Game/Energy Saving | To adjust the "Brightness/ Contrast/Saturation/Sharpness" of the image |
| Color Temperature | User/Cool/Standard/Warm | To adjust Red/Blue/Green gain |
| Display Mode | 16:9/4:3/Auto/Full | To adjust Aspect ratio |
- Other Setting
![]()


| Other Setting | Menu included | Function |
| Boot Source Option | HDMI 1/HDMI2/AV/OFF | Default signal source of Power on |
| Power On Option | Direct/Standby | Choose the mode of Power On |
| Language Setting | English, French, German, Italian, Spanish, Japanese.20 several languages | Choose a language |
| Scheduled Shutdown | OFF/10min/20min/30min/60min/ 120min | Set the sleep time of the projector |
- About(System Info)
![]()

FAQ
| Questions | Solutions |
| Can't play video in App Netflix, Hulu | Those APPs are limited with HDCP. This model doesn't support this function. So it can't support these APPs. |
| Indicator light is off when plug into power supply |
|
| Press the power button on the remote control and the projector does not turn on |
|
| Picture right, no sound |
|
| It will shut off automatically after turn on for a while |
|
| Can't find devices when connected with hard drive or flash drive? |
|
| Can't play the movies |
|
| Not compatible with your bluetooth speaker? |
|
| Black spot on the picture | Contact seller for a video to remove them. |
Safety Precautions

High brightness lamp! Don't look straight into the lens when the projector is on.
- Clean
When clean this projector, please pull out the power cable. Use a wet cloth to clean, don't use any detergent that may damage the unit. - Accessory
Please use our recommended accessory. Or it will damage the projector. - Correct environment
Do not place the projector in a wet environment, like damp basement or near the swimming pool, etc. - Ventilation
The ventilation is equipped for the projector to work stably. Do not put anything around the vents. Or it will cause the projector heating up. To ensure the stability of heat dissipation, please open the height bracket in the bottom of the projector before starting. - Power
Please make sure the power is within the required power range. - Thunder
For thunder day, please unplug the power cable from the projector. - Repair
Due to high voltage inside, please do not open or try to repair the projector by yourself. Please ask a professional technician to repair the projector. - Keep away from heat device
Please make sure the projector is far away from any heat devices which will damage the projector.
Contact us
If you have questions about the projector, please contact us at support01@wimius.com We sincerely hope this projector can make your life more colorful.
Email: support01@wimius.com
Website: www.wimius.com

Documents / Resources
References
Download manual
Here you can download full pdf version of manual, it may contain additional safety instructions, warranty information, FCC rules, etc.
Advertisement
Thank you! Your question has been received!


Need Assistance?
Do you have a question about the P62 that isn't answered in the manual? Leave your question here.