Toshiba BMS-SM1280HTLE Service Manual
Smart manager
Hide thumbs
Also See for BMS-SM1280HTLE:
- Owner's manual (44 pages) ,
- Installation manual (24 pages) ,
- Network configuration manual (8 pages)

Related Manuals for Toshiba BMS-SM1280HTLE


Summary of Contents for Toshiba BMS-SM1280HTLE
- Page 1 FILE NO. A10-026 SERVICE MANUAL SMART MANAGER Model name: BMS-SM1280HTLE PRINTED IN JAPAN, Mar, 2011...
-
Page 2: Table Of Contents
Contents SAFETY PRECAUTIONS ..........3 1 PRODUCT OVERVIEW. -
Page 3: Safety Precautions
SAFETY PRECAUTIONS Important safety-related information is described on the product and in this Service Guide. Read the following description on labels and symbols carefully and follow their directions. [Explanation of labels] Label Explanation Indicates that the repair engineer and other third-party individuals in the vicinity may be DANGER exposed to immediate risk of death or serious injury if operation is not performed correctly. - Page 4 WARNING Do not allow unauthorized personnel other than repair engineers to enter areas where fault diagnosis and repair work is conducted. Unauthorized persons may suffer injury from tools and disassembled parts. Restricted area Connect lead wires with crimping terminals and turn the closed end upwards to avoid exposure to water.
-
Page 5: Product Overview
PRODUCT OVERVIEW This product is an air-conditioning control system to control and monitor the operation state of air conditioners in a building by using a computer with the mouse at a customer site. The system enables intensive management, operation control, and energy-saving operation for the air conditioners of up to 128 groups. The display and operation are available on a Web browser. -
Page 6: System Configuration
SYSTEM CONFIGURATION Alarm output TCC-LINK Operation output Schedule Timer Outdoor unit All operation Fire alarm input All Stop Indoor unit TCC-LINK Central Controller RS-485 Ethernet Energy Monitoring Relay I/F Electric energy meter Electric energy meter Electric energy meter Digital I/O Relay I/F Fire alarm input Lock input... - Page 7 System Devices Configuration EXTENDED SYSTEM Device Name Number of Units Model Remarks Connected Indoor Unit (TCC-LINK based model) Up to 64 units per line Max 128 Up to 128 units in total for 2 lines Energy Monitoring Relay Interface BMS-IFWH5E Up to 8 electric energy meters per Max 4 BMS-IFWH5E...
-
Page 8: List Of Functions
LIST OF FUNCTIONS Function Details User account Number of user registrations Type of user account Administrator Power user Guest Air conditioner category Category structure 3 levels Monitoring air conditioner status Start / Stop Operation mode Set temperature Fan speed Louver Remote control prohibition / permission Warning... - Page 9 Function Details Billing schedule Number of registrations Singularity settable period Up to 12 months later including current month Number of set points per day 10 settings Interval of set point 1 minute Number of days assigned 45 days per a special day schedule special day schedule Settable parameters Working hours / Non-working hours...
-
Page 10: Product Specification
PRODUCT SPECIFICATION BMS-SM1280HTLE (Smart Manager) Central Controller Power supply Use the supplied power unit. Power consumption Operating 0 to 40 °C, 10 to 90% RH temperature / humidity (no condensation) Dimensions 120(H) x 180(W) x 64(D) mm Mass 0.8 kg Power Unit 182.7... - Page 11 BMS-IFWH5E (Energy Monitoring Relay Interface) Power supply 220 - 240 V, AC 50 / 60 Hz Power consumption Operating temperature / 0 to 40 °C, 10 to 90% RH humidity 6-Ø5.5 Storage temperature -20 to +60 °C mounting holes Dimensions 66(H) x 193(W) x 246(D) mm 63.6 Mass...
-
Page 12: Installation Of The Smart Manager
INSTALLATION OF THE SMART MANAGER CAUTION • Do not twist communication wires (used between indoor unit and outdoor unit and used for central control) and input/ output wires with power wires or bundle them together with power wires in a metal tube. Doing so may cause malfunction. - Page 13 Power Unit Installation Method and Orientation There are five installation methods for this power unit as shown below: surface mount and wall mounts. Use the attached screws. No good REQUIREMENT Do not install the unit in any of the following places. •...
- Page 14 Combining the Central Controller and Power Unit You can combine the central controller and power unit using the supplied brackets as follows in order to control them as one unit Power unit Bracket Panel Combination method Fix the brackets and the central controller box together using the screws on the box.
-
Page 15: Connection Of Power Cables / Earth Wires / Communication Cables
CONNECTION OF POWER CABLES / EARTH WIRES / COMMUNICATION CABLES Connect power cables, communication cables, and earth wires to the specified terminals on the terminal block. REQUIREMENT Attach a round pressure terminal to the end of each wire except those for digital input and output. The power terminals on the central TCC-LINK U1 and U2 controller have polarity. - Page 16 Length of stripped power cable Length of stripped TCC-LINK Length of stripped RS-485 Length of stripped digital Input / communication cable communication cable Output communication wire Attach a round pressure terminal to Attach the supplied clamp filter to the LAN cable. Loosen the screw with the screw the end of each wire of the power * Wind the LAN cable around the clamp filter as shown...
- Page 17 <Specifications for Wiring> Use the following materials to connect signal lines and power lines (locally procured) Line Type / Wire size / Length 2-core shield wire For TCC-LINK 1.25mm², 1000m max. (total length including 2.00mm², 2000m max. air conditioner area) 2-core shield wire For RS-485 1.25mm², 500m max.
-
Page 18: Product Connection Diagram
PRODUCT CONNECTION DIAGRAM BMS-IFWH5E • BMS-IFDD03E (Energy Monitoring Relay Interface, Digital Input / Output Relay Interface) Installation Method and Orientation Installation Space and Maintenance Space There are five installation methods for this relay interface A side space for connecting through cable inlets as shown below: surface mount and wall mounts. - Page 19 7-2. Digital Input / Output Relay Interface (BMS-IFDD03E) Connect power cables, earth wires, and signal wires to the specified terminals on the terminal block. To connect 2 cables, change the preset cable clamp to the provided one and fix the cables with the cable clamp as shown in the figure.
-
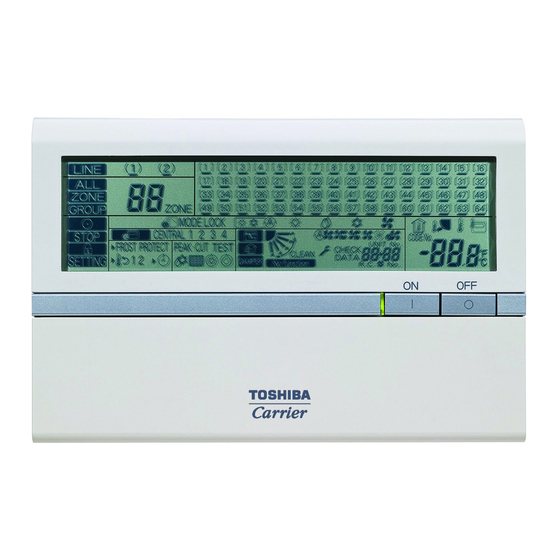
Page 20: Switches For Setting (Smart Manager)
SWITCHES FOR SETTING (Smart Manager) 8-1. Smart Manager (BMS-SM1280HTLE) The settings switch is installed on the rear of the Smart Manager. 1 2 3 Must be set ALL ON ALL OFF to OFF Normal NOT CHANGE ALL OFF Fire alram... - Page 21 <DS23> Factory setting: All OFF <1> Smart Manager main / sub selection DS23 OFF: Main 2 3 4 5 6 7 8 ON: Sub Normally, this bit is set to OFF. When two Smart Manager units are used as a main unit and a sub unit with the same mode setting, set this bit to OFF (Main) for one unit and to ON (Sub) for the other unit.
- Page 22 Factory setting: All OFF <DS24> DS24 <1> to <3> Timer input switching 2 3 4 5 6 7 8 These bits switch operation when the weekly timer has changed. • Use (1) and (2) only in the remote control mode. •...
- Page 23 <DS25> Factory setting: All OFF <1> Always OFF DS25 • Always set this bit to OFF. 2 3 4 <2> Synchronization of zone setting data OFF: With synchronization ON: Without synchronization This bit specifies whether to perform synchronous communication of zone setting data between Smart Managers.
- Page 24 8-2. Energy Monitoring Relay Interface (BMS-IFWH5E) The following settings are necessary to use Energy Monitoring Relay Interfaces. Address setting SW1 Address set switch When two or more Energy Monitoring Relay Interfaces are used, set a different address for each unit to avoid address duplication.
- Page 25 8-3. Digital Input / Output Relay Interface (BMS-IFDD03E) The following settings are necessary to use Digital Input / Output Relay Interfaces. Address setting SW1 Address set switch When two or more Digital Input / Output Relay Interfaces are used, set a different address for each unit to avoid address duplication.
-
Page 26: Mode Setting For Smart Manager
MODE SETTING FOR SMART MANAGER Operation mode You can switch the functional mode of the smart manager between the central control mode and remote control mode. The mode is switched with the dip switch DS23-<6>. OFF side: Central control mode This Smart Manager is used as a central control unit. -
Page 27: Zone Setting
ZONE SETTING What is zone? • A zone is a control unit consisting of a combination of any indoor units and the settings of indoor units in a zone can be configured collectively. • You can make up to 64 zones pairing any of up to 64 groups in a line. By using lines 1 and 2, you can set up to 128 zones in total. -
Page 28: Changing Return-Back Time / Temperature Settings
CHANGING RETURN-BACK TIME / TEMPERATURE SETTINGS What is return-back? When the return-back function is activated, the temperature setting exceeding the return-back temperature will automatically be adjusted to the return-back temperature after a certain period of time to prevent extremely high / low temperature setting. -
Page 29: Test Run
TEST RUN Start the system to perform operation check by following the procedure below. 12-1.Preparation Item Details Procedure Peparation Discuss with a customer to determine details of the Refer to the Owner’s manual of the Setting following. File Creation Software. •... - Page 30 12-2.Operation Check Complete the test run of air conditioners before operation check. Item Details Procedure Start-up check • Turn on the all air conditioners. For further details, refer to the Installation • Turn on the all interfaces. manual of each device. •...
-
Page 31: Troubleshooting
TROUBLESHOOTING About the check codes If there is a problem with the air handling unit or if the controller detects anything unusual with the system, a check code is displayed in the warning list on the computer screen or the LCD of the controller. Check code Description Action... - Page 32 13-1.Trouble with Connection 13-1-1. Logon screen is not displayed. Cause Solution The controller is not turned on. Turn on the controller. The HUB is not turned on. Turn on the HUB. The LAN cable is not connected. Check that the LAN cable is inserted into the controller and PC and connect them.
- Page 33 13-2.Trouble with Web Screen 13-2-1. Takes long time to display. Cause Solution The network is busy. Connection via an intra-company LAN may slow the Web screen display due to a busy network. Use the system during off-peak hours of network use, or use a dedicated network to connect a PC with the controller.
- Page 34 13-2-6. After logon, the dialog message “Login has been disabled.” appears. Cause Solution The user account has been deleted. The message appears if the user account used for the logon is deleted. Log on with another user account. 13-2-7. The buttons or other elements are not displayed. Cause Solution Trouble due to browsers.
- Page 35 13-2-10. The operation state does not match that displayed on the remote controller. Cause Solution The inputs in the setting file are incorrect. Check if the address set in the setting file matches that in the air conditioner. To show the address set in the air conditioner, press the [UNIT] button on the remote controller.
- Page 36 13-3.Other Troubles 13-3-1. The date or time change is not applied. Cause Solution The internal processing of the controller is prioritized. The internal processing of the controller may be given priority over a setting operation from the browser. Try to change the date or time again. 13-3-2.
- Page 37 13-3-6. Clicking [OK] or [Cancel] does not close the window or takes some time for the window to close. Cause Solution Operating schedule is displayed and set. If many operating schedules are displayed and set, closing the operating schedule window takes some time after [OK] or [Cancel] is clicked. Wait for the window to close without performing any operation.
- Page 38 13-3-11. No daily report file is found. Cause Solution The controller was not turned on at the time of meter- If the controller is off at the time of meter-reading, the daily report file of the reading. day is not created. The accumulated operation hours and electricity amount are added up to the daily report file of the next day, so the values in the daily reports will be correctly summed up.
- Page 39 13-4-4. Lock input does not stop the air conditioner. Cause Solution Communication error with the digital input / output relay 1.Check if communication error with the digital input / output relay interface. interface is detected. 2.Check if communication error with the air conditioner is detected. Communication error with the air conditioner.
- Page 40 Cause Solution Noise is superposed on the communication wiring. Check the waveform between RS-485 communication wiring A and B. If noise is superposed, identify the noise source and remove it. The communication cable in use is not the specified Change it to the specified communication cable. one.
- Page 41 Questions Answer Is connection available via the Internet (WAN)? Not available. Is connection available from a mobile phone? If a failure occurs on the air conditioner, can mail be Not possible. sent? Can a tenant name or other names be changed? You can use the Setting File Creation Software to change the name of a floor, a tenant, an area, and an air conditioner.
-
Page 42: Test Run Check
TEST RUN CHECK 14-1.Check Items Before Trial Run Check item Has the electrical work (power supply and communication wiring work) been completed? Key point 1.When the Energy Monitoring Relay Interface or Digital Input / Output Relay Interface is connected, check that the polarity (A / B) of the wiring is correct. - Page 43 14-2.Procedure of Test Run Check Check item Procedure PC connection check Start the browser software of the PC to be connected. Enter http://the controller's IP address/index.html in the address bar of the browser, and check that the logon window is displayed. Error message ×...
- Page 44 Check item Procedure Controller operation 1.Turn on the controller and check that the LCD displays “Line” and “All”. check Error message × 1) Check if the controller is turned on. The frame line only is 2) Check if the controller internal wiring is defective or displayed;...
- Page 45 Check item Procedure Air conditioner In the zone window, select all the floors and display the “General” tab. connection check Check if all the indoor unit operation statuses are obtained (if the units are connected). (Facing test) Error message × NG1: The display is as follows.
- Page 46 Check item Procedure Digital Input / Output Check the connection when the Digital Input / Output Relay Interface is connected and the locking Relay Interface or fire alarm interlocking is set. connection check Locking interlocking operation check Display “Alarm List” on the PC, and check that the S07:BMS-IFDD communication error is not detected.
- Page 47 Check item Procedure Energy Monitoring Check the connection when the Energy Monitoring Relay Interface is connected and an energy Relay Interface meter input name is set in the setting file. connection check Display “Alarm List” on the PC, and check that the S06:BMS-IFWH communication error is not detected.
-
Page 48: Check Points
CHECK POINTS 15-1.Network Wiring Check point Check that the LAN cable is connected to the connector on the upper side of the controller, and the connector’s LED illuminates. Check that the LAN cable is connected to the PC that is connected to the controller via the network, and check that the PC operates normally. - Page 49 15-5.Facing Test Check point At both sides of the controller and handy remote controller, perform setting and display check. Before starting the check, discuss and determine the air conditioners checking order and procedure. Check 1: Check that the unit name and operation state match between the controller and the handy remote controller. Check 2: Check that the setting operation from the controller can change the setting in the handy remote controller.
- Page 50 Check point Check the RS-485 send circuit of the interface. Error message Enable the test mode 2 at the interface, and check that communication waveform is output between A and B of the RS-485 terminal block of the interface. The RS-485 send circuit of the interface is normal. Check the RS-485 send circuit of the controller.
- Page 51 15-9.How to Identify Defective Part at S06 (BMS-IFWH Communication Error) or S07 (BMS-IFDD Communication Error) Occurrence Check point Check if the RS-485 LED (Green) is blinking at the Energy Monitoring Relay Interface or the Digital Input / Output Relay Interface. Error message (If blinking) Defective part:...
-
Page 52: Exploded Views And Parts List
EXPLODED VIEWS AND PARTS LIST 16-1.EXPLODED VIEWS 16-2.PARTS LIST Location No. Parts No. Description 4316V463 CONTROLLER 4316V464 ELECTRIC PARTS ASSY 43108027 PANEL... - Page 53 Copylight © 2011 TOSHIBA CARRIER CORPORATION ALL Rights Reserved...