Table of Contents
Advertisement
Quick Links
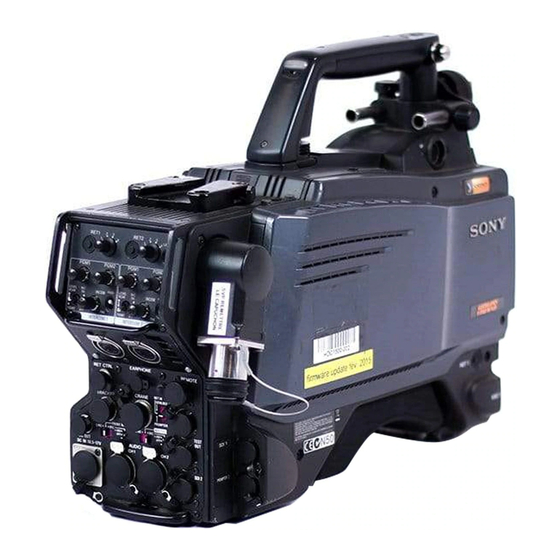
HD COLOR CAMERA
HDC1000
HDC1400
HDC1500
HDC1550
HDC1580
MAINTENANCE MANUAL
Volume 1 1st Edition (Revised 4)
Serial No. 10001 and Higher: HDC1000 (UCJ)
Serial No. 40001 and Higher: HDC1000 (CE)
Serial No. 10001 and Higher: HDC1400 (UC)
Serial No. 10001 and Higher: HDC1500 (SY)
Serial No. 40001 and Higher: HDC1500 (CE)
Serial No. 10001 and Higher: HDC1550 (UC)
Serial No. 40001 and Higher: HDC1550 (CE)
Serial No. 400001 and Higher: HDC1550 (CE)
Serial No. 50001 and Higher: HDC1580 (CN)
Advertisement
Table of Contents

Related Manuals for Sony HDC1000


Summary of Contents for Sony HDC1000
- Page 1 HDC1550 HDC1580 MAINTENANCE MANUAL Volume 1 1st Edition (Revised 4) Serial No. 10001 and Higher: HDC1000 (UCJ) Serial No. 40001 and Higher: HDC1000 (CE) Serial No. 10001 and Higher: HDC1400 (UC) Serial No. 10001 and Higher: HDC1500 (SY) Serial No. 40001 and Higher: HDC1500 (CE) Serial No.
- Page 2 This HD Color Camera is classified as a CLASS 1 Use of controls or adjustments or performance of LASER PRODUCT. procedures other than those specified herein may result in hazardous radiation exposure. CAUTION The use of optical instruments with this product will increase eye hazard. HDC1000/V1(E)
- Page 3 Hävitä käytetty paristo valmistajan ohjeiden Remplacer uniquement avec une batterie du même mukaisesti. type ou d’un type équivalent recommandé par le constructeur. Mettre au rebut les batteries usagées conformément aux instructions du fabricant. 1 (P) HDC1000/V1(E)
- Page 4 Gebrauchsdauer der Batterien “nicht mehr einwandfrei funktioniert”. Um sicherzugehen, kleben Sie die Batteriepole z.B. mit einem Klebestreifen ab oder geben Sie die Batterien einzeln in einen Plastikbeutel. For the customers in Taiwan only 2 (P) HDC1000/V1(E)
-
Page 5: Table Of Contents
HDC1400/1500/1550/1580 ........2-7 (Commercially Available) is not Available ..1-23 2-4. Replacing the Fan (HDC1000) ........2-8 1-9. Setting the Utility Out Voltage (HDC1000) ....1-24 2-4-1. DC Fan (TOP) ............2-8 1-10. Notes on Flexible Card Wire ........1-24 2-5. - Page 6 HDC1400/1500/1580 .......... 2-23 3-4-6. Auto-iris Adjustment ........... 3-17 2-11-3. HDC1550 ............2-24 3-4-7. Pedestal Level Adjustment ........3-18 2-12. Replacing the Boards (HDC1000) ........ 2-25 3-4-8. Flare Adjustment ..........3-18 2-12-1. MB-1060 Board ........... 2-25 3-4-9. Gamma Correction Adjustment ......3-19 3-4-10.
- Page 7 Scene File ................ 4-4 4-5. Reference File ..............4-6 4-6. Lens File ................. 4-8 4-7. OHB File ............... 4-10 4-8. File Items ..............4-12 5. Setup Menu 5-1. Entering the SERVICE Menu ......... 5-1 5-2. Settable Special Functions ..........5-2 HDC1000/V1(E)
-
Page 8: Manual Structure
Manual Structure Purpose of this manual This manual is the maintenance manual Volume 1 for HD Color Camera HDC1000/ 1400/1500/1550/1580. This manual describes the information items that premise the service based on the components parts such as service overview, replacement of main parts, electrical alignment, file system, SERVICE menu, assuming use of system and service engineers. -
Page 9: Service Overview
If the ROM and software version is lower than the specified below, be sure to perform ROM replacement and updating the software. If ROM replacement and updating the software are required, contact your local Sony Sales Office/Service Center. Peripheral equipment Board name Ref No. -
Page 10: Connectors And Cables
1-2. Connectors and Cables 1-2-1. Connector Input/Output Signals HDC1000 Connector Layout 0 !' !, HDC1000/V1(E) - Page 11 HDC1400/1500/1550/1580 Connector Layout *: HDC1500 only : There are no connectors on HDC1580. : There are no connectors on HDC1400/1550. HDC1000/V1(E)
- Page 12 8 RET CONTROL (6P FEMALE) Input/Output Signals 1 CCU connector (HDC1000/1400/1500/1580) BTA S-004A/005A/006A compliant 1.485 Gbps serial HDCU/HDFX connector (HDC1550) UC: King Triax connector CE: Fisher Triax connector (External view) No. Signal Specifications Output Signals 2 SDI 1 (HDC1000/1500) INCOM 1 Zi >...
- Page 13 (0 dBu = 0.775 Vrms) TX-GND —— GND for TX POWER (+) OUT UNREG +10.5 V to 17 V dc, ![ AC OUT (HDC1000) 200 mA (max) (For service personnel only) POWER (_) OUT —— GND for UNREG-OUT VIDEO (X) 75 Z, 1.0 V p-p...
- Page 14 !\ LENS (36P FEMALE) (HDC1000) (External view) No. Signal Specifications No. Signal Specifications No connection RET 3-ON Zi > 10 kZ ON : GND No connection OFF : High impedance No connection LENS-ADR-0 LENS +12 V +12 V (at 2 A)
- Page 15 !\ LENS (12P FEMALE) (HDC1400/1500/1550/ !; VF (25P FEMALE) (HDC1000) 1580) (External view) (External view) No. Signal Specifications No. Signal Specifications VF-Y (X) 1.0 V p-p, Zo = 75 Z RET VIDEO ENABLE : 0 V VF-GND (Pr) —— GND for VF-Pr (X)
- Page 16 ± 0.35 V p-p, Zo = 75 Z Pb VIDEO ± 0.35 V p-p, Zo = 75 Z Pr VIDEO No connection R TALLY ON : 5 V OFF : GND No connection UNREG GND —— GND for UNREG +10.5 V to +17 V UNREG HDC1000/V1(E)
-
Page 17: Wiring Diagrams For Cables
!. MIC 1 IN (3P FEMALE) (HDC1400/1500/1550/ 1580) (External view) No. Signal Specifications MIC 1 (G) —— _60 dBu, _50 dBu, _40 dBu, MIC 1 (X) _30 dBu, _20 dBu, selectable MIC 1 (Y) High impedance, Balanced (0 dBu = 0.755 Vrms) HDC1000/V1(E) -
Page 18: Connection Connectors/Cables
The down-converted SD signal is output. *2: If using a cable of length different from a standard product, contact your local Sony Sales Office/Service Center. *3: The pin 8 of CCA-5 cable is GND (ground). The pin 8 of REMOTE cable is not GND (ground). -
Page 19: Location Of Printed Circuit Boards
1-3. Location of Printed Circuit Boards HDC1000 SWITCHING REGULATOR DC-DC COVERTER AT-166 CN-2609 LE-291 LE-309 AT-163 CN-2671 SW-1233 AU-298 CN-2608 DAP-33 CN-2603 (for UCJ) CN-2603B (for CE) VDA-63 MB-1060 CN-2671 CN-2606 CN-2607 CN-2604 CN-2605 CN-2602 DPR-265 SDI-84 TG-243 PA-317 DR-528... - Page 20 CN-2619 SW-1237 CN-2621 CN-2623 SDI-84 (HDC1500) SDI-84C (HDC1400/1580) DC-DC COVERTER AT-163 SW-1238 AU-298 DAP-33 VDA-63 CN-2615 CN-2616 MB-1059 SW-1240 SW-1239 CN-2617 SW-1245 TG-243 (HDC1500) PA-317 (HDC1400/1500) TG-243B (HDC1400) PA-317C (HDC1580) TG-243C (HDC1580) DR-528 BI-175 BI-175 CN-2579 BI-175 CN-2578 1-12 HDC1000/V1(E)
- Page 21 FL-338 LE-308 FL-337 MX-109 CN-2618 SW-1236 DPR-265B CN-2618 TR-136 CN-2640 CN-2614 SW-1242 CN-2619 SW-1237 CN-2621 CN-2623 DC-DC COVERTER AT-163 SW-1238 AU-298 DAP-33 VDA-63 CN-2615 CN-2616 MB-1059 SW-1240 SW-1239 CN-2617 SW-1245 TG-243 PA-317 DR-528 BI-175 BI-175 CN-2579 BI-175 CN-2578 1-13 HDC1000/V1(E)
-
Page 22: Opening/Closing The Side Panel
1-4. Opening/Closing the Side Panel HDC1550 1. Unscrew the nine screws as shown in the figure, then HDC1000 open the inside panel and outside panel. 1. Unscrew the two lock screws of the side panel. 2. Release the hanging band (FRONT) and hanging band 2. -
Page 23: Switch Settings
S1-2 All Preset FRAM clear S1-3 Reserve Not used (Fixed to OFF) S1-4 Firmware Load Forcibly upgrading of firmware AT-166 Board (HDC1000) AT-166 BOARD (SIDE B) Ref. No. Name Description Factory setting S1-1 Not used (Fixed to OFF) S1-2 WRITER... - Page 24 AUDIO IN CH1 connector. Switch ON to supply +12 V for MIC POWER to the S3-2 AB POWER MIC2 microphone connected to the AUDIO IN CH2 connector. DPR-265 Board (HDC1000/1400/1500/1550) DPR-265C Board (HDC1580) DPR-265/265C BOARD (SIDE A) Ref. No. Name...
- Page 25 SDI-84 Board (HDC1000/1500) SDI-84C Board (HDC1400/1580) S201 S202 SDI-84/84C BOARD (SIDE A) Ref. No. Name Description Factory setting HDC1000/1500 HDC1400/1580 S201-1 TEST Not used (Fixed to OFF) S201-2 PROMPTER2 OUT Switch ON for PROMPTER2 ON (active) S201-3 VBS RET IN...
- Page 26 When this switch is set to ON, the 400 Hz sine wave is output from the built-in audio test signal generator. S1-5 When this switch is set to ON, the 1 kHz sine wave is output from the built-in audio test signal generator. S1-6 to S1-8 Spare (not used) 1-18 HDC1000/V1(E)
-
Page 27: Notes For Replacing Parts
2. Replace the flexible card wire with a flexible card wire whose conductive part is silver when the conductive part of a flexible card wire is silver. In this case, silk “G” or a “G” seal is not put on the board name. When the conductive part is gold (HDC1000) When the conductive part is silver (HDC1000) -
Page 28: Notes For Replacing The Board
2619G Board Flexible card wire Board Gold : Parts No. CN-2619G 1-833-557-11 MB-1059G CN-2621G 1-831-663-11 MB-1059G MB-1059G 1-831-661-12 SW-1273G CN-2579G 1-831-658-11 PA-317CG /PA-317G CN-2579G 1-831-656-11 DR-528G DR-528G 1-831-659-11 TG-243CG /TG-243BG *1, *3: For HDC1580 *2, *4: For HDC1400 1-20 HDC1000/V1(E) -
Page 29: Cleaning The Vent Portion Of The Fan (Hdc1400/1500/1550/1580)
1. Loosen the two screws with stopper, and remove the shoulder pad assembly. 2. Remove the two screws, and remove the ventilate bracket. 3. Remove dust on the ventilate bracket with a vacuum cleaner. Screws with stopper Precision Shoulder pad assembly Ventilate bracket P2 x 4 1-21 HDC1000/V1(E) -
Page 30: Cleaning Of Connector/Cable (Hdc1000/1400/1500/1580)
1-8. Cleaning of Connector/Cable [Female connector] (HDC1000/1400/1500/1580) 1. Insert the optical connector cleaner straight. Ensure that it is held straight when inserting. The photo receptive condition of the optical connector can 2. Apply sufficient pressure (approximately 600 g to 700... -
Page 31: When The Optical Connector Cleaner
Insert the shorter nose end Great care should be taken so as not to lose or damage the alignment sleeve. (Alignment sleeve: Sony P/N 9-980-074-01) . Alcohol (commercially available) . Cotton swabs (commercially available) Alignment sleeve Use a cotton swab whose diameter is about 4 mm. -
Page 32: Setting The Utility Out Voltage (Hdc1000)
The setting of the utility out voltage can be made by the The flexible card wires are used between the boards of combination of the switches 1 and 2 in the figure. HDC1000/1400/1500/1550/1580. Take care not to bend forcedly these flexible card wires. This shortens the wire life. HDC1000... - Page 33 A. Connector latch 2. Close the connector latch in the direction of arrow B to Connector lock it. Flexible card wire Flexible card wire Connector latch Insulating surface Insulating surface Connector 1-25 HDC1000/V1(E)
-
Page 34: Forming Of The Flexible Card Wire
If using a new flexible card wire, be sure to fold it by hand it as shown in the figure before installation. Never fold it back after being formed once. HDC1000 TR-136(CN2) . MB-1060 board CN6 ↔ CN-2609 board CN3... -
Page 35: Notes On Replacement Of Circuit Board
. When the replacement is needed, remove the IC attached 4. For HDC1000, set the destinations of the intercom to the former board and replace it to the new board. with the SERVICE menu. (Refer to “INTERCOM” in . -
Page 36: Setting Microphone Power And Intercoms
1-12-1. How to Supply a Power of + + + + + 12 V menu. Microphone sensitivity, power supply system, balanced/unbalanced inputs can be set. Since intercom 1 HDC1000/1400/1500/1550/1580 can supply +12 V for and intercom 2 are independent, make settings for each MIC POWER to the microphone connected to the AUDIO intercom. -
Page 37: Upgrading The Software
To get the upgrading program (program files To get the upgrading program (program files “hdc1000.rom” and “boot.rom”), contact your local Sony “hdc1000.rom” and “boot.rom”), contact your local Sony Sales Office/Service Center. Sales Office/Service Center. (1) Make the following directory on the Memory Stick. -
Page 38: Upgrading The Boot Program
1-13-2. Upgrading the Boot Program Procedures 1. Open the right side panel (HDC1000), or inside panel Tools (HDC1400/1500/1550/1580). (Refer to Section 1-4.) . Memory Stick 2. Extend the AT-163 board using the EX-738 board. . ROM-28 board: (Sony Part No. : A-8326-017-A) 3. -
Page 39: Writing And Rewriting The Pld Internal Data
For checking the SDI-84 board, refer to Section 2-14. 2. The standard software (PLD Download Tool) can be used. Equipment required . The PLD internal data is controlled in the Sony Database . PLD download fixture Server under the name of Project file (Sony part number: J-7120-140-A) (E_xxx_xxx_xx_xx). -
Page 40: Note On Replacement Of Lithium Battery
Therefore the battery replacement is required. 1. Prepare the Project file. DAP-33 board/CR2032 : Sony part No. (1-528-174-11) Download the Project file from the Sony Database Server. In replacing, ensure that the battery is installed with “+” and “_” poles connected to the correct terminals. -
Page 41: Recommended Replacing Parts
1-16. Recommended Replacing Parts 1-16-1. HDC1000 Description Sony Part No. Following parts are recommended replacing parts. The KNOB (DIA 3) ASSY, VOLUME X-3167-563-X optical filter unit may become clouded with the lapse of time. By such a cloudy optical filter unit, the characteris-... -
Page 42: Hdc1400/1500/1550/1580
1-16-2. HDC1400/1500/1550/1580 Description Sony Part No. Following parts are recommended replacing parts. The COVER, SWITCH 3-676-244-0X optical filter unit may become clouded with the lapse of time. By such a cloudy optical filter unit, the characteris- COVER, SWITCH 3-676-244-2X tics of this camera could not fully exploited, therefore... -
Page 43: Periodic Check/Replacement Parts
The replacement period of each part is changed according to the environment and condition. Refer to the “Section 2 Replacement of Main Parts” for the replacement method of part. . HDC1000 Description Sony Part No. Check/ Replacement Period FAN, DC 1-787-497-11 Replace every two years (60 SQUARE) *: When used for eight hours a day. -
Page 44: Description Of Ccd Block Number
Example : MDA xxxxx 2. Standardization of Parts Serial number for the CCD unit CCD block type Some repair parts supplied by Sony differ from those used for the unit. These are because of parts common- ality and improvement. Model CCD block type Parts list has the present standardized repair parts. -
Page 45: Replacement Of Main Parts
Spring washers electrical cable or the cable connected to the DC IN B2.6 x 6 connector in addition to turning off power switch. 2-1-1. HDC1000 Hexagon-socket Front panel assembly bolts (3 x 8) 1. Loosen the screw of the mount lever fixing lid, and open the mount lever fixing lid in the arrow direction. - Page 46 6. Install the CCD unit by reversing the steps above. When installing the CCD unit, adjust the boss of the front assembly to the hole on the chassis and connect the connector firmly. Holes Boss Boss Connector Front assembly HDC1000/V1(E)
-
Page 47: Hdc1400/1500/1550/1580
2. Remove the four hexagon-socket bolts and four spring washers, and remove the front panel assembly. CCD unit P3 x 6 P3 x 6 P3 x 6 5. Install the CCD by reversing the steps above. Spring washers Hexagon-soket bolts Front panel assembly (3 x 8) HDC1000/V1(E) -
Page 48: Replacement Of Ccd Unit Boards
2. Disconnect the flexible card wires from the connectors CN-2579 board (CN1, CN2) on the DR-528 board. 3. Remove the three screws to remove the DR-528 board. Special screws (M2) Install the board by reversing the steps above. B2 x 4 B2 x 4 DR-528 board HDC1000/V1(E) -
Page 49: Board
5. Remove the four screws to remove the PA-317 board. 6. Disconnect the harness from the connectors (CN101, CN201, and CN301) on the PA-317 board. Install the board by reversing the steps above. CN301 B2 x 4 CN201 CN101 PA-317 board B2 x 4 HDC1000/V1(E) -
Page 50: Cn-2578 Board
(CN2, CN3, and CN4) on the CN-2578 board. 7. Remove the two screws to remove the CN-2578 board. Install the board by reversing the steps above. OHB holder B2 x 4 B2 x 4 CN-2578 board B2 x 4 HDC1000/V1(E) -
Page 51: Replacing The Filter Disk Unit
2-3. Replacing the Filter Disk Unit 2-3-2. HDC1400/1500/1550/1580 2-3-1. HDC1000 1. Remove the inside panel. (Refer to Section 1-4.) 2. Disconnect the harness of the filter disk unit from the 1. Open the right side panel. (Refer to Section 1-4.) connector of the CCD unit. -
Page 52: Replacing The Fan (Hdc1000)
2-4. Replacing the Fan (HDC1000) 5. Detach the fan packing, and remove the DC fan. Protrusions If the fan is out of order, the inside temperature of the unit Fan packing will rise. Touching the inside in this state may cause a burn. -
Page 53: Replacing The Fan (Hdc1400/1500/1550/1580)
Be careful of the orientation of the label side and the harness when installing the DC fan. DC-DC converter unit VDA-63 board DAP-33 board AU-298 board AT-163 board Screws with stopper Shoulder pad assembly HDC1000/V1(E) -
Page 54: Dc Fan (Rear)
4. Remove the fan harness from the DPR rear bracket, and remove the duct (fan). 5. Detach the DC fan from the duct (fan). MB-1059 board CN18 CN18 Label side MB-1059 board Fan harness DPR rear bracket DC fan DPR rear bracket Duct (fan) 2-10 HDC1000/V1(E) -
Page 55: Replacing The Vf Disp Switches (Hdc1400/1500/1550/1580) (Sw-1237 Board)
10. Install a new switch by reversing the steps above. 4. Remove the three screws and pull out the handle holder assembly. 5. Disconnect the harness from the connector (CN3) on the CN-2614 board. Handle holder assembly CN-2614 board B3 x 8 B3 x 8 2-11 HDC1000/V1(E) -
Page 56: Replacing The Side Switch Panel Assembly (Hdc1400/1500/1550/1580) (Sw-1240 Board)
Toggle SW cushions 5. Install a new EARPHONE jack by reversing the steps Nuts above. Inside SW bracket Toggle SW plate SW-1240 board Switch Unsolder Toggle SW cushions 6. Install a new switch by reversing the steps above. 2-12 HDC1000/V1(E) -
Page 57: Dc In Connector (Cn-2623 Board)
CN-2619 Push the plug into the connector while turning it board clockwise and counterclockwise several times. Hold the plug to connect Screws CN-2621 board (M2) SDI 2/SDI connector CN-2623 board Screws (M2) Connecting connector 2-13 HDC1000/V1(E) -
Page 58: Intercom 1/2 Connector
CN-2618 board INTERCOM 1/2 connector Unsolder 6. Install a new INTERCOM 1 or INTERCOM 2 connec- Washer tor by reversing the steps above. Lens bracket LENS connector 6. Install a new LENS connector by reversing the steps above. 2-14 HDC1000/V1(E) -
Page 59: Mic 1 In Connector (Cn-2615 Board)
P2.6 x 5 CN-2615 board MIC 1 IN connector Unsolder 5. Install a new REMOTE connector by reversing the steps above. P2.6 x 5 B2.6 x 5 7. Install a new MIC 1 IN connector by reversing the steps above. 2-15 HDC1000/V1(E) -
Page 60: Ret In, Test Out Connector
5. Install a new SDI 1 connector by reversing the steps above. Hold the plug of the coaxial cable, and connect it perpendicularly to the connector. Push the plug into the connector while turning it clockwise and counterclockwise several times. Hold the plug to connect Connecting connector 2-16 HDC1000/V1(E) -
Page 61: Sdi 2 Connector (Hdc1500)
5. Remove the two fixing screws of the connector and (Refer to Section 1-4.) remove the BUILD UP connector. 2. Remove the switching regulator. (Refer to Section 2-11-2.) BUILD UP connector Screw of the connector 6. Install a new BUILD UP connector by reversing the steps above. 2-17 HDC1000/V1(E) -
Page 62: Replacing The Encapsulated Cable Assembly/Triax Assembly
7. Remove the four screws, and remove the connector Assembly/TRIAX Assembly box. 8. Remove the four screws, and pull out the encapsulated 2-9-1. HDC1000 (Encapsulated Cable Assembly) cable assembly. 1. Open the left side panel. (Refer to Section 1-4.) 2. Remove the two screws, and remove the harness K3 x 8 guard. -
Page 63: Hdc1400/1500/1580 (Encapsulated Cable Assembly)
Capacitors CN102 . When connecting the optical fiber cables to the E/O converter module CP201 or O/E converter module CP401 on the SDI-84/84C board, clean the connect- UL tape SDI-84/84C board ing connectors. (Refer to Section 1-8.) 2-19 HDC1000/V1(E) -
Page 64: Hdc1550 (Triax Assembly)
B3 x 8 7. Install the TRIAX assembly by reversing the steps 5. Disconnect the harness and coaxial cable from the above. connectors (CN1, CN2) on the FL-337 board. Replace the UL tape with new one. FL-337 board 2-20 HDC1000/V1(E) -
Page 65: Replacing The Dc/Dc Converter Unit
2-10. Replacing the DC/DC Converter Unit 2-10-2. HDC1400/1500/1550/1580 2-10-1. HDC1000 The DC/DC converter unit is a critical part for safety. If it is replaced with an unspecified part, a fire or electric shock The DC/DC converter unit is a critical part for safety. If it may be caused. -
Page 66: Replacing The Switching Regulator
2-11. Replacing the Switching Regulator 4. Remove the two screws, and remove the power unit bracket. 2-11-1. HDC1000 5. Remove the four screws, and remove the switching regulator from the power unit bracket. The switching regulator is a critical part for safety. If it is... -
Page 67: Hdc1400/1500/1580
3. Disconnect the harnesses from the five connectors on above. the switching regulator. 4. Remove the three screws, and remove the switching regulator, hanging band (REAR), and the harness clamp. Connectors B2.6 x 5 Harness clamp Connectors Switching regulator Hanging band (REAR) B2.6 x 5 2-23 HDC1000/V1(E) -
Page 68: Hdc1550
4. Remove the three screws, and remove the switching regulator, FL bracket, and hanging band (REAR). Connectors B2.6 x 5 FL bracket B2.6 x 5 Connectors Switching regulator B2.6 x 5 Hanging band (REAR) 2-24 HDC1000/V1(E) -
Page 69: Replacing The Boards (Hdc1000)
2-12. Replacing the Boards (HDC1000) 5. Release the harness and cables from the three harness clamps. 2-12-1. MB-1060 Board 6. Disconnect the coaxial cables from the connectors (CN201, CN851) on the SDI-84 board. 1. Open the right side panel and left side panel. - Page 70 CN11, CN13, CN15, CN16, and CN27) on the MB- MB-1060 board 1060 board (side B). PSW3 x 6 CN16 CN15 CN10 CN13 CN29 CN28 CN27 Coaxial cable CN11 (orange) MB-1060 board (side B) CN29 Coaxial cable CN28 (yellow) 2-26 HDC1000/V1(E)
- Page 71 . Arrange the harness and cables on the SDI-84 board as shown below, and clamp them with the three harness clamps. Coaxial cable Optical fiber cable (No.2) (green) Harness clamp CP401 SDI-84 board Harness clamps CN102 CP201 Coaxial cable (brown) Optical fiber cable (No.1) 2-27 HDC1000/V1(E)
-
Page 72: Replacing The Boards (Hdc1400/1500/1550/1580)
CN3, CN7, CN8, and CN9) on the CN-2617 board, and remove the sub frame assembly. CN-2617 board CN-2617 board B2 x 4 7. Install the CN-2617 board by reversing the steps Sub frame assembly above. B2.6 x 5 B2.6 x 5 2-28 HDC1000/V1(E) -
Page 73: Mb-1059 Board
Push the plug into the connector while turning it (HDC1550 only) clockwise and counterclockwise several times. Hold the plug to connect DPR-265 board Connecting connector CN601 B2.6 x 5 Coaxial cable Hold the plug to Do not attempt to remove. remove by pulling the cable. 2-29 HDC1000/V1(E) -
Page 74: Checking Sdi-84 Board (Hdc1400/1500/1580)
B2.6 x 5 Claw Outside pad subassembly Claws 2. Remove the five screws and the heatsink subassembly. 3. The SDI-84 board appears. Heatsink subassembly B2.6 x 5 B2.6 x 5 2-30 HDC1000/V1(E) -
Page 75: Electrical Alignment
Refer to Section 3-1-8 when using the camera setup menu for electrical adjustments without using MSU-900. 3-1-3. File Data at Adjustment 3-1. Preparations The file structure of the adjustment data of HDC1000/ 1500/1550/1580 is as follows. 3-1-1. Equipment Required Scene... -
Page 76: Maintaining The Grayscale Chart
2. Place the illuminance meter on the chart surface. Adjust the position and angle of the light source so that the whole surface of the chart is evenly 2000 lx. Light the chart from almost the same direction and height as the camera to shoot the chart. HDC1000/V1(E) - Page 77 4. Adjust the luminance control of the pattern box so that the white portion in the center of the chart is 573 ± 6 cd/m This corresponds to the luminous intensity on the 89.9 %-reflective chart at 2000 lx. Chart Luminance meter HDC1000/V1(E)
-
Page 78: Description On Setup Menu
The setup menu consists of the following menus. changed by turning the MENU SELECT control Besides there is a TOP menu indicating the entire configu- (HDC1000) or rotary encoder (HDC1500/1550/1580), ration of menu items. proceed as follows. . USER menu . -
Page 79: Connection Of Equipment
3-1-6. Connection of Equipment HDC1000 HDVF-700A LENS HD CAMERA HDC1000 MASTER SETUP UNIT MSU-700A/750/900/950 SDI 1 REMOTE Waveform monitor Color monitor CCA-5 CABLE A-ch Y, Pb, Pr (max. 200 m) R, G, B 75 Z HDC1400/1500/1550 2" VF HDVF-20A HD CAMERA... -
Page 80: Initial Settings
. Others → ON (lit normally) Gamma Off → 0 (0 dB) Master Gain → 1 (CLEAR) ND (1/2/3/4/5) → B (3200K) CC (A/B/C/D/E) → OFF (lit normally) ECS/Shutter *: Push the FUNCTION button, then select the function menu display. HDC1000/V1(E) -
Page 81: Adjustment Items And Setup Menu Items
Menu item of the MSU-900 Menu item of the camera Menu Adjusting item MENU PAGE ITEM Gamma R/G/B/Master PAINT GAMMA LEVEL R/G/B/M Knee Point R/G/B/Master KNEE POINT R/G/B/M Knee Slope R/G/B/Master SLOPE R/G/B/M White Clip R/G/B/Master WHT CLP R/G/B/M HDC1000/V1(E) -
Page 82: Automatic Adjustment
For 1080_59.94P/50P, set “DC_ADJ_A [R1], [G1], [B1]” and “DC_ADJ_A [R2], [G2], [B2]” to 68. (This item is fine adjusted during the RPN adjustment described later.) 2. Execute file storing for each format. MENU: SERVICE PAGE: OHB-ADJ1 ITEM: STORE FILE HDC1000/V1(E) -
Page 83: Black Set Adjustment
Then turn OFF (light off) the TEST1 button. . Shoot the grayscale chart so that the chart frame is aligned with the underscanned monitor frame. . Lens iris: F10 * Use a lens with a transmittance equivalent to Canon HJ18. HDC1000/V1(E) -
Page 84: V-Sub Adjustment
± 25 mV. . For 1080_29.97PsF/25PsF/24PsF, adjust “V-SUB [R], [G], [B]” in the same way so that the “A” level becomes 710 +30_0 mV. 2. Execute file storing for each format. MENU: SERVICE PAGE: OHB_ADJ3 ITEM: STORE FILE 3-10 HDC1000/V1(E) -
Page 85: Black Shading Adjustment
3-3-5. BLACK SHADING Adjustment 3-3-6. White Shading Adjustment Equipment: Waveform monitor (R, G, B) Preparation Test Point: SDI 1 connector (HDC1000/1500) . Setting for MSU-900 SDI connector (HDC1400/1550) CLOSE button → ON (lit) SDI 1 connector (HDCU1080) GAMMA OFF button → OFF (lit) - Page 86 WHITE button/MSU-900 → ON (lit) 12. Lens extender (x2) → OFF or lens shrinker (x0.8) → OFF OHB File Store MSU menu operation: . FILE button → ON (lit) . Touch panel operation [OHB|File] → [OHB|Store] → [Store] 3-12 HDC1000/V1(E)
-
Page 87: Rpn Adjustment
OHB_ADJ2 ITEM: STORE FILE ITEM: DC_ADJ_C [R1], [G1], [B1] If the residual point noise (RPN) still remains after the RPN adjustment, perform the RPN compensation (Section 3-10). However, this function is available for Software Version 1.11 and higher. 3-13 HDC1000/V1(E) -
Page 88: Video System Level Adjustment
3-4-1. H/V Ratio Adjustment Limiter → 0 Crispening → _25 Equipment: Waveform monitor (R, G, B) Level Dep → 25 Test Point: SDI 1 connector (HDC1000/1500) 2. MSU menu operation: SDI connector (HDC1400/1550) SDI 1 connector (HDCU1080) . Touch panel operation... -
Page 89: Detail Level Adjustment
Detail Level Adjustment 3-4-3. Crispening Adjustment Equipment: Waveform monitor (R, G, B) Equipment: Waveform monitor (R, G, B) Test Point: SDI 1 connector (HDC1000/1500) Test Point: SDI 1 connector (HDC1000/1500) SDI connector (HDC1400/1550) SDI connector (HDC1400/1550) SDI 1 connector (HDCU1080) -
Page 90: Level Dependent Adjustment
Level Dependent Adjustment 3-4-5. Detail Clip Adjustment Equipment: Waveform monitor (R, G, B) Equipment: Waveform monitor (R, G, B) Test Point: SDI 1 connector (HDC1000/1500) Test Point: SDI 1 connector (HDC1000/1500) SDI connector (HDC1400/1550) SDI connector (HDC1400/1550) SDI 1 connector (HDCU1080) -
Page 91: Auto-Iris Adjustment
MSU menu operation: . PAINT button → ON (lit) Equipment: Waveform monitor (R, G, B) . Touch panel operation Test Point: SDI 1 connector (HDC1000/1500) (Page 1/3) → [Detail] → [Detail|3] SDI connector (HDC1400/1550) Adjustment Item: W.Limiter SDI 1 connector (HDCU1080) -
Page 92: Pedestal Level Adjustment
3-4-7. Pedestal Level Adjustment 3-4-8. Flare Adjustment Equipment: Waveform monitor (R, G, B) Equipment: Waveform monitor (R, G, B) Test Point: SDI 1 connector (HDC1000/1500) Test Point: SDI 1 connector (HDC1000/1500) SDI connector (HDC1400/1550) SDI connector (HDC1400/1550) SDI 1 connector (HDCU1080) -
Page 93: Gamma Correction Adjustment
3-4-9. Gamma Correction Adjustment 3-4-10. Knee Point/Knee Slope Adjustment Equipment: Waveform monitor (R, G, B) Equipment: Waveform monitor (R, G, B) Test Point: SDI 1 connector (HDC1000/1500) Test Point: SDI 1 connector (HDC1000/1500) SDI connector (HDC1400/1550) SDI connector (HDC1400/1550) SDI 1 connector (HDCU1080) -
Page 94: White Clip Level Adjustment
. Touch panel operation (Page 2/3) → [Knee|Slope] Equipment: Waveform monitor (R, G, B) Adjustment Item: R, G, B Master Test Point: SDI 1 connector (HDC1000/1500) Adjust the levels B for preferred Specification: SDI connector (HDC1400/1550) level for R, G and B respectively. -
Page 95: File Store
1. MSU menu operation: . FILE button → ON (lit) . Touch panel operation [Reference] → [Ref|Store] → [Start] 2. When the store operation is completed, the message “Completed” is displayed. 3-21 HDC1000/V1(E) -
Page 96: Nd Offset Adjustment
Proceed as follows. . Touch panel operation [OHB|File] → [OHB|Store] → [Store] Equipment: Waveform monitor (R, G, B) Test Point: SDI 1 connector (HDC1000/1500) 2. When the store operation is completed, the message SDI connector (HDC1400/1550) “OHB File Stored” is displayed. -
Page 97: Adjustment Preparation Of Hdc1550
. Check that the switches S601 and S605 for electrical adjustments on the DTX-1 board in HDCU-950 as follows. S601/DTX-1 board: SDI S605/DTX-1 board: HD POWER S607 S608 OPTICAL CONDITION S610 S606 S603 S604 LOCK S601 RETURN SET S605 DTX-1 board in HDCU-950 (Side A) 3-23 HDC1000/V1(E) -
Page 98: Connection
HDFX100 HDC1550 HDCU Outside pad CAMERA/ HDCU/ assembly HDTX HDFX B2.6 x 8 TRIAX cable B2.6 x 8 B2.6 x 8 3. Open the heat sink sub assembly as shown in the following figure. Heat sink sub assembly 3-24 HDC1000/V1(E) -
Page 99: Tone Adjustment (Hdc1550)
TP208 LV103 TP207 RV601 RV201 LV204 RV602 RV103 LV203 TP204 TP801 TP203 LV105 RV801 RV202 LV206 LV205 TP206 RV105 TP401 TP205 TP106 E200 LV202 TP202 TP201 RV721 LV104 TP721 RV104 LV101 TP602 TP603 TP601 TR-136 BOARD (SIDE A) 3-25 HDC1000/V1(E) -
Page 100: Video System Adjustment (Hdc1550)
950 as follows. (Refer to Section 3-6-2.) S601: SDI TP101 S605: HD LV301 LV201 LV101 TP201 5. Disconnect the signal generator from the RET 1 IN RV301 LV302 connector on HDCU-950. TP301 RV201 RV302 TP203 TP302 TP202 MX-109 BOARD (SIDE A) 3-26 HDC1000/V1(E) -
Page 101: Return Frequency Adjustment
4. . Replace the TRIAX cable between HDFX100 and HDC1550 with the 50 m cable. . Set S1 on the DM-141 board in HDFX100 to “2”. TP101 LV301 LV201 LV101 TP201 RV301 LV302 TP301 RV201 RV302 TP203 TP302 TP202 MX-109 BOARD (SIDE A) 3-27 HDC1000/V1(E) -
Page 102: 74 Mhz Clock Duty Adjustment
TP208 LV103 TP207 RV601 RV201 LV204 RV602 RV103 LV203 TP204 TP801 TP203 LV105 RV801 RV202 LV206 LV205 TP206 RV105 TP401 TP205 TP106 E200 LV202 TP202 TP201 RV721 LV104 TP721 RV104 LV101 TP602 TP603 TP601 TR-136 BOARD (SIDE A) 3-28 HDC1000/V1(E) -
Page 103: Prompter Adjustment
HDFX setting: S1: “1” TRIAX cable: 400 m Adjusting point: 1LV301 (PROMPT FREQ)/ MX-109 board Specification: A waveform shall be maximized. Flat TP101 LV301 LV201 LV101 TP201 RV301 LV302 TP301 RV201 RV302 TP203 TP302 TP202 MX-109 BOARD (SIDE A) 3-29 HDC1000/V1(E) - Page 104 . The noise level shall be minimum. Specification: . The SYNC level shall be main- tained. . The back porch shall be flat. TP101 LV301 LV201 LV101 TP201 RV301 LV302 TP301 RV201 RV302 TP203 TP302 TP202 MX-109 BOARD (SIDE A) 3-30 HDC1000/V1(E)
-
Page 105: Return Dc Level Adjustment
TP208 LV103 TP207 RV601 RV201 LV204 RV602 RV103 LV203 TP204 TP801 TP203 LV105 RV801 RV202 LV206 LV205 TP206 RV105 TP401 TP205 TP106 E200 LV202 TP202 TP201 RV721 LV104 TP721 RV104 LV101 TP602 TP603 TP601 TR-136 BOARD (SIDE A) 3-31 HDC1000/V1(E) -
Page 106: Audio System Adjustment (Hdc1550)
TP208 LV103 TP207 RV601 RV201 LV204 RV602 RV103 LV203 TP204 TP801 TP203 LV105 RV801 RV202 LV206 LV205 TP206 RV105 TP401 TP205 TP106 E200 LV202 TP202 TP201 RV721 LV104 TP721 RV104 LV101 TP602 TP603 TP601 TR-136 BOARD (SIDE A) 3-32 HDC1000/V1(E) -
Page 107: Audio Modulation Adjustment
TP208 LV103 TP207 RV601 RV201 LV204 RV602 RV103 LV203 TP204 TP801 TP203 LV105 RV801 RV202 LV206 LV205 TP206 RV105 TP401 TP205 TP106 E200 LV202 TP202 TP201 RV721 LV104 TP721 RV104 LV101 TP602 TP603 TP601 TR-136 BOARD (SIDE A) 3-33 HDC1000/V1(E) -
Page 108: Incom 1 Demodulation/Output Level Adjustments
TP208 LV103 TP207 RV601 RV201 LV204 RV602 RV103 LV203 TP204 TP801 TP203 LV105 RV801 RV202 LV206 LV205 TP206 RV105 TP401 TP205 TP106 E200 LV202 TP202 TP201 RV721 LV104 TP721 RV104 LV101 TP602 TP603 TP601 TR-136 BOARD (SIDE A) 3-34 HDC1000/V1(E) -
Page 109: Incom 2 Demodulation/Output Level Adjustments
TP208 LV103 TP207 RV601 RV201 LV204 RV602 RV103 LV203 TP204 TP801 TP203 LV105 RV801 RV202 LV206 LV205 TP206 RV105 TP401 TP205 TP106 E200 LV202 TP202 TP201 RV721 LV104 TP721 RV104 LV101 TP602 TP603 TP601 TR-136 BOARD (SIDE A) 3-35 HDC1000/V1(E) -
Page 110: Pgm 1 Demodulation/Output Level Adjustments
TP208 LV103 TP207 RV601 RV201 LV204 RV602 RV103 LV203 TP204 TP801 TP203 LV105 RV801 RV202 LV206 LV205 TP206 RV105 TP401 TP205 TP106 E200 LV202 TP202 TP201 RV721 LV104 TP721 RV104 LV101 TP602 TP603 TP601 TR-136 BOARD (SIDE A) 3-36 HDC1000/V1(E) -
Page 111: Pgm 2 Demodulation/Output Level Adjustments
TP208 LV103 TP207 RV601 RV201 LV204 RV602 RV103 LV203 TP204 TP801 TP203 LV105 RV801 RV202 LV206 LV205 TP206 RV105 TP401 TP205 TP106 E200 LV202 TP202 TP201 RV721 LV104 TP721 RV104 LV101 TP602 TP603 TP601 TR-136 BOARD (SIDE A) 3-37 HDC1000/V1(E) -
Page 112: Rpn Compensation
If any RPN still remains after this manual adjustment, FIELD/FRAME : FIELD handle it according to the flowchart. *: Provided for Software Version 1.11 and higher. Setting after Adjustment Preparations ITEM : RPN CURSOR → OFF . Perform the automatic black balance adjustment. 3-38 HDC1000/V1(E) -
Page 113: Procedures To Be Taken When The Rpn
In this case, the CCD or 02.<CONCEALMENT2> 03.<COMPENSATION> the CCD block must be replaced. For more 04.<V.LINE> 05.<RPN MANAGE> information, contact your local Sony Sales Office/ 06.<RPN STATUS> Service Center. 07.<BACKUP FILE> 08.<FACTORY FILE> 09.<LENS FILEL2 >... -
Page 114: Performing Automatic Rpn Detection
Increase RPN WIDTH to 3, 4, ..., and select a value that allows the best compensation. For an RPN that has a horizontal extent (smear), increase RPN WIDTH from 1 to 2, 3, 4, ..., and select a value that allows the best compensation. 3-40 HDC1000/V1(E) -
Page 115: Rpn Compensation Flowchart
When there is another RPN, perform the manual RPN compensation again. The RPN cannot be compensated because the RPN is adjacent to another RPN. Replace the CCD block. Compensation is successful. 3-41 HDC1000/V1(E) -
Page 117: File System
Section 4 File System The HDC1000/1400/1500/1550/1580 are equipped with various file systems for managing data. In this section, the menu operations are described as follows. Example: When executing WRITE (CAM → MS) at the OPERATOR FILE page of the OPERATION menu. -
Page 118: Operator File
Reading Storing (Step 2) (Step 1) Camera unit Calling (Step 3) Initializing (Step 5) Preset Operator File Current Operator Preset Operator File Factory-set File Data value Storing (Step 4) Output to hardware Fig. 4-2. Operating Procedure for Operator Files HDC1000/V1(E) -
Page 119: Preset Operator File
Operator File. [FILE] → [OPERATOR|FILE] → [STORE|PRESET|FILE] Initializing (Refer to step 5 of Fig. 4-2.) Using FILE Menu of This Unit Use when initializing the changed Preset Operator File data to their factory-set values. [FILE] → [FILE|CLEAR] → [PRESET|OPERATOR] HDC1000/V1(E) -
Page 120: Scene File
Select the number again to cancel the call and resume the previ- ous status. With MSU Press and light up the SCENE FILES button of the desired number when the STORE button is dark. Press the lit button again to turn it dark and resume the previous status. HDC1000/V1(E) - Page 121 Scene File data stored in the memory stick cannot be read when the power is just turned on. Camera unit Storing in Storing memory stick (Step 1) (Step 1) Scene File Memory stick Current paint data Calling Readng from memory stick (Step 2) (Step 3) Output to hardware Fig. 4-3. Operating Procedure for Scene Files HDC1000/V1(E)
-
Page 122: Reference File
The temporary paint amount and scene file amount will be cleared and the reference file will be reset to the state stored in. With MSU Press STANDARD button to reset the reference file item to the state stored in. HDC1000/V1(E) - Page 123 (Step 1) Camera unit (Step 3) Storing (Step 1) Initializing (Step 4) Reference File Reference File Current paint data factory-set value (Initial value 0) Calling (Step 2) Output to hardware Fig. 4-4. Operating Procedure for Reference Files HDC1000/V1(E)
-
Page 124: Lens File
(11) Zooming the lens, and adjust the center marker to a position at which the object does not deviate. (12) Store the Lens File. [FILE] → [LENS|FILE] → [STORE|FILE] *1 : The center marker position is stored in the Lens File immediately after the position is aligned and not when executing the Lens File store. HDC1000/V1(E) - Page 125 *2 : The center marker position is stored in the Lens File immediately after the position is aligned and not when executing the Lens File store. Calling Using OPERATION Menu of This Unit Select the Lens File. [OPERATION] → [LENS|FILE] HDC1000/V1(E)
-
Page 126: Ohb File
2 Select 1 by the ND filter knob, and adjust the lens iris so that the video level is 80 to 50 % (560 to 350 mV), and then adjust the white balance automatically. [MAINTENANCE] → [AUTO|SETUP] → [AUTO|WHITE] 4-10 HDC1000/V1(E) - Page 127 (6) Perform the OHB matrix adjustment. [OHB|File] → [Adjusting] → [Matrix] Change the adjustment display by pressing the button 1, 2 of sub menu, and adjust the value of the OHB matrix. (7) Store the OHB File. [OHB|File] → [OHB|store] → [Store] 4-11 HDC1000/V1(E)
-
Page 128: File Items
Black Shading V Saw-B X Black Shading H Para-R X Black Shading H Para-G X Black Shading H Para-B X Black Shading V Para-R X Black Shading V Para-G X Black Shading V Para-B X Auto Black Shading (Continued) 4-12 HDC1000/V1(E) - Page 129 Master V Mod Saw Dynamic Shading Compensation ON OFFSET X White White-R White-G White-B OFFSET X color temp — — — — — balance — — — — — Auto White Balance Flare Flare OFF Flare-R Flare-G Flare-B (Continued) 4-13 HDC1000/V1(E)
- Page 130 Skin 1 On Skin 1 Gate On Skin 1 Level Skin 1 Phase Skin 1 Width Skin 1 Sat Skin 2 On Skin 2 Gate On Skin 2 Level Skin 2 Phase Skin 2 Width Skin 2 Sat (Continued) 4-14 HDC1000/V1(E)
- Page 131 Phase select Saturation Black Gamma Black Gamma On R Black Gamma G Black Gamma B Black Gamma M Black Gamma Black Gamma (RGB) Range Low key Low Key Saturation ON saturation Range Low Key Saturation level O (Continued) 4-15 HDC1000/V1(E)
- Page 132 Auto Knee Slope Adaptive Auto Knee — — — — — White Clip White Clip Off R White Clip G White Clip B White Clip M White Clip Level auto level auto set up set up White Setup Mode (Continued) 4-16 HDC1000/V1(E)
- Page 133 — — OHB file store — — — — — format 1080 59.94i — — — — — HDC1000, 1400, 1500, 1550 only 1080 29.97PsF — — — — — HDC1000, 1500, 1550 only 1080 23.98PsF — — — —...
- Page 134 — — — — LEVEL — — — — CRISP — — — — ZEBRA ZEBRA — — — — ZEBRA1 LEVEL — — — — WIDTH — — — — ZEBRA2 LEVEL — — — — (Continued) 4-18 HDC1000/V1(E)
- Page 135 — — — — SY model only — — — — CE model only PROD — — — — CE model only PGM1 — — — — PGM2 — — — — TRACKER — — — — (Continued) 4-19 HDC1000/V1(E)
- Page 136 INTERCOM — — — — SY model only — — — — CE model only PROD — — — — CE model only PGM1 — — — — PGM2 — — — — TRACKER — — — — 4-20 HDC1000/V1(E)
-
Page 137: Setup Menu
The setup menu consists of the following menus. changed by turning the MENU SELECT control Besides there is a TOP menu indicating the entire configu- (HDC1000) or rotary encoder (HDC1500/1550/1580), ration of menu items. proceed as follows. . USER menu . -
Page 138: Settable Special Functions
FILTER RESUME . If “Digital extender” is set to ON, the area marker is not When the buildup connector is installed in HDC1000 or displayed correctly. HDC1400/1500/1550/1580 and “FILTER LOCAL” is changed from ON to OFF on the rear panel, the camera filter position must be set. -
Page 139: Black Shading
BLK SET: EE REF-SEL : HD-60i OFFSET: 00 CHANNEL-SEL : COLOR GAIN: 12dB TEST: --- STORE FILE: EXEC The VDA-ADJ menu is used for adjustments of the VDA The BLACK SHADING menu is used for adjustment of board. the black shading. HDC1000/V1(E) - Page 140 : 1CH The SDI menu is used to display the SDI board status. EXT RETURN <EXT RETURN> S12 TOP EXT RET IN: VBS STATUSE : OK FORMAT : NTSC SD ASPECT : SQ The EXT RETURN menu is not used. HDC1000/V1(E)
- Page 141 In HDC1400/1500/1550/1580, this setting is automatically made by performing file menu → reference → ALL preset. However, in HDC1000 or when not using ALL PRESET, set INTERCOM FILE in this menu. Set CE for CE destina- tions and HDC1580, or set UCJ for others.
- Page 144 HDC1000 (UCJ) HDC1000 (CE) HDC1400 (UC) HDC1500 (SY) HDC1500 (CE) HDC1550 (UC) HDC1550 (CE) Printed in Japan Sony Corporation HDC1580 (CN) E 2007. 5 08 9-968-212-05 ©2005...
Need help?
Do you have a question about the HDC1000 and is the answer not in the manual?
Questions and answers