Table of Contents
Advertisement
Quick Links
Advertisement
Table of Contents

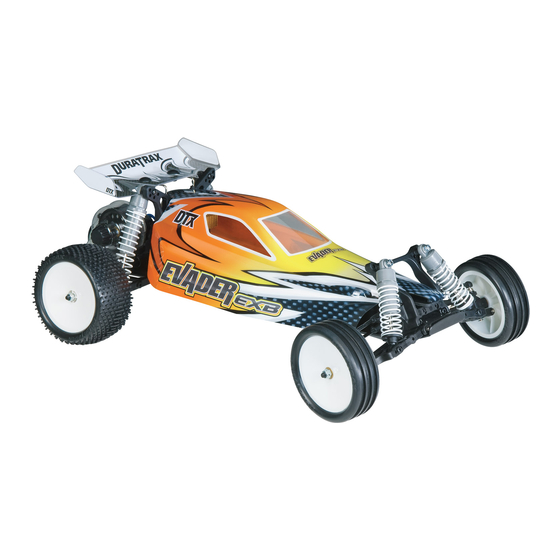
Summary of Contents for Duratrax Evader EXB
- Page 1 ® ™ ASSEMBLY AND OPERATION MANUAL www.duratrax.com...
- Page 2 ITEMS INCLUDED Chassis Body Body Clips (Qty 3) The following items are included with your Evader EXB. Transmitter Transmitter Antenna Receiver Antenna Tube Decal Sheet Instruction Manual Exploded View/Parts Listing Transmitter Frequency Flag YOU WILL NEED ™ PIRANHA 6-CELL 7.2V 2000MAH NIMH STICK...
-
Page 3: Warranty
• Do not operate the Evader EXB near people. DuraTrax will warranty this kit for 90 Spectators should be behind the driver or at ❏... -
Page 4: Transmitter Preparation
FINISHING THE EVADER EXB TRANSMITTER PREPARATION • Slide the batttery tray door off and install eight “AA” batteries into transmitter, making sure the polarity is correct. Battery Tray Door Battery Light • Insert the antenna into the top of the transmitter and tighten. - Page 5 • Remove the clip from the battery strap post and remove the battery strap from the Evader EXB. Clip Battery Strap Post • Install the charged 6-cell battery into the battery slot.
-
Page 6: Speed Control Set Up
SPEED CONTROL SET UP • Connect the battery pack to the ESC. Turn on the Tx, and then the ESC. ™ • The Sprint 2 sets up automatically. • Do not touch the throttle trigger for 2-3 seconds. • The green light will fl ash and then glow steadily. •... -
Page 7: Speed Control
• Motor is geared too high. Change to a lower gear setup. 2. Disconnect and remove the battery from the Evader EXB. • Binding in the vehicle’s drivetrain. Check to make sure 3. Check for any broken or damaged parts. This way parts nothing is interfering with the model’s drivetrain. - Page 8 WHEELBASE TUNING GUIDE When tuning the Evader EXB make sure that you have equal length shocks, camber rods and steering rods on both sides (left and right). They do not have to be the same front to rear. CASTER Wheelbase is the distance from the center of the front wheel to the center of the rear wheel.
-
Page 9: Front Shock Adjustment
Stiffening the front shocks will result in less steering and more rear traction. DuraTrax offers different rate (stiffness) springs to suite most running conditions. The springs are color coded for easy identifi cation:... - Page 10 MAINTENANCE GUIDE The following section is provided to help you with maintenance and repairs to your Evader EXB. Pay extra attention to the notes and tips for proper assembly. Bulkhead, Bulkhead Brace, Front Suspension Arm, Front Shock Tower, Front Bumper 1.
- Page 11 The servo saver tension will need to be properly adjusted once the entire servo saver assembly has been installed onto the Evader EXB. 12. Insert a plastic bushing (47) into each end of the left servo saver assembly. Again, make sure the bushings are fully seated.
- Page 12 Rear Shock Tower, Rear Transmission Plate, Rear Bulkhead, Rear Suspension Arm 1. Attach the rear chassis plate (41) to the chassis (1) using four 3x10mm round head screws (C). 2. Attach the rear suspension arms (36,37) to the rear chassis plate using the inner rear hinge pins (97).
- Page 13 Spring Pin Hole Bushing Mount Keyed Spring Section Pin Hole Differential 1. Place one 10x16mm bushing (110) on the bushing mounts on the diff gear case (18) and another on the diff gear case cover (12). 2. Install the outdrives (10) through the diff gear case and the gear cover. Install the spring pins (11) into the spring pin holes. 3.
- Page 14 Slipper Clutch 1. Install the inner slipper plate (84) onto the top shaft (83). Make sure the notch in the inner slipper plate keys onto the 2x10 spring pin (116) in the top shaft. 2. Place the slipper pad (64) and outer slipper plate (85) onto the top shaft.
- Page 15 Transmission Installation 1. Install the motor guard (3) to the top of the transmission, using two 4-40x1/4" F/H screws (A). 2. Install the transmission onto the rear chassis plate using two 3x10mm screws (C), and two more 3x10mm screws (C) to secure it to the transmission brace. 3.
- Page 16 OTHER ITEMS AVAILABLE FOR THE EVADER EXB Piranha ™ NiMH Aluminum Front Hinge Pin Plate 7.2V 2000mAh Battery DTXC6613 Blue DTXP4005 DTXC6614 Purple Piranha Digital Charger DTXP4005 Aluminum Rear Hub Carrier Aluminum Front Hub Carrier DTXC8071 Blue DTXC8032 Blue DTXC8072 Purple...


Need help?
Do you have a question about the Evader EXB and is the answer not in the manual?
Questions and answers