Table of Contents
Advertisement
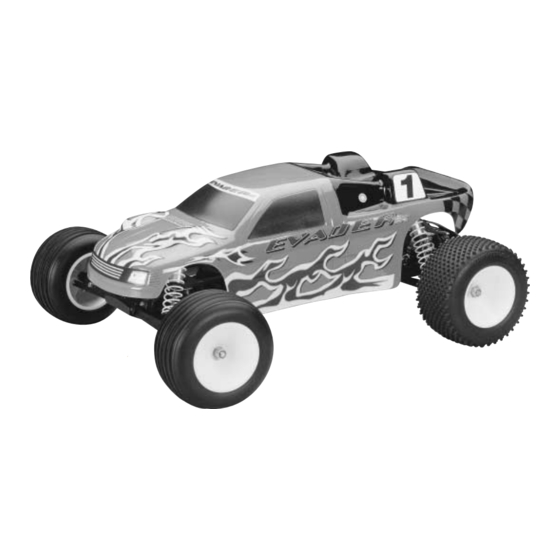
Length: 15.2" [385mm]
Width: 13" [330mm]
Height: 5.8" [147mm]
Weight: 3 lbs 6.3 oz
Wheelbase: 11.6" [295mm]
Motor: Photon Speed
™
Radio: 2-channel surface frequency
• DuraTrax
®
will warranty this kit for 90 days after the purchase date from defects in materials or workmanship. DuraTrax
will either repair or replace, at no charge, the incorrectly made part.
• Make sure you save the receipt or invoice you were given when you bought your model! It is your proof of purchase
and we must see it before we can honor the warranty.
• To return your Evader ST for repairs covered under warranty you should send your truck to:
If the buyer is not prepared to accept the liability associated with the use of this product, the buyer is advised to
return this kit immediately in new and unused condition to the place of purchase.
READ THROUGH THIS MANUAL BEFORE STARTING.
IT CONTAINS IMPORTANT INSTRUCTIONS AND
WARNINGS CONCERNING THE ASSEMBLY AND USE
OF THIS MODEL.
© Copyright 2001
®
20 Turn
ASSEMBLY AND OPERATION MANUAL
Champaign, Illinois 61822
Attn: Service Department
Phone: (217) 398-0007 9:00 am - 5:00 pm Central Time M-F
E-mail: hobbyservices@hobbico.com
Warranty
Hobby Services
1610 Interstate Drive
1610 Interstate Drive Champaign, IL 61822
®
(217) 398-8970, Ext. 2
carsupport@duratrax.com
DTXZ3100 For Kit DTXC0020/DTXD20**
™
Advertisement
Table of Contents

Related Manuals for Duratrax Evader ST


Summary of Contents for Duratrax Evader ST
- Page 1 • DuraTrax ® will warranty this kit for 90 days after the purchase date from defects in materials or workmanship. DuraTrax will either repair or replace, at no charge, the incorrectly made part. • Make sure you save the receipt or invoice you were given when you bought your model! It is your proof of purchase and we must see it before we can honor the warranty.
-
Page 2: Table Of Contents
SPECIFICATION & DESCRIPTION CHANGES ....3 REQUIRED ITEMS FOR COMPLETION......3 • Do not operate the Evader ST near people. Spectators TOOLS NEEDED FOR COMPLETION ......3 should be behind the driver or at a safe distance away from the vehicle. -
Page 3: Stress Tech Parts Guarantee
™ PARTS GUARANTEE SPECIFICATION & DESCRIPTION CHANGES We have engineered the Evader ST to take the rough and All pictures, descriptions and specifications found in this tumble abuse that makes R/C stadium trucks fun. We are so instruction manual are subject to change without notice. -
Page 4: Finishing The Rtr Version
FINISHING THE EVADER ST RTR VERSION (DTXD20**) 1. Remove the Evader ST and radio system from the box. 2. Charge the (not included) 6 or 7 cell battery on the (not included) charger. See Safety Precautions before charging and charge the battery according to the instructions that Route the antenna came with your charger. -
Page 5: Finishing The Pre-Built Version
8. Install the charged 6 or 7 cell battery into the battery slot. Re-install the battery strap onto the Evader ST. Note that there is a channel in the chassis for the battery strap to rest in. Re-install the body clip into the battery strap post. -
Page 6: Steering Servo Installation
STEERING SERVO INSTALLATION 4. Remove the two (2) 4-40 x 3/4" socket head machined screws from the upper plate and rotate the front of the truck 1. Locate and remove from the parts bag two (2) steering forward. (Note: Be careful that you do not loosen any of servo mounts, one (1) servo arm (determine which servo arm the steering assembly parts during this process). -
Page 7: Receiver Installation
4. Install the charged 6 or 7 cell battery into the battery slot. Re-install the battery strap onto the Evader ST. Note that there is a channel in the chassis for the battery strap to rest in. -
Page 8: Electronic Speed Control Set-Up
4. Squeeze the throttle trigger all of the way and hold it for or damaged parts before running the Evader ST. Running of 2 seconds. the Evader ST with broken or damaged parts could result in 5. Push the throttle trigger to full reverse and hold it for damage to other parts. -
Page 9: Assembly Guide
ASSEMBLY GUIDE The following information has been provided to help maintain and tune the Evader ST. 90 81... - Page 10 The diff can be properly adjusted by tightening the diff bolt until snug and then back off 1/8 turn. 3/32" Hex wrench...
-
Page 11: Tuning Guide
TUNING GUIDE CAMBER 2º Negative Camber When tuning the Evader ST make sure that you have equal length shocks on both sides (left and right), camber rods and steering rods. Also, make sure to have the shock pre-load adjusters at the same setting from left to right. They do not have to be the same front to rear. -
Page 12: Front Toe-In And Toe-Out
We have filled the shocks with 20 weight shock oil, which is a good choice for most driving conditions. RIDE HEIGHT The ride height of the Evader ST effects how it jumps and handles. The ride height of the Evader ST is adjustable STEERING DUAL RATE through the threaded pre-load adjusters on the shock bodies.
Need help?
Do you have a question about the Evader ST and is the answer not in the manual?
Questions and answers