
Related Manuals for Duratrax Vendetta ST


Summary of Contents for Duratrax Vendetta ST
- Page 1 ® ™ ASSEMBL Y AND OPERA TION MANU ASSEMBL Y AND OPERA TION MANU .duratrax.com .duratrax.com...
-
Page 2: Phillips Head Screwdriver
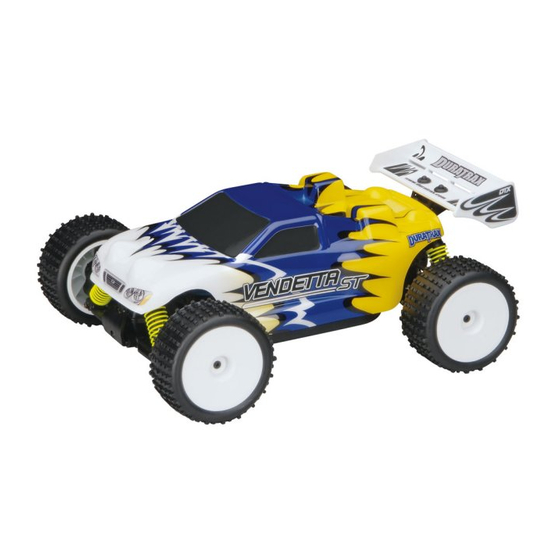
ITEMS ITEMS INCLUDED INCLUDED The following items are included in the box. Chassis Body Decal Sheet (Not Shown) Transmitter Transmitter Antenna Transmitter Flag (Not Shown) Receiver Antenna Tube with Antenna Cap (Not Shown) Shock Spring Clips (Not Shown) “AA” Batteries (Qty 8) Exploded View/Parts Listing (Not Shown) Extra Servo Saver Adapters for Hitec, JR (Not Shown) WILL... -
Page 3: Warranty
ARANTEE DESCRIPTION CHANGES ARANTEE All pictures, descriptions and specifications We have engineered the Vendetta ST to found in this instruction manual are subject to take the rough and tumble abuse that makes change without notice. DuraTrax maintains no R/C fun. We are so confident of the quality... -
Page 4: Transmitter Preparation
FINISHING FINISHING VENDETT A ST VENDETT A ST TRANSMITTER PREPARATION Battery Light • Install eight “AA” batteries into transmitter, making sure the polarity is correct. • Insert the antenna into the top of the transmitter and tighten. • Turn the transmitter on and check the battery light. If the red light glows steady, the batteries have enough voltage. -
Page 5: Receiver Antenna Installation
RECEIVER ANTENNA INSTALLATION • Route the receiver antenna wire through the receiver antenna tube. • Insert the antenna tube into the molded antenna mount on the battery strap. DO NOT CUT • Install the antenna tube cap onto the top of ANTENNA WIRE! the antenna tube. - Page 6 • When running, adjust the steering trim so the truggy tracks straight. • Gently pull back on the throttle trigger. The Vendetta ST should slowly move forward. If the truggy goes in reverse, move the throttle reversing switch on the transmitter. The throttle trim knob may also need to be adjusted to find neutral.
-
Page 7: Body Installation
• Check for broken or damaged parts. Replace any broken or should be replaced.) damaged parts before running the Vendetta ST. Running of the Vendetta ST with broken or damaged parts could result • Check the tires to make sure they are still properly glued in damage to other parts. - Page 8 RIDE HEIGHT ADJUSTMENT the front or rear. Negative The ride height of the Vendetta ST is easily adjusted by using camber is when the wheels the included pre-load spacers. To increase the ride height of lean inward and positive...
-
Page 9: Maintenance
MAINTENANCE MAINTENANCE GUIDE GUIDE The following section is provided to help you with maintenance and repairs to your Vendetta ST. Pay extra attention to the notes and tips for proper assembly. Gear Differential For Front and Rear ...2 8x12mm Ball Bearing ...2... - Page 10 3mm E-Clip ...1 6x10mm Ball Bearing ...2 8x12mm Ball Bearing 8x12mm 6x10mm ...1 8x12mm 3mm E-Clip ...1 2x8mm Drive Shaft Pin...
- Page 11 ...5 2.6x8mm S/T Screw When using optional pinion gear set, adjust motor position..2 2.6x6mm Screw 4.7mm ...1 3x3mm Set Screw ...1 13T Pinion...
- Page 12 ...2 2.6x6mm Motor Mount Screw 2.6x12mm 2.6x8mm ...2 2.6x8mm S/T Screw ...2 2.6x12mm S/T Screw ...1 2.6x10mm F/H S/T Screw ...2 2.6x8mm F/H Screw...
- Page 13 ...2 1.5 mm E-Clip 2.6x6 mm ...4 ...2 2.6x6 mm Screw 2.6x6 mm Screw...
- Page 14 ...4 2.6x8mm S/T Screw ...2 2.6x10mm F/H S/T Screw 2.6x8mm ...4 2x6 mm S/T Screw ...2 Flange Locknut ...2 2.6x8mm 2.6x8mm S/T Screw ...2...
- Page 15 ...3 2.6x8mm S/T Screw 2.6x12mm ...1 2.6x12mm S/T Screw 2.6x8mm ...2 ...2 6x10mm Ball Bearing 6x10mm Ball Bearing Left Right...
- Page 16 Right Left Pivot ball stud end should Pivot ball stud end should cover half the hole in the cover half the hole in the upper arm. upper arm. 2x8mm Shaft Pin...
- Page 17 Right 2x26.5mm Shaft Left 2x37.5mm Shaft ...2 2x6mm S/T Screw ...1 2.6x10mm F/H S/T Screw...
- Page 18 25.5–26mm 3x30mm Threaded Shaft 21–21.5mm ...1 2x12mm Screw ...2 6x10mm Ball Bearing 2x26.5mm Shaft 3.8mm Pivot Ball Left 1.5mm 1.5mm...
- Page 19 ...1 2x12mm Screw ...2 6x10mm Ball Bearing 2x26.5mm Shaft Rear Hinge Pin Pivot Ball Right 1.5mm 1.5mm Right 2x37.5mm Shaft Left...
-
Page 20: Front & Rear Shocks
...3 2.6x10mm F/H S/T Screw ...4 2x6mm S/T Screw 2x6mm S/T 2.6x10mm F/H S/T Front & Rear Shocks ...8 O-Ring ...8 1.5 mm E-Clip O-Ring Apply a small amount of oil to the shock shaft before inserting into the shock assembly. This will help prevent the shock shaft from tearing the O-rings. -
Page 21: Front Shocks
...4 ...4 Completely fill the shock body with shock oil. Slowly work the piston up and down to remove air bubbles. Do not push the piston out of the shock oil. Slowly tighten the shock cap onto the shock body to allow the remaining air bubbles to escape. -
Page 22: Rear Shocks
Adjust the ride height using the shock spring clip. Rear Shocks ...2 2x12mm Screw ...2 2x14mm Cap Screw ...2 The body posts will need to be trimmed to mount most bodies. - Page 23 2.6x8mm ...2 The body posts will need to be trimmed to mount most bodies.
- Page 24 2.6x8mm 3x12mm Screw For standard size servos, the 2.6x12mm Screw mounting tabs will have to be trimmed off to fit in the chassis. Use a sharp hobby knife or a pair of Lexan scissors. Be careful not to damage the servo case.
- Page 25 Double-Sided Tape Thoroughly clean the chassis and servo case with alcohol before applying the servo tape. Micro Standard Servo Servo...
- Page 26 Speed Control Double-Sided Tape Thoroughly clean the battery strap, receiver and the ESC with alcohol before applying the servo tape.
- Page 27 Steering Servo Yellow to motor ...1 ...4 2.6x10mm F/H S/T Screw Glue Glue...
- Page 28 TX NiCad Conversion Kit Carry Bag (For use with DuraTrax & Futaba Systems) Power Shot DTXP2028 DTXP4010 Motor Cleaner 12oz DTXC2459 For more optional parts and accessories, contact your hobby dealer or www.duratrax.com Copyright © 2006 V1.0 DTXZ1091 for DTXD14**...
Need help?
Do you have a question about the Vendetta ST and is the answer not in the manual?
Questions and answers