Blomberg DV 16540 NBL00 Owner's Manual & Installation Instructions
Front-loading dryer
Hide thumbs
Also See for DV 16540 NBL00:
- Owners and installation manual (24 pages) ,
- Owner's manual & installation instructions (24 pages)
Table of Contents
Advertisement
To prevent accidents and/or machine damage, read these
instructions before installation or use. Use the dryer only as
instructed in this owner's guide and installation instructions
manual included with your dryer. Keep this guide for future
reference
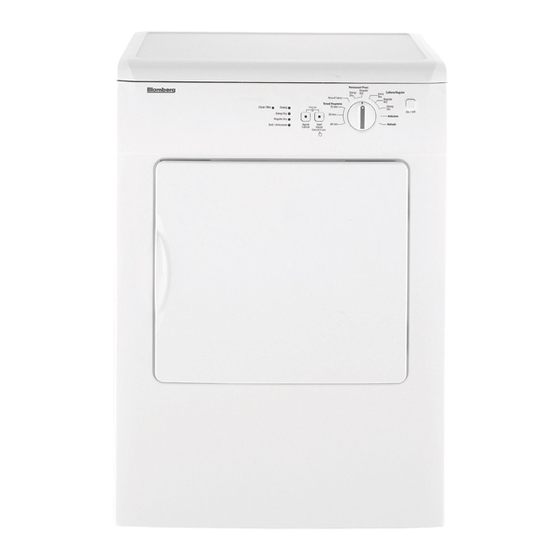
Front-Loading Dryer
DV 16540 NBL00
Owner's Guide & Installation Instructions
Advertisement
Table of Contents

Related Manuals for Blomberg DV 16540 NBL00


Summary of Contents for Blomberg DV 16540 NBL00
- Page 1 To prevent accidents and/or machine damage, read these instructions before installation or use. Use the dryer only as instructed in this owner’s guide and installation instructions manual included with your dryer. Keep this guide for future reference Front-Loading Dryer DV 16540 NBL00 Owner’s Guide & Installation Instructions...
-
Page 3: Important Safety Information
Please read this manual first! Dear Customer, We hope that your product, which has been manufactured in modern facilities and passed through strict quality control procedures, will give you the best results. Therefore, we advise you to read this manual thoroughly before using your product and keep it for future reference. -
Page 4: Table Of Contents
TABLE OF CONTENTS 1 Your Dryer End of program .........19 Technical Specifications .....20 Overview ..........5 5 Quick Start-up Instructions 21 2 Important Safety Instructions 6 Maintenance and cleaning 22 3 Installation Instructions Lint filter ..........22 Sensor ..........22 Electrical connection ......8 Grounding Instructions ......9 7 Troubleshooting Appropriate installation location ...9... -
Page 5: Your Dryer
Overview Figure 1 Type label Lint filter Control Panel Adjustable Feet Specifications of this appliance may change without notice to improve the quality of the product. Drawings in this manual are schematic and may not match your product exactly. Values stated on the machine labels or in the documentation accompanying it are obtained in the laboratory in accordance with relevant standards. -
Page 6: Important Safety Instructions
Important Safety Instructions WARNING: To reduce the risk of fire, WARNING: Improper connection of electric shock, or personal injury when the equipment-grounding conductor can using this appliance, follow the basic result in a risk of electric shock. Check precautions including the following: with a qualified electrician or service representative or personnel if you are •... - Page 7 • Items such as foam rubber (latex foam), WARNING: Never stop the tumble shower caps, waterproof textiles, rubber- dryer before the end of the drying cycle backed articles and clothes or pillows fitted unless all items are quickly removed and with foam rubber pads should not be dried spread out dissipate heat.
-
Page 8: Installation Instructions
Installation Instructions A WARNING - Risk of fire • The clothes dryer (“appliance‘) installation must be performed by a qualified installer. • Install the appliance according to the manufacturer’s instructions and local codes. • Do not install a clothes dryer with flexible 3- wire receptacle plastic venting materials. -
Page 9: Grounding Instructions
8. Attach the power cord Ground conductor This appliance is equipped with a cord having (the center wire) to the terminal labeled N. an equipment-grounding conductor and a Connect the terminal labeled N and the grounding plug. The plug must be plugged Ground terminal labeled G with the supplied into an appropriate outlet that is properly short cable. -
Page 10: Minimum Installation Clearances
” (875 mm) min. ” (850 mm) Ventilation Requirements Minimum Installation Closet door must have 2 openings, located 3 Clearances inches (7.5 cm) from bottom and top of door each having a minimum area of 60 sq. inches (375 cm Alcove or Built-under Closet Use on top of a washing machine... -
Page 11: Adjusting The Feet
when they are full. Therefore, the floor Make the duct passages as shown the must be capable of carrying the load picture below. placed on it! Exhaust of humid air from the dryer into Adjusting the feet the room is to be avoided. It may damage the walls and furniture in the room. -
Page 12: Destroying Packaging Material
Destroying packaging material Packaging material can be dangerous to children. Keep the packaging materials out of the reach of children or dispose of them accordingly. Do not dispose of them together with normal domestic waste. Packaging materials of your appliance are manufactured from recyclable materials. -
Page 13: Operating Instructions
Operating Instructions • Do not dry items like woolens, silk garments and nylon stockings, delicate WARNING: To reduce the risk embroidered fabrics, garments with metal of fire, electric shock, or personal accessories and items like sleeping bags injury, read the IMPORTANT SAFETY in the machine. -
Page 14: Correct Load Capacity
The following weights are given as examples. Correct load capacity Approximate Home articles weights (gr) Cotton quit covers (double) 1500 Cotton quit covers (single) 1000 Bed sheets (double) Bed sheets (single) Large tablecloths Small tablecloths Tea napkins Bath towels Hand towels Approximate Garments weights (gr) -
Page 15: Control Panel
Control panel Permanent Press Regular Cottons/Regular Damp Extra Regular Mixed Fabric Timed Programs Damp 15 min Clean Filter Drying Child Lock On / Off Damp Dry 30 min Delicates Regular Dry Refresh 75 min Signal Start End / Anticrease Cancel Pause Cancel 3 sec. -
Page 16: Loading Door
Loading door Always select the highest allowed temperature for drying. High temperature • Open loading door. will ensure energy and time savings. • Place laundry items loosely into the dryer. For further program details, see the • Push the loading door to close. Make Program Selection Table. -
Page 17: Special Programs
Special programs •Refresh / Ventilation For special cases, there are also extra Only cool air circulation is performed for 10 programs available: minutes without providing hot air. •Timed Programs Permanent Press Regular One of the 15 min., 30 min., 75 min. timer Cottons/Regular Damp Extra... -
Page 18: Starting The Program
As the inside of the dryer will be Starting the Program excessively hot when you cancel the 1. Press the “Start/Pause/Cancel” button to program when the dryer is running, activate the ventilation program to cool it start the program. down. 2. -
Page 19: Child-Proof Lock
Child-proof lock There is a childproof lock to prevent any program interruption due to the pressing of keys while a program is running. The loading door and all buttons except the “On/Off” key on the panel are deactivated when the child- proof lock is active. -
Page 20: Technical Specifications
Technical Specifications Enus Model Vented Dryer with electronic Sensor control Height (in) Witdth (in) Depth (in) Height adjustment of feet (in) Weight, unpacked (lbs) 70.5 Voltage / Frequency 208-240V ~ 60 Hz Connected load 2000-2400 W Fuse This appliance’s packaging material is recyclable. Help recycle it and protect the environment by dropping it off at recycling locations provided for this purpose. -
Page 21: Quick Start-Up Instructions
Quick Start-up Instructions Open loading door. Push the ON / OFF button to ON. Cottons/Regular Extra Regular Damp On / Off Delicates Refresh Select the appropriate Program. Permanent Press Check filter. Regular Cottons/Regu Damp Extra Mixed Fabric Regular ed Programs 15 min Damp 30 min... -
Page 22: Maintenance And Cleaning
Maintenance and cleaning Lint filter Sensor Lint and fibers released from the laundry in to There are humidity sensors in your machine the air during the drying cycle are collected in that detect whether the laundry is dry or not. the “Lint Filter”. -
Page 23: Troubleshooting
Troubleshooting Problem Cause Explanation / Solution * Clean the lint filter. Drying process Lint filter may not have been * Meshes of the filter may be clogged. takes too long. cleaned. Wash with water. * It may not plugged in. * Make sure that the dryer is plugged * The loading door may be ajar.
Need help?
Do you have a question about the DV 16540 NBL00 and is the answer not in the manual?
Questions and answers