Advertisement
- 1 Safety precautions
- 2 Package contents
- 3 Description of parts
- 4 Loading Slides
- 5 Loading Negatives
- 6 Loading photo
- 7 General operations
- 8 Trouble shooting
- 9 Technical Specifications
- 10 Documents / Resources
Safety precautions

Do not expose this product to rain or moisture to preserve the life of your product.

Do not disassemble this unit. To prevent the risk of electric shock, do not remove cover.
Ventilation: The device should be situated so that its location or position does not interfere with its proper ventilation. For example, the unit should not be situated on a bed, sofa, rug or similar surface that may block the ventilation openings.
Heat: The device should be situated away from sources of high heat such as radiators or stoves.
Cleaning: We strongly suggest using a clean, dry, non-alcohol cotton swab to clean the glass surface periodically to produce a clear image.
Non use period: The USB cord for the device should be unplugged from the computer when the unit is left unused for a long period of time.
USB overloading: Do not overload the USB connections on your computer. If you have too many devices connected to your computer such as a wireless mouse, media player, mobile phone or other USB powered devices. There may not be enough power for the film & photo scanner to operate properly.
Servicing: The user should not attempt to service the device beyond those means described in the operating instructions. All other servicing should be referred to qualified person.
Film Holder: The design of the film holder follows ISO standard. In some cases the holes on the film will not match exactly to the alignment of the holder. This is caused by a non-standard camera. In this case there will be a small black line on the edge of the frame that can easily be cropped out using photo editing software.
ISO-- International Organization for Standardization For environmental protection and energy conservation, besides in PLAYBACK and USB mode, the device will be powered off automatically without any operation in 30 minutes of inactivity.
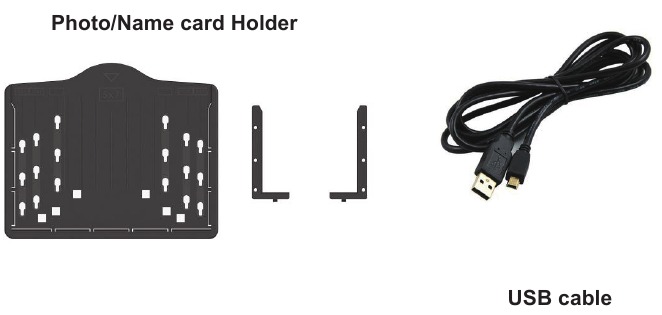
Package contents
- Film & photo scanner
- USB cable
- Negative Film Holder
- Positive Slide Holder
- 4 in 1 Photo Tray
- OCR CD
- AC/DC adapter
- User's Manual
Please remove the adaptor from the mains when not in use.
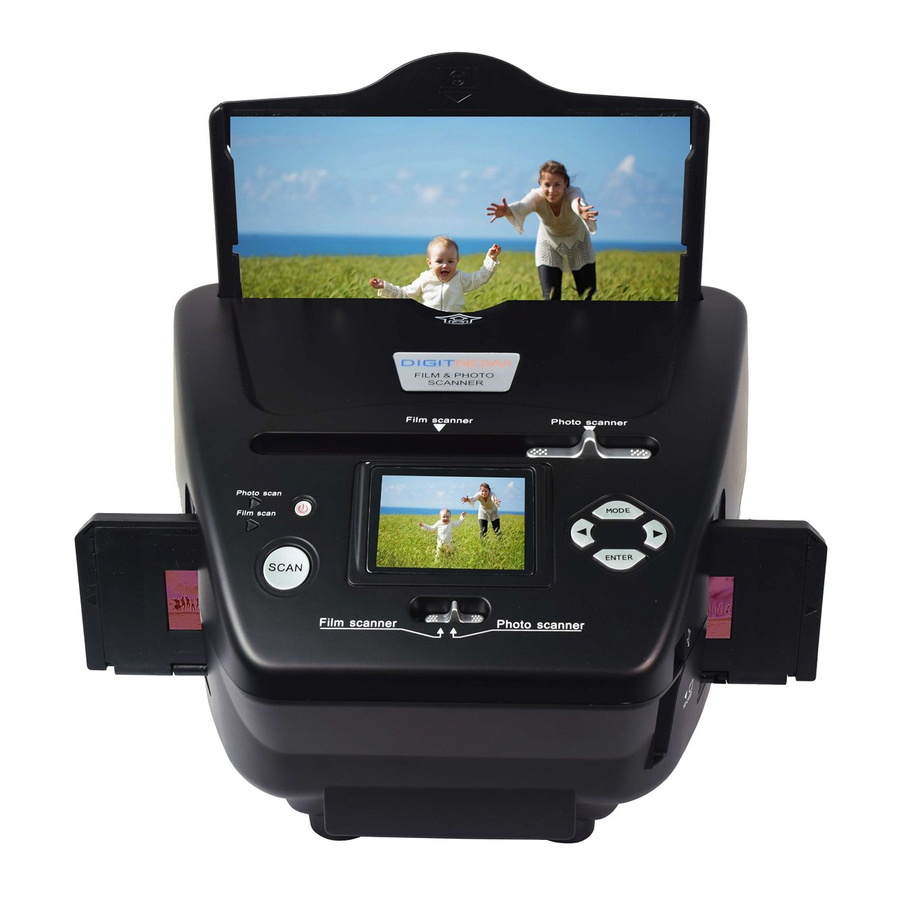
Description of parts

Loading Slides
Hold up the slide toward the light. Face the trademark side of the slide away from you. Look through the slide and it should appear normally (not a mirror image).
Now turn the slide so the image is upside down while looking at the same side.

Open the slide holder at the marked spot on the top.
With the slide holder laid open place the slide into recessed area in the holderthe slide should fit perfectly.
Note: Handle slides with care. Any dust scratches or fingerprints will show up on your saved images. You'd better to cotton gloves when handling slides. It is recommended to use compressed air to remove any dust on the slides. You can purchase it from an office supply or electronics retailer.

Close the slide holder and press the edges so that it locks in place.

Hold it in the position as shown in the film & photo scanner.
Insert the Slide Holder into the slot on the right side of the film & photo scanner as shown.

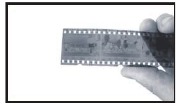
Loading Negatives
Hold up the negative toward the light. As you look through the negative you should be able to read the small negative numbers normally (not a mirror image). Now turn the negative so the image is upside down while looking at the same side.
Open the negative holder at the marked spot on the top.
With the negative holder laid open place the negative into holder so the notches line up with the notches on the holder.
Note: Handle negatives with care. Any dust, scratches or fingerprints will show up on your saved images. If possible use cotton gloves when handling negatives. It is recommended to use compressed air to remove any dust on the negatives. This is not included with the film & photo scanner but can be purchased from an office supply or electronics retailer.
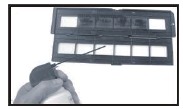
Close the negative holder and press the edges so that it locks in place
Hold it in the position as shown in the film & photo scanner.
Insert the negative holder into the slot on the right side of the film & photo scanner as shown.
Film Holder: The design of the film holder follows ISO standard. In some cases the holes on the film will not match exactly to the alignment of the holder. This is caused by a non-standard camera. In this case there will be a small black line on the edge of the frame that can easily be cropped out using photo editing software.
ISO-- International Organization for Standardization
Loading photo

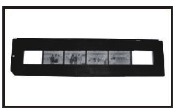
Position the brackets according to the marked dimensions on the photo tray. Note that for 5"x7" photographs, the brackets do not need to be fitted into the photo tray.

Place the brackets into the slots and slide the brackets downwards to secure. Check that they are securely fastened by turning the photo tray upside down. The brackets should not fall off.
- Place brackets in photo tray


- Slide brackets downwards to secure


Insert the photo into appropriately sized photo tray (5"x7" (5R), 4"x6" (4R), 3 ½"x5" (3R), name card)

Insert the photo tray into the photo tray slot from the top of the film & photo scanner as shown.

Note:
- Please use the provided OCR CD to organize the name cards.
- Handle photo with care. Any dust scratches or fingerprints will show up on your saved images.
- Scanned name cards will capture a standard dimension of 91x55mm. The scanned image will have a slight border around the name card.
General operations
Note: Maybe there is some difference between the preview image and saved image, please subject to the image that you saved in SD card.
Quick Start
- If you want to scan the films, please switch two switches on the top of the device to the left side. Otherwise if you want to scan the photos, please switch to the right side.
- Put Slide/Negative onto the Slide/Negative Holder or insert photo into appropriately sized photo tray (5"x7" (5R), 4"x6" (4R), 3 ½"x5" (3R), name card)
- Insert the Slide/Negative Holder into the slot on the right of the device or insert photo tray into photo tray slot from the top of the device.
- Apply the power to the film & photo scanner by two ways:
- USB: Connect the film & photo scanner to PC with USB cable
- 5V adapter: Connect the adapter to the device with USB cable
- Press POWER button to turn on the film & photo scanner.
Note:
- When the Film scanner mode is selected, the Film scan indication LED is on.
- When the Photo scanner mode is selected, the Photo scan indication LED is on.
- Follow the menu on screen for scanning.
- After finished the scanning, take out the memory card.
Note: The film & photo scanner has a built-in memory for recording, when there is a memory card inserted, it will be the top priority for saving data - Or read pictures from PC by USB mode
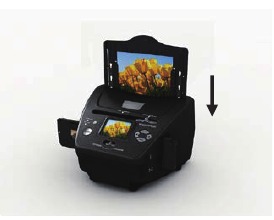
- When capturing in either photo or film modes, please remember to push both slide switches to the correct placement.
A notification will appear on-screen as a reminder to carry out the following:
- Photo: push both sliders to the right
![]()
- Film: push both sliders to the left.
![]()


Operation Guide
Home/MODE: Main menu
When the Film scanner mode is selected, the following main menu will appear:

- Language mode
- USB mode
- Capture mode
- Playback mode
- Film Type
- Resolution
When the Photo scanner mode is selected, the following main menu will appear:

- Language mode
- USB mode
- Capture mode
- Playback mode
- Effect: multicolor, B&W
- Crop proportion: (5"x7" (5R), 4"x6" (4R), 3 ½"x5" (3R), name card)
- Resolution
Home/MODE: No memory card

If there is no memory card inserted into the device, a warning icon will be shown on screen when entering the main menu SD / SDHC card slot up to 128GB
Capture

After the welcome page, the above menu will appear. User can press LEFT/RIGHT button for desired menu, then press ENTER button to confirm the selection.
Adjust brightness and color of image
You can adjust brightness and color of image in capture mode. When enter into capture mode, press ENTER button, following picture will show on:
EV means brightness; R means red; G means green; B means blue.
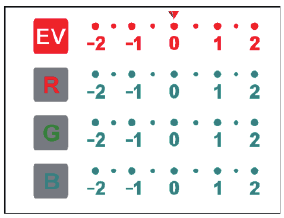
Press ENTER button to switch, press LEFT/RIGHT button to adjust data
Press SCAN button back to image preview mode
Capture: Mirror/Flip(Hard Key)
If any image requires for Mirror or Flip before capture, press LEFT/RIGHT button for Mirror/Flip function, the live view will be adjusted accordingly(This step is to correct user misplaced the film/photo either upside down or flip). Mirror and Flip function can only be used while in the live view mode.
 - Step 1")
Press LEFT button to change image left to right
 - Step 2")
Press RIGHT button to upside down image
Capture mode

Once entered capture mode, there will be an indicator on the left top corner to indicate it is in live view mode. User can also press ENTER button, then press LEFT/RIGHT button to adjust EV value, press SCAN button again to confirm and back to live view mode.
Capture: Edit Menu

- Save: save captured image
- Cancel: cancel any editing with this image
- Home: back to main menu
Live view →Capture/Edit menu

Once press SCAN button in live view, the edit menu will appear. When user press ENTER button, the current image will be saved to internal memory or memory card when there is a memory card inserted, the display will return to live view again.
Capture: Save

Once user press SCAN button, preview (live view) image will be selected and shown on the TFT which will take between 1~2 second with 2 icons shown on the left side of the screen. Save icon will be highlighted for user to confirm by ENTER button, after the above step, the display will go back to live view mode (preview)
Capture: Cancel

Select Cancel icon with LEFT/RIGHT button and press ENTER button to cancel any editing step with present selected image and the display will return to live view mode (nothing will be saved)
Capture: Home

Select Home icon with LEFT/RIGHT button, then press ENTER button or press MODE button on top of the device anytime to return to main menu
Exit from Edit mode back to Capture mode (live view)
Once user press ENTER button for save or cancel option, the display will return to capture mode/live view. Then user can move the film holder to next target film or change another photo to capture.
Memory full
Once the images in internal memory or memory card is full, a memory full icon will be shown on screen when press SCAN button. User has to download the images to PC or replace another memory card for continue capture.

Playback

Press LEFT/RIGHT button to playback mode when power on the device or access the main menu by Home icon/MODE button anytime. Press ENTER button to confirm the selection.
Playback: Auto Slide Show

Once user enter playback mode (default to slide show), TFT will auto display all images stored in internal memory or memory card with 2 seconds interval from previous captured image. User can also stop the slide show by press ENTER button (Only the images captured by the film & photo scanner are available in playback mode)
Playback: Edit Menu

- Rotate +90: captured image rotate +90 degrees
- Rotate –90: captured image rotate –90 degrees
- Delete: delete this picture stored in internal memory or memory card
- Exit: return to Slide show mode
- Save: save the modified image to internal memory or memory card
- Home: return to main menu
Playback: Slide show →Single picture →Edit mode
User can interrupt (stop) slide show mode to stand alone playback mode (single picture playback) by press ENTER button. (Pause slide show) Then user is able to scroll each picture by LEFT/RIGHT button. Once user select the picture stored in internal memory or memory card which intended to be modified, press ENTER button again to bring out the edit mode for modification.
If there is no memory card inserted or no image in internal memory, TFT will auto display 20 frames stored in internal memory when enter playback mode, but they will not be edited anytime.

Playback: Rotate/Save

If user wants to rotate +90 degrees by ENTER button, the image will be rotated +90 degrees and cursor will remain at Save. Press ENTER button again to save modified result and next picture will be shown. For continuously rotate +90 degrees, move cursor to rotate again and press ENTER button. (Same for Rotate –90 function)
Playback: Exit

Once user select Exit function in edit menu, the display will go back to slide show starting with the current picture without any change
Playback: Delete

Select delete icon with LEFT/RIGHT button then press ENTER button, that will delete the present selected picture and next picture will be shown. Cursor will remain at Exit icon. If user intend to process continuously delete, just move cursor to delete icon again and press ENTER button to confirm.
Playback: Home

Select Home icon with LEFT/RIGHT button, then press ENTER button or press MODE button on top of the device anytime to return to main menu
Playback: No Picture
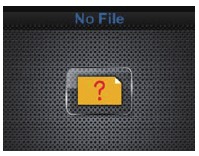
If there is no picture when enter playback mode, a No picture symbol will show on screen
Film Type
When the Film scanner mode is selected, user can change film type by enter Film Type menu when power on the device or access the main menu by Home icon/MODE button anytime. Press LEFT/RIGHT button for Film Type and press ENTER button to confirm.

- Negatives Film: select Negatives film when load color negative film in holder
- Slides: select Slides when load slide in holder
- B&W: select B&W when load B&W negative film in holder
User can press LEFT/RIGHT button to select film type, then press ENTER button to confirm
Effect
When the Photo scanner mode is selected, user can change color effect by enter Effect menu when power on the device or access the main menu by Home icon/MODE button anytime. Press LEFT/RIGHT button for Effect and press ENTER button to confirm

- Multicolor effect
- B&W effect
User can press LEFT/RIGHT button to select color effect, then press ENTER button to confirm
Crop proportion
When the Photo scanner mode is selected, user can change crop proportion by enter Crop menu when power on the device or access the main menu by Home icon/MODE button during operation. Press LEFT/RIGHT button for Crop and press ENTER button to confirm

- 5R (5''X7'') crop proportion
- 4R (4''X6'') crop proportion
- 3R (3 ½ ''x5'') crop proportion
- Name card crop proportion
User can press LEFT/RIGHT button to select crop proportion, then press ENTER button to confirm
Resolution
Change resolution by enter Resolution menu when power on the device or access the main menu by Home icon/MODE button anytime. Press LEFT/RIGHT button for Resolution and press ENTER button to confirm

- 10M resolution
- 16M resolution
User can press LEFT/RIGHT button to select resolution, then press ENTER button to confirm
Language
Change language definition by enter language menu when power on the device or access the main menu by Home icon/MODE button anytime. Press LEFT/RIGHT button for language and press ENTER button to confirm.

User can press LEFT/RIGHT button to select language, then press ENTER button to confirm
USB mode
After finished capture, please take out the memory card from the film & photo scanner to download the stored images from the memory card. When the device is connected with USB cable to PC, User can also press MODE button to main menu, then press LEFT/RIGHT button to select USB mode, then press ENTER button to confirm, the film & photo scanner will become a mass storage device and user can review or edit images on PC.

User can also press MODE button to back to main menu.
Trouble shooting
Question: There is unwanted stripe appearance at the edge of the image.
Answer: If it is slight stripe, move the slide holder gently to and fro in the device until the stripe is no longer visible in the preview window. If the stripe is still, please contact with our retailer.
Question: The device cannot connect to the computer.
Answer: Please check if the cable has already connected to the USB port of the computer. Or connect the cable to another USB port. It is recommended that connect it to the motherboard directly, not to the front panel. Turn on the power button, enter USB mode, it acts as a mass storage device.
Technical Specifications
| Lens: | 2G3P F/NO=4.0 f=5.7 Film Range: 51.5mm F/NO=4.0 f=5.7 Photo Range: 170mm |
| Sensor: | 10 mega pixels CMOS sensor |
| LCD: | 2.4 inch LTPS LCD Display |
| External memory: | SD/MMC |
| Exposure: | Auto |
| Color balance: | Auto |
| Scan high resolution: | 16M interpolation resolution |
| Data conversion: | 12 bits per color channe |
| Scan Method: | Single pass |
| Light source: | Backlight Panel |
| LED light lifetimefor on & off: | 10000 times |
| Power: | Powered from USB/5V adapter |
| Interface: | USB 2.0 |
| Dimension: | 220 x 208 x 147mm |
| Weight: | 890g |
| Language: | English, French, German, Italian, Spanish, Traditional Chinese, Simplified Chinese, Japanese |
Documents / ResourcesDownload manual
Here you can download full pdf version of manual, it may contain additional safety instructions, warranty information, FCC rules, etc.
Advertisement
Thank you! Your question has been received!


Need Assistance?
Do you have a question about the M122A that isn't answered in the manual? Leave your question here.