Toro TX 1000 Installation Instructions Manual
Snow canopy compact tool carrier
Hide thumbs
Also See for TX 1000:
- Operator's manual (60 pages) ,
- Installation instructions manual (8 pages) ,
- Installation instructions (4 pages)
Table of Contents
Advertisement
Quick Links
Snow Canopy
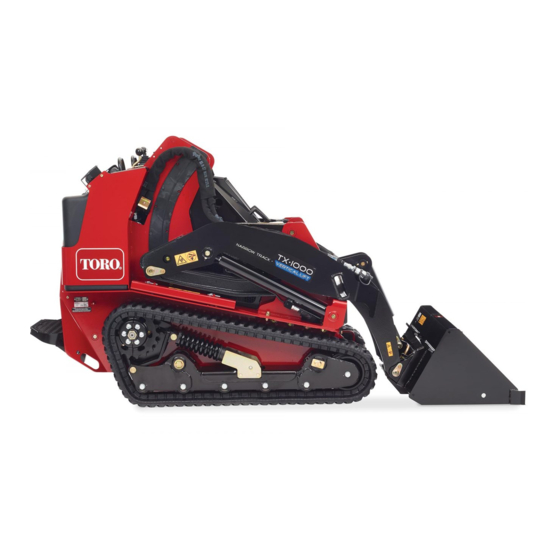
TX 1000 Compact Tool Carrier
Model No. 22584
Use of this product may cause exposure to chemicals known to the State of California
to cause cancer, birth defects, or other reproductive harm.
Safety
WARNING
This canopy does not protect you from falling objects or during rollovers.
Do not use the canopy as a falling object or rollover protection system.
Installation
Loose Parts
Use the chart below to verify that all parts have been shipped.
Procedure
1
2
© 2020—The Toro® Company
8111 Lyndale Avenue South
Bloomington, MN 55420
Proposition 65 Warning
Description
No parts required
Front receiver tube
Left, rear receiver tube
Right, rear receiver tube
Windshield bracket
Hose guard
Bolt (1/4 x 1-1/2 inches)
Bolt (5/16 x 1 inch)
Bolt (5/16 x 1-1/4 inches)
Bolt (1/4 x 2 inches)
Locknut (1/4 inch)
Register at www.Toro.com.
WARNING
CALIFORNIA
Qty.
–
2
1
1
1
2
2
2
2
2
4
Form No. 3443-799 Rev A
Installation Instructions
Use
Prepare the machine.
Install the receiver tubes.
*3443-799*
Original Instructions (EN)
Printed in the USA
All Rights Reserved
Advertisement
Table of Contents

Related Manuals for Toro TX 1000


Summary of Contents for Toro TX 1000
- Page 1 Form No. 3443-799 Rev A Snow Canopy TX 1000 Compact Tool Carrier Model No. 22584 Installation Instructions WARNING CALIFORNIA Proposition 65 Warning Use of this product may cause exposure to chemicals known to the State of California to cause cancer, birth defects, or other reproductive harm.
-
Page 2: Preparing The Machine
Procedure Description Qty. Center brace Front frame tube Rear frame tube Side frame tube Front post Rear post Assemble the frame. Bolt (1/4 x 3/4 inch) Bolt (1/4 x 1 inch) Bolt (1/4 x 1-1/4 inches) Acorn nut (1/4 inch) Locknut (1/4 inch) Fender washer Left panel... - Page 3 Installing the Receiver Tubes Parts needed for this procedure: Front receiver tube Left, rear receiver tube g323568 Figure 2 Right, rear receiver tube 1. Right, rear receiver tube 4. Hose guard Windshield bracket 2. Bolt (5/16 x 1 inch) and 5.
-
Page 4: Assembling The Frame
Assembling the Frame Parts needed for this procedure: Center brace Front frame tube Rear frame tube Side frame tube Front post Rear post Bolt (1/4 x 3/4 inch) Bolt (1/4 x 1 inch) Bolt (1/4 x 1-1/4 inches) Acorn nut (1/4 inch) g341665 Figure 3 Locknut (1/4 inch) - Page 5 Install the 2 side frame tubes to the rear frame Install the 2 rear posts to the side frame tubes tube (Figure 5 Figure (Figure Note: Note: Install the side frame tubes so that they Ensure that the heads of the bolts face bend outward and the holes for the rear posts outward.
-
Page 6: Installing The Canopy
Installing the Canopy Parts needed for this procedure: Left panel Right panel Windshield Top cover Bolt (5/16 x 1-1/4 inches) g323638 Procedure Figure 11 Install the left and right panels, using the hook 1. Right panel 2. Windshield and loop fasteners to secure them to the frame, as shown in Figure 10 Figure... -
Page 7: Operation
g323732 Figure 13 1. Spring 2. Bolt (5/16 x 1-1/4 inches) Hook the springs from the panels on the bolt. Operation Transporting the Machine Before transporting the machine, unhook the springs and lift the canopy frame out of the receiver tubes. Important: Do not transport the machine with the canopy installed. - Page 8 While the exposure from Toro products may be negligible or well within the “no significant risk” range, out of an abundance of caution, Toro has elected to provide the Prop 65 warnings. Moreover, if Toro does not provide these warnings, it could be sued by the State of California or by private parties seeking to enforce Prop 65 and subject to substantial penalties.