Siemens SINAMICS S120 Commissioning Manual
With startdrive
Hide thumbs
Also See for SINAMICS S120:
- Function manual (1094 pages) ,
- Diagnostic manual (947 pages) ,
- Manual (848 pages)

Related Manuals for Siemens SINAMICS S120


Summary of Contents for Siemens SINAMICS S120
- Page 1 Commissioning Manual SINAMICS S120 With Startdrive Edition 06/2020 www.siemens.com/drives...
- Page 3 Introduction Fundamental safety instructions Startdrive engineering tool SINAMICS Fundamentals S120 Commissioning with Startdrive Commissioning Diagnostics Commissioning Manual Appendix Valid as of: Firmware Version 5.2 SP3, Startdrive V16 Update 3 06/2020 6SL3097-5AA10-0BP2...
- Page 4 Note the following: WARNING Siemens products may only be used for the applications described in the catalog and in the relevant technical documentation. If products and components from other manufacturers are used, these must be recommended or approved by Siemens. Proper transport, storage, installation, assembly, commissioning, operation and maintenance are required to ensure that the products operate safely and without any problems.
-
Page 5: Table Of Contents
Table of contents Introduction ............................9 The SINAMICS converter family .................... 9 General information about SINAMICS documentation............10 Usage phases and their documents/tools ................13 Where can the various topics be found?................14 Training and support......................15 Directives, standards, certificates..................16 Additional information ....................... - Page 6 Table of contents Online and diagnostics....................... 59 Information system......................61 3.7.1 Tooltip ..........................63 3.7.2 Help for the current context ....................64 3.7.3 Help for messages and diagnostics ..................64 Project protection and user administration ................. 66 Fundamentals ............................69 Requirements for commissioning ..................
- Page 7 Table of contents 5.3.5.2 Specifying an infeed unit....................112 5.3.5.3 Connecting infeed units in parallel ................... 114 5.3.5.4 Editing inserted and specified components ............... 116 5.3.5.5 Editing DRIVE-CLiQ connections ..................117 5.3.5.6 Making detailed settings ....................119 5.3.6 Inserting a Motor Module or Power Module ..............121 5.3.6.1 Inserting and specifying a Motor Module................
- Page 8 Table of contents 5.7.1.1 Activating function modules .................... 180 5.7.1.2 Configuring the web server ....................180 5.7.1.3 Web server user accounts....................183 5.7.1.4 Enabling "SINAMICS" and "Administrator" user ..............184 5.7.1.5 Creating a password for the users "SINAMICS" and "Administrator" ........185 5.7.1.6 Deleting the password for the user "SINAMICS"...
- Page 9 Table of contents 5.9.3.2 Relative positioning ......................248 5.9.3.3 Absolute positioning ......................249 5.9.3.4 Modify traversing block....................250 5.9.3.5 Active homing ......................... 251 5.9.3.6 Direct homing........................252 5.9.4 One Button Tuning (OBT) ....................253 5.9.4.1 Performing One Button Tuning..................253 5.9.5 Stationary/rotating measurement..................
- Page 10 Table of contents 6.1.4.5 Terminal Module TM150 ....................310 Diagnostics via Startdrive ....................311 6.2.1 Device diagnostics ......................311 6.2.2 Trace function........................315 6.2.2.1 Creating or calling a trace ....................318 6.2.2.2 Configuring a trace ......................319 6.2.2.3 Transferring the trace configuration to the device ............. 323 6.2.2.4 Activating the trace recording ..................
-
Page 11: Introduction
With the SINAMICS converter family, you can solve any individual drive task in the low-voltage, medium-voltage and DC voltage range. From converters to motors and controllers, all Siemens drive components are perfectly matched to each other and can be easily integrated into your existing automation system. -
Page 12: General Information About Sinamics Documentation
Siemens MySupport/Documentation You can find information on how to create your own individual documentation based on Siemens content and adapt it for your own machine documentation at the following address (https://support.industry.siemens.com/My/ww/en/documentation). Commissioning with Startdrive Commissioning Manual, 06/2020, 6SL3097-5AA10-0BP2... - Page 13 Siemens Support while on the move With the "Siemens Industry Online Support" app, you can access more than 300,000 documents for Siemens Industry products – any time and from anywhere. The app supports you in the following areas, for example: •...
- Page 14 This document includes hyperlinks to websites of third-party companies. Siemens is not responsible for and shall not be liable for these websites or their content, as Siemens has not checked the information contained in the websites and is not responsible for the content or information they provide.
-
Page 15: Usage Phases And Their Documents/Tools
SINAMICS S210 Servo Drive System (D 32) • SINUMERIK 840 Equipment for Machine Tools (Catalog NC 62) Installation/assembly • SINAMICS S120 Equipment Manual for Control Units and Supplementary System Components • SINAMICS S120 Equipment Manual for Booksize Power Units •... -
Page 16: Where Can The Various Topics Be Found
Of a simple SINAMICS S120 drive with Getting Started STARTER Commissioning With STARTER SINAMICS S120 Commissioning Manual Commissioning Of a simple SINAMICS S120 drive with Start‐ Getting Started with Startdrive drive Commissioning With Startdrive SINAMICS S120 Commissioning Manual with Startdrive Web server... -
Page 17: Training And Support
Introduction 1.5 Training and support Training and support Training You can find information on SITRAIN at the following address (http://www.siemens.com/sitrain). SITRAIN offers training courses for products, systems and solutions in drive and automation technology from Siemens. Technical Support To ask a technical question or create a support request, click on "Support Request" at the following address and select "Create Request". -
Page 18: Directives, Standards, Certificates
Relevant directives and standards You can obtain an up-to-date list of currently certified components on request from your local Siemens office. If you have any questions relating to certifications that have not yet been completed, please ask your Siemens contact person. - Page 19 SINAMICS S devices showing the test symbols fulfill the EMC requirements for Australia and New Zealand. • Quality systems Siemens AG employs a quality management system that meets the requirements of ISO 9001 and ISO 14001. Not relevant standards China Compulsory Certification SINAMICS S devices do not fall in the area of validity of the China Compulsory Certification (CCC).
-
Page 20: Additional Information
This document contains recommendations relating to third-party products. Siemens accepts the fundamental suitability of these third-party products. You can use equivalent products from other manufacturers. Siemens does not accept any warranty for the properties of third-party products. Commissioning with Startdrive Commissioning Manual, 06/2020, 6SL3097-5AA10-0BP2... - Page 21 Introduction 1.7 Additional information Ground symbols Table 1-1 Symbols Icon Meaning Connection for protective conductor Ground (e.g. M 24 V) Connection for function potential bonding Commissioning with Startdrive Commissioning Manual, 06/2020, 6SL3097-5AA10-0BP2...
-
Page 22: Using Openssl
Introduction 1.8 Using OpenSSL Using OpenSSL Many SINAMICS products include OpenSSL. The following applies to these products: • This product contains software (https://www.openssl.org/) that has been developed by the OpenSSL project for use in the OpenSSL toolkit. • This product contains cryptographic software (mailto:eay@cryptsoft.com) created by Eric Young. -
Page 23: Scope Of The Document
Scope of the document Scope of the document The commissioning of a SINAMICS S120 drive system with Startdrive is described in this manual. The commissioning manual applies both to SINAMICS S120 drives and to the following drive systems that use a CU320-2 PN: •... -
Page 24: General Data Protection Regulation
For the SINAMICS Startdrive product – including the installed SINAMICS DCC option package – this means the following: The product only sends personal data to SIEMENS AG if the user explicitly requests this. This occurs in the following cases: • If the SINAMICS Startdrive program and the SINAMICS DCC option package end unexpectedly, then the user is given the opportunity to send diagnostics information to SIEMENS AG for analysis. - Page 25 Introduction 1.10 General Data Protection Regulation By generating the login or user name, personal data can be pseudonymized for the functions. Deleting the project will cause all personal data saved within it to be deleted too. The particularities of multi-user engineering should be taken into consideration here (e.g. that the project not only needs to be deleted locally from the user's PC, but also from the server used).
- Page 26 Introduction 1.10 General Data Protection Regulation Commissioning with Startdrive Commissioning Manual, 06/2020, 6SL3097-5AA10-0BP2...
-
Page 27: Fundamental Safety Instructions
Fundamental safety instructions General safety instructions WARNING Electric shock and danger to life due to other energy sources Touching live components can result in death or severe injury. • Only work on electrical devices when you are qualified for this job. •... - Page 28 Fundamental safety instructions 2.1 General safety instructions WARNING Risk of electric shock and fire from supply networks with an excessively low impedance Excessively high short-circuit currents can lead to the protective devices not being able to interrupt these short-circuit currents and being destroyed, and thus causing electric shock or a fire.
- Page 29 Fundamental safety instructions 2.1 General safety instructions WARNING Electric shock due to unconnected cable shield Hazardous touch voltages can occur through capacitive cross-coupling due to unconnected cable shields. • As a minimum, connect cable shields and the conductors of power cables that are not used (e.g.
- Page 30 • Therefore, if you move closer than 20 cm to the components, be sure to switch off radio devices or mobile telephones. • Use the "SIEMENS Industry Online Support app" only on equipment that has already been switched off. NOTICE...
- Page 31 Fundamental safety instructions 2.1 General safety instructions WARNING Fire due to inadequate ventilation clearances Inadequate ventilation clearances can cause overheating of components with subsequent fire and smoke. This can cause severe injury or even death. This can also result in increased downtime and reduced service lives for devices/systems.
- Page 32 Fundamental safety instructions 2.1 General safety instructions WARNING Unexpected movement of machines caused by inactive safety functions Inactive or non-adapted safety functions can trigger unexpected machine movements that may result in serious injury or death. • Observe the information in the appropriate product documentation before commissioning. •...
-
Page 33: Equipment Damage Due To Electric Fields Or Electrostatic Discharge
Fundamental safety instructions 2.2 Equipment damage due to electric fields or electrostatic discharge Equipment damage due to electric fields or electrostatic discharge Electrostatic sensitive devices (ESD) are individual components, integrated circuits, modules or devices that may be damaged by either electric fields or electrostatic discharge. NOTICE Equipment damage due to electric fields or electrostatic discharge Electric fields or electrostatic discharge can cause malfunctions through damaged individual... -
Page 34: Warranty And Liability For Application Examples
Fundamental safety instructions 2.3 Warranty and liability for application examples Warranty and liability for application examples Application examples are not binding and do not claim to be complete regarding configuration, equipment or any eventuality which may arise. Application examples do not represent specific customer solutions, but are only intended to provide support for typical tasks. -
Page 35: Security Information
Siemens’ products and solutions undergo continuous development to make them more secure. Siemens strongly recommends that product updates are applied as soon as they are available and that the latest product versions are used. Use of product versions that are no longer supported, and failure to apply the latest updates may increase customer’s exposure to cyber... -
Page 36: Residual Risks Of Power Drive Systems
Fundamental safety instructions 2.5 Residual risks of power drive systems Residual risks of power drive systems When assessing the machine- or system-related risk in accordance with the respective local regulations (e.g., EC Machinery Directive), the machine manufacturer or system installer must take into account the following residual risks emanating from the control and drive components of a drive system: 1. -
Page 37: Startdrive Engineering Tool
Startdrive engineering tool Overview The Startdrive engineering tool is available for configuring and parameterizing drives in the TIA Portal. You can perform the following tasks, for example, with Startdrive: • You create projects for drive-specific solutions. • You insert drives in the project as single drives or link the drives to higher-level controllers. •... - Page 38 You can order and download SINAMICS Startdrive V16 and available updates from the address specified below. You can find information about requirements that must be fulfilled before installation as well as installation notes on the website. • SINAMICS Startdrive V16 (https://support.industry.siemens.com/cs/ww/en/view/ 109771710) Commissioning with Startdrive Commissioning Manual, 06/2020, 6SL3097-5AA10-0BP2...
-
Page 39: Structure Of The User Interface
Startdrive engineering tool 3.1 Structure of the user interface Structure of the user interface 3.1.1 Project view The following figure shows an example of the most important sections of the project view. ① The components and project data are displayed in the "Project tree" window. ②... -
Page 40: Project Navigation
Startdrive engineering tool 3.1 Structure of the user interface 3.1.2 Project navigation Drives, drive components and project data are displayed in the project tree and can be edited in the working area. After inserting, drives and drive components are displayed as follows: ①... -
Page 41: User Interface - Parameterization
Startdrive engineering tool 3.2 User interface - parameterization User interface - parameterization 3.2.1 Modules in the hardware catalog Overview As soon as the device configuration is active, a hardware catalog can be displayed/hidden at the right-hand edge of the program window. The device configuration automatically becomes active as soon as a drive device was inserted. -
Page 42: Device View
Startdrive engineering tool 3.2 User interface - parameterization Components Designation Types of construction CU310-2 PN CU320-2 PN Supplementary system Communication Boards – components DRIVE-CLiQ Hub Modules Terminal Boards – Terminal Modules Voltage Sensing Modules The PM240-2 Power Module is inserted together with a Control Unit Adapter (CUA) in the device configuration. The following types are available: CUA31, CUA32. - Page 43 Startdrive engineering tool 3.2 User interface - parameterization Display of configured drives The following figure shows an example of the most important parts of a configuration that are displayed in the device view. ① Control Unit ② Infeed ③ DRIVE-CLiQ interfaces and connections ④...
-
Page 44: Parameterization Editor
Startdrive engineering tool 3.2 User interface - parameterization 3.2.3 Parameterization editor Overview The parameterization editor is comprised of 2 tabs in which you can parameterize the drive: • In the function view, you parameterize the drive using a graphic user interface. The individual screen forms are based on the function diagrams –... -
Page 45: Function View
Startdrive engineering tool 3.2 User interface - parameterization 3.2.4 Function view Overview You parameterize the drive using a graphical user interface in the "Function view". The individual screen forms are based on the function diagrams – and include the parameters required. Layout of the function view The following figure shows an example of a screen form structure in the function view. -
Page 46: Parameter View
Startdrive engineering tool 3.2 User interface - parameterization Icon Meaning Activate Safety processing Save Safety processing Default with drive-specific parameters If you call interconnection screen forms in the function view, then a series of parameters are already preassigned values. For less experienced users, we recommend that they first work with the preassigned values. - Page 47 Startdrive engineering tool 3.2 User interface - parameterization Structure of the parameter view The following figure shows an example of the structure of the parameter view. ① Secondary navigation: Depending on the selected function, the parameter view shows the corresponding parameter groups. This applies to the following product groups: S120, S150, G150 and G130.
- Page 48 Startdrive engineering tool 3.2 User interface - parameterization Icon Meaning Compares the parameters of the drive object with another parameter set. • In offline mode, the parameters are compared to the factory settings by default. • In online mode, the parameters are compared to the offline settings by default. •...
- Page 49 Startdrive engineering tool 3.2 User interface - parameterization Using parameter lists You can find additional information about using parameter lists in Chapter "Using parameter lists (Page 79)". Commissioning with Startdrive Commissioning Manual, 06/2020, 6SL3097-5AA10-0BP2...
-
Page 50: Inspector Window
Startdrive engineering tool 3.2 User interface - parameterization 3.2.6 Inspector window Overview Properties and parameters of the selected object are displayed in the inspector window. You can edit these properties and parameters. As a result, S120 drive objects that are newly inserted into the device view can be specified, for example. -
Page 51: Device Configuration Detection
Division of the "Properties" tab Each main tab contains information that is displayed via secondary tabs. The most important information for SINAMICS S120 drives can be found in the "Properties" main tab. The following secondary tabs are displayed in this main tab: •... - Page 52 Startdrive engineering tool 3.2 User interface - parameterization Structure of the dialog The following figure shows an example of the structure of the dialog. ① Drive object type of the motor controls ② Activation of the parallel connection view. In the parallel connection view, only the parallel connection-capable components are displayed.
-
Page 53: User Interface - Control Panel
Startdrive engineering tool 3.3 User interface - Control panel User interface - Control panel Overview The control panel is used for the control and monitoring of individual drives. You traverse drives from the control panel by specifying values (e.g. speed setpoint). Layout of the control panel The following figure shows as example the various components of the control panel: ①... - Page 54 Startdrive engineering tool 3.3 User interface - Control panel Further information You can find further information in Chapter "Using the control panel (Page 244)". Commissioning with Startdrive Commissioning Manual, 06/2020, 6SL3097-5AA10-0BP2...
-
Page 55: User Interface - One Button Tuning (Obt)
Startdrive engineering tool 3.4 User interface - One Button Tuning (OBT) User interface - One Button Tuning (OBT) Overview One Button Tuning (OBT) is used to determine the optimum control parameters of a servo drive. Structure of the screen form The following diagram shows as example the various components of the "One Button Tuning"... - Page 56 Startdrive engineering tool 3.4 User interface - One Button Tuning (OBT) Restrictions ② • Option "Dynamic response factor" in the setting range "Dynamic response settings" is only available when using a CU320-2 PN. ④ • Option "Switch-on/switch-off infeed" is only available when using a CU320-2 PN. Further information You can find further information in Chapter "One Button Tuning (OBT) (Page 253)".
-
Page 57: User Interface - Trace Function
Startdrive engineering tool 3.5 User interface - trace function User interface - trace function Structure of the user interface The user interface of the trace function is made up of several display areas. The following figure shows an example of the structure of the trace user interface. ①... -
Page 58: Curve Diagram
Startdrive engineering tool 3.5 User interface - trace function 3.5.1 Curve diagram Overview The curve diagram displays the selected signals of a recording. Binary signals are shown in the lower diagram as bit track. You can adapt the display of the signals in the signal table and with the toolbar of the curve diagram. -
Page 59: Signal Table
Startdrive engineering tool 3.5 User interface - trace function 3.5.2 Signal table Overview The signals of the selected measurement and setting options for individual properties are displayed in a list in the signal table. Recording data of traces and changed settings in the signal table are only displayed in online mode. - Page 60 Startdrive engineering tool 3.5 User interface - trace function Layout of the "Measurements" tab The following figure shows an example of the structure of the "Measurements" tab. ① "Trigger/measurement point": This option facilitates the alignment of the measurements in accordance with the trigger or meas‐ urement point.
-
Page 61: Online And Diagnostics
Startdrive engineering tool 3.6 Online and diagnostics Online and diagnostics Overview You can check the status of the online accesses using function "Online & Diagnostics", and if necessary, you can establish or disconnect an online connection. Layout of working area "Online access" The following figure shows an example of the structure of the "Online access"... - Page 62 Startdrive engineering tool 3.6 Online and diagnostics Further information You can find further information in Chapter "Online diagnostics (Page 328)". Commissioning with Startdrive Commissioning Manual, 06/2020, 6SL3097-5AA10-0BP2...
-
Page 63: Information System
Startdrive engineering tool 3.7 Information system Information system Overview The Startdrive information system opens in a separate window. The following diagram shows an example of the Startdrive information system in the TIA Portal: Figure 3-15 Example: Configuring drives The information system is divided into the following sections: •... - Page 64 Startdrive engineering tool 3.7 Information system You receive the following support when working in Startdrive: • Information system The Startdrive information system provides background information, step-by-step instructions and examples that are needed for working in Startdrive. • Tooltips The tooltips in Startdrive provide information on interface elements. In some instances, tooltips are supplemented by cascades containing more precise information.
-
Page 65: Tooltip
Startdrive engineering tool 3.7 Information system Opening the information system with the menu To open the Startdrive information system, select the command "Display help" in the "Help" menu. The start page of the information system opens. Further information You can find further information in the Startdrive information system by searching for "Help on information system". -
Page 66: Help For The Current Context
Startdrive engineering tool 3.7 Information system Opening further information If there is more detailed information in the tooltip, you can open it as follows: 1. Click on a link in the lower section of the opened tooltip dialog. The information system opens and the additional help topic appears. 3.7.2 Help for the current context Overview... - Page 67 Startdrive engineering tool 3.7 Information system Opening the help for messages and diagnostics Some messages offer further help. To display the help for a message, proceed as follows: 1. Ensure that the inspector window is open. 2. Click on the question mark behind a message.
-
Page 68: Project Protection And User Administration
Startdrive engineering tool 3.8 Project protection and user administration Project protection and user administration Overview You can also use the user administration in the TIA Portal for Startdrive projects. In this way, for example, a project can be protected against unintentional or unauthorized modification. A user sets up the project protection to activate user management. - Page 69 Startdrive engineering tool 3.8 Project protection and user administration Roles When you enable user administration, the system creates the following two roles: • ES Administrator This role is assigned to the project user first created and has all three function rights by default.
- Page 70 Startdrive engineering tool 3.8 Project protection and user administration Commissioning with Startdrive Commissioning Manual, 06/2020, 6SL3097-5AA10-0BP2...
-
Page 71: Fundamentals
• A programming device (PG/PC) • TIA Portal with integrated Startdrive engineering tool • A communications interface, e.g. PROFINET, Ethernet • Completely wired-up drive line-up (see SINAMICS S120 manuals) Configuration example A configuration example with booksize components and PROFINET communication is shown in... -
Page 72: Safety Instructions For Commissioning
• Observe the safety instructions provided in the hardware documentation. • When assessing the risk, take into account residual risks. Note Please observe the installation guidelines and safety instructions in the SINAMICS S120 Manuals. Commissioning with Startdrive Commissioning Manual, 06/2020, 6SL3097-5AA10-0BP2... -
Page 73: Bico Interconnections
Fundamentals 4.3 BICO interconnections BICO interconnections 4.3.1 Binectors and connectors Overview Each drive contains a large number of connectable input and output variables and internal control variables. The BICO technology (Binector Connector Technology) allows the drive to be adapted to a wide variety of conditions. -
Page 74: Interconnect Bico Inputs
Opens an interconnection dialog in which you can create a bit-by-bit interconnection (multiple interconnections). Further information Further information on BICO technology and BICO connections can be found in Section "Basics of the drive system" in the SINAMICS S120 Drive Functions Function Manual. 4.3.2 Interconnect BICO inputs Overview You perform the interconnection of binector or connector inputs in the interconnection dialog. - Page 75 Fundamentals 4.3 BICO interconnections Procedure To interconnect a BICO input, proceed as follows: 1. Click the binector or connector symbol of the signal that you want to connect. A connection dialog for the selection of the possible parameters opens. The drive object for which you want to make an interconnection is displayed automatically in the "Drive object"...
-
Page 76: Interconnecting Bico Outputs
Fundamentals 4.3 BICO interconnections 3. Select the parameter bit that you want to connect. 4. Confirm with OK. The connection dialog closes. Result The binector or connector input is connected to the selected parameter (bit). 4.3.3 Interconnecting BICO outputs Overview You perform the interconnection of binector or connector outputs in the interconnection dialog. - Page 77 Fundamentals 4.3 BICO interconnections Procedure To interconnect a BICO output, proceed as follows: 1. Click the binector or connector symbol of the signal that you want to connect. A connection dialog for the selection of the possible parameters opens. The drive object for which you want to make an interconnection is displayed automatically in the "Drive object"...
- Page 78 Fundamentals 4.3 BICO interconnections 3. Activate the check boxes for the parameter bits that you want to connect. 4. Confirm with OK. The connection dialog closes. Result The binector or connector output is connected to the selected parameter (bit). Multiple connections at outputs Several interconnections can be set simultaneously for a parameter, which for reasons of space however, cannot be displayed in the interconnections field.
-
Page 79: Activating / Deactivating Individual Drive Components
Fundamentals 4.4 Activating / deactivating individual drive components Activating / deactivating individual drive components Function description Configure the drive, which comprises a CU and additional components, in the device view (DRIVE-CLiQ Editor). All drive components are activated by default. When replacing parts, carrying out testing or service, it may be necessary to briefly deactivate and then reactivate individual components. - Page 80 Fundamentals 4.4 Activating / deactivating individual drive components Deactivating / activating component Proceed as follows to deactivate a component in the device view: 1. In the device view, select the drive object, (e.g. infeed) with the component that you wish to ①...
-
Page 81: Using Parameter Lists
Fundamentals 4.5 Using parameter lists Using parameter lists 4.5.1 Editing the parameter list Overview The following functions are available in the parameter view: • Monitoring and editing parameter values • Changing/restricting parameter view • Exporting the parameters as CSV Additional information on the user interface structure is provided in Chapter "Parameter view (Page 44)". -
Page 82: Searching For Parameters
Fundamentals 4.5 Using parameter lists Proceed as follows to export the parameter list as CSV file: 1. Click on the arrow icon in the button A menu selection opens. The following export options are available: – Exporting displayed parameters in a CSV file –... -
Page 83: Comparing Parameters
Fundamentals 4.5 Using parameter lists Proceed as follows to search for individual parameters or terms: 1. Ensure that the parameter view is selected. The parameter is selected if the upper editor bar is dark blue. 2. Enter <Ctrl+F>. 3. Enter a parameter number or a search term in the search field (e.g. control word). 4. - Page 84 Fundamentals 4.5 Using parameter lists Procedure Proceed as follows to make a comparison: 1. Open the parameter view of the drive object whose parameter set you wish to compare. 2. Click on the arrow icon in the button A selection list containing the comparison options opens: Mode Options Offline...
- Page 85 Fundamentals 4.5 Using parameter lists Icon Meaning At least one of the two comparison values has a technological or syntax error. The comparison is not possible. At least one of the two comparison values is not available (e.g. snapshot). Commissioning with Startdrive Commissioning Manual, 06/2020, 6SL3097-5AA10-0BP2...
-
Page 86: Saving Settings
Fundamentals 4.6 Saving settings Saving settings To permanently save the settings, you have the following options: • Saving settings in the project. • Saving settings (offline/online) on the memory card of the converter. 4.6.1 Saving settings in the project Overview In Startdrive, settings are predominantly made via screen forms. - Page 87 Fundamentals 4.6 Saving settings Saving offline data Proceed as follows to save the offline configuration retentively: 1. Load the project data into the converter. For information on this, see Chapter "Loading the project data into the converter (Page 242)". 2. Click the icon in the function view of the active Startdrive project.
-
Page 88: Restoring Factory Settings
Fundamentals 4.7 Restoring factory settings Restoring factory settings Overview In online operation, you can restore the factory settings for the drive control. Procedure To restore the factory settings for the drive control, proceed as follows: 1. Establish an online connection (Page 152) to your drive unit. 2. -
Page 89: Loading Project Data From The Converter
Fundamentals 4.8 Loading project data from the converter Loading project data from the converter Overview You can load the saved project data from your drive unit into your current project in Startdrive. Requirements • A project is open. • The hardware configuration and software to be loaded must be compatible with the Startdrive (see Chapter "Checking the firmware version (Page 154)"). - Page 90 Fundamentals 4.8 Loading project data from the converter Result The project data has been loaded from the drive unit into your Startdrive project on the PC. Commissioning with Startdrive Commissioning Manual, 06/2020, 6SL3097-5AA10-0BP2...
-
Page 91: Updating The Firmware
4.9 Updating the firmware Updating the firmware Overview The firmware for the SINAMICS S120 drive system is distributed in the system. It is installed on the Control Unit and in every individual DRIVE-CLiQ component. When is a firmware update required? A firmware update is required if you want to use a new firmware version with an extended range of functions. - Page 92 Fundamentals 4.9 Updating the firmware 6. Insert the memory card with the new firmware version. 7. Turn your Control Unit on again. The drive unit now starts with a self-configuration and downloads the firmware data from the memory card to the Control Unit. Explanation of LED displays Firmware update is active: •...
-
Page 93: Using Libraries
Fundamentals 4.10 Using libraries 4.10 Using libraries 4.10.1 Overview Function description In the TIA Portal, libraries are used to archive elements that you wish to reuse in a specific project or across projects. In a project involving several drives, you can create copies of drives using master copies. You can then insert these elements at the required location in your project. - Page 94 Fundamentals 4.10 Using libraries Figure 4-3 Example: Folder functions Explanation of icons The following table provides an overview of the icons that are displayed in the "Project library" palette. Icon Explanation Creating a new folder: Creates a new folder in the selected folder. Opening or closing the element view: All elements are displayed in the "Elements"...
-
Page 95: Using Copy Templates
Fundamentals 4.10 Using libraries 3. Select a device / several devices in the project tree. Select one network / several networks in the network view. 4. Drag your selection and drop it into folder "Master copies". The selected device is inserted as master copy in the library. Procedure (global libraries) Proceed as follows to create a master copy in a global library: 1. - Page 96 Fundamentals 4.10 Using libraries 4. Select a master copy. 5. Drag the master copy and drop into the project folder in the project tree. 6. If the master copy originates from the network view, drag the master copy and drop it into the network view.
-
Page 97: Commissioning
Commissioning Overview You perform the commissioning of your SINAMICS S120 drive in the TIA Portal with the integrated Startdrive engineering tool. Requirements • TIA Portal is installed on your PG/PC. The version of the following software component applies exclusively to the current edition of this documentation: –... - Page 98 Commissioning 5. Commission the drive via the control panel. (Page 244) 6. Result: The motor turns. Loading the configuration of the drive offline into the project For commissioning a drive by uploading the drive configuration to the project, the following steps are required: 1.
-
Page 99: Calling The Tia Portal
Commissioning 5.1 Calling the TIA portal Calling the TIA portal To start the TIA Portal, click on the TIA Portal icon of your user interface or call it up via the Start menu of your PG/PC. Commissioning with Startdrive Commissioning Manual, 06/2020, 6SL3097-5AA10-0BP2... -
Page 100: Check Lists To Commission Sinamics S
Commissioning 5.2 Check lists to commission SINAMICS S Check lists to commission SINAMICS S You will find the checklists that must be observed before the commissioning of SINAMICS S120 drives in the following. Checklist for commissioning booksize power units Carefully observe the content of the following checklist, and read the safety instructions in the manuals before starting any work. - Page 101 Commissioning 5.2 Check lists to commission SINAMICS S Check Do the temperature monitoring circuits fulfill the specifications of protective separation? Have the rules for the DRIVE-CLiQ topology been observed? Have the line-side and motor-side power cables been dimensioned and routed in accord‐ ance with the environmental and routing conditions? Have the maximum permitted cable lengths between the frequency converter and the motor (depending on the type of cables used) been observed?
-
Page 102: Creating A Project Offline
Commissioning 5.3 Creating a project offline Creating a project offline The following options are available to you for Startdrive projects: • You create a new project (see Chapter "Create a new project (Page 100)"). • You open an existing project and subsequently change the project configuration (see Chapter "Opening an existing project (Page 100)"). - Page 103 Startdrive (V15 or higher). If you wish to upgrade older S120 projects of version V14 SP1 to version V15 or higher, proceed as described in the following document: "Migrating SINAMICS S120 projects in Startdrive from V14 to V15 (https:// support.industry.siemens.com/cs/ww/en/view/109755173)"...
-
Page 104: Sequence When Creating Drive Components
Commissioning 5.3 Creating a project offline This information is generated and administered in the user administration of the TIA Portal. You can find further information about project protection in the Startdrive information system under "Using user administration". 5.3.3 Sequence when creating drive components Overview As a rule, the needed components must be inserted into the device configuration and specified after a new project is created. -
Page 105: Inserting The Control Unit
5.3.4 Inserting the Control Unit A Control Unit must be inserted as the first component of a drive. You insert a SINAMICS S120 Control Unit into a new project via one of the following described ways: • Via the project view (recommended) •... - Page 106 Commissioning 5.3 Creating a project offline Procedure Proceed as follows to insert a Control Unit into the project view: 1. Double-click "Add new device" in the project tree. The appropriate dialog opens. ① "Device name" input field (default: Drive unit_x) ②...
- Page 107 Commissioning 5.3 Creating a project offline 3. Click on the required Control Unit in the "Control Units" list. Note Comparing and possibly changing version numbers The latest firmware version is always suggested when creating a Control Unit. Under certain circumstances, the recommended firmware version does not match the version number on the memory card of your converter.
-
Page 108: Inserting A Control Unit Via The Portal View
5.3.4.2 Inserting a Control Unit via the portal view Overview Alternatively to the recommended main method, you can insert a SINAMICS S120 Control Unit into a new project via the portal view. Requirements • A project has been created (Page 100), or an existing project is open. -
Page 109: Inserting A Control Unit Via The Network/Topology View
5.3.4.3 Inserting a Control Unit via the network/topology view Overview Alternatively to the recommended main method, you can insert a SINAMICS S120 Control Unit into a new project via the network or topology view Requirements • A project has been created (Page 100), or an existing project is open. -
Page 110: Copying Drives From Existing Projects
To insert a drive via the network/topology view, proceed as follows: 1. Open the network/topology view in the project view. 2. In the hardware catalog, open entry "Drives & starters > SINAMICS drives > SINAMICS S120 > Control Units". 3. Drag the required Control Unit and drop it into the network/topology view. -
Page 111: Copying Drives From Existing Libraries
Commissioning 5.3 Creating a project offline Copying drives from a reference project You can also copy drives from a reference project. Additional information about using reference projects is provided in the Startdrive information system under "Editing projects". Note Copying and inserting between protected projects It is not possible to copy and insert drives and drive components between protected projects. -
Page 112: Inserting An Infeed Unit
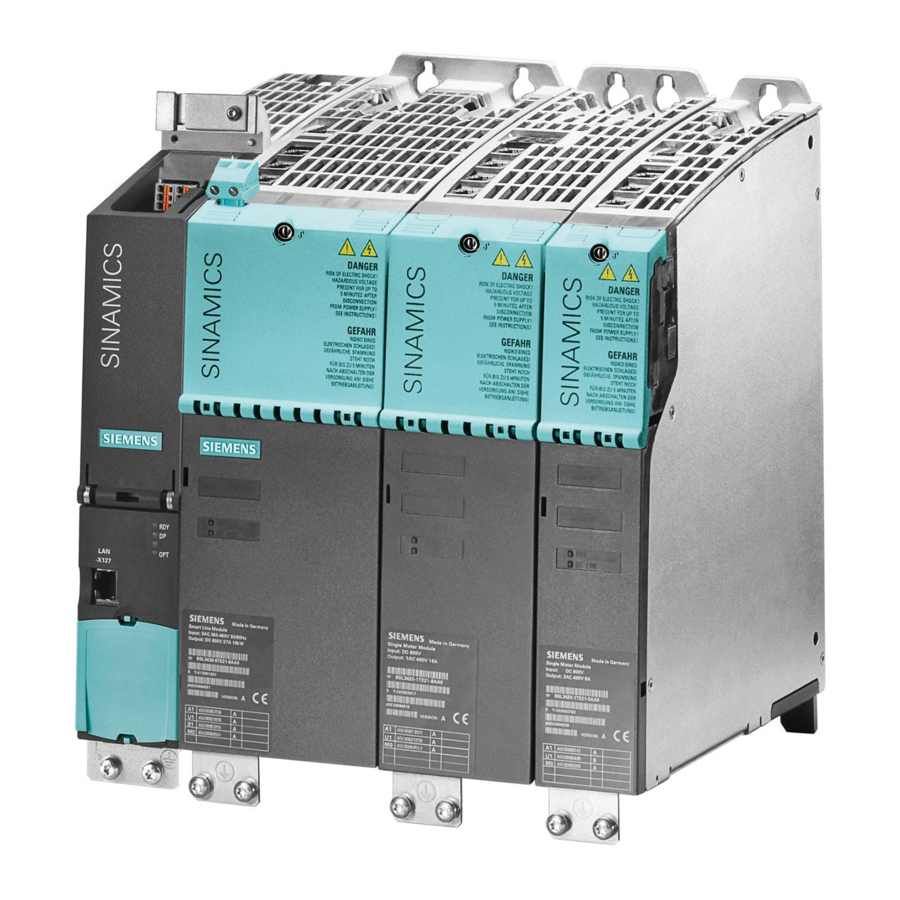
• The recommended ON and OFF sequence for activating the SLMs must be adhered to. You can find further information on the wiring of Smart Line Modules with the Control Unit and for the recommended ON/OFF sequence in the Equipment Manual SINAMICS S120 booksize power units. - Page 113 Commissioning 5.3 Creating a project offline Requirements • A SINAMICS S120 CU320-2 PN Control Unit is inserted in the device configuration. • Insert an Active, Basic or Smart Line Module in the device configuration. Restrictions • The use of a Line Module excludes the use of a PM 240-2 Power Module in a drive configuration.
-
Page 114: Specifying An Infeed Unit
Commissioning 5.3 Creating a project offline 5.3.5.2 Specifying an infeed unit Overview Initially, after creating an infeed unit in the configuration, only one non-specified placeholder is available. Using an article number, this placeholder must be specified in more detail. As a result, you ensure that the component in the device view corresponds to the component that is contained in your drive configuration. - Page 115 Commissioning 5.3 Creating a project offline 3. In the "General" tab, select the entry "Line Module - Selection - xxx". A selection of the available infeed units is displayed. 4. Select the required infeed unit based on the article number. The following is automatically set based on your selection: –...
-
Page 116: Connecting Infeed Units In Parallel
Commissioning 5.3 Creating a project offline The infeed unit is inserted and specified in accordance with your drive configuration. Note If an Active Line Module or a Smart Line Module with the chassis format was inserted, then a Voltage Sensing Module is automatically added and wired. 5.3.5.3 Connecting infeed units in parallel Overview... - Page 117 Motor supply lines must be opened. Further information Further information on rules, requirements, and restrictions for the parallel connection of Line Modules and Motor Modules can be found in the SINAMICS S120 Function Manual Drive Functions. Commissioning with Startdrive...
-
Page 118: Editing Inserted And Specified Components
Commissioning 5.3 Creating a project offline 5.3.5.4 Editing inserted and specified components Overview All of the inserted components are graphically displayed in the device view. The device view provides the following editing options for the inserted components: • Moving the component •... -
Page 119: Editing Drive-Cliq Connections
Commissioning 5.3 Creating a project offline Deleting components Delete the components that you no longer require. 1. Right-click in the gray border. A shortcut menu opens. 2. To delete the DRIVE-CLiQ component, select "Delete" from the shortcut menu. The component is deleted. Note You can undo the deletion via the shortcut <Ctrl>... - Page 120 Commissioning 5.3 Creating a project offline Automatic wiring of components With most drive systems, the DRIVE-CLiQ connections are automatically established with the default settings when creating a component. Note No automatic wiring With an S120 drive system with a CU310-2 PN, the components are not automatically wired via DRIVE-CLiQ.
-
Page 121: Making Detailed Settings
Commissioning 5.3 Creating a project offline Creating a DRIVE-CLiQ connection To create a DRIVE-CLiQ connection between two DRIVE-CLiQ ports, proceed as follows. 1. Left-click the output port and keep the mouse button pressed. 2. Drag the line displayed to the target port. A DRIVE-CLiQ connection is established between the ports and is displayed as a blue line. - Page 122 Commissioning 5.3 Creating a project offline Note Switching on a new/modified network When first switched on with a new/modified network, an automatic controller setting must be implemented using the line and DC link identification routine (p3410). While the identification routine is running, it is not permissible for other loads to be switched in/switched out. Procedure To make detailed settings for an infeed unit, proceed as follows: 1.
-
Page 123: Inserting A Motor Module Or Power Module
Commissioning 5.3 Creating a project offline 3. In order to parameterize the device supply voltage, click the icon next to the "Line data / operating mode" entry. The "Line data / Operating mode" screen form is opened: Set the required device supply voltage here (see Chapter "Line data/operating mode (Page 208)"). - Page 124 Commissioning 5.3 Creating a project offline Many of the following settings depend on the set drive object type. The setting of the correct type is therefore prerequisite for all other settings during the commissioning and parameterization of the Motor Module or Power Module. Important notes •...
-
Page 125: Inserting And Specifying A Motor Module
Commissioning 5.3 Creating a project offline Vector control features The motor connected to a vector control is simulated in a vector model based on data from the equivalent circuit diagram. The motor module is emulated as precisely as possible to obtain the best results regarding control control accuracy and control quality. - Page 126 5.3 Creating a project offline Requirements • A SINAMICS S120 CU320-2 PN Control Unit is inserted in the device configuration. • An infeed unit is inserted. You can also add an infeed unit at a later point in time. In this case, you must manually wire the infeed unit with the other components.
-
Page 127: Inserting And Specifying An Ac Power Module
Requirement • A SINAMICS S120 Control Unit has been inserted in the device configuration. Restrictions • Only chassis format AC Power Modules can be specified in the Startdrive engineering tool. - Page 128 Commissioning 5.3 Creating a project offline Procedure Proceed as follows to insert and specify an AC Power Module in the device configuration: 1. Open the "Power Modules" entry in the hardware catalog. 2. Select component "AC Power Module". 3. Drag the unspecified AC Power Module and drop it into the device view. The Power Module is automatically interconnected with the Control Unit via DRIVE-CLiQ.
-
Page 129: Inserting And Specifying Pm240-2
Commissioning 5.3 Creating a project offline 7. Confirm the procedure with "Yes". The Power Module selection list is now refreshed. 8. Select the Power Module based on the Article No. The data of the selected Power Module is assigned to the Power Module in the device configuration. - Page 130 Commissioning 5.3 Creating a project offline Requirement • A SINAMICS S120 CU320-2 PN Control Unit is inserted in the device configuration. Restrictions • Only blocksize format PM240-2 can be specified in the Startdrive engineering tool. Procedure Proceed as follows to insert and specify a PM240-2 together with a Control Unit Adapter (CUA) in the device configuration: 1.
- Page 131 Commissioning 5.3 Creating a project offline 8. Select the Power Module based on the Article No. The data of the selected Power Module is assigned to the Power Module in the device configuration. The Power Module has therefore been specified. The corresponding component is shown in the device configuration in dark gray.
-
Page 132: Making Detailed Settings
Commissioning 5.3 Creating a project offline 5.3.6.4 Making detailed settings Overview The following detail settings can be carried out in the inspector window for Motor Modules and Power Modules: • Settings – Allows the modification of the preallocated supply voltage. –... -
Page 133: Copying And Inserting Motor Modules
Copying and inserting Motor Modules Overview In a project with SINAMICS S120 drives, Motor Modules can be copied and inserted within the same drive or in another drive of the same type. As a consequence, it is only necessary to configure a Motor Module once. - Page 134 5.3 Creating a project offline Restrictions • Command option "Paste" is not listed for Control Units that do not belong to the SINAMICS S120 product category (e.g. G150). • The procedure is not possible under a SIMATIC Drive Controller. Procedure (project tree) Proceed as follows, to copy and insert a configured Motor Module within the project tree.
-
Page 135: Interconnecting Motor Modules In Parallel
You can interconnect additional Motor Modules in the same way. Requirements • A SINAMICS S120 CU320-2 PN Control Unit is inserted in the device configuration. • The Motor Module inserted in the device configuration has the following specifications: – Format: "Booksize"... -
Page 136: Inserting A Motor
Commissioning 5.3 Creating a project offline Procedure To connect several Motor Modules in parallel, proceed as follows: 1. Open "Motor Modules" in the hardware catalog. 2. Drag & drop a Motor Module into the light gray area of the already existing Motor Module. 3. -
Page 137: Inserting And Specifying Motors From The Motor List
5.3 Creating a project offline Requirements • A SINAMICS S120 Control Unit has been inserted in the device configuration. • An infeed unit is inserted. You can also add an infeed unit at a later point in time. In this case, you must manually wire the infeed unit with the other components (see Chapter "Inserting an infeed unit... -
Page 138: Inserting And Specifying Motors That Are Missing From The Motor List
Commissioning 5.3 Creating a project offline 6. In the inspector window, select entry "Motor- Selection - xxx". 7. Select your motor with the corresponding motor encoder in the drop-down list based on the article number. Motor data – The data of the selected motor are assigned to the unspecified motor. The white area turns dark gray. - Page 139 Commissioning 5.3 Creating a project offline 7. If you want to record motor data under "Optional motor data" and "Equivalent circuit diagram data", activate the following options in the "Rating plate values" screen form: – "Activate display of the optional motor data" –...
-
Page 140: Configuring Motor Details
Commissioning 5.3 Creating a project offline 5.3.7.3 Configuring motor details Overview You can configure the following motor details for motors during commissioning: • Basic parameter assignment • Rating plate values • Motor brake Procedure To configure the motor details, proceed as follows: 1. - Page 141 Commissioning 5.3 Creating a project offline 6. In the inspector window, select the "Motor details > Motor brake" menu. The current configuration of the motor holding brake is displayed in the screen form. 7. To change the configuration of the motor holding brake, click the icon next to the "Brake control"...
-
Page 142: Inserting Measuring Systems (Encoders)
This is the reason that high quality encoders must be used for motor encoders. – Siemens motors that have already been configured are created in the device view with the matching encoder and the encoder evaluation. -
Page 143: Inserting An Encoder
Note Encoders from the hardware catalog SIEMENS in-house encoders which are listed in the hardware catalog no longer have to be parameterized as they are already preassigned the appropriate settings. In contrast, third-party encoders must be parameterized as described below. -
Page 144: Specifying The Encoder Evaluation
Commissioning 5.3 Creating a project offline Procedure Proceed as follows to insert and specify an encoder in your device configuration: 1. Open "Measuring systems" in the hardware catalog. 2. Select the desired, unspecified encoder in the device overview. 3. Drag the desired, unspecified encoder to the lower area of the Motor Module. An encoder and a Sensor Module are created. -
Page 145: Encoder System Connection
Control Unit. The encoder system connection to SINAMICS S120 drives is exclusively done via DRIVE-CLiQ. In conjunction with motor encoders, the motor temperature can also be evaluated using Sensor Modules. -
Page 146: Making Detailed Settings
Commissioning 5.3 Creating a project offline Assignment of measuring system to Sensor Modules The following table gives an overview of the assignment of the various measuring systems to the available Sensor Modules. Measuring systems SMC10 SMC20 SMC30 SMC40 SME20 SME25 SME120 SME125 Resolver... - Page 147 Commissioning 5.3 Creating a project offline 3. To configure the actual value processing, click the icon next to the "Actual value processing" entry. The "Actual value processing" screen form opens: Make the required settings here (see chapter "Actual value processing (Page 218)"). 4.
-
Page 148: Inserting Additional System Components
Commissioning 5.3 Creating a project offline Result You have made the detailed settings for the selected encoder in your device configuration. 5.3.9 Inserting additional system components The following components can be inserted additionally in the device configuration of your drive: •... - Page 149 Commissioning 5.3 Creating a project offline Requirement • A SINAMICS S120 Control Unit (or a SIMATIC Drive Controller) has been inserted in the device configuration. Restriction • When using a CU310-2 PN, DRIVE-CLiQ Hub Modules inserted in the device configuration are not automatically wired via DRIVE-CLiQ.
-
Page 150: Insert Communication Board Cbe20
The CBE20 Communication Board is a flexible component, which can be operated in Startdrive with the "SINAMICS link" communication profile. Requirements • A SINAMICS S120 Control Unit has been inserted in the device configuration. • No Terminal Board TB30 is contained in the device configuration. Note A TB30 Terminal Board and a CBE20 Communication Board cannot be created simultaneously in the device configuration. -
Page 151: Insert Terminal Module
With Terminal Modules, you can expand the interfaces of the Control Unit. They are connected to the Control Unit via DRIVE-CLiQ. Requirement • A SINAMICS S120 Control Unit has been inserted in the device configuration. Procedure To insert a Terminal Module into the device configuration, proceed as follows: 1. -
Page 152: Insert Voltage Sensing Module Vsm10
5.3 Creating a project offline Requirements • A SINAMICS S120 Control Unit has been inserted in the device configuration. • No Communication Board CBE20 is contained in the device configuration. TB30 and CBE20 cannot be created simultaneously in the device configuration. - Page 153 Control Unit. Further information You can find further information on the system rules for operating multiple VSMs per Line Module in the SINAMICS S120 Function Manual Drive Functions. Commissioning with Startdrive Commissioning Manual, 06/2020, 6SL3097-5AA10-0BP2...
-
Page 154: Establishing An Online Connection To The Drive
5.4 Establishing an online connection to the drive Establishing an online connection to the drive Overview Most SINAMICS S120 control units (e.g. CU320-2 PN) have 2 interfaces, via which you can connect the drive online. Industrial security guidelines Observe the following information and follow the instructions in them when selecting and configuring the interfaces. - Page 155 Commissioning 5.4 Establishing an online connection to the drive IP addresses in the project A SINAMICS S120 Control Unit is created with the following IP addresses in a project in the TIA Portal: • Commissioning and service interface X127: – IP address: 169.254.11.22 –...
-
Page 156: Checking The Firmware Version
Commissioning 5.4 Establishing an online connection to the drive 3. In display area "Preset connection path for online access", define the interface type and the interface. 4. Enable the option "Display dialog for setting the default connection path for the online access". - Page 157 Commissioning 5.4 Establishing an online connection to the drive Checking the firmware consistency To check the firmware consistency between your Startdrive project and drive, proceed as follows: 1. Check the firmware version on your memory card using the "General" diagnostics screen form.
-
Page 158: Online Connection Via Standard Service Interface X127
The interface X127 with a default IP address is available for commissioning your drive. Requirements New project • A SINAMICS S120 Control Unit has been inserted in the device configuration. • You have connected your PG/PC with the drive via the X127 service interface. Note You can go directly online as the service interface X127 has already been assigned an IP address. - Page 159 Commissioning 5.4 Establishing an online connection to the drive Procedure To establish an online connection between your PG/PC and the drive, proceed as follows: 1. Select the drive unit with which you want to go online in the project tree (or in the device view).
-
Page 160: Online Connection Via Profinet Interface
Commissioning 5.4 Establishing an online connection to the drive 8. Select your drive unit from the table. 9. To establish an online connection to the drive unit, click "Connect". The online connection between the PG/PC and the drive unit is established. The settings are used automatically the next time you go online and the "Go online"... -
Page 161: Searching For A Drive
Commissioning 5.4 Establishing an online connection to the drive 5.4.3.2 Searching for a drive Overview You can search for your drive in the TIA Portal using the "Online access" option. Requirements • You have inserted a drive in the project. •... -
Page 162: Assigning An Ip Address
Commissioning 5.4 Establishing an online connection to the drive 3. Double click on "Update accessible devices". The drive is displayed in the project tree. If the communication parameters of the drive are set to factory settings (IP address 0.0.0., no device name), then the default device name of the TIA Portal (in this case: "Accessible device") and the MAC address are displayed. - Page 163 Commissioning 5.4 Establishing an online connection to the drive Overview Upon delivery, the PROFINET interface X150 of the drive does not have an assigned IP address. If a cyclic connection already exists from SINAMICS to the controller, it is no longer possible to assign an IP address.
-
Page 164: Assigning Profinet Device Names
Commissioning 5.4 Establishing an online connection to the drive 5.4.3.4 Assigning PROFINET device names You must assign a device name to the drive so that you can operate the drive in a PROFINET subnet. Assign device name This name must comply with DNS name conventions. For detailed information, refer to the information system of the TIA Portal. -
Page 165: Ip Address And The Subnet Mask In The Project
Commissioning 5.4 Establishing an online connection to the drive 5.4.3.5 IP address and the subnet mask in the project Overview After you have assigned an IP address to the drive, check the IP address and subnet mask set in the project. An online connection can only be established when the settings in the project and in the drive are identical. -
Page 166: Setting Up The Preferred Pg/Pc Interface
Commissioning 5.4 Establishing an online connection to the drive 5.4.3.6 Setting up the preferred PG/PC interface Overview The PROFINET communication between the drive and the PG/PC takes place via an Ethernet interface. For the communication via the X150 PROFINET interface, the IP address and subnet mask of the PG/PC interface must lie within the number range of the PROFINET subnet. - Page 167 Commissioning 5.4 Establishing an online connection to the drive Add IP address for PG/PC interface in the subnet 1. Click in the toolbar on button The "Go online" dialog opens. 2. Select the device and click "Connect" to confirm. 3. Assign an IP address to the PG/PC, which is located in the subnet of the drive. If you have not yet done this via the Windows system control, you will be offered at this point to temporarily assign a suitable IP address from the subnet of the drive to your PG/PC.
-
Page 168: Restoring Factory Settings
Commissioning 5.4 Establishing an online connection to the drive To display the overview of all of the temporary IP addresses and to delete temporary IP addresses, proceed as follows: 1. Navigate in the project tree to "Online access" and from there to the appropriate interface. 2. - Page 169 Commissioning 5.4 Establishing an online connection to the drive 3. Double-click the "Restore factory settings" entry in the secondary navigation. The dialog box with the current settings is displayed. 4. Click the "Reset" button. The drive communication settings are reset to the factory settings. 5.
-
Page 170: Alternative 1: Loading The Drive Configuration Into The Project
Commissioning 5.5 Alternative 1: Loading the drive configuration into the project Alternative 1: Loading the drive configuration into the project 5.5.1 Create a new project Overview You can create new projects once you have opened the Startdrive application in the TIA Portal. Procedure Proceed as follows to create a new project: 1. - Page 171 Commissioning 5.5 Alternative 1: Loading the drive configuration into the project Procedure To upload a device as a new station, proceed as follows: 1. In the project tree, click on the arrow icon next to the "Online access" function. The following options are then displayed: 2.
-
Page 172: Post-Processing The Drive Configuration
Commissioning 5.5 Alternative 1: Loading the drive configuration into the project 5.5.3 Post-processing the drive configuration Overview In an ideal scenario, all of the drive components are transferred into the drive configuration and specified via the automatic configuration. In this case, the error-free configuration is confirmed in the message display and the configuration does not have to be post-processed. -
Page 173: Alternative 2: Creating A Project With A Determined Drive Configuration
The new project is created and simultaneously opened. 5.6.2 Inserting the drive offline Overview The following describes how to insert a SINAMICS S120 Control Unit into a new project via the project view. Requirements • A project has been created, or an existing project is open. - Page 174 Commissioning 5.6 Alternative 2: Creating a project with a determined drive configuration Procedure Proceed as follows to insert a Control Unit into the project view: 1. Double-click "Add new device" in the project tree. The appropriate dialog opens. ① "Device name" input field (default: Drive unit_x) ②...
- Page 175 Commissioning 5.6 Alternative 2: Creating a project with a determined drive configuration 3. Click on the required Control Unit in the "Control Units" list. Note Comparing and possibly changing version numbers The latest firmware version is always suggested when creating a Control Unit. Under certain circumstances, the recommended firmware version does not match the version number on the memory card of your converter.
-
Page 176: Determining The Drive Configuration
Commissioning 5.6 Alternative 2: Creating a project with a determined drive configuration Result The Control Unit is inserted and can then be configured. Example: CU310-2 PN inserted Example: CU320-2 PN inserted 5.6.3 Determining the drive configuration Overview The individual steps for automatically determining the drive configuration via the function "Detection of the device configuration"... - Page 177 Commissioning 5.6 Alternative 2: Creating a project with a determined drive configuration Performing device configuration identification To determine the drive configuration via the function "Detection of the device configuration", proceed as follows: 1. Select the desired drive in the project tree or in the device configuration. 2.
- Page 178 Commissioning 5.6 Alternative 2: Creating a project with a determined drive configuration Non-assignable components Components that are not automatically assigned to a main component during device configuration detection are listed at "Non-assignable components". These components can be manually assigned via drag-and-drop or via the shortcut menu of a main component. Note All of the components listed in the "Non-assignable components"...
- Page 179 Commissioning 5.6 Alternative 2: Creating a project with a determined drive configuration Changing the assignment of components To change the assignment of the components, proceed as follows: 1. Select a component in the list that you want to assign to a different main component. 2.
-
Page 180: Importing The Drive Configuration Into The Project
Commissioning 5.6 Alternative 2: Creating a project with a determined drive configuration Cancelling a parallel connection To eliminate an existing parallel connection, proceed as follows: 1. Move individual components to the higher-level drive using the drag-and-drop feature. 2. Select a component that is connected in parallel and then the shortcut menu "Disconnect parallel connection". -
Page 181: Post-Processing The Drive Configuration
Commissioning 5.6 Alternative 2: Creating a project with a determined drive configuration 5.6.5 Post-processing the drive configuration Overview In an ideal scenario, all of the drive components are transferred into the drive configuration and specified via the automatic configuration. In this case, the error-free configuration is confirmed in the message display and the configuration does not have to be post-processed. -
Page 182: Basic Parameterization Of The Drive Objects
2. Save the project to back up the settings. 5.7.1.2 Configuring the web server Overview The web server provides information on a SINAMICS S120 device via its web pages. Access is via an Internet browser. Commissioning with Startdrive Commissioning Manual, 06/2020, 6SL3097-5AA10-0BP2... - Page 183 Commissioning 5.7 Basic parameterization of the drive objects Configuration in Startdrive You configure the web server in the Startdrive commissioning tool in the "Web server" screen form. Generally you can perform the configuration both in the online and in the offline mode of the Startdrive.
- Page 184 2. Then save the project to accept the settings. Restricting web server access to just secure connections Using the default configuration of the web server, you can access the SINAMICS S120 converter via an HTTP connection or via an encrypted HTTPS connection. Using the configuration, access can be restricted so that only a secure HTTPS connection is possible.
-
Page 185: Web Server User Accounts
HTTPS" in the configuration dialog. Further information You can find further information on access to the web server and the functions of the web server in the Chapter "Web server" of the SINAMICS S120 Function Manual Drive Functions. 5.7.1.3 Web server user accounts Overview For SINAMICS S120, the rights of both user accounts "SINAMICS"... -
Page 186: Enabling "Sinamics" And "Administrator" User
Commissioning 5.7 Basic parameterization of the drive objects Defaults The web server provides the following default settings for the users "SINAMICS" and "Administrator": • "SINAMICS" user – No password set. For these users we recommend that a password is assigned. With a password, you prevent an attacker from assigning a password and thereby blocking other commissioning engineers. -
Page 187: Creating A Password For The Users "Sinamics" And "Administrator
Commissioning 5.7 Basic parameterization of the drive objects 5.7.1.5 Creating a password for the users "SINAMICS" and "Administrator" Overview You can use this function for the users "SINAMICS" and "Administrator" in online or offline mode. The procedure is the same for both users. Requirements •... -
Page 188: Changing The Password For The Users "Sinamics" And "Administrator
Commissioning 5.7 Basic parameterization of the drive objects Procedure To delete the password for the "SINAMICS" user, proceed as follows: 1. Click the "Delete password" button. The "Delete password" dialog opens. 2. Enter the password for the "SINAMICS" user. The entry is checked. "Password has been deleted" is displayed if you entered the correct password. -
Page 189: Password Forgotten
Commissioning 5.7 Basic parameterization of the drive objects Procedure To change a password, proceed as follows: 1. Click "Change password". The "Change Password" dialog opens. 2. In the "Old password" input field, enter the user's existing password. 3. Enter the new password in the "New password" input field. Pay attention to upper and lower case. -
Page 190: Activating/Deactivating Write Protection
• Parameters with attribute "WRITE_NO_LOCK" are generally not affected by write protection. You can find a list of parameters with the attribute "WRITE_NO_LOCK" in the chapter "Parameters with "WRITE_NO_LOCK"" of the SINAMICS S120/S150 List Manual. The following functions are not affected by write protection: •... -
Page 191: Know-How Protection
However, if necessary, it is possible to activate write protection in addition when know-how protection is activated. Requirements • A SINAMICS S120 control module has been inserted in the device configuration. Procedure Proceed as follows to activate/deactivate write protection: 1. Establish an online connection to your drive. - Page 192 Commissioning 5.7 Basic parameterization of the drive objects Activated know-how protection has the following effects: • Parameter view: In the parameter view, know-how-protected parameters are not shown in the parameter lists. • Function view: – Know-how-protected parameter values ("KHP_ACTIVE_READ") that can be read but not ①...
- Page 193 (parameter and DCC data): Figure 5-6 Available protection settings Note Siemens memory card Use of know-how protection with basic copy protection and extended copy protection is only possible with a Siemens memory card. Commissioning with Startdrive Commissioning Manual, 06/2020, 6SL3097-5AA10-0BP2...
- Page 194 You can find a list of the adjustable parameters that can be read and changed in the SINAMICS S120/S150 List Manual in the chapter "Pa‐ rameters with "KHP_WRITE_NO_LOCK"". Note: Adjustable parameters without know-how protection cannot be added to an exception list (see Chapter "Managing the exception list (Page 197)").
-
Page 195: Configuring Know-How Protection
More information on the individual protection settings can be found in Chapter "Know-how protection (Page 189)". Requirements • A SINAMICS S120 control module has been inserted in the device configuration. • An online connection to the drive has been established. • Write and know-how protection are disabled. - Page 196 Commissioning 5.7 Basic parameterization of the drive objects • A Siemens memory card is inserted in the converter. This requirement applies to know-how protection with basic copy protection and extended copy protection. • Optional: – The drive unit is fully commissioned.
- Page 197 Commissioning 5.7 Basic parameterization of the drive objects 7. To activate know-how protection with the selected protection setting, click "Specify password for the activation". The corresponding dialog is opened. 8. Assign a password and confirm with "OK". Note Recommendation for secure passwords When assigning a password, make sure that it contains the following: •...
- Page 198 Commissioning 5.7 Basic parameterization of the drive objects Proceed as follows to deactivate the know-how protection temporarily: 1. Click on "Deactivation". The corresponding dialog is opened. The following options are available: 2. Select option "Temporary deactivation for configuration changes" option. Know-how protection is deactivated.
-
Page 199: Managing The Exception List
Commissioning 5.7 Basic parameterization of the drive objects Additional protective measures After configuration of know-how protection, make sure that the Startdrive project file is not retained by the end user. 5.7.1.13 Managing the exception list Overview In the exception list, you manage all parameters that are to remain readable and modifiable with activated know-how protection. - Page 200 Commissioning 5.7 Basic parameterization of the drive objects Adding parameters to the exception list Note Parameters in the exception list can be read and modified With activated know-how protection, parameters in the exception list can be read and modified in other commissioning tools and in the web server. Therefore, do not add any critical parameters to the exception list.
-
Page 201: Configuring Digital Inputs
The modified exception list is taken into account after activation of know-how protection in online mode. All of the parameters that were removed from the list are then know-how protected again. Parameters (see SINAMICS S120/S150 List Manual) • p7763 Know-how protection OEM exception list, number of indices for p7764 •... -
Page 202: Bidirectional Digital Inputs/Outputs
Commissioning 5.7 Basic parameterization of the drive objects 5.7.1.15 Bidirectional digital inputs/outputs Overview The bidirectional inputs/outputs of terminals X122 and X132 on the CU (DO1) can be used by a drive object as well as by a higher-level controller (resource sharing). The assignment to a terminal is defined by means of BICO interconnections which are either connected to a controller via the DO1 telegram p0922 = 39x or to a drive object. -
Page 203: Measuring Sockets
Commissioning 5.7 Basic parameterization of the drive objects To parameterize the digital inputs/outputs 8 to 15, proceed as follows: 1. Select the digital input/output on the required terminal. 2. Interconnect the signal source of the digital input (8 to 15). 3. - Page 204 Commissioning 5.7 Basic parameterization of the drive objects Interconnect signal sources To interconnect signal sources with the available measuring sockets, proceed as follows: 1. Select one of the following settings in the "Limitation" drop-down list of a measuring socket: – Limitation On If signals are output outside the permissible measuring range, the signal is limited to 4.98 V or to 0 V.
-
Page 205: Digital Output, Isolated (Cu310-2 Pn)
Commissioning 5.7 Basic parameterization of the drive objects Function diagrams (see SINAMICS S120/S150 List Manual) • 8134 Diagnostics - measuring sockets (T0, T1, T2) Parameters (see SINAMICS S120/S150 List Manual) Adjustable parameters • p0771[0...2] CI: Measuring sockets signal source • p0777[0...2] Measuring sockets characteristic curve value x1 •... -
Page 206: Analog Input (Cu310-2 Pn)
Commissioning 5.7 Basic parameterization of the drive objects 5.7.1.18 Analog input (CU310-2 PN) Overview The analog input is used to acquire external analog signals. These signals can be voltages or currents, for example. Analog inputs are used, for example, to be able to enter a speed or torque as analog signal. - Page 207 Commissioning 5.7 Basic parameterization of the drive objects Procedure Proceed as follows to configure the scaling: 1. Click on "Scaling". The "Scaling TM31 analog input AI 0" dialog opens. 2. Enter the x and y values for 2 points of the scaling line: –...
-
Page 208: Infeed Unit
Commissioning 5.7 Basic parameterization of the drive objects Additional functions (optional) Function Description Absolute-value Activate the absolute-value generation in the screen form if the absolute value of the scaled input value is generation to be generated. The activated absolute-value generation is indicated by the icon. - Page 209 Commissioning 5.7 Basic parameterization of the drive objects Note The display of the function modules that can be activated is dynamic and depends on the selected infeed and the configuration of this infeed. The following table provides an overview of the function modules that can be used. In addition to the individual function modules, the table includes an explanations of how each function module can be used.
-
Page 210: Line Supply Data / Operating Mode
Commissioning 5.7 Basic parameterization of the drive objects 5.7.2.3 Line supply data / Operating mode Overview You set the most important parameters for the operation of an infeed in the function view of the "Line data / operating mode" screen form. The corresponding parameters are displayed depending on the infeed type. -
Page 211: Enable Logic
Commissioning 5.7 Basic parameterization of the drive objects Setting the line data and operating mode The parameters in this screen form are assigned default values when creating the device. 1. Enter a value for the device supply voltage in the "Device supply voltage" field (p0210). 2. -
Page 212: Line Contactor Control
Commissioning 5.7 Basic parameterization of the drive objects 5.7.2.5 Line contactor control Overview This function allows an external line contactor to be controlled. The closing and opening of the line contactor can be monitored by evaluating the feedback contact of the line contactor. The line contactor can be controlled with the following drive objects via r0863.1: •... -
Page 213: Function Modules
Commissioning 5.7 Basic parameterization of the drive objects The following table provides an overview of the maximum number of options of the basic parameterization and lists the conditions under which individual options can be displayed and selected. Table 5-1 Basic parameterization: selectable options Option "Basic parameterization"... - Page 214 Commissioning 5.7 Basic parameterization of the drive objects The following table provides an overview of the function modules that are available. In addition to the individual function modules, the table includes an explanations of how each function module can be used. Function module Explanation Frequently used function modules...
-
Page 215: Control Mode
When the "basic positioner" function module is activated, then the "position control" function module is automatically activated as well. 2. Save the project to back up the settings. Parameters (see SINAMICS S120/S150 List Manual) • p0108[0..n] Drive objects function module •... -
Page 216: Limits
Commissioning 5.7 Basic parameterization of the drive objects Selecting the control mode To select a control mode, select one of the following control modes from the drop-down list (p1300): • Speed control with encoder • Speed control without encoder • Torque control with encoder If you selected a control mode with encoder, then the encoder is now shown in the device configuration. -
Page 217: Drive Settings
Commissioning 5.7 Basic parameterization of the drive objects • p2006: Reference temperature • p2007: Reference acceleration Correct defaults You can correct the default settings for all p parameters in the table: Proceed as follows: 1. Click in the "Values" field for the corresponding reference parameter. 2. - Page 218 Commissioning 5.7 Basic parameterization of the drive objects Setting the calculation of the drive functions To set the calculation of the drive functions, proceed as follows: 1. Select one of the following applications in the "Technology application" (p0500) drop-down list: –...
-
Page 219: Sampling Times/Pulse Frequency
Commissioning 5.7 Basic parameterization of the drive objects 5.7.3.7 Sampling times/pulse frequency Overview From a pulse frequency of 800 Hz and higher, we recommend that you enter the sampling times and the pulse frequency for the drive. Note You can only activate or deactivate the "Sampling times/pulse frequency" function when you are offline. -
Page 220: Actual Value Processing
Note You cannot set the values arbitrarily. The rules for setting the sampling times can be found in Chapter "System rules, sampling times and DRIVE-CLiQ wiring" of the SINAMICS S120 Function Manual Drive Functions. Enter the sampling times for the internal control loops. - Page 221 Commissioning 5.7 Basic parameterization of the drive objects Gn_XIST_1 and Gn_XIST_2 contain the following information: • Encoder pulse count (Gn_XIST_1) • Fine resolution (Gn_XIST_1) • Multiturn information (Gn_XIST_2) Fine resolution p0419 (XIST_1) Encoders with their sampling mechanism provide significantly more precise information than that determined with the pulse counts.
- Page 222 1. Enter here the fine resolution of the encoder used in bits. The pre-setting is 11 bits and is sufficient for all Siemens motor encoders. 2. The multiturn resolution is set to 9 bits for all Siemens motor encoders and does not need to be adjusted.
- Page 223 Commissioning 5.7 Basic parameterization of the drive objects Parameterizing actual value processing To parameterize the actual value processing, proceed as follows. Requirements • The motor used in the device configuration of the drive axis is completely specified and configured. Note This basic parameterization cannot be performed without having completed this full configuration.
-
Page 224: Rotor Position Synchronization
Commissioning 5.7 Basic parameterization of the drive objects Parameterizing the measuring gearbox position tracking Position tracking enables the load position to be reproduced when using gearboxes. It can also be used to extend the position range. 1. Activate the position tracking for measuring gearboxes. 2. - Page 225 Note This basic parameterization cannot be performed without having completed this full configuration. Procedure for Siemens motors When using standard Siemens motors use the automatic default setting for the PolID. Commissioning with Startdrive Commissioning Manual, 06/2020, 6SL3097-5AA10-0BP2...
- Page 226 • Ensure that this technique is only performed by appropriately trained and experienced technical experts. Note Contact the Siemens service organization if you are not familiar and trained in using this technique. – [1] Saturation-based 1st harmonic – [4] Saturation-based 2-stage –...
-
Page 227: Mechanical System
Commissioning 5.7 Basic parameterization of the drive objects If the encoder system facilitates calibration of the zero mark position, then fine synchronization is recommended (p0404.15 = 1). In this case, fine synchronization avoids measurement scatter and also facilitates an additional check of the determined pole position. Suitable zero marks are: •... - Page 228 Commissioning 5.7 Basic parameterization of the drive objects Parameterizing the load gearbox position tracking If you have parameterized encoder 1 for the position control, you can set the position tracking as follows: 1. Activate the "Activate load gearbox position tracking" (p2729.0) option. 2.
-
Page 229: Enable Logic
Commissioning 5.7 Basic parameterization of the drive objects 360° are travelled per load revolution. According to the encoder resolution, maximum 364,544 LU/360° = 1012 LU/° can be defined. We will select 100 LU per ° (1 LU = 0.01°). 360° per revolution results in 36,000 LU per load revolution. -
Page 230: Drive Axes (Vector)
Commissioning 5.7 Basic parameterization of the drive objects 4. Connect the 2nd signal source for the "OFF2 (low active) signal source 2" command (p0845). 5. Connect the 1st signal source for the "OFF3 (low active) signal source 1" command (p0848). This command corresponds to control word 1 bit 2 (STW1.2) in the PROFIdrive profile. - Page 231 Commissioning 5.7 Basic parameterization of the drive objects Function description Note The display of the function modules that can be activated is dynamic and depends on the selected drive axis and the configuration of this drive axis. The following table provides an overview of the function modules that can be used. In addition to the individual function modules, the table includes an explanations of how each function module can be used.
-
Page 232: Control Mode
Commissioning 5.7 Basic parameterization of the drive objects Function module Explanation S120 S150 G150 G130 Vector Moment of inertia estimator In the "Open-loop/closed-loop control" area, adds (r0108.10) the "Speed setpoint filter" function. The moment of inertia estimator can now be activated in the "Pre‐ control"... -
Page 233: Limits
Commissioning 5.7 Basic parameterization of the drive objects • Torque control (without encoder) • Torque control (with encoder) Requirements • The motor used in the device configuration of the drive axis is completely specified and configured. Note This basic parameterization cannot be performed without having completed this full configuration. -
Page 234: Optimization Runs
Commissioning 5.7 Basic parameterization of the drive objects Requirements • The motor used in the device configuration of the drive axis is completely specified and configured. Note This basic parameterization cannot be performed without having completed this full configuration. 5.7.4.5 Optimization runs Overview Using the "Optimization run"... - Page 235 Commissioning 5.7 Basic parameterization of the drive objects Setting the technological application and selection of the motor data identification To select a technological application and to set the selection of the motor data identification, proceed as follows: 1. Select one of the following applications in the "Technology application" (p0500) drop-down list: –...
-
Page 236: Actual Value Processing
Commissioning 5.7 Basic parameterization of the drive objects Procedure Proceed as follows to finalize calculating motor and controller parameters: 1. In the "Controller data calculation" field, click on "Finish drive parameterization". The automatic calculation of motor and controller parameters is completed and the following message displayed. - Page 237 Commissioning 5.7 Basic parameterization of the drive objects Fine resolution p0419 (XIST_1) Encoders with their sampling mechanism provide significantly more precise information than that determined with the pulse counts. They can be evaluated by the drive unit and transferred as fine resolution to the controller. Change the fine resolution, for example, when increased precision is required for machining a workpiece.
- Page 238 1. Enter here the fine resolution of the encoder used in bits. The pre-setting is 11 bits and is sufficient for all Siemens motor encoders. 2. The multiturn resolution is set to 9 bits for all Siemens motor encoders and does not need to be adjusted.
- Page 239 Commissioning 5.7 Basic parameterization of the drive objects Actual value processing parameter assignment Parameterizing actual value processing To parameterize the actual value processing, proceed as follows. Requirements • The motor used in the device configuration of the drive axis is completely specified and configured.
-
Page 240: Mechanical System
Commissioning 5.7 Basic parameterization of the drive objects Parameterizing the measuring gearbox position tracking Position tracking enables the load position to be reproduced when using gearboxes. It can also be used to extend the position range. 1. Activate the position tracking for measuring gearboxes. 2. - Page 241 Commissioning 5.7 Basic parameterization of the drive objects Parameterizing encoder selection for position control An encoder is assigned to the position control during commissioning. This encoder setting is shown in a drop-down list at the top right in the "Mechanical system" screen form. You can change the encoder assignment in this screen form before parameterizing the position control.
- Page 242 Commissioning 5.7 Basic parameterization of the drive objects For good repeat accuracy, the LU per load resolution should be selected in the ratio of 1:10 to the encoder resolution, if the encoder supports this resolution at the required dynamic response. Example 1: Linear axis –...
-
Page 243: Enable Logic
Commissioning 5.7 Basic parameterization of the drive objects 40 chain links travelled per load revolution. According to the encoder resolution, maximum 468,095 LU / 40 chain links = 11,702 LU / chain link can be selected. We will therefore select 1,000 LU per chain link (1 LU = 33.8667344 µm). -
Page 244: Loading The Project Data Into The Converter
Commissioning 5.8 Loading the project data into the converter Loading the project data into the converter Overview In order to set up your project, you need to load the project data you generated offline on the connected drive units. Project data are generated, for example: •... - Page 245 Commissioning 5.8 Loading the project data into the converter 4. Check the messages in the "Load preview" dialog. Activate the required actions in the "Action" column to perform a secure download. As soon as downloading becomes possible, the "Load" button is enabled. 5.
-
Page 246: Commissioning A Drive
Commissioning 5.9 Commissioning a drive Commissioning a drive 5.9.1 Using the control panel Overview You use the control panel to traverse the drive, thus testing the settings that have already been made (see Chapter "User interface - Control panel (Page 51)"). WARNING Non-observance of the safety instructions for the drive control panel The safety shutdowns from the higher-level controller have no effect with this function. - Page 247 Commissioning 5.9 Commissioning a drive Procedure When an online connection to the drive unit has been established, the bar in the header area of the screen form has a colored background. The control elements are grayed-out – with the exception of the "Activate" button. The remaining control elements become active after you have activated the control panel and set the enable signals.
-
Page 248: Run The Drive
Commissioning 5.9 Commissioning a drive Deactivating the control panel Proceed as follows to return the master control: 1. Click the "Off" button to switch off the drive. 2. Click the "Deactivate" button at "Master control". The "Deactivate master control" message window opens. 3. -
Page 249: Drive Positioning
Commissioning 5.9 Commissioning a drive Traversing the drive with specified speed To specify the speed setpoint, proceed as follows: 1. In the "Operating Mode" drop-down list, select menu item "Speed setpoint specification". 2. Enter a speed setpoint in the "Speed" field with which the motor is to turn. Once you have specified the speed setpoint, the drive is switched on as soon as you click one of the buttons "Start backward", "Start forward", "Jog forward"... -
Page 250: Relative Positioning
Commissioning 5.9 Commissioning a drive Requirements • There is an online connection to the drive unit. • The "Basic positioner" function module is activated. • The drive control panel is called and the master control is activated (see Chapter "Using the control panel (Page 244)"). -
Page 251: Absolute Positioning
Commissioning 5.9 Commissioning a drive Procedure To traverse the drive via the "Relative positioning" function, proceed as follows: 1. Select "Basic positioner" in the "Operating mode" drop-down list. 2. Then select "Relative positioning". The "Distance", "Velocity" and "Acceleration" entries are displayed. 3. -
Page 252: Modify Traversing Block
Commissioning 5.9 Commissioning a drive 3. At "Target position", enter a value in LU and press the ENTER key. 4. At "Velocity", enter a value in LU/s and press the ENTER key. 5. At "Acceleration", enter a value in LU/s and press the ENTER key. -
Page 253: Active Homing
Commissioning 5.9 Commissioning a drive Actual values The values currently active in the drive are displayed at "Actual values" (actual values and current values in the drive). In addition to the default parameter values, additional r-parameters are available for free selection in two drop-down lists. 5.9.3.5 Active homing Overview... -
Page 254: Direct Homing
Commissioning 5.9 Commissioning a drive 5.9.3.6 Direct homing Overview With the "Direct homing" function, you traverse the drive to a defined home position without using a higher-level control system. The drive itself controls and monitors the homing cycle. Requirements • Startdrive is in online mode. •... -
Page 255: One Button Tuning (Obt)
Commissioning 5.9 Commissioning a drive 5.9.4 One Button Tuning (OBT) Overview Function "One Button Tuning" (OBT) is used to determine the optimum control parameters of a servo drive. Structure of the screen form Further information on the structure of the "One Button Tuning" screen form is provided in Chapter "User interface - One Button Tuning (OBT) (Page 53)". - Page 256 Commissioning 5.9 Commissioning a drive Assume master control To activate the control panel, proceed as follows: 1. Click the "Activate" button at "Master control". The "Activate master control" message window opens. 2. Carefully read the warning note and check the value of the monitoring time. The monitoring time specifies the time during which the connection from the PG/PC to the drive is cyclically monitored.
- Page 257 Commissioning 5.9 Commissioning a drive Making settings for the OBT To make the settings for the OBT, proceed as follows: 1. Select the dynamic response setting for the OBT function corresponding to the mechanical system of your machine. The function optimizes the drive based on the selected dynamic response setting. –...
- Page 258 Commissioning 5.9 Commissioning a drive Result • OBT has been successful The controller optimization result is displayed in the "Status" area. The appropriate LED is lit green if the controller optimization was successful. The modified settings are compared with the settings before tuning in the "Optimization result" list. •...
-
Page 259: Stationary/Rotating Measurement
Commissioning 5.9 Commissioning a drive 5.9.5 Stationary/rotating measurement Overview Motor identification (MotID) provides a means of determining motor data, for example, of third- party motors. To improve control properties of the motor, the MotID should be performed. The main motor identification components are the stationary and rotating measurements. Adjustment Explanation range... - Page 260 Commissioning 5.9 Commissioning a drive Note For the duration of the period in which a rotating measurement is selected and running, the following actions or functions cannot be carried out: • Upload (load configuration from the drive) • Download (loading the configuration into the drive) •...
-
Page 261: Parameter Values (For Experts)
Commissioning 5.9 Commissioning a drive After the basic parameterization and subsequent download, the "Stationary measurement" measurement type is active as the "Calculation of motor/control parameters" has already been performed. You perform the configuration of the motor data identification in the following steps: Activating the infeed unit Click the "1"... - Page 262 Commissioning 5.9 Commissioning a drive Parameter values for stationary measurement The following table gives an overview of the necessary parameter values for the stationary measurement. Drive type Parameter Explanation Servo p0352 Cable resistance Important for long motor cables p0353 Series inductance Important for long motor cables p0640 Current limit p1909 Motor identification control word...
- Page 263 Commissioning 5.9 Commissioning a drive Encoder adjustment configuration data The following table gives an overview of the necessary parameter values for the encoder adjustment for servo drives. Drive type Parameter Servo p0325 Motor pole position identification current 1. Phase p0329 Motor pole position identification current p1980 Pole position identification procedure p1981 Pole position identification maximum movement p1993 Pole position identification current, motion based...
-
Page 264: Configuring Brake Control
Configuring brake control Overview The SINAMICS S120 drives are equipped with a brake control for motor holding brakes. The brake control is only used for the control of motor holding brakes. Generally, a motor is switched off at standstill in order to save energy and so that the motor temperature is not unnecessarily increased. -
Page 265: Simple Brake Control
Commissioning 5.10 Configuring brake control 5.10.1 Simple brake control Overview The "Simple brake control" is used exclusively for the control of holding brakes. Drives that have been switched off, can be secured against unwanted motion by the holding brake. Activation and response The control command for opening and closing the holding brake is transferred directly via DRIVE- CLiQ to the Motor Module by the Control Unit that logically links and monitors the signals with the system-internal processes. -
Page 266: Parameterizing The Simple Brake Control
Commissioning 5.10 Configuring brake control Commissioning the brake control Simple brake control is activated automatically (p1215 = 1) when the Motor Module has an internal brake control and a connected brake has been found. If no internal brake control is available, the control can be activated via parameter (p1215 = 3). - Page 267 Commissioning 5.10 Configuring brake control Selecting the type of brake control To select the type of brake control, proceed as follows: 1. Select the "Drive functions > Brake control" menu in the project navigator. The corresponding screen form is opened. 2.
- Page 268 Commissioning 5.10 Configuring brake control Parameterizing "Motor holding brake acc. to sequence control" To parameterize the "Motor holding brake acc. to sequence control" option, proceed as follows: 1. Set the opening time of the brake (p1216). After activating the holding brake (opening), the speed/velocity setpoint zero is active during this time.
-
Page 269: Opening The Brake
Commissioning 5.10 Configuring brake control 4. Interconnect the "Open brake command" (p0899.12) signal source to the required parameters. Several connections are possible. 5. To open the "Closing the brake (Page 268)" dialog, click "Close brake". Make the required settings in the dialog. 6. -
Page 270: Closing The Brake
Commissioning 5.10 Configuring brake control 5.10.1.3 Closing the brake Overview The following describes how you can set conditions and commands for the forced closing of the holding brake. Parameterizing the "Close brake" command To set the parameters that influence the closing of the brake, proceed as follows: 1. -
Page 271: Extended Brake Control
Commissioning 5.10 Configuring brake control Note Prioritization of the commands The "Unconditionally close brake" signal has a higher priority than the "Unconditionally open holding brake" signal. 5.10.2 Extended brake control Overview The "Extended brake control" allows complex brake controls, such as for motor holding brakes and service brakes. -
Page 272: Parameterizing Extended Brake Control
Commissioning 5.10 Configuring brake control 5.10.2.1 Parameterizing extended brake control Overview For braking with feedback (p1275.5 = 1), the brake control reacts to the feedback signal contacts of the brake. If the period p1216 is longer than the time until the feedback signal comes, the startup is delayed by the associated time difference. - Page 273 Commissioning 5.10 Configuring brake control Parameterizing the selected brake control To parameterize the selected brake control, proceed as follows: 1. Set the opening time of the brake (p1216). After activating the holding brake (opening), the speed/velocity setpoint zero is active during this time.
- Page 274 Commissioning 5.10 Configuring brake control Making settings for the brake feedback To make the settings for the brake feedback, proceed as follows: 1. Select the "[1] Yes" setting in the "Brake with feedback" (p1275.5) drop-down list. The mask then expands downwards with the additional settings. 2.
-
Page 275: Opening The Brake
Commissioning 5.10 Configuring brake control 4. Click "Status word". A mask with the same name opens. Connect the signal sources for the following areas: – Sequence control status word (r0899) – Motor holding brake status word (r1229) 5. Click "Logic operations" in the "Brake control" mask. The corresponding dialog is opened. -
Page 276: Closing The Brake
Commissioning 5.10 Configuring brake control Parameterizing the "Open brake" command To parameterize the command for the forced opening of the holding brake, proceed as follows: 1. Interconnect the "Open threshold signal source" (p1220) signal sink for the "Open brake" command. 2. - Page 277 Commissioning 5.10 Configuring brake control Parameterizing the "Close brake" command To set the parameters that influence the closing of the brake, proceed as follows: Commissioning with Startdrive Commissioning Manual, 06/2020, 6SL3097-5AA10-0BP2...
- Page 278 Commissioning 5.10 Configuring brake control 1. Interconnect the signal sinks for the following options of the "Close brake at standstill" function: – p1224[0]: Close brake at standstill signal, inversion via p1275.2 – p1224[1]: Close brake at standstill signal, inversion via p1275.3 –...
- Page 279 Commissioning 5.10 Configuring brake control Configuring standstill detection The standstill detection is configured in a separate dialog. You can decide for the standstill detection whether a deceleration ramp for the monitoring time is to be used in addition. In the latter case, the brake, however, can close for a turning motor.
-
Page 280: Function Diagrams And Parameters
Brake control - Extended brake control, open/close brake (r0108.14 = 1) • 2711 Brake control - Extended brake control, signal outputs (r0108.14 = 1) Overview of important parameters (see SINAMICS S120/S150 List Manual) • r0108.14 Drive objects, function module; Extended brake control • r0899.0...15... - Page 281 Commissioning 5.10 Configuring brake control • p1221 Open motor holding brake, threshold • p1277 Motor holding brake, delay, braking threshold exceeded • p1279[0...3] BI: Motor holding brake, OR/AND logic operation Free blocks • p1279[0...3] BI: Motor holding brake, OR/AND logic operation Brake monitoring functions •...
- Page 282 Commissioning 5.10 Configuring brake control Commissioning with Startdrive Commissioning Manual, 06/2020, 6SL3097-5AA10-0BP2...
-
Page 283: Diagnostics
Diagnostics This chapter describes the following diagnostic features of the SINAMICS S120 drive system: • Diagnostics via LEDs – Control Units – Power units – Additional modules – Terminal Modules • Diagnostics via Startdrive – Device diagnostics – Trace function –... -
Page 284: Diagnostics Using Leds
Diagnostics 6.1 Diagnostics using LEDs Diagnostics using LEDs Table 6-1 Appearance of the LEDs for the display of the operating states LED is on. (Steady light) Possible colors: Red, green, orange or yellow. LED is off. Is partly indicated by hyphens in the following tables in the "Color" column. LED flashes slowly. - Page 285 Diagnostics 6.1 Diagnostics using LEDs All the LEDs are controlled by the loaded software during operation. Control Unit 310-2 during ramp-up Table 6-3 CU310-2 Control Unit – description of the LEDs during ramp-up Color Display State, description, cause Orange Continuous light POWER ON Orange All LEDs light up for approx.
- Page 286 Diagnostics 6.1 Diagnostics using LEDs CU310-2 Control Unit in operation Table 6-4 Description of the LEDs during operation of the CU310-2 Color State Description, cause, remedy Electronic power supply is missing or outside permissible tolerance range. Remedy: Check the power supply. Continuous light The unit is ready for operation.
-
Page 287: Led Statuses Of A Cu320-2 Pn
Diagnostics 6.1 Diagnostics using LEDs Color State Description, cause, remedy Cyclic communication has not (yet) taken place. Remark: PROFIdrive is ready for communication when the Control Unit is ready for operation (see LED: RDY). Continuous light Cyclic communication is taking place. Green Flashing light Full cyclic communication is not yet taking place. - Page 288 Diagnostics 6.1 Diagnostics using LEDs Control Unit 320-2 PN during run-up Table 6-6 Control Unit CU320-2 – description of the LEDs during ramp-up Color Display State, description, cause Continuous light Hardware reset Orange Orange Continuous light BIOS loaded Flashing light 2 Hz BIOS error: "An error occurred while loading the BIOS".
- Page 289 Diagnostics 6.1 Diagnostics using LEDs Control Unit 320-2 PN during operation Table 6-7 CU320-2 PN Control Unit – description of the LEDs after powering up Color Display Description, cause, remedy – Electronics power supply is missing or outside permissible toler‐ ance range.
- Page 290 DCP = Discovery and Configuration Protocol DCP is used by PROFINET to determine PROFINET devices and to make basic settings. More detailed information can be found in the SINAMICS S120 Function Manual Communica‐ tion. Individual behaviors of the LED OPT are described for the respective Option Boards in the SINAMICS S120 Manual Control Units and supplemental system components.
-
Page 291: Power Units
Diagnostics 6.1 Diagnostics using LEDs 6.1.2 Power units 6.1.2.1 Safety instructions for diagnostic LEDs of the power units WARNING Non-observance of the fundamental safety instructions and residual risks The non-observance of the fundamental safety instructions and residual risks stated in Section 1 can result in accidents with severe injuries or death. -
Page 292: Basic Line Module Booksize
Diagnostics 6.1 Diagnostics using LEDs State Description, cause Remedy Ready DC link Green / red – Firmware download is complete. Wait for POWER ON. Carry out a POWER ON flashing light 2 Hz Green / – Component detection via LED is activated (p0124). –... -
Page 293: Smart Line Modules Booksize 5 Kw And 10 Kw
Diagnostics 6.1 Diagnostics using LEDs 6.1.2.4 Smart Line Modules booksize 5 kW and 10 kW Table 6-10 Meaning of the LEDs at the Smart Line Modules 5 kW and 10 kW Color State Description, cause Remedy READY – Electronic power supply is missing or outside permissible –... -
Page 294: Single Motor Module / Double Motor Module / Power Module
Diagnostics 6.1 Diagnostics using LEDs State Description, cause Remedy Ready DC link Green / red – Firmware download is complete. Wait for POWER ON. Carry out a POWER ON flashing light 2 Hz Green / – Component detection via LED is activated (p0124). –... -
Page 295: Smart Line Module Booksize Compact Format
Diagnostics 6.1 Diagnostics using LEDs 6.1.2.7 Smart Line Module booksize compact format Table 6-13 Meaning of the LEDs on the Smart Line Module booksize compact State Description, cause Remedy DC LINK Electronic power supply is missing or outside permissible tol‐ –... -
Page 296: Control Interface Module In The Active Line Module Chassis Format
Both options depend on the LED status when component rec‐ red/orange ognition is activated using the parameter. See SINAMICS S120/S150 List Manual for the parameters to activate the recognition of components via LED 6.1.2.9 Control Interface Module in the Active Line Module chassis format Table 6-15 Meaning of the LEDs "READY"... -
Page 297: Control Interface Module In The Basic Line Module Chassis Format
The component is ready for operation. Flashing light There is a fault. If the LED continues to flash after you have performed a POWER ON, please contact your Siemens service center. 6.1.2.10 Control Interface Module in the Basic Line Module chassis format Table 6-17 Meaning of the LEDs "Ready"... -
Page 298: Control Interface Module In The Smart Line Module Chassis Format
DC link voltage < 100 V and voltage at -X9:1/2 less than 12 V. The component is ready for operation. Flashing light There is a fault. If the LED continues to flash after you have performed a POWER ON, please contact your Siemens service center. Commissioning with Startdrive Commissioning Manual, 06/2020, 6SL3097-5AA10-0BP2... -
Page 299: Control Interface Module In The Motor Module Chassis Format
DC link voltage < 100 V and voltage at -X9:1/2 less than 12 V. The component is ready for operation. Flashing light There is a fault. If the LED continues to flash after you have performed a POWER ON, please contact your Siemens service center. Commissioning with Startdrive Commissioning Manual, 06/2020, 6SL3097-5AA10-0BP2... -
Page 300: Control Interface Module In The Power Module Chassis Format
DC link voltage < 100 V and voltage at -X9:1/2 less than 12 V. The component is ready for operation. Flashing light There is a fault. If the LED continues to flash after you have performed a POWER ON, please contact your Siemens service center. Commissioning with Startdrive Commissioning Manual, 06/2020, 6SL3097-5AA10-0BP2... -
Page 301: Additional Modules
Diagnostics 6.1 Diagnostics using LEDs 6.1.3 Additional modules 6.1.3.1 Control Supply Module Table 6-25 Control Supply Module – description of the LEDs Color State Description, cause Remedy READY – Electronic power supply is missing or outside permissible tol‐ – erance range. Green Continu‐... -
Page 302: Smc30 Sensor Module Cabinet
The electronics power supply for the encoder system is avail‐ – ous light able. Power supply > 5 V The parameters for activating component recognition using LEDs can be taken from the following reference: Reference: SINAMICS S120/S150 List Manual Commissioning with Startdrive Commissioning Manual, 06/2020, 6SL3097-5AA10-0BP2... -
Page 303: Smc40 Sensor Module Cabinet (Only For Direct Measuring Systems)
Both options depend on the LED status when component rec‐ Red/ ognition is activated. orange The parameters for activating component recognition can be taken from the following reference: Reference: SINAMICS S120/S150 List Manual Each channel has a multifunction LED. 6.1.3.5 Communication Board Ethernet CBE20 Table 6-29... - Page 304 Diagnostics 6.1 Diagnostics using LEDs Table 6-30 Meaning of the Sync and Fault LEDs on the CBE20 Color Status Description Fault – If the link port LED is green: The CBE20 is operating normally, data is being exchanged with the configured IO Con‐ troller.
- Page 305 Diagnostics 6.1 Diagnostics using LEDs Table 6-31 Meaning of the OPT LED on the Control Unit Color Status Description, cause Remedy – Electronics power supply is missing or outside the permissible – tolerance range. CBE20 either defective or not inserted. Green Continu‐...
-
Page 306: Voltage Sensing Module Vsm10
Diagnostics 6.1 Diagnostics using LEDs 6.1.3.6 Voltage Sensing Module VSM10 Table 6-32 Meanings of the LEDs on the Voltage Sensing Module VSM10 Color Status Description, cause Remedy READY – The electronics power supply is missing or outside the permis‐ – sible tolerance range. -
Page 307: Drive-Cliq Hub Module Dmc20
Diagnostics 6.1 Diagnostics using LEDs 6.1.3.7 DRIVE-CLiQ Hub Module DMC20 Table 6-33 Description of the LEDs on the DRIVE-CLiQ Hub Module DMC20 Color Status Description, cause Remedy READY – The electronics power supply is missing or outside the permis‐ – sible tolerance range. -
Page 308: Terminal Modules
Both options depend on the LED status when component rec‐ ognition is activated. Red/ orange The parameters for activating component recognition using LEDs can be taken from the following reference: Reference: SINAMICS S120/S150 List Manual Commissioning with Startdrive Commissioning Manual, 06/2020, 6SL3097-5AA10-0BP2... -
Page 309: Terminal Module Tm31
Both options depend on the LED status when component recognition is activated. Red/ orange The parameters for activating component recognition using LEDs can be taken from the following reference: Reference: SINAMICS S120/S150 List Manual Commissioning with Startdrive Commissioning Manual, 06/2020, 6SL3097-5AA10-0BP2... -
Page 310: Terminal Module Tm41
Flashing The zero mark is output at each virtual revolution. – light The parameters for activating component recognition using LEDs can be taken from the following reference: Reference: SINAMICS S120/S150 List Manual Commissioning with Startdrive Commissioning Manual, 06/2020, 6SL3097-5AA10-0BP2... -
Page 311: Terminal Module Tm120
Both options depend on the LED status when component rec‐ red/ ognition is activated. orange The parameter for activating component recognition using LEDs can be taken from the following reference: Reference: SINAMICS S120/S150 List Manual Commissioning with Startdrive Commissioning Manual, 06/2020, 6SL3097-5AA10-0BP2... -
Page 312: Terminal Module Tm150
Diagnostics 6.1 Diagnostics using LEDs 6.1.4.5 Terminal Module TM150 Table 6-38 Meaning of the LEDs at the Terminal Module TM150 Color State Description, cause Remedy – Electronic power supply is missing or outside permissible tol‐ Check power supply erance range. Green Continu‐... -
Page 313: Diagnostics Via Startdrive
Diagnostics 6.2 Diagnostics via Startdrive Diagnostics via Startdrive 6.2.1 Device diagnostics Display of alarms and faults If the device outputs faults or alarms, or if maintenance is required, then the appropriate messages are displayed in Startdrive using various icons. The icons have different colors according to the seriousness of a fault or alarm. - Page 314 Diagnostics 6.2 Diagnostics via Startdrive The following table lists the possible icon colors and their respective meaning. Icon Meaning OK = no fault active or maintenance is required Maintenance is required Maintenance is required for a subordinate component Maintenance request Maintenance request for a subordinate component Fault/error Fault/error on a subordinate component...
- Page 315 Diagnostics 6.2 Diagnostics via Startdrive Detecting and correcting a topology error Operationally ready drive objects (DOs) are displayed with a green checkmark in online mode. Erroneous port assignments are marked in red. Figure 6-2 Example: topology error for DRIVE-CLiQ connections The following describes 3 error scenarios, which illustrate the detection and elimination of topology errors.
- Page 316 Diagnostics 6.2 Diagnostics via Startdrive 4. Check the DRIVE-CLiQ wiring on the real hardware. Insert the connection according to the target topology. 5. Acknowledge the active errors in the message view. If the actual and setpoint topology then match, the interfaces are displayed in the device view in light blue.
-
Page 317: Trace Function
Diagnostics 6.2 Diagnostics via Startdrive 6.2.2 Trace function Overview Using the trace function, you can record the variables of a S120 drive, and then subsequently evaluate them. Variables are, for example, drive parameters or system and user variables of a Control Unit. - Page 318 Diagnostics 6.2 Diagnostics via Startdrive Basic procedure The following figure shows the basic process when applying the trace function. ① The signals to be recorded, the recording time and the trigger conditions are defined in the trace configuration. ② If an online connection exists, you transfer the complete trace configuration from the PG/PC to the device.
- Page 319 Diagnostics 6.2 Diagnostics via Startdrive An unlimited number of recordings cannot be made in Startdrive for SINAMICS S120 as a result of the restricted memory capacity: • 2 traces can be recorded for each drive. • A maximum of 8 signals can be recorded for each trace recording.
-
Page 320: Creating Or Calling A Trace
Diagnostics 6.2 Diagnostics via Startdrive Note Saving a trace configuration and recording You save the trace configuration and record together with the project in Startdrive. If you close the project without saving it, then the trace configurations and the measurements transferred into the project are rejected. -
Page 321: Configuring A Trace
Diagnostics 6.2 Diagnostics via Startdrive Displaying a saved trace configuration or an appropriate curve diagram To display a saved trace configuration, proceed as follows: 1. In the project tree, double-click on the appropriate icon ( offline / online) of the trace configuration, a trace in the drive or a measurement. - Page 322 Diagnostics 6.2 Diagnostics via Startdrive Requirement • With a double-click a new trace configuration is created and selected in the project tree. Selecting and configuring signals Note Maximum number of signals You can configure a maximum of 8 signals per trace. To configure the signals to be recorded, proceed as follows: 1.
- Page 323 Diagnostics 6.2 Diagnostics via Startdrive Configuring recording conditions To configure the recording conditions for a measurement, select the desired trigger condition in the "Trigger mode" drop-down list in the 1st step. You then carry out the subsequent configuration of the recording conditions depending on the selected trigger condition as follows: Figure 6-3 Example: Configuring recording conditions...
- Page 324 Diagnostics 6.2 Diagnostics via Startdrive Trigger condition: Trigger on variable 1. Select a trigger parameter from the "Trigger variable" field. The following options are available: – Click on the icon for the trigger parameter and select a parameter. – Enter the name or the parameter number into the input field for the trigger parameter. Additional specific setting options are shown in accordance with the data type of the selected trigger variables.
-
Page 325: Transferring The Trace Configuration To The Device
Diagnostics 6.2 Diagnostics via Startdrive 4. Should you wish to set the maximum recording time, activate the option "Use max. recording duration". 5. Enter a recording cycle under "Cycle" The possible cycle settings depend on the number of signals. Trigger condition: Trigger on fault 1. -
Page 326: Activating The Trace Recording
Diagnostics 6.2 Diagnostics via Startdrive 6.2.2.4 Activating the trace recording Overview The following describes how you can activate a trace in the drive. Requirements • An online connection has been established to the drive. • A trace is saved in the drive. •... -
Page 327: Displaying The Trace Recording
Diagnostics 6.2 Diagnostics via Startdrive Procedure To end an activated trace recording in the drive, click on the icon. The trace in the drive is deactivated and the status display of the trace switches to "inactive". 6.2.2.6 Displaying the trace recording Overview The following describes how you can display the trace recording. -
Page 328: Importing And Exporting A Trace Recording
Diagnostics 6.2 Diagnostics via Startdrive Procedure To save a trace recording in the project, proceed as follows: 1. Open the trace in the drive with the recorded data (see Chapter "Creating or calling a trace (Page 318)"). 2. Ensure that the actual data from the drive are loaded by activating icon 3. -
Page 329: Transferring The Trace Configuration From The Drive To The Project
Diagnostics 6.2 Diagnostics via Startdrive 6.2.2.9 Transferring the trace configuration from the drive to the project Overview The following describes how you can transfer a trace configuration into the project. Requirements • An online connection has been established to the drive. •... -
Page 330: Online Diagnostics
Diagnostics 6.2 Diagnostics via Startdrive 1. In the project tree, select one or several trace configurations in the drive 2. Call the "Delete" shortcut menu to delete the trace configurations in the drive. A confirmation prompt opens. 3. To confirm the deletion, in the query, click on "Yes". The selected trace configuration is deleted. - Page 331 Diagnostics 6.2 Diagnostics via Startdrive ① Secondary navigation ② Screen form for online diagnostics and important basic functions Commissioning with Startdrive Commissioning Manual, 06/2020, 6SL3097-5AA10-0BP2...
-
Page 332: Diagnostics
Diagnostics 6.2 Diagnostics via Startdrive 6.2.3.1 Diagnostics The following diagnostics information on the connected drive device is provided in the diagnostics view: • General Information on module and manufacturer • Diagnostics status Information on status and standard diagnostics • PROFINET interface –... -
Page 333: Displaying Control/Status Words
Diagnostics 6.2 Diagnostics via Startdrive 6.2.4.2 Displaying control/status words Overview The control and status words are displayed in the function view in 2 adjacent lists for diagnostic purposes in the "Control/status words" screen form. Procedure To select the group of control and status words, proceed as follows: 1. -
Page 334: Fault And Alarm Messages
Diagnostics 6.3 Fault and alarm messages Fault and alarm messages Overview The errors and states detected by the individual components of the drive system are indicated by messages. The messages are categorized into faults and alarms. Note The individual faults and alarms are described in Chapter "Faults and alarms" in the SINAMICS S120/S150 List Manual. - Page 335 Diagnostics 6.3 Fault and alarm messages Properties of faults and alarms • Faults (code F01234) – Are identified by Fxxxxx. – Can lead to a fault reaction. – Must be acknowledged once the cause has been remedied. – Status via Control Unit and LED RDY. –...
-
Page 336: Buffer For Faults And Alarms
Diagnostics 6.3 Fault and alarm messages Acknowledging faults The list of faults and alarms specifies how each fault is acknowledged after the cause has been remedied. • Acknowledgement of faults by "POWER ON" – Switch the drive on/off (POWER ON) –... - Page 337 Diagnostics 6.3 Fault and alarm messages Fault buffer Faults which occur are entered in the fault buffer as follows: r0949[0] [I32] r0948[0] [ms] r2109[0] [ms] r0945[0] r3115[0] r3120[0] r3122[0] r2133[0] [Float] r2130[0] [d] r2136[0] [d] r0949[1] [I32] r0948[1] [ms] r2109[1] [ms] r0945[1] r3115[1] r3120[1]...
- Page 338 Diagnostics 6.3 Fault and alarm messages Properties of the fault buffer The fault buffer has the following characteristics: • A new fault incident encompasses one or more faults and is entered in "Current fault incident". • The entries are arranged in the buffer according to the time at which they occurred. •...
- Page 339 Diagnostics 6.3 Fault and alarm messages Alarm buffer, alarm history An alarm in the alarm buffer comprises the alarm code, the alarm value and the alarm time (received, resolved). The alarm history occupies the last indices ([8...63]) of the parameter. Figure 6-5 Structure of alarm buffer Alarms that occur are entered in the alarm buffer as follows:...
-
Page 340: Configuring Messages
Diagnostics 6.3 Fault and alarm messages Properties of the alarm buffer/alarm history The alarm buffer/alarm history has the following characteristics: • The alarms in the alarm buffer are arranged from 7 to 0 according to the time that they occurred. In the alarm history, this is from 8 to 63. •... - Page 341 Diagnostics 6.3 Fault and alarm messages = 2: IMMEDIATELY = 3: PULSE INHIBIT 19 message types per drive object can be changed. Note If BICO interconnections exist between drive objects, all interconnected objects must be configured. Example: The TM31 has BICO interconnections with drive 1 and 2 and F35207 is to be reconfigured as an alarm.
-
Page 342: Propagation Of Faults
Diagnostics 6.3 Fault and alarm messages Once an external fault (1 to 3) has been triggered on the Control Unit drive object, this fault is also present on all associated drive objects. If one of these external faults is triggered on a different drive object, it is only present on that particular drive object. -
Page 343: Alarm Classes
The new statuses act as alarms for the drive, therefore there is no immediate reaction from the drive (like for the former level "alarm"). The information regarding the alarm class for SINAMICS S120 drives is illustrated in status word ZSW2 on the bit positions bit 5/6. -
Page 344: Function Diagrams And Parameters
In the following, you will find a list of the relevant function diagrams and an overview of important parameters for messages that are output by an S120 drive. Overview of important function diagrams (see SINAMICS S120/S150 List Manual) • 8050 Diagnosis - Overview •... -
Page 345: Appendix
Appendix List of abbreviations Note The following list of abbreviations includes all abbreviations and their meanings used in the entire SINAMICS family of drives. Abbreviation Derivation of abbreviation Meaning A… Alarm Warning Alternating Current Alternating current Analog Digital Converter Analog digital converter Analog Input Analog input Active Interface Module... - Page 346 Appendix A.1 List of abbreviations Abbreviation Derivation of abbreviation Meaning Basic Line Module Basic Line Module Binector Output Binector output Basic Operator Panel Basic operator panel Abbreviation Derivation of abbreviation Meaning Capacitance Capacitance C… Safety message Controller Area Network Serial bus system Communication Board CAN Communication Board CAN Communication Board Ethernet...
- Page 347 Appendix A.1 List of abbreviations Abbreviation Derivation of abbreviation Meaning Dynamic Drive Control Dynamic Drive Control Drive Data Set Drive Data Set DHCP Dynamic Host Configuration Protocol Dynamic Host Configuration Protocol (Communica‐ tion protocol) Digital Input Digital input DI/DO Digital Input/Digital Output Digital input/output, bidirectional Deutsches Institut für Normung Deutsches Institut für Normung (German Institute...
- Page 348 Appendix A.1 List of abbreviations Abbreviation Derivation of abbreviation Meaning Electrostatic Sensitive Devices Electrostatic sensitive devices Essential Service Mode Essential service mode Extended Stop and Retract Extended stop and retract Abbreviation Derivation of abbreviation Meaning F… Fault Fault Frequently Asked Questions Frequently Asked Questions FBLOCKS Free Blocks...
- Page 349 Appendix A.1 List of abbreviations Abbreviation Derivation of abbreviation Meaning Hochlaufgeber Ramp-function generator Hydraulic Module Hydraulic Module Human Machine Interface Human Machine Interface High-Threshold Logic Logic with high interference threshold HTTP Hypertext Transfer Protocol Hypertext Transfer Protocol (communication proto‐ col) HTTP Hypertext Transfer Protocol Secure Hypertext Transfer Protocol Secure (communication...
- Page 350 Appendix A.1 List of abbreviations Abbreviation Derivation of abbreviation Meaning Kreuzweiser Datenvergleich Data cross-check Know-how protection Know-how protection Kinetische Pufferung Kinetic buffering Proportional gain KTY84-130 Temperature sensor Abbreviation Derivation of abbreviation Meaning Symbol for inductance Light Emitting Diode Light emitting diode Linearmotor Linear motor Lageregler...
- Page 351 Appendix A.1 List of abbreviations Abbreviation Derivation of abbreviation Meaning N. C. Not Connected Not connected N… No Report No report or internal message NAMUR Interessengemeinschaft Automatisierungstechnik User association of automation technology in the der Prozessindustrie process industry Normally Closed (contact) NC contact Numerical Control Numerical control...
- Page 352 Appendix A.1 List of abbreviations Abbreviation Derivation of abbreviation Meaning Protective Earth Protective ground PELV Protective Extra Low Voltage Safety extra-low voltage Probability of dangerous failure per hour Probability of dangerous failure per hour Programmiergerät Programming device Proportional Integral Proportional integral Proportional Integral Differential Proportional integral differential Programmable Logical Controller...
- Page 353 Sicherheitsgerichteter Ausgang Safety-related output Sicherheitsgerichteter Eingang Safety-related input Sicherer Halt Safe stop Safety Integrated Safety Integrated Safety Info Channel Safety Info Channel Safety Integrity Level Safety Integrity Level SITOP Siemens power supply system Commissioning with Startdrive Commissioning Manual, 06/2020, 6SL3097-5AA10-0BP2...
- Page 354 Appendix A.1 List of abbreviations Abbreviation Derivation of abbreviation Meaning Safely-Limited Acceleration Safely limited acceleration Smart Line Module Smart Line Module Safely-Limited Position Safely Limited Position Safely-Limited Speed Safely limited speed SLVC Sensorless Vector Control Sensorless vector control Sensor Module Sensor Module Sensor Module Cabinet Sensor Module Cabinet...
- Page 355 Appendix A.1 List of abbreviations Abbreviation Derivation of abbreviation Meaning TPDO Transmit Process Data Object Transmit Process Data Object Time-Sensitive Networking Time-Sensitive Networking Terre Terre Grounded three-phase line supply Transistor-Transistor-Logic Transistor-transistor logic Rate time Abbreviation Derivation of abbreviation Meaning Underwriters Laboratories Inc. Underwriters Laboratories Inc.
- Page 356 Appendix A.1 List of abbreviations Abbreviation Derivation of abbreviation Meaning No entries Abbreviation Derivation of abbreviation Meaning Zwischenkreis DC link Zero Mark Zero mark Zustandswort Status word Commissioning with Startdrive Commissioning Manual, 06/2020, 6SL3097-5AA10-0BP2...
-
Page 357: Documentation Overview
Appendix A.2 Documentation overview Documentation overview Commissioning with Startdrive Commissioning Manual, 06/2020, 6SL3097-5AA10-0BP2... -
Page 358: System Rules, Sampling Times, Drive-Cliq Wiring And Number Of Controllable Drives
There are also still dependencies and rules for the components used and the selected DRIVE-CLiQ wiring. Further information Additional information on system rules, rules for DRIVE-CLiQ wiring and the number of controllable drives is provided in the SINAMICS S120 Function Manual, Drive Functions. Commissioning with Startdrive Commissioning Manual, 06/2020, 6SL3097-5AA10-0BP2... -
Page 359: Index
Index Mechanical system, 225, 238 Sampling times/pulse frequency (servo), 217 Basic parameterization (vector) Calculating motor and controller data, 232 Bidirectional digital inputs/outputs, 200 Binector Input, 71 Output, 71 AC Power Module Brake control Inserting, 126 Advanced, 269 Close brake, 268, 275 Setting the drive object type, 125 Acknowledgment, 334 Motor holding brake, 262... - Page 360 Requirements for commissioning, 69 Activate component, 77 Sequence, 95 Deactivate component, 77 Sequence when creating drive components, 102 Diagnostics, 281 SINAMICS S120 drive, 95 Device diagnostics, 311 Specifying an infeed unit, 112 DRIVE-CLiQ wiring, 312 Component Missing enable signals, 330...
- Page 361 Index Inserting the placeholder, 110 Missing enable signals, 330 Specifying the placeholder, 112 Infeed units Enable logic Line Modules, 206 Servo, 227 Parallel connection, 114 Vector, 241 Information system Encoder Components of the information system, 61 Detailed settings, 144 Tooltip, 63 Overview, 140 Inspector window, 48 Encoder evaluation...
- Page 362 Index Smart Line Modules 16 kW and higher, 291 Motors Smart Line Modules 5 kW and 10 kW, 291 Detailed settings, 138 Terminal Module TM120, 309 Terminal Module TM15, 306 Terminal Module TM150, 310 Terminal Module TM31, 307 One Button Tuning Terminal Module TM41, 308 Parameterization, 253 Voltage Sensing Module VSM10, 304...
- Page 363 Startdrive, 35, 48, 51 Data archive, 317 BICO connection, 71 Delete configuration, 327 Binector, 71 Displaying a configuration, 318 Commissioning of a SINAMICS S120 drive, 95 Displaying the recording, 325 Commissioning workflow, 95 Exporting measurements, 326 Connector, 71 Importing measurement, 326...
- Page 364 Index Measurements on the card, 315 Overlay measurement, 57 Recording, 315 Recording conditions, 319 Save the measurement in the project, 325 Signal selection, 319 Signal table, 57 Structure of the user interface, 55 Trace configuration, 317 Transferring the configuration from the drive to the project, 327 Transferring the configuration to the drive, 323 Trace function...
- Page 366 Additional information Siemens: www.siemens.com Industry Online Support (service and support): www.siemens.com/online-support IndustryMall: www.siemens.com/industrymall Siemens AG Digital Industries Motion Control P.O. Box 3180 D-91050 Erlangen Germany Scan the QR-Code for product information...
Need help?
Do you have a question about the SINAMICS S120 and is the answer not in the manual?
Questions and answers