
Related Manuals for Xiaomi X10+


Summary of Contents for Xiaomi X10+
- Page 1 米家全能扫拖机器人使用说明书 - 英版 2022/05/30 说明书 文也 04170500000961 80g 金东太空梭哑粉纸 骑马钉 Pantone cool gray 11 C 195mm*130mm 注:此页面非印刷内容...
- Page 2 (以下訊息僅香港市場適用) 服務電話: 852-30773620 本產品售後服務請查詢官網: www.mi.com/hk/service(香港) www.mi.com لمزيد من المعلومات، الرجاء االنتقال إلى موقع Xiaomi Communications Co., Ltd. :ت م ّ التصنيع لصالح شركة ( الشاملMi )إحدى شركات نظام Dreame (Tianjin) Information Technology Co., Ltd :الجهة المصن ّعة تيانجين، الصين 300463 ,Room 2112-1-1, South District, Finance and Trade Center, No.6975 Yazhou Road, Dongjiang Bonded Port Area, Tianjin Pilot Free Trade Zone :العنوان...
- Page 3 Robot Vacuum X10+ User Manual · 1 Xiaomi 掃拖機器人 X10+ 使用說明書 · 25 Xiaomi منX10+ دليل مستخدم المكنسة الكهربائية الروبوت · 47...
- Page 5 Safety Information Read this manual carefully before use, and retain it for future reference. Usage Restrictions · This product is for floor cleaning in a home environment only. Do not use it outdoors, on non-floor surfaces, or in a commercial or industrial setting. ·...
- Page 6 · Do not use the robot vacuum in an area suspended above ground level without a protective barrier. · Do not place the robot vacuum upside down. Do not move the robot vacuum by using its LDS laser sensor cover, cover, or bumper as a handle. ·...
- Page 7 · Do not vacuum up hard or sharp objects. · The plug must be removed from the socket-outlet before cleaning or maintaining the appliance. · Do not wipe the robot vacuum or the omni station with a wet cloth or rinse them with any liquid. After cleaning washable parts, fully dry the parts before reinstalling and using them.
- Page 8 · Do not dismantle, repair, or modify the battery or the omni station on your own. · Do not place the omni station near a heat source. · Do not use a wet cloth or wet hands to wipe or clean the omni station's charging contacts. ·...
- Page 9 Laser Safety Information This product's laser radar meets the IEC 60825-1:2014 Standard for Class I laser product safety and does not produce laser radiation hazardous to the human body. EU Declaration of Conformity Hereby, Dreame (Tianjin) Information Technology Co., Ltd. declares that the radio equipment type B101GL is in compliance with Directive 2014/53/EU. The full text of the EU declaration of conformity is available at the following internet address: http://www.mi.com/global/service/support/declaration.html For detailed e-manual, please go to www.mi.com/global/service/userguide...
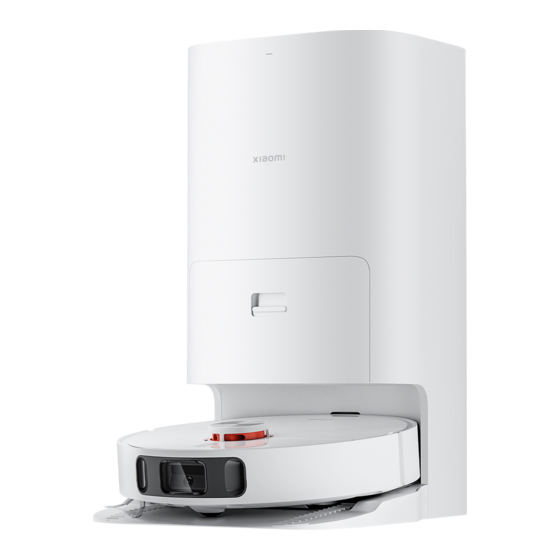
- Page 10 Product Overview Accessories Pre-installed Accessories Brush Brush Cover Dust Compartment Other Accessories Cleaning Tool Disposable Bag Side Brush (Replacement) Robot Vacuum Note: Illustrations of product, accessories, and user interface in the user manual are for reference Mop Pad × 2 Mop Pad Holder ×...
- Page 11 Robot Vacuum Power/Clean Button Power on/off: Press and hold for 3 seconds Clean: Press to start cleaning after the robot vacuum is powered on Dock Button Start docking: Press Enable/Disable child lock function: Press and hold for 3 seconds Indicator ·...
- Page 12 Robot Vacuum and Sensors Cliff Sensor Ultrasonic Sensor Omnidirectional LDS Laser Sensor Cover Side Brush Wheel Brush Cover Brush Brush Cover Clips LDS Laser Sensor Main Wheel Main Wheel Bumper AI Visual Recognition Sensor Mop Pad Holder Line Laser Sensor Mounting Hole Reset Button Cover...
- Page 13 Omni Station Indicator Cover · White: The omni station is connected to power Dirty Water Tank Clean Water Tank · Quickly blinking orange: The omni station has an error Handle Handle Dust Cabinet Dust Cabinet Release Button Dust Cabinet Cover Signaling Area Cleaning Tray Charging Contacts...
- Page 14 How to Install Omni Station Buttons Remove Protective Coverings Before using the robot vacuum, remove the protective strips from both sides. Leave Button Press to make the robot vacuum leave the omni station. Clean Button Press to make the robot vacuum clean all areas. Dry Button Press to make the omni station start or stop drying the mop pads.
- Page 15 Place the Omni Station Place the Robot Vacuum Place the omni station near an electrical outlet in an area with a good Press and hold the button on the robot vacuum for 3 seconds to turn it Wi-Fi signal. Then connect the station to power. on.
- Page 16 C4576F12 your device. * The app is referred to as Xiaomi Home app in Europe (except for Russia). The name of the app displayed on your device should be taken as the default. Notes: ·...
- Page 17 Note: Do not lift or move the robot vacuum while it is paused. Otherwise, it may have You can update the robot vacuum's firmware via the Mi Home/Xiaomi navigation errors that could prevent the robot vacuum from returning to the omni station or cause the loss of the map.
- Page 18 Vacuuming & Mopping 1. Start vacuuming and mopping 2. Automatically return to clean mop pads midway Before starting, make sure that the mop assembly is installed onto the During the cleanup, the robot vacuum will automatically return to the omni robot vacuum.
- Page 19 Care & Maintenance Parts To keep the robot vacuum in good condition, it is recommended to refer to the following table for routine maintenance. Maintenance Replacement Maintenance Replacement Part Part Frequency Frequency Frequency Frequency Cliff sensor Dust compartment Clean as required Omni station's Filter in the dust Clean every two weeks...
- Page 20 Disposable Bag 1. Press the dust cabinet release button, then tilt the dust cabinet cover 3. Install the disposable bag as illustrated and insert the handle of the downwards to open it. Remove the disposable bag from its handle, and bag into the slot.
- Page 21 Dirty Water Tank Sensors and Charging Contacts Use a soft cloth to clean all sensors and chraging contacts in the robot 1. Remove the dirty water tank, open its cover and pour out the dirty water. vacuum: · The cliff sensors and the ultrasonic sensor on the bottom of the robot vacuum ·...
- Page 22 Brush Side Brush 1. Flip the robot vacuum over and pinch the clips to remove the brush cover. 1. Flip the robot vacuum over and remove the side brush upwards to clean it. 2. Lift the brush out of the robot vacuum, then clean the brush bearings. 2.
- Page 23 Filter 3. Open the dust compartment cover, fill the dust compartment with clean water and close the dust compartment cover. Shake the dust 1. Remove the filter from the filter clip as illustrated. compartment from side to side and then pour the dirty water out of the compartment.
- Page 24 Dust Compartment Omni Station Remove the dust compartment as illustrated. Open the dust compartment Clean the charging contacts, the auto-empty vents, and the signaling cover, and empty out the contents. area of the omni station with a soft, dry cloth. Note: To prevent the filter from becoming clogged, lightly tap the dust compartment when emptying its contents.
- Page 25 Troubleshooting Issue Possible Cause and Solution The battery level is low. Fully charge the robot vacuum, and then try again. The robot vacuum does not turn on. The ambient temperature is lower than 0°C or higher than 40°C. Make sure to use the robot vacuum between 0°C and 40°C.
- Page 26 Issue Possible Cause and Solution The robot vacuum cannot be turned off when it is charging. It is recommended to move the robot vacuum from the omni station, and then press and hold the power button for three seconds to turn it off. The robot vacuum cannot turn off.
- Page 27 Issue Possible Cause and Solution Clear any obstruction within 0.5 m on the left and right sides or within 1.5 m in front of the omni station to prevent the robot vacuum from being blocked. The robot vacuum gets stuck in front of The route for returning to charge is blocked, e.g.
- Page 28 Specifications Robot Vacuum Omni Station Name Robotic Vacuum Cleaner Model JZ2202 Model B101GL Item Dimensions 423 × 340 × 568 mm Item Dimensions 350 × 350 × 97 mm Rated Input 220–240 V~ 50/60 Hz Battery 4800 mAh (Rated Capacity) Rated Output 20 V Charging Time...
- Page 29 安全須知 使用產品前請仔細閱讀本說明書, 並妥善保管。 使用限制 · 本產品僅用於家居環境的地面清潔, 請勿用於室外、 非地面、 商用或工業環境。 · 8 歲及以上兒童, 以及上述生理、 感知或智力能力不足, 或缺乏經驗和知識的人士可以在接受有關安全使用 本裝置的監督和指導, 並理解本裝置所含風險的情況下使用本裝置。 兒童不得將本裝置當作玩具使用。 兒 童不得在無人監督的情況下清潔本裝置及為其進行用戶維護。 · 請僅使用本產品隨附的全能底座來為本款掃拖機器人充電。 · 本產品的電池僅可由專業人士更換。 · 請勿讓兒童將機器人當成玩具, 主機工作時請監督兒童及寵物使其儘量遠離。 · 如果電源軟線損壞, 必須使用專用軟線或從其製造商或維修部購買專用的組件更換。 · 請勿在懸空環境且沒有防護欄的情況下使用。 · 請勿將主機倒扣放置。 請勿將 LDS 鐳射感應器保護蓋、 主機上蓋及碰撞緩衝板作為提手搬運主機。 · 請勿在高於 40℃、 低於 0℃ 或地面有任何液體及黏稠物的環境下使用。 ·...
- Page 30 · 請收起地面上放置的易碎物品及雜物, 避免主機在運作過程中碰撞, 導致家中貴重物品損壞。 · 請勿將清潔工具放置在兒童可觸摸的區域。 · 請勿將任何物體 ( 包括兒童、 寵物) 放置於靜止或運動中的主機上。 · 請勿在主機工作時, 讓人體或寵物毛髮、 手指等部位靠近機器的吸塵口。 · 請勿用於清掃任何燃燒中的物體。 · 請勿讓主機吸取堅硬或尖銳物體。 · 清潔和維護主機及全能底座前請關機, 並將電源插頭拔出。 · 請勿使用濕布擦拭或任何液體沖洗主機和全能底座; 可水洗部件日常清潔後, 請充分乾燥後再安裝使用。 · 如需運輸產品, 請確保主機處於關機狀態, 並建議使用原包裝盒包裝。 · 請依照說明書的指示使用本產品, 因不當使用導致的任何損失和傷害, 皆由用戶自行承擔。 · 本產品鐳射感應器符合 IEC 60825-1: 2014 的 1 類鐳射產品標準, 不會產生危險的鐳射輻射。 ·...
- Page 31 · 產品在50Hz和60Hz之間可以自行適配, 使用者不需要進行任何調節操作。 · 請勿私自拆解、 修理、 改裝電池或全能底座。 · 請勿將全能底座靠近熱源放置。 · 請勿用濕布或濕手擦拭或清理全能底座的充電彈片。 · 如長時間不使用本產品, 請充滿電後關閉主機並放置於陰涼乾燥處, 至少每 3 個月充電一次, 避免電池出 現過度放電情況。 · 本產品含有可充電鋰電池組, 任意丟棄會對環境造成汙染, 請在丟棄本產品前按照以下提示將電池從產品 中取出, 並作恰當的處置 : *拆除電池前請先斷電以及盡可能用完電量, 然後轉開機器下方機殼上固定螺絲後取下機殼。 *拔掉連接電池的端子後取下電池, 注意不要破壞到電池外殼以防止發生危險。 *請將取下來的電池交給專業回收機構作處理。...
- Page 32 產品介紹 配置清單 已安裝在主機上的配件: 主刷 主刷罩 塵盒 其他配件: 清潔工具 塵袋(替換裝) 邊刷 主機 提示: 說明書中的產品、 配件、 使用者介面等插圖均為示意 圖, 僅供參考。 由於產品的更新與升級, 產品實物與示意圖 拖布 × 2(已安裝) 拖布盤 × 2 電源線 全能底座 可能略有差異, 請以實物為準。 (含塵袋、 清水箱、 污水箱和清洗盤)...
- Page 33 主機 開關機/清掃 開關機: 長按 3 秒開機或關機 清掃: 開機後, 按一下以啟動清掃 回充 按一下以啟動返航充電 長按 3 秒開啟或關閉童鎖 指示燈 · 白色恆亮: 工作中或工作完成或充電完成 · 白色閃爍: 回充中/重新定位/韌體升級中/裝置待連接/Wi-Fi 連接中 · 白色呼吸: 充電中 · 橙色閃爍: 異常狀態 · 橙色常亮: Wi-Fi 未連線 提示: 在清掃或回充時, 短按主機上的任意鍵暫停。...
- Page 34 主機及感應器 防墜感應器 超聲波感應器 萬向輪 LDS 鐳射感應器保護蓋 邊刷 主刷罩 主刷 主刷罩釋放鍵 LDS 鐳射感應器 主輪 主輪 碰撞緩衝板 AI 視覺識別感應器 拖布盤安裝軸 線鐳射傳感器 重設鍵 上蓋 長按3 秒恢復原廠設定 Wi-Fi 指示燈 塵盒釋放鍵 ·恆亮: Wi-Fi 已連接 ·熄滅: Wi-Fi 未連線 塵盒 集塵出口 ·閃爍: 等待連線/正在連線 塵盒蓋卡扣 充電電極 濾網 接口 濾網卡扣...
- Page 35 全能底座 指示燈 上蓋 · 白色常亮: 電源已接通 ·橙色快閃: 全能底座異常 污水箱 清水箱 提手 提手 集塵盒 集塵盒釋放鍵 集塵盒面蓋 訊號發射區 清洗盤 充電彈片 集塵口 自動注水口 水箱卡扣 水箱卡扣 濾網 浮球 水管 浮子 污水箱 清水箱...
- Page 36 安裝 全能底座按鍵 移除防護物 使用前, 請務必移除主機兩側的防護物。 出倉鍵 短按, 主機退出全能底座 掃拖鍵 短按, 主機啟動全域清掃 烘乾鍵 短按, 全能底座執行或結束拖布烘乾 提示: 安裝邊刷和拖布組件 · 只有主機連接全能底座, 全能底座上的按鍵才會生效; 主機未連接全能底座時, 全能底座 上的按鍵則無效。 · 需要清潔維護清洗盤及全能底座時, 可讓主機退出全能底座。 將邊刷安裝到主機底部的卡扣位置並將拖布組件妥善安裝。 拖布組件 黏貼位置 邊刷卡扣 拖布盤 拖布...
- Page 37 放置全能底座 放置主機 將全能底座放置在靠近電源插座且 Wi-Fi 訊號良好的位置, 然後連接電源線。 使用前, 長按主機上的 鍵 3 秒開機。 開機後, 將主機放置在全能底座上 (主機 拖布組件需朝向全能底座清洗盤位置) , 主機會自動對接。 當聽到語音播報開始 充電後, 即主機已成功連接全能底座。 開啟電源開關 注意: 全能底座左右 0.5 米及前方 1.5 米範圍內不要放置任何物品。 提示: · 首次使用前, 建議充滿電。 如果電量因耗盡而無法開機, 可以手動連接主機與全能底座來 充電。 · 主機連接全能底座時, 不會關機。 · 首次使用建議全程跟隨主機, 協助清理可能影響主機工作的物品。 若某些區域可能卡住主 機或主機運行時會刮傷家具表面,...
- Page 38 使用 向清水箱注入清水 連接米家App 向清水箱注入清水至最高水位線。 本產品已連接米家, 可透過米家App操控, 並與其他產品互聯互通。 掃描QR Code, 下載並安裝米家App, 已安裝米 家App的用戶將直接進入裝置連接頁面。 或在 Google Play商店及Apple App Store搜尋「米家」 , 下載並安裝米家App。 打開米家 App 首頁, 在頁面右上角點擊 , 根據 App 提示方式新增裝置。 C4576F12 提示: · 本產品連線米家 App, 支援的手機系統為 Android 4.4 或 iOS 10.0 及更高版本。 · 本產品僅支援連線 2.4 GHz 頻帶的 Wi-Fi 網絡。 ·...
- Page 39 開機/關機 兒童鎖設定 長按 鍵 3 秒開機, 電源指示燈常亮, 主機進入待機狀態; 當主機未充電且暫 長按主機上的 鍵 3 秒, 兒童鎖開啟或關閉。 停時, 長按 鍵 3 秒關機。 主機連接著全能底座時, 同時長按全能底座的 鍵和 鍵 3 秒(清洗拖布和集 塵狀態下不可操作) , 兒童鎖開啟或關閉。 提示: 若主機處於充電狀態時, 會自動開機且無法關機。 提示: 兒童鎖開啟時, 全能底座和主機上的按鍵將會被鎖定。 暫停 韌體升級 主機處於運作狀態時, 短按主機上的任意鍵暫停。 可在米家App中升級主機韌體, 升級前, 請確保主機在全能底座上並且電量大 提示:...
- Page 40 掃拖功能 1. 開始運作 2. 自動中途回洗 確保主機已安裝拖布組件, 短按全能底座上的 鍵或使用App啟動或短按主機 拖地過程中, 主機將根據已清掃面積自動返回全能底座清洗拖布, 返回全能底座 上的 鍵, 主機將從全能底座出發, 根據所建立地圖規劃的最優清潔方案執行 後, 主機水箱會透過全能底座自動補水, 完成後繼續執行清潔任務。 拖地任務。 3. 自動集塵後清洗並烘乾拖布 主機完成工作並回充後, 全能底座開始自動集塵, 然後進行拖布清洗並烘乾。 提示: · 主機出發前會先進行一次清洗拖布的操作, 請耐心等候。 · 拖地過程中請勿隨意移動全能底座、 清水箱、 污水箱及清洗盤。 4. 清理污水箱 · 取下拖布組件, 主機自動切換為掃地功能; 若不取下拖布組件, 可在App上選擇掃地模 主機完成自動清潔後, 請及時清理污水箱, 以避免產生異味。 式,...
- Page 41 日常維護 部件保養 為使主機保持良好狀態, 建議參考下表進行日常維護: 部件 維護頻率 更換頻率 部件 維護頻率 更換頻率 塵盒 按需清理 防墜感應器 濾網(塵盒上) 每 2 週清洗 1 次 3-6 個月 全能底座訊號發射區 清水箱 每 2 週清洗 1 次 主機充電極片 污水箱 建議每次使用後清理一次 全能底座充電彈片 清洗盤 每 1 個月清洗 1 次 碰撞緩衝板 主刷 每...
- Page 42 塵袋 1. 按住集塵盒釋放鍵, 向下傾斜拉開集塵盒面蓋, 將塵袋提手拉出, 取出塵袋並 3. 按圖示裝入塵袋並將塵袋提手插入卡槽, 以確保妥善安裝。 丟棄。 提示: 向上拉起塵袋提手將密封塵袋, 這可有效防止灰塵或髒物撒落。 4. 關閉集塵盒, 聽到「喀噠」一聲以確保其完全封閉。 2. 用乾抹布將濾網上的灰塵或髒污擦拭乾淨。 喀噠...
- Page 43 污水箱 感應器和充電極片 1. 取出污水箱, 打開污水箱上蓋以傾倒污水。 用柔軟乾布擦拭清理主機上的各個感應器和充電極片, 包括: · 主機底部的懸崖感應器和超音波感應器。 · 主機後部的充電極片。 · 主機側邊的邊沿感應器。 · 主機頂部的 LDS 鐳射感應器 · 主機前方的碰撞緩衝板、 AI 視覺識別感應器及線雷射感應器。 AI 視覺識別感應器 線鐳射傳感器 LDS 鐳射感應器 2. 用清水充分清洗乾淨並放回全能底座。 邊沿感應器 碰撞緩衝板 充電電極 防墜感應器 超聲波感應器 提示: 污水箱中浮球為活動零件, 清洗時不要用力過大, 以免影響浮球功能。...
- Page 44 主刷 邊刷 1. 將主機底部朝上, 按下主刷罩釋放鍵以取下主刷罩。 1. 翻轉主機, 向上拔出邊刷並清理。 2. 向上取出主刷並清理主刷軸承。 2. 將邊刷安裝回主機。 3. 用配套的清潔工具割斷主刷上纏繞的毛髮, 並清掉雜物。 4. 裝回主刷和主刷罩並卡牢。 提示: 每 6-12 個月更換主刷一次, 以確保清掃效果。 主刷罩 釋放鍵 主刷 主刷軸承 提示: 每 3-6 個月更換邊刷一次, 以確保清掃效果。 萬向輪 1. 翻轉機器, 向上拔出萬向輪。 2. 清理輪體和輪軸上的毛髮和汙物。 3. 重新裝回萬向輪並壓緊。 輪體 輪軸...
- Page 45 濾網 3. 打開塵盒蓋, 向塵盒中注入清水後關閉塵盒蓋, 左右搖晃塵盒, 倒出髒水。 1. 從塵盒箭頭位置打開濾網卡扣並取下濾網。 注意: 請用清水清洗, 不要添加任何清潔劑。 2. 沖洗並輕輕拍打濾網邊框, 將污垢輕敲出來, 直到乾淨為止。 4. 晾曬塵盒及濾網, 等到乾透後方可裝回使用。 提示: 請不要用刷子、 手指等清理濾網。 提示: 請務必晾乾後再使用。...
- Page 46 塵盒 全能底座 按圖示取出塵盒, 打開塵盒蓋並倒出垃圾。 用柔軟乾布擦拭全能底座的充電彈片、 集塵口及訊號發射區。 提示: 為免濾網堵塞, 請在倒垃圾時輕敲塵盒。 拖布 從拖布盤上取下拖布以進行更換。 電池 主機內置高性能鋰離子電池組, 為維持電池性能, 日常使用時, 請將主機保持充 電狀態。 提示: 若長時間不使用, 請充滿電後關機存放, 至少每三個月充電一次, 避免電池因過度放電 而受損。...
- Page 47 常見問題 問題類型 解決辦法 電池電量不足, 請先充電後再使用。 無法開機 環境溫度不可低於 0℃ 或高於 40℃, 請在 0℃ 至 40℃ 環境下使用。 全能底座未通電, 請確認全能底座電源線兩頭是否都已插好。 無法充電 接觸不良, 請清理全能底座的充電彈片與主機充電極片。 請檢查主機接口是否有異物。 如有, 請清理乾淨。 Wi-Fi 密碼不正確, 請輸入正確的 Wi-Fi 密碼。 請切換到 2.4 GHz 網絡進行連線, 暫不支援 5 GHz 網絡和企業路由器。 連線失敗 請保持主機在 Wi-Fi 的訊號強度較好的範圍內。 主機可能未進入待配置狀態。...
- Page 48 問題類型 解決辦法 主機需在非充電狀態下才能關機, 建議將主機搬離全能底座, 長按開關機鍵 3 秒即可關機。 主機無法關機 返回上一步。 如仍無法關機, 請再長按開關機鍵 15 秒強制關機。 如仍未能解決問題, 請聯絡售後客戶服務人員。 主機由電量不足到充至滿電, 正常需時約 6.5 小時。 充電速度緩慢 若在高溫或低溫環境下使用, 機器人會自動降低充電速度以延長電池使用壽命。 充電接觸區域可能有髒污, 請用乾布擦拭此區域。 塵盒已滿, 請傾倒塵盒。 主刷和塵盒中捲入硬物, 請查看確認後清理。 工作時運作聲音大 邊刷、 主刷被異物纏繞, 請查看確認後清理。 主機吸力擋位可適當調低至標準或安靜擋位。 地面擺放的電線、 拖鞋等物體影響主機的正常工作, 建議使用前放置整齊。 工作時行走路線混亂 在濕滑地面工作, 造成主輪打滑, 建議手動擦乾或風乾後使用。 請用乾淨軟布擦拭主機的線雷射感應器和...
- Page 49 問題類型 解決辦法 為防阻擋, 請查看全能底座兩側或前後是否留有足夠空間(左右 0.5 米, 前方 1.5 米) 。 主機在全能底座前卡住, 導致無法返回 回充路線被阻斷, 如房門關閉。 全能底座 可能打滑, 建議查看全能底座前方是否有積水。 如有, 建議擦乾後再試。 建議將全能底座換個位置放置後再試。 請確認房門都已完全打開。 部分房間漏掃 此產品無法翻越較高門檻或台階, 請確認房間門口是否有高於 2 厘米的門檻。 房間門口較為濕滑, 導致主機打滑並工作異常, 建議手動清理地面積水。 清掃中途電量不足而返航充電, 但未繼 請確認主機未處於勿擾模式下, 該模式下不會繼續清掃。 續清掃 手動回充(包括手動將主機放回全能底座或手動透過App主機觸發回充任務)後, 將不會繼續清掃。 請取下清洗盤, 檢查污水排水口是否堵塞。 如有, 請清理。 清洗盤水位異常...
- Page 50 基本參數 主機 全能底座 產品名稱 智能吸塵器 產品型號 JZ2202 產品型號 B101GL 產品尺寸 423 × 340 × 568 mm 產品尺寸 350 × 350 × 97 mm 額定輸入 220–240 V~ 50/60 Hz 電池容量 4800 mAh(額定容量) 額定輸出 20 V 充電時間 約 6.5 小時 功率(集塵狀態) 1000 W 功率(清洗狀態)...
- Page 51 معلومات السالمة . ً اقرأ هذا الدليل بعناية قبل االستخدام واحتفظ به للرجوع إليه مستقبال قيود االستخدام هذا المنتج مخصص لتنظيف األرضيات يف بيئة منزلية فقط. ال تستخدمه يف الخارج أو على األسطح غير األرضية أو يف بيئة تجارية أو .صناعية...
- Page 52 ال تقم بتركيب المكنسة الكهربائية الروبوت هذه أو شحنها أو استخدامها يف الفسحات الخارجية أو يف الحمامات أو بالقرب من حمام .السباحة .قد يكون هناك خطر إذا مر الجهاز فوق سلك إمداد الطاقة .قم بإزالة العناصر الهشة أو الصغيرة من األرض لمنع المكنسة الكهربائية الروبوت من االصطدام بها وتحطيمها .اجعل...
- Page 53 .JZ2202 المحطة الشاملة من الطراز 60ال يلزم اتخاذ أي إجراء من المستخدمين لتحويل المحطة الشاملة بين 05 و06 هرتز، ويمكن للمنتج تكييف نفسه لكل ٍّ من 05 و .هرتز .ال تفك ّ ك البطارية أو المحطة الشاملة أو تصلحها، أو تعدلها بنفسك .ال...
- Page 54 نظرة عامة حول المنتج الملحقات الملحقات المركبة مسب ق ً ا الفرشاة الرئيسية غطاء الفرشاة سلة الغبار الملحقات األخرى أداة التنظيف كيس لالستعمال مرة واحدة الفرشاة الجانبية ()ملحق بديل المكنسة الكهربائية الروبوت مالحظة: الرسوم التوضيحية للمنتج والملحقات وواجهة المستخدم يف 2 ×...
- Page 55 المكنسة الكهربائية الروبوت زر التشغيل/التنظيف ٍ التشغيل/اإليقاف: اضغط مع االستمرار لمدة 3 ثوا ن التنظيف: اضغط لبدء التنظيف بعد تشغيل المكنسة الكهربائية الروبوت زر القاعدة بدء القاعدة: اضغط تمكين/ تعطيل وظيفة القفل ضد عبث األطفال: اضغط مع االستمرار ٍ لمدة 3 ثوان مؤشر...
- Page 56 المكنسة الكهربائية الروبوت والمستشعرات مستشعر المنحدرات المستشعر فوق الصوتي LDS غطاء مستشعر الليزر عجلة لجميع االتجاهات الفرشاة الجانبية غطاء الفرشاة LDS مستشعر ليزر الفرشاة الرئيسية مشابك غطاء الفرشاة المصد العجلة الرئيسية العجلة الرئيسية مستشعر التعرف البصري باستخدام الذكاء االصطناعي مستشعر خط الليزر فتحة...
- Page 57 المحطة الشاملة غطاء مؤشر خزان المياه النظيفة خزان الماء المتسخ أبيض: المحطة الشاملة متصلة بالطاقة وميض سريع باللون البرتقالي: حدث خطأ المقبض المقبض يف المحطة الشاملة خزانة الغبار زر تحرير خزانة الغبار صينية التنظيف غطاء خزانة الغبار منطقة اإلشارة موصالت الشحن فتحة...
- Page 58 طريقة التركيب إزالة األغطية الواقية أزرار المحطة الشاملة .قبل استخدام المكنسة الكهربائية الروبوت، قم بإزالة الشرائط الواقية من كال جانبيها زر المغادرة .اضغط عليه لتمكين المكنسة الكهربائية الروبوت من مغادرة المحطة الشاملة زر التنظيف .اضغط عليه لتمكين المكنسة الكهربائية الروبوت من تنظف جميع المناطق زر...
- Page 59 وضع المكنسة الكهربائية الروبوت وضع المحطة الشاملة جيدة. ثم قم بتوصيلWi-Fi ضع المحطة الشاملة بالقرب من مقبس كهربائي يف منطقة بها إشارة على المكنسة الكهربائية الروبوت لمدة 3 ثوا ن ٍ لتشغيلها. ضع اضغط مع االستمرار على الزر .المحطة بالطاقة المكنسة...
- Page 60 Mi Home/Xiaomi Home االتصال بتطبيق .امأل خزان المياه النظيفة بمياه نظيفة حتى الوصول إلى عالمة الحد األقصى للمياه /Mi Home *. استخدم تطبيقMi Home/Xiaomi Home يعمل هذا المنتج من خالل تطبيق . للتحكم يف جهازك، وللتفاعل مع أجهزة المنزل الذكية األخرىXiaomi Home ...
- Page 61 مالحظة: ال ترفع أو تحرك المكنسة الكهربائية الروبوت أثناء إيقافها مؤقت ًا. خالف ذلك، قد تتعرض ألخطاء يف التنقل قد Mi Home/Xiaomi يمكنك تحديث البرنامج الثابت للمكنسة الكهربائية الروبوت عبر تطبيق .تمنع المكنسة الكهربائية الروبوت من العودة إلى المحطة الشاملة أو تتسبب يف فقدان الخريطة...
- Page 62 الكنس والمسح 2. العودة تلقائي ً ا لتنظيف لوحات الممسحة يف منتصف المسافة 1. بدء الكنس والمسح أثناء التنظيف، ستعود المكنسة الكهربائية الروبوت تلقائي ً ا إلى المحطة الشاملة لغسل لوحات قبل البدء، تأكد من تركيب مجموعة الممسحة على المكنسة الكهربائية الروبوت. اضغط على الممسحة...
- Page 63 العناية والصيانة القطع .للحفاظ على المكنسة الكهربائية الروبوت يف حالة جيدة، ي ُ ستحسن الرجوع إلى الجدول التالي للصيانة الروتينية تكرار االستبدال تكرار الصيان الجزء تكرار االستبدال تكرار الصيانة الجزء مستشعر المنحدرات تنظيف حسب الحاجة سلة الغبار منطقة إشارة المحطة الشاملة 3–6 أشهر...
- Page 64 كيس لالستعمال مرة واحدة 3. قم بتركيب الكيس المخصص لالستعمال مرة واحدة كما هو موضح وأدخل مقبض الكيس يف 1. اضغط على زر تحرير غرفة الغبار، ثم قم بإمالة غطاء غرفة الغبار ألسفل لفتحه. أخرج الكيس .الفتحة. تأكد من تثبيت الكيس بإحكام يف مكانه .المخصص...
- Page 65 المستشعرات ونقاط اتصال الشحن خزان الماء المتسخ استخدم قطعة قماش ناعمة لتنظيف المستشعرات ونقاط اتصال الشحن يف المكنسة الكهربائية .1. أزل خزان المياه المتسخة، وافتح غطاءه واسكب المياه المتسخة :الروبوت، بما يف ذلك · توجد مستشعرات المنحدرات والمستشعر بالموجات فوق الصوتية يف أسفل المكنسة الكهربائية .الروبوت...
- Page 66 الفرشاة الجانبية الفرشاة الرئيسية .1. قم بقلب المكنسة الكهربائية الروبوت وإزالة الفرشاة الجانبية ألعلى لتنظيفها .1. اقلب المكنسة الكهربائية الروبوت واضغط على المشابك لخلع غطاء الفرشاة .2. إعادة تثبيت الفرشاة الجانبية يف المكنسة الكهربائية الروبوت .2. ارفع الفرشاة خارج المكنسة الكهربائية الروبوت، ثم قم بتنظيف محامل الفرشاة 3.
- Page 67 3. افتح غطاء حجرة الغبار وامأل حجرة الغبار بماء نظيف وأغلق غطاء حجرة الغبار. ه ز ّ حجرة الغبار الفلتر .من جانب إلى آخر ثم صب ّ الماء المتسخ خارج الحجرة .1. أزل الفلتر من مشبك الفلتر كما هو موضح .تنبيه: ال...
- Page 68 المحطة الشاملة سلة الغبار ن ظ ِّ ف موصالت الشحن، وفتحات التفريغ التلقائي، ومنطقة اإلشارة الخاصة بالمحطة الشاملة بقطعة .أز ِ ل حجرة الغبار كما هو موضح. افتح غطاء حجيرة الغبار وأفرغ المحتويات .قماش ناعمة وجافة .مالحظة: لمنع انسداد الفلتر، انقر برفق على حجرة الغبار عند تفريغ محتوياتها لوحة...
- Page 69 استكشاف األخطاء وإصالحها السبب المحتمل والحل المشكلة .مستوى البطارية منخفض. اشحن المكنسة الكهربائية الروبوت بالكامل ثم حاول مجد د ً ا درجة الحرارة المحيطة أقل من 0 درجة مئوية أو أعلى من 04 درجة مئوية. تأكد من استخدام المكنسة الكهربائية الروبوت يف دراجة .المكنسة...
- Page 70 السبب المحتمل والحل المشكلة ال يمكن إيقاف المكنسة الكهربائية الروبوت عند شحنها. يوصى بنقل المكنسة الكهربائية الروبوت من المحطة الشاملة، ثم الضغط مع االستمرار .على زر الطاقة لمدة ثالث ثوا ن ٍ إليقاف تشغيلها .ال يمكن إيقاف تشغيل المكنسة الكهربائية الروبوت إذا...
- Page 71 السبب المحتمل والحل المشكلة أزل أي عائق يف نطاق 5.0 متر على الجانبين األيسر واأليمن أو يف نطاق 5.1 متر أمام المحطة الشاملة لمنع تعطيل المكنسة الكهربائية .الروبوت .طريق العودة إلى الشحن محجوب، على سبيل المثال الباب مغلق تعلق المكنسة الكهربائية الروبوت أمام المحطة الشاملة وال قد...
- Page 72 المواصفات المحطة الشاملة المكنسة الكهربائية الروبوت JZ2202 ممسحة ومكنسة كهربائية روبوت االسم الطراز B101GL الطراز 324 × 043 × 865 ملم أبعاد المنتج 053 × 053 × 79 ملم أبعاد المنتج 022–042 فولت ~ 05/06 هرتز اإلدخال المقدر (0084 مللي أمبير/ساعة )السعة المقدرة البطارية...
Need help?
Do you have a question about the X10+ and is the answer not in the manual?
Questions and answers