Xiaomi Mi Robot Vacuum-Mop Essential Manual
- Manual (21 pages) ,
- Quick start manual (21 pages)
Advertisement
Safety information
Usage Restrictions
- This appliance can be used by children aged from 8 years and above and persons with reduced physical, sensory or mental capabilities or lack of experience and knowledge if they have been given supervision or instruction concerning use of the appliance in a safe way and understand the hazards involved. Children shall not play with the appliance. Cleaning and user maintenance shall not be made by children without supervision.
- The appliance is only to be used with the < BLJ24W200120P-V> power supply unit provided with the appliance.
- This appliance contains ba eries that are only replaceable by skilled persons.
- Make sure the vacuum-mop is turned off and the charging dock is unplugged before cleaning or performing maintenance.
- This vacuum-mop is only intended to clean floors in a home environment. Do not use it outdoors such as on an open balcony or on a surface that is not a floor, like a sofa, or in a commercial or industrial se ing.
- Do not use the vacuum-mop in an area suspended above ground level, such as a loft, open balcony, or on top of furniture, unless a protective barrier is present.
- Do not use the vacuum-mop at an ambient temperature above 40°C or below 0°C or on a floor with liquids or sticky substances Charging Temperature: 0°C to 35°C.
- Please prepare the room before use, and give instructions for continuous care of the host.
- Remove any cables from the floor before using the vacuum-mop to prevent it from dragging them while cleaning.
- Remove any fragile or loose items from the floor, such as vases or plastic bags, to prevent the vacuum-mop from being obstructed or bumping into them and causing damage.
- Do not place children, pets, or any item on top of the vacuum-mop while it is stationary or moving.
- Do not use the vacuum-mop to clean dark-colored carpet as dark carpets may not be able to be cleaned properly.
- Do not allow the vacuum-mop to pick up hard or sharp objects such as building materials, glass, or nails.
- Do not spray any liquid into the vacuum-mop. Make sure the dust compartment is thoroughly dry before reinstalling.
- Do not place the vacuum-mop upside down.
- Please keep the main brush cleaning tools out of reach of children.
- Keep hair, loose clothing, fingers, and all parts of body away from openings and moving parts.
- Do not use the vacuum-mop to clean any burning substances.
- Under normal use of condition, this equipment should be kept a separation distance of at least 20cm between the antenna and the body of the user.
- Only use this product as directed in the user manual or quick start guide. Users are responsible for any loss or damage arising from improper use of this product.
Battery and Charging
- Do not use any third-party battery, power adapter, or charging dock.
- Do not wipe any part of the vacuum-mop with a wet cloth or other liquid.
- Do not dismantle, repair, or modify the ba ery or charging dock on your own.
- Do not place the charging dock near a heat source, such as a radiator.
- Do not improperly dispose of old batteries. Before discarding the vacuum-mop, make sure the vacuum-mop is unplugged and the battery is removed and disposed of in an environmentally safe manner.
- Make sure the vacuum-mop is turned off when being transported and kept in its original packaging if possible.
- If the vacuum-mop will not be used for an extended period, fully charge it, then turn it off and store it in a cool, dry place.
- Recharge the vacuum-mop at least once a month to prevent battery damage.
Hereby, Xiaomi Communications Co., Ltd. declares that the radio equipment type Mi Robot Vacuum-Mop Essential MJSTG1 is in compliance with Directive 2014/53/EU. The full text of the EU declaration of conformity is available at the following internet address: http://www.mi.com/global/service/support/declaration.html For detailed e-manual, please go to www.mi.com/global/service/userguide
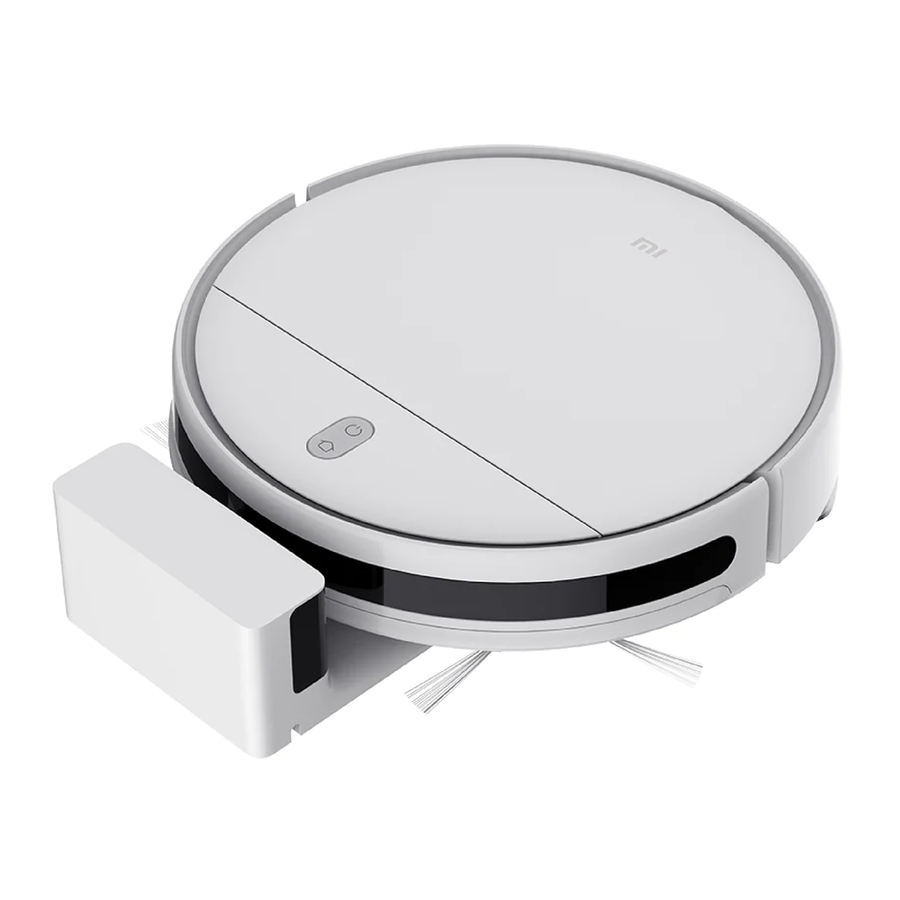
Product Overview

 Dock
Dock
Press to send vacuum-mop back to charging dock.
Press again to pause.
Press and hold for 5 seconds. After hearing a voice message, press and hold for 5 more seconds to restore factory settings.
 Power/Cleanup Button
Press and hold for 3 seconds to turn the vacuum-mop on or off when the vacuum-mop is not charging. Press to start or pause cleaning.
 Simultaneously press and hold both buttons for 3 seconds to reset Wi-Fi.
 Status Indicator
Blinking orange: Error/Returning to dock to charge when running low battery
Slowly blinking orange: Charging (the battery level is low)
Slowly blinking white: Charging (the battery level is more than 20%).
Blinking white: Returning to dock to charge/Paused
White: Cleaning/Fully charged.


Connect with Mi Home/Xiaomi Home App
This product works with Mi Home/Xiaomi Home app*. Control your device with Mi Home/Xiaomi Home app.

Scan the QR code to download and install the app. You will be directed to the connection setup page if the app is installed already. Or search "Mi Home/Xiaomi Home" in the app store to download and install it.


Open Mi Home/Xiaomi Home app, tap "+" on the upper right, and then follow prompts to add your device.
* The app is referred to as Xiaomi Home app in Europe (except for Russia). The name of the app displayed on your device should be taken as the default.
Note: The version of the app might have been updated, please follow the instructions based on the current app version.
Resetting Wi-Fi Connection
When switching to a new router or changing your Wi-Fi password, you will need to reset the vacuum-mop's Wi-Fi connection. To do so, turn on the vacuum-mop, then simultaneously press and hold the buttons "+" and "" "" for 3 seconds until you hear a voice saying "Resetting the Wi-Fi connection and entering network configuration mode". Once the Wi-Fi connection is reset, follow the in-app prompts to add the device.
Note: Only 2.4 GHz Wi-Fi networks are supported.
Restoring Factory Settings
Press and hold the Dock button "![]() " for 5 seconds. Upon hearing a voice message, press and hold the Dock button again for 5 more seconds. Separate voice prompts will indicate when the reset begins and after it is completed. Restoring factory settings will clear all user data.
" for 5 seconds. Upon hearing a voice message, press and hold the Dock button again for 5 more seconds. Separate voice prompts will indicate when the reset begins and after it is completed. Restoring factory settings will clear all user data.
How To Use
- Before use
Remove the protective foam strips from both sides, and peel the protective film off the collision sensor.

- Connect to the power supply
Open the bottom cover of the charging dock. Connect the power cord, and wrap any excess cord around the spool on the bottom of the dock, then remove the protective film from the IR sensor.

- Place the charging dock on the level ground against a wall.
![]()


- Turn on and charge the vacuum-mop. Press and hold the button
![]() for 3 seconds on the vacuum-mop. When the indicator lights up, manually place the vacuum-mop onto the charging dock to charge.
for 3 seconds on the vacuum-mop. When the indicator lights up, manually place the vacuum-mop onto the charging dock to charge.
![]()

Vacuuming Mode
Turn on the vacuum-mop. It is now ready to start cleaning.

Vacuuming & Mopping Mode
- Open the lid and fill up the tank, then reattach the lid. Insert the 2-in-1 dust compartment with water tank into the vacuum-mop.
![]()
- Slide the assembled mop pad holder into the bottom of thevacuum-mop levelly in the direction shown.
![]()
- Turn on the vacuum-mop. It is now ready to start vacuuming and mopping.
Note: If the mop pad holder is not installed, only vacuuming mode will be used.
![]()


 Precautions:
- Do not place the charging dock in an area with direct sunlight.
- Make sure there are 0.5 meters or more of open space on either side of the charging dock and more than 1.5 meters in front.
- If the vacuum-mop is unable to turn on due to low battery, place it directly onto the charging dock to recharge.
- The vacuum-mop will automatically turn on when it is on the charging dock.
- The vacuum-mop cannot be turned off when it is on the charging dock.
- Remove the mop pad holder when the vacuum-mop is charging or not in use.
- Regularly clean the 2-in-1 dust compartment with water tank to prevent dirt buildup. This will help the vacuum-mop maintain optimal performance.
- It is strictly forbidden to use hot water or detergent to clean the 2-in-1 dust compartment with water tank and the filter.
- Otherwise, they may get deformed.
- To prevent water from getting in the fan, the 2-in-1 dust compartment with water tank and the filter must dry completely before reinstalling into the vacuum-mop.
- Tidy up any loose cables on the floor before cleaning to prevent the vacuum-mop from dragging or getting caught on them.
Turning On/Off
Press and hold the button "" for 3 seconds to turn on the vacuum-mop. The indicator will turn white and you will hear a voice message indicating that the vacuum-mop is in standby mode.
To turn off the vacuum-mop, press and hold the button "" while it is stationary. A voice message will indicate that the vacuum-mop is turning off.
Note: The vacuum-mop cannot be turned off while charging. If the vacuum-mop is unable to turn on due to low battery, manually place the vacuum-mop onto the charging dock to recharge.
Starting/Pausing Cleanup
Turn on the vacuum-mop, then press the button "" to start cleanup.
To pause cleanup while the vacuum-mop is working, press the button "".
Note: The vacuum-mop cannot be used to clean up liquids. If the vacuum-mop is low on battery and cannot start cleaning, recharge it to a sufficient level before cleaning. If the vacuum-mop starts to run low on battery during a cleaning task, it will automatically return to the charging dock. Once its battery level is sufficient, the vacuum-mop will automatically resume cleaning where it left off. Before cleaning, tidy up any loose cables on the floor (including the charging dock power cord) to prevent the vacuum from dragging or getting caught on them, which could accidentally shut off electrical appliances or cause damage to objects or cables.
Starting/Pausing Docking
Auto mode: The vacuum-mop will automatically return to the charging dock after it finishes cleaning.
Manual mode: Press the button "" to manually send the vacuum-mop to the charging dock.
When returning to the charging dock, the vacuum-mop's indicator blinks white, or blinks orange if the vacuum-mop runs low battery.
The indicator slowly blinks white while charging, and stays white when fully charged.
Note: If the vacuum-mop is unable to return to the charging dock due to an error, make sure there are no obstacles around the charging dock, then manually place the vacuum-mop onto the dock to recharge.
Cleanup Modes
Upon cleaning up all, the vacuum-mop will methodically clean in the S-shape pattern and generate a real-time map in the Mi Home/ Xiaomi Home app.
Note: Avoid moving the vacuum-mop while it is working, as this may cause the vacuum-mop to lose its position and remap its surroundings, which will reduce the vacuum-mop's cleaning efficiency.
- Edge Cleanup
Enable the edge cleanup mode in the app. The vacuum-mop will clean along edges and walls for 30 minutes, then return to the charging dock. - Spot Cleanup
You can use the app to tell the vacuum-mop to clean a specific area on the map. Upon tapping Spot cleanup, the vacuum-mop will automatically navigate there and clean a 1×1 m area. - Scheduled Cleanup
You can schedule cleaning times in the app. The vacuum-mop will automatically start cleaning at the scheduled times, then return to the charging dock after the cleanup is completed.
Adjusting Suction Power
Four suction modes are available in the app: Silent, Standard, Medium, and Turbo. The default mode is Standard.
Adjusting Water Output
You can use the app to adjust the amount of water the vacuum-mop uses when mopping. Three water output modes are available: Low (1), Medium (2), and High (3). The default mode is Medium (2).
Care & Maintenance
Recommended Cleaning & Part Replacement Schedule
| Component | Cleaning Frequency | Recommended Replacement Cycle |
| 2-in-1 Dust Compartment with Water Tank | After each use | Replace if worn or damaged |
| Filter | Once a week | Every 6 months (or every 150 working hours) |
| Brush | Once a week | Every 6 to 12 months (or every 300 working hours) |
| Side Brush | Once a month | Every 3 to 6 months (or every 150 working hours) |
| Cleaning Brush | After each use | Replace if worn or damaged |
| Brush Cover | Once a month | Replace if the brush cover's silicone rubber strip becomes noticeably worn |
| Cliff Sensors | Once a month | No replacement necessary |
| Charging Contacts | Once a month | No replacement necessary |
| Caster Wheel | Once a month | Replace if worn or damaged |
| Mop Assembly | After each use | Replace if worn or damaged |
| Mop Pad | After each use | Every 3 to 6 months (or upon noticeable wear) |
Note: Turn off the vacuum-mop and disconnect it from the power supply before performing cleaning or maintenance.
Actual part replacement cycle may vary depending on usage conditions.
Cleaning the 2-in-1 Dust Compartment with Water Tank
- Open the cover of the vacuum-mop, then pinch theclips on both sides of the 2-in-1 dust compartment with water tank, as shown in the figure.
![]()
- Take out the filter assembly, then remove the filter andsponge filter to clean them.
![]()
- Empty the contents of the dust compartment. Clean thecompartment using the cleaning brush, then align and reinstall the filter.
![]()
- Reinstall the 2-in-1 dust compartment with water tank intothe vacuum-mop until it clicks into place, then close the cover of the vacuum-mop.
![]()


Cleaning the brush
- Flip the vacuum-mop over and pinch the clips to remove the brush cover.
- Remove the brush and brush bearings.
- Reinstall the brush, then put the cover back on and press down until it locks into place.
![]()

Note: For best cleaning results, it is recommended to replace the brush every 6–12 months.
Cleaning the Cliff Sensors
It is recommended to clean the cliff sensors every three months by using a soft cloth.

Cleaning the Side Brush
Use a screwdriver to remove the screws holding the side brush in place. Clean the side brush, then reinstall it. For best cleaning results, it is recommended to replace the side brush every 3–6 months.

Cleaning the Mop Pad
- Pinch the side clips of the mop pad holder and pull to remove it, as shown in the figure.
![]()
- Peel the mop pad away from the velcro on the mop pad holder, then slide it out of the groove as illustrated. Clean the mop pad with water, then reinstall it after it is thoroughly dry. It is recommended to replace the mop pad every 3 to 6 months, or when the pad becomes noticeably worn.
![]()


FAQ / Troubleshooting
| Error 01: Left wheel error | There is too much load on the left wheel or it cannot turn. Check whether the left wheel is stuck. |
| Error 02: Right wheel error | There is too much load on the right wheel or it cannot turn. Check whether the right wheel is stuck. |
| Error 03: Cliff sensor error | The cliff sensor is not functioning properly. Check whether the sensor is dirty or obstructed. |
| Error 04: Low battery | Vacuum-mop runs at low battery level. Place the vacuum-mop onto the charging dock to recharge. |
| Error 05: Bumper error | The bumper is not functioning properly and may be jammed. Check to make sure the bumper is not stuck. |
| Error 06: Brush error | There is too much load on the brush or it cannot turn. Check whether the brush is stuck. |
| Error 07: Side brush error | There is too much load on the side brush or it cannot turn. Check whether the side brush is stuck. |
| Error 08: Fan error | The fan cannot rotate or is drawing excessive current. Try restarting the vacuum-mop. If the error persists, please contact a ersales service. |
| Error 09: Dust Compartment/ Water Tank | 2-in-1 dust compartment with water tank is not detected. Check whether it is installed correctly. |
| Error 10: Charging error | Make sure the vacuum-mop is well connected to the charging dock. |
| Error 11: Insufficient water | The water tank has insufficient water. Refill the water tank. |
| Error 12: Vacuum-mop is off the ground | Move the vacuum-mop to a level surface and start again. |
Specifications
Vacuum-Mop | |
| Name | Mi Robot Vacuum-Mop Essential |
| Model | MJSTG1 |
| Wireless Connectivity | Wi-Fi IEEE 802.11 b/g/n 2.4 GHz |
| Operation Frequency | 2412-2472 MHz |
| Maximum Output Power | 20 dBm |
| Rated Voltage | 14.4 V |
| Ba ery Runtime | Approx. 90 min (Standard Mode) |
| Rated Power | 25 W |
| Ba ery Capacity | 2500 mAh |
| Charging Time | 4-5 h |
| Rated Input Voltage | 20 V |
| Rated Input Current | 1.2 A |
| Service Life | 1,000 hours of continuous operation |
Power Adapter | ||
| Information Published | Value and Precision | Unit |
| Manufacturer | Zhongshan Baolijin Electronic Co., Ltd. | - |
| Model Identifier | BLJ24W200120P-V | - |
| Input Voltage | 100 - 240 | V ~ |
| Input AC Frequency | 50/60 | Hz |
| Output Voltage | 20.0 | V |
| Output Current | 1.2 | A |
| Output Power | 24.0 | W |
| Average Active Efficiency | 86.2 | % |
| Efficiency at Low Load (10%) | 80.1 | % |
| No-load Power Consumption | 0.10 | W |
Charging Dock | |
| Model | G1 |
| Rated Input Voltage | 20 V |
| Rated Input Current | 1.2 A |
| Rated Output Voltage | 20 V |
| Rated Output Current | 1.2 A |
WEEE Information
![]() All products bearing this symbol are waste electrical and electronic equipment (WEEE as in directive 2012/19/EU) which should not be mixed with unsorted household waste. Instead, you should protect human health and the environment by handing over your waste equipment to a designated collection point for the recycling of waste electrical and electronic equipment, appointed by the government or local authorities. Correct disposal and recycling will help prevent potential negative consequences to the environment and human health. Please contact the installer or local authorities for more information about the location as well as terms and conditions of such collection points.
All products bearing this symbol are waste electrical and electronic equipment (WEEE as in directive 2012/19/EU) which should not be mixed with unsorted household waste. Instead, you should protect human health and the environment by handing over your waste equipment to a designated collection point for the recycling of waste electrical and electronic equipment, appointed by the government or local authorities. Correct disposal and recycling will help prevent potential negative consequences to the environment and human health. Please contact the installer or local authorities for more information about the location as well as terms and conditions of such collection points.

Documents / Resources
References
Download manual
Here you can download full pdf version of manual, it may contain additional safety instructions, warranty information, FCC rules, etc.
Advertisement


Need help?
Do you have a question about the Mi Robot Vacuum-Mop Essential and is the answer not in the manual?
Questions and answers