
Related Manuals for POLMAR DB-4


Summary of Contents for POLMAR DB-4
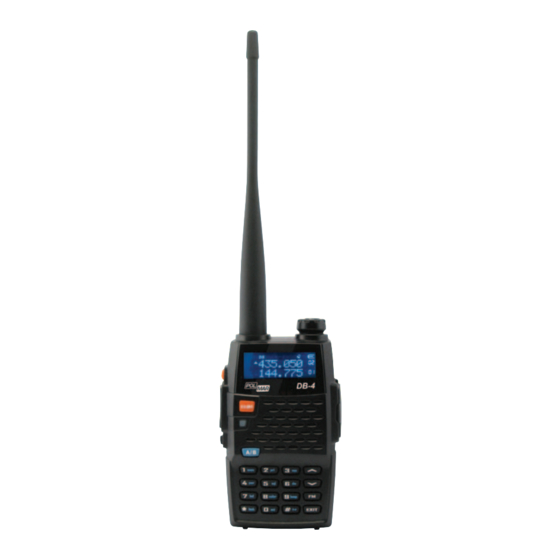
- Page 1 RICETRASMETTITORE DUAL BAND DUAL BAND TRANSCEIVER Manuale d’uso User’s manual Importato e distribuito da Polmar srl...
- Page 2 Attuale nella progettazione e pratico nell’uso, ha una funzionalità stabile. Il progetto è stato sviluppato per soddisfare le esigenze utente sulla qualità e fa- cilità d’uso. Siamo certi che vi soddisferà strutturalmente e nelle prestazioni. Questo manuale è relativo al modello DB-4.
- Page 3 FUNZIONALITÀ PRINCIPALI • Due bande, doppio schermo, doppio “standby”. • Operatività bande A / B indipendente. • 2 x 128 canali memoria e scansione. • Scorciatoie menù operativo. • Radio FM con 25 canali memoria. • Toni CTCSS / DCS e ricerca toni in scansione. • Spaziatura ripetitori.
-
Page 4: Table Of Contents
SOMMARIO Suggerimenti d’uso Disimballo e verifica contenuto Parti in dotazione .................. 6 Carica pacco batteria Precauzioni durante la carica ..............7 Esecuzione carica .................. 8 Installazione accessori Pacco batteria ..................9 Antenna ....................10 Clip da cintura ..................11 Microaltoparlante esterno ..............12 Familiarizzare con l’apparato Descrizione apparecchio ................13 Schermo LCD ..................15 Funzionalità... - Page 5 Modo menù impostazione Scorciatoie operative menù Funzionalità operative Impostazione scansione e modalità ............28 Trasmissione prioritaria .................29 Livello VOX ..................29 Impostazione potenza TX ..............30 Regolazione squelch ................30 Doppia attesa / stand-by ...............30 Modalità illuminazione ................31 Intensità retroilluminazione ..............31 Nota acustica azione su tasti..............31 ANI (numerazione automatica identità) ...........31 Temporizzatore durata massima trasmissione ..........32 Blocco canale occupato .................32...
- Page 6 Selezione larghezza banda larga / stretta ..........39 Vibrazione ...................39 Modalità audio voce ................39 Funzionalità evoluta Impostazione PTT / ANI ID ..............40 Allarme emergenza ................41 Impostazione blocco tastiera ..............41 Inversione frequenze ................41 Tono chiamata (1750 Hz) ..............42 Memorizzazione e cancellazione canale memoria ........42 Ricevitore radiodiffusione FM ..............43 Clonare via cavo ..................45 Segnalazioni opzionali...
-
Page 7: Suggerimenti D'uso
SUGGERIMENTI D’USO Raccomandiamo di leggere interamente questo manuale d’uso a prevenire l’insor- gere di possibili problemi. • Rispettare i regolamenti locali sulle radiocomunicazione, ad evitare d’essere per- seguiti a termine di legge. • Prima di entrare in ambienti contenenti esplosivi o infiammabili, spegnere la radio. • Non sostituire o caricare la batteria in ambienti contenenti esplosivi o infiammabili. • Prima di entrare in zona con detonatori o mine, spegnere la radio. • Non usare la radio se l’antenna è... -
Page 8: Disimballo E Verifica Contenuto
DISIMBALLO E VERIFICA CONTENUTO Prima di iniziare ad usare il ricetrasmettitore DB-4 verificare che la confezione con- tenga le parti di seguito elencate. Qualora mancasse qualcosa, rivolgersi al Rivenditore. Parti in dotazione • Apparato DB-4 • Antenna • Pacco batteria Li-ion • Caricabatteria • Cinghietto • Clip da cintura • Manuale utente... -
Page 9: Carica Pacco Batteria
CARICA PACCO BATTERIA Precauzioni durante la carica Il compatto pacco batteria in dotazione al DB-4 è agli ioni di litio, “Li-ion” ad alta efficienza. La vita utile, con normale uso, supera i 500 cicli di carica, dopodiché le prestazioni tenderanno a diminuire. Un pacco batteria molto usato, che presenta una autonomia di carica ridotta, deve essere sostituito con identico tipo e modello, l’uso di altre batterie può... -
Page 10: Esecuzione Carica
Esecuzione carica Inserito il pacco batteria, se l’icona che segnala la carica residua è significa che si deve procedere subito alla carica. La spia posta sul carica tore segnala la condizione di carica. Spia Stato carica Rossa In carica Verde Carica completata Suggerimenti •... -
Page 11: Installazione Accessori Pacco Batteria
INSTALLAZIONE ACCESSORI Pacco batteria 1. Inserire il pacco batteria in dotazione nel vano, facendolo scivolare fino in fondo,a inserimento completo, direzione come da freccia fig. 1. 2. Per rimuovere il pacco batteria premere il blocco di questo e far scivolare verso l’esterno il pacco, direzione come da freccia fig. 2. Fig. 1 Fig. 2 Si dovrebbe prestare attenzione alle conseguenze ambientali derivanti dalla eli- minazione delle batterie;... -
Page 12: Antenna
Installazione antenna L’antenna in dotazione presenta un’ottima resa in banda VHF/UHF. Per installare l’antenna bisogna avvitarla sul connettore del ricetrasmettitore, tenendola per la base, fino al serraggio. Non applicare una coppia eccessiva, fig. 3. Per togliere l’antenna, tenerla per la base e svi- tarla (verso antiorario), fig. 4. -
Page 13: Clip Da Cintura
Clip da cintura Allineare le due prese della clip da cintura nelle sedi previste sulla radio. Fissarle tramite le due viti M 2.5 x 5 in dotazione. Per rimuoverla, svitarle. Fig. 5 Fig. 6... - Page 14 Microfono / auricolare esterno Rimuovere la copertura della presa microfono / altoparlante sul- la radio ed inserire la spina jack, come rappresentato in fig. 7. Note • Utilizzando un microfono / altoparlante esterno, si limita la resistenza all’acqua della radio. • Per poter usare la funzionalità VOX è necessario usare la cuffia combinata. Fig.
-
Page 15: Familiarizzare Con L'apparato Descrizione Apparecchio
Si usa anche per regolazione volume. Spia ALTOPARLANTE Internamente, in questa area griglia, è posto l’alto- parlante. Il microfono incorporato è posto in questa area. TASTIERA Tramite questi 16 tasti si interviene sui parametri operativi del DB-4. La fun- zionalità dei tsti è descritta a pag. 16 e 17. - Page 16 CALL Tasto chiamata (1750 Hz) per accedere ai ripetitori e inviare stringhe DTMF MIC/SP TASTO PTT Questa presa è per Premere questo tasto per passare collegare un microfono/ in trasmissione, terminata, auricolare esterno rilasciarlo per tornare in ricezione. MONI Con una pressione prolungata su questo tasto si disabilita lo squelch, per ascoltare debolissimi segnali, appena sopra il rumore...
-
Page 17: Schermo Lcd
Schermo LCD All’accensione, sullo schermo LCD, appaiono diverse icone. Nella tabella seguente si riporta il significato. Icona Descrizione Intensità segnale ricevuto e potenza trasmissione in banda operativa Impostato bassa potenza Doppio ascolto “Dual Watch” / standby Risparmio energia RX attivo VOX attivo Direzione spaziatura ripetitore Banda stretta attivata inversione frequenza trasmissione / ricezione Blocco tastiera attivo... - Page 18 Icona Descrizione Squelch attivo Tono tasti attivo Indicazione carica residua batteria Decodificatore CTCSS attivo Decodificatore DCS attivo Segnalazione DTMF attiva Indicazione operatività su banda A Indicazione operatività su banda B Indicazione decimale frequenza Numero canale / passo menù Indicazione canale occupato Canale scansionato disponibile in modo CH...
-
Page 19: Funzionalità Tastiera
Funzionalità tastiera Commu- Commutare Entrare Passo menù, Passo menù, tare tra la tra modo Premere il nel menù / canale o canale o frequenza A VFO e MR / tasto confermare frequenza frequenza e B quella uscire dalla impostazione superiore inferiore operativa impostazione... - Page 20 Immissione Immissione Immissione Immissione Immissione Premere il cifra “6” cifra “7” cifra “8” cifra “9” cifra “0” tasto frequenza / frequenza / frequenza / frequenza / frequenza / selez. canale selez. canale selez. canale selez. canale selez. canale Impostare Premere Impostare Impostare Impostare Impostare...
-
Page 21: Modalità Operativa Modo A Sintonia Libera (Vfo)
è stata immessa per il canale corrente, sarà riportata a schermo. Consultare operatività scorciatoia menù 23 e 24, pag. 36. Ricevitore radiodiffusione FM Il DB-4 copre la gamma radiodiffusione FM da 88.00 a 108.00 MHz. In questo modo si può direttamente sintonizzarsi sulla frequenza d’interesse. Per entrare od uscire dal modo FM basta premere... -
Page 22: Modo Menù
Modo menù Per entrare in modo menù premere , questo propone 34 passi. Consultare il paragrafo Modo Menù Impostazione, pag. 21. Azzeramento Per entrare in modo azzeramento, accendere l’apparecchio tenendo premuto il ta- poi premerlo ancora per entrare. Premere per selezionare VFO o FULL. VFO: ripristina stato iniziale impostazioni in modo frequenza. -
Page 23: Modo Menù Impostazione
MODO MENÙ IMPOSTAZIONE Schermo LCD Valori disponibili Descrizione funzione SCAN Scansione frequenza / canale TX.SE EDIT / BUSY Trasmissione priorità 1 - 8 Impostazione livello VOX POWER LOW / HIGH Selezione potenza TX alta / bassa 0 - 9 Impostazione livello squelch D.WAIT ON / OFF Doppia attesa / standby... - Page 24 Schermo LCD Valori disponibili Descrizione funzione RX.SAV ON / OFF Risparmio energia in ricezione SCAN.S TO / CO / SE Modalità scansione AUTOLK ON / OFF Blocco tastiera automatico VOICE ON / OFF Annunciatore vocale OPNSET OFF / DC / MSG Schermata all’accensione Tensione batteria PONMSG...
- Page 25 Operatività menù 1. In modo standby, premere per entrare in modo menù. A schermo appare l’indicazione “MENU”. 2. Per selezionare il passo menù d’interesse agire su , a schermo viene riportata etichetta passo menù corrente. 3. Entrare premendo , poi selezionare l’impostazione desiderata agendo su 4.
-
Page 26: Scorciatoie Operative Menù
SCORCIATOIE OPERATIVE MENÙ N. Descrizione Immettere Schermo Selezione Descrizione Conferma Uscire 1 Scansione Premere Premere Premere per avviare la due volte per per invertire frequenza scansione direzione scansione uscire / canale Premere 2 Trasmis- due volte per Premere per selezio- uscire sione priorità... - Page 27 N. Descrizione Immettere Schermo Selezione Descrizione Conferma Uscire Premere 10 Numeraz. Premere due volte per per selezio- identità uscire nare parametro automatica Premere 11 Durata max Premere due volte per per selezio- uscire trasmissione nare parametro Premere 12 Blocco Premere due volte per per selezio- uscire...
- Page 28 N. Descrizione Immettere Schermo Selezione Descrizione Conferma Uscire Premere 19 Annunciatore Premere due volte per per selezio- vocale uscire nare parametro Premere 20 Schermata Premere due volte per per selezio- accensione uscire nare parametro 21 Tensione Premere Premere due volte per batteria Riporta tensione corrente per selezio-...
- Page 29 N. Descrizione Immettere Schermo Selezione Descrizione Conferma Uscire Premere 26 Codificatore Premere due volte per tono RX N. Descrizione Immettere Schermo Selezione Descrizione Conferma Uscire per selezio- uscire nare parametro Premere 26 Codificatore Premere 27 Codificatore Premere due volte per Premere due volte per tono RX...
-
Page 30: Funzionalità Operative
FUNZIONAITÀ OPERATIVE Impostazione scansione e modalità (passo menù 1 e 17) Funzionalità: in modo VFO il DB-4 può esplorare in scansione l’intera banda opera- tiva corrente ed i canali memoria. Per avviare la scansione richiamare il passo 1 del menù e premere Avviata la scansione si può... -
Page 31: Trasmissione Prioritaria
Trasmissione prioritaria (passo menù 2) Funzionalità: con il DB-4 si può trasmettere in banda secondaria anche se si sta operando in banda principale. Per selezionare la banda trasmissione prioritaria richiamare il passo 2, impostazio- ne iniziale EDIT. EDIT: trasmissione in banda operativa. -
Page 32: Impostazione Potenza Tx
Impostazione potenza TX (passo menù 4) Funzionalità: in base alle necessità della radiocomunicazione si può selezionare tra potenza alta e bassa. Questa impostazione è specificatamente programmabile per ogni canale della memoria. Richiamare il passo 4 del menù. HIGH alta, 4 W. LOW 0.5 W, questo livello è segnalato a schermo dalla indicazione “L”. Regolazione squelch (passo menù... -
Page 33: Modalità Illuminazione
Modalità illuminazione (passo menù 7) Funzionalità: selezione modalità led retroilluminazione tastiera. Richiamare il passo 7. ON: led sempre attivi. AUTO: ad ogni azione sui comandi si attiva per 3” l’illuminazione (impostazione iniziale). OFF: led disattivati. Intensità retroilluminazione (passo menù 8) Funzionalità: impostare intensità... -
Page 34: Temporizzatore Durata Massima Trasmissione
Così altre stazioni, che non sono sentite perché usano altri toni CTCSS o codici DSC da quelli impostati nel DB-4 e quindi l’audio viene bloccato, non possono venire disturbate dalla accidentale sovrimposta trasmissione. Per impostare BCLO richiamare il passo 12 del menù, impostazione iniziale OFF. OFF: BCLO disattivato. -
Page 35: Doppio Ascolto / Monitoraggio
Per impostare RX.SAV richiamare il passo 16 del menù, impostazione iniziale OFF. Blocco automatico tastiera (passo menù 18) Funzionalità: previene accidentali interventi sulla tastiera, a variare la frequenza o passando in trasmissione. Diversi aspetti dei tasti e comandi del DB-4 possono essere bloccati. A tastiera bloccata premere per riattivarla. Premendo lo stesso tasto s’attiva manualmente il blocco. -
Page 36: Impostazione Schermata Accensione
Impostazione schermata accensione (menù passo 20, 21 e 22) Funzionalità: scelta modalità schermata accensione ed editazione messaggio all’accensione. Per impostare OPN.SET richiamare il passo 20 del menù, impostazione iniziale OFF. OFF: a schermo viene riportato la versione modello. DC: tensione batteria. MSG: messaggio alla accensione. -
Page 37: Etichetta Canale
1. Selezionare tra CTCSS, DC e OFF premendo il tasto . Scegliendo CTCSS o DCS premere per selezionare tra i due. 2. Selezionare tipo DCS premendo Il DB-4 prevede 50 subtoni CTCSS e 104 codici digitali DCS tipo normale o inver- tito. - Page 38 FREQUENZA SUBTONI CTCSS...
- Page 39 CODICI DCS...
-
Page 40: Passo Sintonia Vfo
Funzionalità 2: scansione ricerca toni. Quando non si è a conoscenza dei subtoni CTCSS o codici DCS usati da altre sta- zioni, si può impostare la radio per ascoltare il segnale ricevuto, in scansione sarà ricercato il tono usato. Richiamare il passo 31 / 32 del menù, per avviare la ricerca rispettivamente CTCSS e DCS. -
Page 41: Selezione Larghezza Banda Larga / Stretta
Selezione larghezza banda larga / stretta (passo menù 30) Funzionalità: selezione larghezza banda larga / stretta. Per impostare la larghezza di banda, richiamare il passo 30. Valori disponibili: larga - 25 kHz o stretta 12.5 kHz. Vibrazione (passo menù 33) Funzionalità: l’avviso a vibrazione è... -
Page 42: Funzionalità Evoluta Impostazione Ptt / Ani Id
FUNZIONALITÀ EVOLUTA Impostazione PTT / ANI ID L’identificazione ID PTT si programma tramite il software del DB-4. Questo ricetrasmettitore supporta il sistema di segnalazione DTMF. Quest’ultimo sistema di segnalazione solo in codifica. Prima impostare le frequenze di ricezione e trasmissione, poi programmare il PTT ID via software, cliccare in sequenza: Program Optional Features PTT ID setting. -
Page 43: Allarme Emergenza
Allarme emergenza Premendo in modo attesa, si entra nel menù, a schermo ap- pare l’indicazione menù, per attivare la funzionalità allarme emergenza premere , la radio invierà il trillo emergenza per 20”, poi ricevere per 10”, finché viene premuto il PTT non si esce da questa ripetizione stato. Impostazione blocco tastiera In modo attesa premendo per 2” si attiva / disattiva il blocco tastiera. -
Page 44: Tono Chiamata (1750 Hz)
Tono chiamata (1750 Hz) Per accedere ad un ripetitore premente, per il tempo minimo determinato su que- sto il tasto . Si passa automaticamente in trasmissione, ad inviare il tono a 1750 Hz. Una volta aperto il ripetitore, si può rilasciare il tasto ed operare normal- mente, usando il PTT per passare in trasmissione. -
Page 45: Ricevitore Radiodiffusione Fm
6. Premere , le cifre che segnalano il numero canale me- moria, in alto a destra dello schermo, lampeggiano. 7. Selezionare 05 immettendo la cifra oppure agendo su 8. Per registrare in memoria premere , lo schermo segnala modo MR ed il canale appena impegnato. Cancellare dati contenuti in un canale memoria 1. - Page 46 Selezione modo sintonia In modo FM premere per commutare tra modo FM memoria e frequenza. Questa funzione è disattiva se non sono stati registrati canali memoria FM radiodiffusione. Sintonia In modo FM frequenza si può immettere direttamente la frequenza agendo sui tasti numerici oppure variare la sintonia agendo su .
-
Page 47: Clonare Via Cavo
25 canali della memoria FM. Clonare via cavo Bisogna disporre di due ricetrasmettitori DB-4 e dello specifico cavo di collegamento tra queste. Una radio sarà già completamente impostata “master”, questa in- vierà i dati alla radio destinazione della copia durante la clonazione. -
Page 48: Segnalazioni Opzionali
SEGNALAZIONI OPZIONALI Tramite il software del DB-4 è possibile programmare i toni DTMF. Cliccare in sequenza Program Optional Features Optional Signal Common Set. Potrebbe darsi che della trasmissione la radio corrispondente non riceva l’intera stringa di segnalazione, per il tempo d’attivazione dallo stato attesa con risparmio energia. -
Page 49: Dtmf
DTMF Cliccare in sequenza Program Optional Features Optional Signal DTMF. 1. Editare la rubrica chiamate rapide tramite il software di programmazione, la radio memorizza in lista fino a 10 righe (0 - 9) delle ultime chiamate. 2. Immettere il codice nella riga corrispondente, lungo fino a 16 caratteri. 3. Scegliere l’azione decodificatore DTMF tra “Code Squelch” (fig. 1) e “Selective Call” (fig. 2). 4. Se si è selezionato “Selective Call”, scegliere il codice intermedio (i primi tre sono codici ID, il quarto è... - Page 50 Inviare una chiamata DTMF con il ricetrasmettitore. Metodo A 1. Accendere l’apparato, selezionare il canale con segnalazione DTMF. 2. Premere , a schermo appare l’indicazione “CALL/DTMF?”, poi premere , a selezionare la riga in rubrica elenco chiamate. Se questa non è stata editata una nota grave se- gnala l’errore.
-
Page 51: Specifiche
SPECIFICHE Generali Gamma frequenza 144 - 146 MHz 430 - 440 MHz 88 - 108 MHz (FMW solo RX) Stabilita di frequenza ±2.5 ppm Memoria 128 x 2 canali Antenna ad elevato guadagno Impedenza antenna 50 W Tensione operativa 7.4 Vcc Modalità operativa simplex o semi-duplex Dimensioni 128 x 63 x 33 mm Trasmissione... - Page 52 This radio of modem design is reasonable structure with stable functions. lt is designed to meet different customers’ need for high quality with easy operation and perfect capablity. We believe you are pleased with its nice shape and excellent performance. This manual is suitable for using the model of DB-4.
- Page 53 MAIN FUNCTIONS • Dual band, dual display, dual standby • AJB band independent operation • 2 x 128 channels storage and scanning • Shortcut menu operation mode • FM radio and 25 stations memory • CTCSS / DCS and tone search scanning • Repeater shifts • Tone calling 1750 Hz tone • 25kHz / 12.5 kHz channel spacing switchable...
- Page 54 CONTENTS USING TIPS UNPACKING AND CHECKING EQUIPMENT Supplied items ..................66 CHARGING BATTERY PACK Charging Preparation ................67 Charging Operation ................68 INSTALLATION OF ACCESSORIES Installation of battery pack ..............69 Antenna installation ................70 Installing belt clip.................71 Installing external micro / speaker ............72 GETTING FAMILIAR Radio illustration ..................73 LCD Display ..................75 Keypad Functions .................77...
- Page 55 SET MENU MODE SHORTCUT MENU OPERATION DETAILED FUNCTION DESCRIPTION Scan & Scan Mode setting ..............88 Priority Transmit ..................89 VOX Level ...................89 TX Power setting ..................90 Squelch Adjustment ................90 Dual Wait / Standby ................90 LED Display Mode ................91 Backlight Brightness setting ..............91 Keypad Beeper setting ................91 Automatic number identity ..............91 Transmitter Time-Out Timer ..............92...
- Page 56 Vibration .....................99 Voice Mode ..................99 ADVANCED FUNCTIONS PTT / ANI ID Setting ................100 Emergency Alert ................101 Keypad locking Setting ............... 101 Reverse Frequency ................101 Tone Calling (1750 Hz) ............... 102 Channel Storage Operation ..............102 FM Radio Operation ................104 Wire Clone ..................
-
Page 57: Using Tips
USING TIPS Please read the following brief instructions, non compliance with these rules may cause danger or violate the law. • Obey the local government regulation before using this radio, improper use may violate the law and be punished. • Tum off the radio, before entering into flammable or explosive areas. • Do not charge or change the battery in flammable or explosive areas. -
Page 58: Unpacking And Checking Equipment
UNPACKING AND CHECKING EQUIPMENT Please check if any damage to the package when your receive it. Carefully unpack the transceiver. We recommend that you check the items listed in the following table. If any items are missing or damaged during shipment, please contact with your local dealer immediately. -
Page 59: Charging Battery Pack
CHARGING BATTERY PACK Charging Precaution The supplied battery pack of DB-4 is a high-performance Li-ion high capacity bat- tery in a very compact package. Under normal use, the battery pack may be used for approximately 500 charge cycles and more, after which operating time maybe expected to decrease. -
Page 60: Charging Operation
When the battery capacity is low, please charge or change the battery. • The battery lasts shortly even if it is fully charged, the battery is depleted, please contact your local dealer to buy a new authentic Polmar battery. -
Page 61: Installation Of Accessories Installation Of Battery Pack
INSTALLATION OF ACCESSORIES Installation of Battery Packa 1. Fit the supplied battery pack into the batter pack trough, then slide it toward the head to insert it completely in direction of arrowhead 1. 2. Push the battery pack lock to release the battery pack and slide it toward the bottom to remove it out-in direction of arrowhead 2. -
Page 62: Antenna Installation
Antenna installation The supplied high gain antenna provides high performance at the entire VHF / UHF frequency range of the transceiver. To install the supplied antenna, hold the bot- tom end of the antenna, then screw it onto the connector on the transceiver until it is snug. Do not over-tighten by use of extreme force. -
Page 63: Installing Belt Clip
Installing Belt Clip Align the two holds of belt clip and the two holes of the radios, fix them with the supplied M2.5x5 screws. Loosen the screw set to remove belt clip. Pic. 5 Pic. 6... -
Page 64: Installing External Micro / Speaker
Installing External Micro / Speaker Open the cover of the mic / speaker jack and insert the mi- crophone/speaker plugs into the jack. Note • Using the external headset or mic / speaker will affect the water-tightness performance of radio. •... -
Page 65: Radio Illustration
Indicator SPEAKER The internal speaker is located here. The internal microphone is located here. KEYBOARD These 16 keys select the operating features on the DB-4. The function of the keys are described in de- tails on pages 16 & 17. - Page 66 CALL TActivates T-CALL (1750 Hz) for repeater access and transmit DTMF MIC/SP The jack provides Press it to transmit and release it connection points for to receive after your transmission microphone audio, is completed. earphone audio, spe- aker and program cable. MONI Long press this key disables the noise squelching action, allowing...
-
Page 67: Lcd Display
LCD DISPLAY You will see various icons shown on the screen when power on. The following table can help you identify icons meaning’s, as displayed on LCD. Icons Description of functions Operating band signal & power meter Low TX power active Dual watch / standby active RX power save active VOX active... - Page 68 Icons Description of functions Squelch active Beep tone active Battery power indicator CTCSS decoder active DCS decoder active DTMF signalling active Operating A band indicator Operating B band indicator Frequency mantissa indicator Channel number / Menu items number indicator Busy channel indicator Channel scanned available under CH mode...
-
Page 69: Keypad Functions
KEYPAD FUNCTIONS... -
Page 71: Frequency Mode (Vfo)
ON, it will show the name of the channel. Please see Shortcut Menu Operation item 23 & 24. FM Radio Mode DB-4 provides frequency 80.00 - 108.00 MHz FM radio. Under this mode, you can choose FM frequency you need directly. Scan frequency range and store your favourite channels. -
Page 72: Menu Mode
MENU Mode Press key to enter MENU mode, there are 34 items in total. Please see SET MENU MODE. Reset Mode Press key and switch the power on to enter Reset mode, then press key to enter. key to select VFO / FULL. VFO: initialize all setting under frequency mode. -
Page 73: Set Menu Mode
SET MENU MODE... - Page 75 Menu Operation 1. Under standby mode, press to enter menu setting, LCD displays “MENU”. 2. Press , to select the desired menu item, LCD display current setting of selected item. 3. Press , to enter and then press to select the desired setting.
-
Page 76: Shortcut Menu Operation
SHORTCUT MENU OPERATION... -
Page 80: Detailed Function Description
DETAILED FUNCTION DESCRIPTIONS Scan & Scan Mode setting (SCAN & SCANS MENU 1 & 17) Functions: under VFO / MR / CH mode, DB-4 allows you to scan the entire current operating band and memory channels. Enter Menu 1st and press key to start scanning. -
Page 81: Priority Transmit
Priority Transmit (TX.SEL - MENU 2) Functions: DB-4 allows you to transmit on the sub band even if you are working on the operating band. Enter Menu 2nd to select priority transmit band. Default: EDIT. EDIT: it will transmit on the operating band. -
Page 82: Tx Power Setting
Enter Menu 5th to set SQL level. Default: 5 Dual Wait/Standby (D.WAIT - MENU 6) Functions: DB-4 allows you to receive the sub band signal even if you are working on the operating band. It could monitor the signal under bath master and sub band at the same time. -
Page 83: Led Display Mode
Enter Menu 9th to set keypad beeper. Default: ON. Automatic Number Identity (ANI - MENU 10) Functions: sending ID code when DB-4 transmits, the others can receive it directly on the display if they also have ANI function. Enter Menu 10th to set ANI. Default: OFF. -
Page 84: Transmitter Time-Out Timer
Transmitter Time-Out Timer (TOT - MENU 11) Functions: the TOT feature provides a safety switch, which limits transmission to a pre-programmed value. This will promote battery conservation by not allowing you to make excessively long transmissions, and in the event of a stuck PTT switch it can prevent interference to other users as well as battery depletion. -
Page 85: Dual Watch / Monitor
Auto Keypad Lock (AUTOLK - MENU 18) Functions: in order to prevent accidental frequency change or inadvertent trans- mission, various aspects of the DB-4’s keys and switches may be locked out. Enter Menu 18th to set AUTOLK. Default: OFF. When you switch AUTOLK ON, the keypad will be locked automatically if there is no key operation for 5 second. -
Page 86: Power-On Display Setting
Power-on Display setting (OPN.SET & VLT & PON.MSG - MENU 20 & 21 & 22) Functions: choose power-on display mode and edit power-on message Enter Menu 20th to set OPN. SET. Default: OFF. OFF: display model version. DC: battery power voltage. MSG: power-on message. -
Page 87: Display Channel Name
CTCSS / DCS / OFF. After you choose CTCSS / DCS, press to choose the right group you need. 2. Press key to select DCS direction. DB-4 has 50 groups CTCSS, 104 groups normal / inverted DCS. -
Page 90: Vfo Step Setting
Function 2: TONE Search Scanning. In operating situations where you don’t know the CTCSS/DCS tone being used by another station or stations, you can command the radio to listen to the incoming signal and scan in search of the tone being used. Enter Menu 31st / 32nd to start CTCSS / DCS searching. -
Page 91: Wide / Narrow Band Selecting
Wide / Narrow band selecting (N/W - MENU 30) Functions: setting of wid / narrow bandwidth. Enter Menu 30th to set bandwidth. Available Values: Wide - 25kHz / Narrow - 12.5kHz. Vibration (ALARM - MENU 33) Functions: the vibration indication helps in working conditions where quiet opera- tion is required. -
Page 92: Advanced Functions
ADVANCED FUNCTIONS PTT ID SETTING PTT ID (Programmed by DB-4 software). This transceiver supports optional signalling DTMF. DTMF signalling only supports encoding. Set transmitting and receiving frequency in advance and then program PTT ID via software, click in sequence: Program – Optional Features - PTT ID setting. And click the ANI . -
Page 93: Emergency Alert
EMERGENCY ALERT Under standby mode, press to enter menu setting, LCD dis- plays “MENU”; then press , to turn on emergency alert func- tion, radio will transmit emergency ring for 20s and then receive for 10s, until you press PTT, it will exit. KEYPAD LOCK SETTING Under standby mode, press for 2s to lock or unlock the keypad, “... -
Page 94: Tone Calling (1750 Hz)
TONE CALLING (1750 Hz TONE) To access a repeater, press and hold in key for the amount of time specified by the repeater. The transmitter will automatically be activated, and a 1750 Hz audio tone will be superimposed on the carrier. Once access to the repeater has been gained, you may release key and use PTT for activating the transmission. - Page 95 6. Press , the digit blinks at the right top of LCD. 7. Press to choose or input 05 directly. 8. Press , for storage, LCD displays MR mode and currently stored channel. Channel delete 1. Under MR or CH mode, press and switch on the radio, LCD displays “DEL ?”...
- Page 96 FM RADIO FUNCTION On / off radio receiver. Under standby mode, press , to open FM radio function, LCD display “90.00M”, then press , again, radios receiver is off. Note: under FM radio mode, if receiving the signal, the radio will be out of FM mode, after 5s, it will be back to FM mode when the signals dis- appear.
-
Page 97: Wire Clone
Repeat this operation, you can delete all memory channel, 25 in maximum. WIRE CLONE Prepare 2 sets of DB-4, 1 pcs specific wired cloning cable. Master radio (sending messages when in wired cloning). Deputy radio (receiving and storing messages when in wired clon- ing). Steps of wired clone. -
Page 98: Optional Signalings
OPTIONAL SIGNALING Optional signalling (programmed by DB-4 software) This transceiver supports DTMF optional signalling. Click in sequence: Program Optional Features Optional Signal Common Set. In transmitting, maybe radio cannot receive the complete signalling, because radio needs time to switch when in power-saving state. We have to set the “Digit delay”, that’s, to send a carrier first, let radio receive signal, then send signalling to make... -
Page 99: Dtmf Part
DTMF Part Click in sequence Program Optional Features Optional Signal DTMF. 1. Edit the fast call list via programming software, radio can store up to 10 groups (0 - 9) last calling list in total. 2. Input the desired code into the corresponding list, 16 character in maximum. 3. - Page 100 Make DTMF call with the transceiver. First method. 1. Power on, then select the channel with DTMF signal. 2. Press , key, LCD displays “CALL/DTMF?”, then press keys to make call with the desired call list message. If the corresponding call list has not bean edited, it will sound “DU”. Second method.
-
Page 101: Technical Parameters
TECHNICAL PARAMETERS General Frequency Range 144 - 146 MHz 430 - 440 MHz 88 - 108 MHz (FMW RX only) Frequency stability ±2.5 ppm Channel No. 128 x 2 Antenna High gain antenna Antenna impedance 50 W Tensione operativa 7.4 Vcc Mode of operation Simple or semi-duplex Dimensions (W x H x D) - Page 102 Questo simbolo, aggiunto al numero di serie, indica che l’apparato risponde pienamente ai requisiti della Direttiva Europea delle Radio e Telecomunicazioni 1999/05/EC, per quanto concerne i terminali radio. This symbol, on the serial number seal, means that the equipment complies with the essential requirements on the European Radio and Telecommunication Terminal Directive 1999/05/EC.
- Page 103 Elenco dei paesi dove l’apparato può essere utilizzato...
- Page 104 Hereby Polmar srl, declares that this apparatus brand Polmar, mod. DB-4 is in compliance with the essential requirements and other relevant provisions of Directive 1999/5/CE. Por medio de la presente Polmar srl declara que el Polmar DB-4 cumple con los requisitos y cualesquiera otras disposiciones aplicables o exigibles de la Directiva 1999/5/CE.
- Page 105 Modello Model tecniche della stessa senza determinare dei danni. Il rivenditore e la Polmar srl si riservano di verificare le condizioni di appli- Data di acquisto (allegare copia dello scontrino o fattura)/ Purchase Date (enclose copy of receipt or invoce) cabilità...
- Page 107 INFORMAZIONE AGLI UTENTI Ai sensi dell’art. 13 del decreto legislativo 25 luglio 2005, n. 15” Attuazione delle Direttive 2002/95/CE, 2002/96/CE e 2003/108/CE, relative alla riduzione dell’uso di sostanze pericolose nelle apparecchiature elettriche ed elettroniche, nonché allo smaltimento dei rifiuti” Il simbolo del cassonetto barrato riportato sull’apparecchiatura indica che il prodotto alla fine della propria vita utile deve essere raccolto separatamente dagli altri rifiuti.
- Page 108 Importato e distribuito da Polmar srl info@polmar.biz • www.polmar.biz...
Need help?
Do you have a question about the DB-4 and is the answer not in the manual?
Questions and answers