Table of Contents
Advertisement
Quick Links
Advertisement
Table of Contents

Related Manuals for Boca Systems Lemur-Z


Summary of Contents for Boca Systems Lemur-Z
- Page 1 LEMUR – Z KIOSK PRINTERS Operator’s Manual Lemur-Z Rev. C 05.28.22...
- Page 2 Table of Contents Page FCC Notice & Warranty Information Unpacking the printer Introduction Introduction for Lemur-Z Important Safety Information Installation Printer Mounting Media Supply Media Load Procedure Clearing Paper Jams Media Width Adjustment Standard Interface Pinouts Thermal Paper – Theory & Specifications...
-
Page 3: Fcc Notice
FCC NOTICE NOTE: The equipment has been tested and found to comply with the limits for a class A digital device, pursuant to part 15 of the FCC rules. These limits are designed to provide reasonable protection against harmful interference when the equipment is operated in a commercial environment. This equipment generates, uses, and can radiate radio frequency energy and, if not installed and used in accordance with the instruction manual, may cause harmful interference to radio communications. -
Page 4: Unpacking The Printer
Email: cathy@bocasystems.com Tel: (561) 998-9600 Fax: (561) 998-9609 The following items should be in the box: A) Lemur-Z Printer B) 24VDC power supply C) AC cord D) May come with below optional accessories listed below (depending on what was ordered): •... -
Page 5: Introduction For Lemur-Z
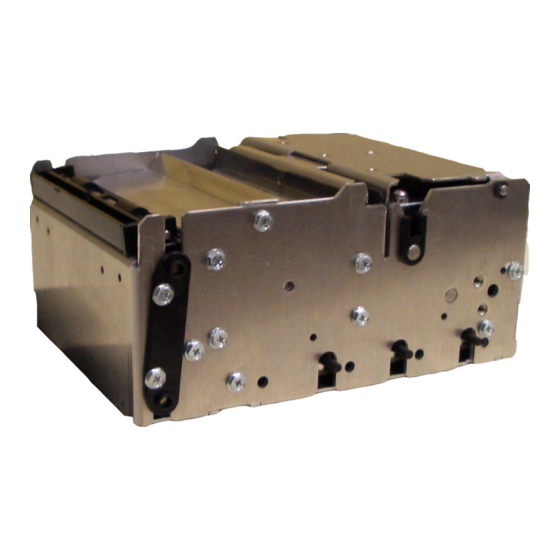
The Lemur-Z series are kiosk printers designed for use with 2” (50.8mm) to 3.25” (82.5mm) rolled receipt stock (minimum core size of 1.0”) or fan folded stock with black timing mark using direct thermal printing. The following is a link to the black timing mark specs www.bocasystems.com/ticket_specs10.html... - Page 6 PRESENTER The Lemur-Z printer features a presenter mechanism with a built in retract and retain function. The following illustrations provide an overview of the functionality of the various stages of printer operation. Store printout • PRINT– It handles documents of various lengths...
-
Page 7: Paper Jam
Controls & Sensors FailSafe button Self-test button PAPER JAM DATA No paper jam No data received Paper jam Data received READY CHECK PAPER Not ready Has paper Ready No paper Print Head Presenter rollers Assembly Top View DC IN Click here to return to > Table of Contents... -
Page 8: Important Safety Information
3.0 Important Safety Information WARNING: The appearance of this symbol indicates the proximity of an exposed high voltage area. Please follow all directions carefully for your personal safety. You must read the following safety information carefully before working on the printer. As a safety precaution, all service to the printer should be done by qualified persons with power off... -
Page 9: Installation
• When the Lemur-Z leaves the factory, it is configured for use with receipt rolled stock (stock with no black timing mark). If you will use the printer with stock that has a black timing mark then it will need to be Appendix C –... -
Page 10: Printer Mounting
You may also purchase an optional Base Mounting Adapter (P/N 424077) that will enable the Lemur-Z to have the same mounting hole pattern as that of a Zebra KR403 and KR203. This will also enable it to be used with the Quick-Fit hubs when the printer is not in retracting mode. -
Page 11: Media Supply
5.1 Media Supply The Lemur-Z has several basic requirements for dispensing the media to the printer from a roll or fan-fold media which include: • Align printer with media – The media roll or fan-fold stack should align with the right side of printer (from where stock is loaded into the printer) to keep the media un-damaged and prevent jams. -
Page 12: Media Load Procedure
6.0 Media Load Procedure 1. Plug the power pack into the printer and the printer will automatically turn on when the AC cord is plugged into the Power pack. The red CHECK PAPER LED will be illuminated. You will also hear the cutter knife cycle during this time. -
Page 13: Clearing Paper Jams
6.1 Clearing Paper Jams Should a paper jam occur (the red paper jam LED will be blinking), follow the procedure below: 1. Cut the media off the from where it is loaded into the printer. Cut media away Scissors 2. Open the print head assembly. See section 9.2 THERMAL PRINT HEAD. 3. -
Page 14: Media Width Adjustment
6.2 Media Width Adjustment If you printer came with Adjustable external infeed guide then the below review how to adjust this path. To adjust the paper path for use with a different media width, adjust the slider bar to the fully open position. Insert your media into the paper guide. -
Page 15: Standard Interface Pinouts
7.0 Standard Interface Pinouts RJ12 Serial Connection +5VDC RJ12 Connector TYPICAL DB9 to RJ12 PIN CONNECTIONS 9 pin host BOCA RJ12 Transmit Receive USB USB 2.0 compliant devices. ETHERNET (Optional) is a standard RJ45 Ethernet cable connection. Low Paper Port used in conjunction with the roll holder with low paper sensor. -
Page 16: Specification
BOCA. 200 dpi usage Lemur-X and Lemur-Z T4, T5, BS7, SKI7 & T7 Besides the above-mentioned stock, the Lemur-X is also able to support thicker stock like M10 & SKI-10 Click here to return to >... -
Page 17: Maintenance
9.0 Maintenance Your ticket printer is solidly constructed and requires minimal care to provide maximum service. WARNING: The appearance of this symbol indicates the proximity of an exposed high voltage area. Please follow all directions carefully for your personal safety. You must read the following safety information carefully before working on the printer. -
Page 18: Thermal Print Head
9.2 THERMAL PRINT HEAD The print head should be cleaned periodically to prevent debris from building up on the print element. The required cleaning interval varies greatly depending on the quality of the media and the amount of dust entering the print area. Excessive dirt builds up on the print head will result in reduced quality. - Page 19 9.3 Platen (Rubber Driver Roller) The Platen (rubber drive roller) should be cleaned once a year to prevent paper dust from building up on the roller. (NOTE: The platen may require more frequent cleaning in dusty environments or when using inferior media) 1.
-
Page 20: Cutter Assembly
9.4 Cutter Assembly The BOCA cutter system is a fully integrated cutter knife mechanism powered by a stepper motor. The cutter requires no adjustments and is rated for approximately 750,000 cuts. Please be aware of the following: Wait five seconds before feeding media into the printer after power up. During this time the cutter knife will move up and down. -
Page 21: Troubleshooting Guide
10.0 Troubleshooting Guide This is a simplified troubleshooting guide listing some of the typical problems. It is not intended to provide As a safety technical details or repair methods, but can serve as a guide to fault isolation in the field. precaution, all service to the printer should be done by qualified persons with power off and... -
Page 22: No Print Out
POOR PRINT OUT (white voids in print out) a. Clean print head. Consult “Thermal Print Head” section. For Lemur-R see “Thermal Print Head” b. Replace thermal head. c. Contact your system provider or BOCA for further assistance. NO PRINT OUT a. -
Page 23: Spare Parts List
11.0 Spare Parts List Part Number Description 200C3 Print Head for Lemur-R & 2C printers only 424181 Cable, Print Head 2C (one on each side) SQ OPTO-JST** Opto Detector cut (JST connector) SQ OPTO Opto Detector cut (AMP Connector) SQ LOAD-JST** Opto Detector Ticket load (JST connector) SQ LOAD Opto Detector Ticket load (AMP Connector) - Page 24 Above shows AMP connectors Above shows JST connectors Click here to return to > Table of Contents...
- Page 25 12.0 Accessories The Lemur-Z printer has a wide range of accessories designed and tested to work with your printer. The accessories can be used by themselves, combined with other printer accessories, or as part of your own unique printer integration design. At the time of this guides release, the following accessories are available for your printer: •...
- Page 26 Kit will include paper guide and four mounting screws. 1. The paper guide is installed onto the Lemur-Z via four mounting locations. 2. Install the paper guide on the back of the printer and align the mounting holes to the above referenced installation location.
- Page 27 12.2 Adjustable Internal Infeed Guide Installation (P/N 424069-Z-7) The adjustable infeed guide enables the Lemur-Z to be used with 2” to 3.22” wide media when the external adjustable infeed guide (p/n 424050) is not practical. For 3.25” wide media the guide is not needed.
- Page 28 12.3 Center Infeed Guide Installation The center 58mm or 80mm infeed guide enables the Lemur-Z to be used in existing kiosk using said media widths that needs to be centered in the middle of the printer. The below reviews how to install the optional centering paper guide.
- Page 29 (P/N 424077) The base mounting adapter enables the Lemur-Z to have similar mounting holes as a Zebra KR203 and KR403 printer. It also allows it to be used with the quick fit hubs when the retracting feature of the printer is not being used.
- Page 30 • Includes an inertia dampening spring roller to optimize printer performance. The plate attaches to the three mounting hole locations on the bottom of the Lemur-Z printer. Above shows the location of the six .112” through holes Use the three 3/16” Hex head Taptite screws, that came with the plate, to mount the plate onto the bottom of the printer.
- Page 31 (P/N 424051-U) This roll holder kit is designed to be used with either a Lemur-X or Lemur-Z model printer. It may also be used with a Lemur-Z using an optional 58mm or 80mm center infeed guide. This kit will work with a roll that has a minimum cord inner diameter of 1.0”...
- Page 32 This side towards roll holder arm 6. Slide the block to the desired location. a. For Lemur-Z without or with 80mm center infeed guide, slide the block all the way to the roll holder arm. See below photo. Sensor tab...
- Page 33 d. Tight the Philip screw on the block to hold it in place. Philip head screw 7. Tear off a full turn of the paper from the new paper roll. Caution: This is important as the outer end of the paper is usually secured to the roll with glue or other adhesive substance that may cause paper jam or damage the print head.
- Page 34 10. Once you have the stopper in the desired position, tighten the Philip head screw to hold the stopper in place. Philip head screw 11. Once the stopper disc is in place it should not be necessary to remove it to install or remove a roll, provided the roll core inner diameter is 1.0”...
- Page 35 12.7 Low Paper Sensor for Roll Holder (P/N 424078) An optional low paper sensor may be installed onto the BOCA receipt roll holder. This sensor will alert the printer when the paper roll physically goes below the sensor eye. When this happens, the printer will send a low paper status message (0F hex or 15 decimal) to the host computer.
- Page 36 Hole in Arm In the Lemur-Z printer a low paper condition is signaled when the printer returns a low paper status message (In Hex 0F, in decimal 15) to the host computer. The low paper condition is detected when the see through opto beam is no longer blocked.
- Page 37 12.8 Low Paper Sensor for Fan Folded Stock (P/N 424084) An optional low paper sensor may be used for fan folded stock. Each kit comes with the following: Low paper 36” Cable sensor 2-56x 3/8” Phil Flat washer flat head screw 2-56x3/16”...
- Page 38 For the Lemur-Z printer, a low paper condition is signaled when the printer returns a low paper status message (In Hex 0F, in decimal 15) to the host computer. The low paper condition is detected when the see through opto beam is no longer blocked.
-
Page 39: Appendix A -Ethernet Parameters
APPENDIX A –ETHERNET PARAMETERS General Each Boca Ethernet Printer is assigned a unique MAC address based in part on the printer's serial number. All Boca printers are factory configured in DHCP enabled mode. (Exceptions may be made by special request.) If the printer is unable to get a dynamic IP address from the customer's network in the allotted time period (about four minutes), it will default to the 10.0.0.192 address. - Page 40 • Below shows the configuration page • If you are going to set a static IP address then you will need to change the ETHERNET setting to YES. Set IP address, Subnet Mask and Default Gateway to the values you want. •...
- Page 41 APPENDIX B – TESTING A LEMUR-Z Boca Systems, Inc. has developed various program that allows customers to communicate from a host computer or mobile device to the printer. Below are the various configure and test programs we offer: WINDOWS: (Allow connection via Ethernet/ Wi-Fi, Parallel, Serial, USB-HID interfaces and print driver connection) https://www.bocasystems.com/documents/Testing%20a%20BOCA.pdf...
- Page 42 Note: The printer may be used with stock that has a black timing mark if needed Lemur-Z (www.bocasystems.com/ticket_specs10.html When the Lemur-Z leaves the factory, it is configured for use with receipt rolled stock (stock with no black timing mark) unless otherwise specified. If you are using the printer with stock that has a black timing mark Appendix C –...
-
Page 43: Failsafe Mode
LOOP = Loop media inside = no loop = no NAK = NAK on trashed media MOTOR = small platen motor = N/A EJECT = present media to be pulled out = eject media immediately LOOP Motor Eject Value The default value is zero (0). This configures the printer as follows: Internal media loop, no NAK on trashed media, small platen motor and media is presented to be pulled out by customer. - Page 44 PRESENTER COMMAND SETTINGS Below are various ways you may configure the Lemur-Z, concerning presenting the media after it is printed. a. Present with no retract - The following software command will disable the retract feature of the <ket0><p> printer: The printer will present and hold the media in place to be taken. You are not able to print the next transaction until the receipt/ ticket has back taken out of the presenter.
- Page 45 STATUS COMMAND SETTINGS The Lemur-Z may also be configured for different status command setting. The printer may only be configured with one of these commands at one given time. Both commands should not be used at the same time. If you are switching from <s90> to <s91> as part of your evaluation you will need to erase the prior status command.
- Page 46 • Solicited Status Mode <s91><p> printer will remain online during error state. Printer will issue a black receipt upon receipt of said command. When the printer is in an error state, it will only respond to <S92> status requests. Disables most unsolicited status messages, see below table.
- Page 47 APPENDIX D – WINDOWS USB DRIVER INSTALLATION GUIDE Do not connect the printer to your computer’s USB port until instructed. Please contact your software provider to confirm if the use of our driver is required for their application. We recommend that the print driver is installed by either your system administrator or IT support staff. These print drivers are intended to be installed on 64-bit Windows PC platforms from Windows 7 forward.
-
Page 48: Appendix F - Service Plans
APPENDIX F – SERVICE PLANS For enhanced warranty coverage or for an out of warranty printer, we offer two types of service plans. GOLD SERVICE • Printer repair at BOCA facility (3 business day turnaround) • Replace defective parts (ship within one business day) – customer must return defective parts •... -
Page 49: Appendix H - Lemur-Z Reference Drawing
APPENDIX H – LEMUR-Z REFERENCE DRAWING... - Page 50 APPENDIX I – REFERENCE DRAWING ROLL HOLDER...
- Page 51 APPENDIX J – REFERENCE DRAWING PRINER MOUNTING PLATE...
Need help?
Do you have a question about the Lemur-Z and is the answer not in the manual?
Questions and answers