Table of Contents
Advertisement
Quick Links
Advertisement
Table of Contents

Related Manuals for Boca Systems LEMUR-X


Summary of Contents for Boca Systems LEMUR-X
- Page 1 LEMUR –X UPG PRINTER Operator’s Manual With Optional Presenter Rev. A 11.04.20...
- Page 2 Table of Contents Page FCC Notice & Warranty Information Unpacking the printer Introduction Introduction for Lemur-X Important Safety Information Installation Receipt Roll Holder Installation (Desktop) Optional Receipt Roll Holder Installation (Kiosk) Low Paper Sensor for Roll Holder Low Paper Sensor for Fan Folded Stock...
-
Page 3: Fcc Notice
FCC NOTICE NOTE: The equipment has been tested and found to comply with the limits for a class A digital device, pursuant to part 15 of the FCC rules. These limits are designed to provide reasonable protection against harmful interference when the equipment is operated in a commercial environment. This equipment generates, uses, and can radiate radio frequency energy and, if not installed and used in accordance with the instruction manual, may cause harmful interference to radio communications. -
Page 4: Unpacking The Printer
Click here to return to > Table of Contents 1.0 Unpacking the Printer The printer is shipped in a ruggedized container. Please save packing material for future use. Remove the printer and accessories from the box and inspect for obvious damage. If damage is noticed, please report it immediately to BOCA. -
Page 5: Paper Jam
The Lemur-X series are low cost point of sale or kiosk printers designed for use with 1” (25.4mm) to 3.25” (82.5mm) wide thermal media. The printer may be configured for use with rolled receipt stock or fan folded media with black timing mark using direct thermal printing. -
Page 6: Important Safety Information
3.0 Important Safety Information WARNING: The appearance of this symbol indicates the proximity of an exposed high voltage area. Please follow all directions carefully for your personal safety. You must read the following safety information carefully before working on the printer. As a safety precaution, all service to the printer should be done by qualified persons with power off... -
Page 7: Installation
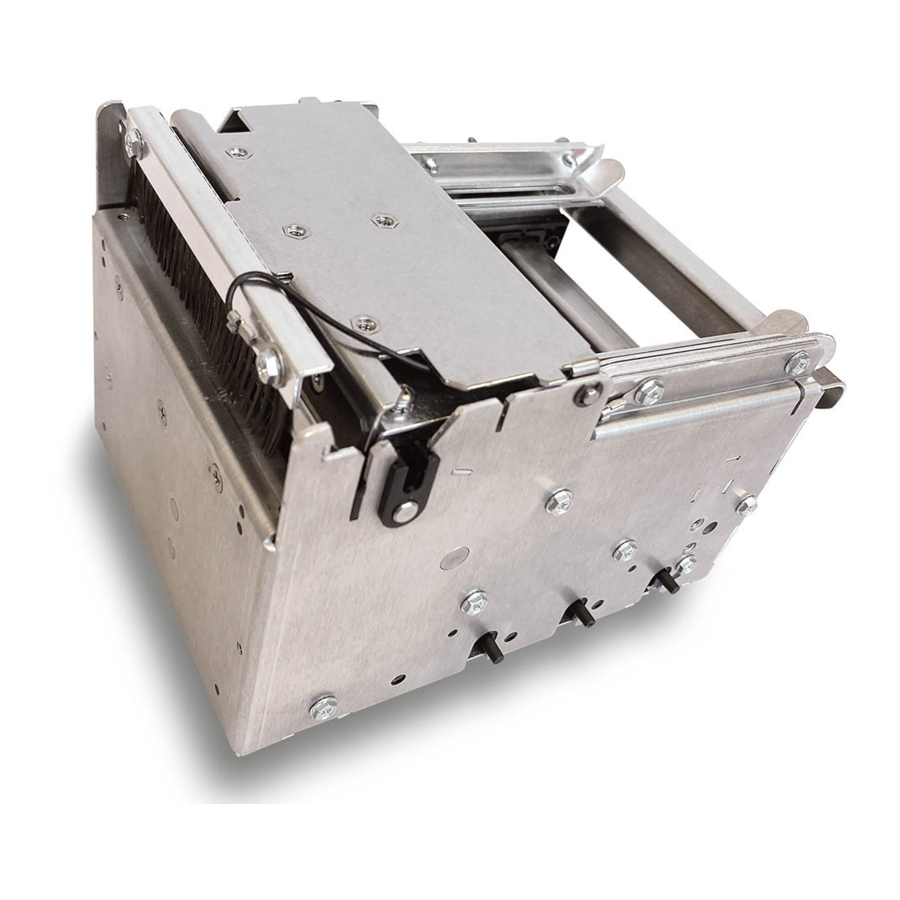
Lemur-X cover removal - The desktop version of the Lemur-X UPG printer comes with a cover. This cover may be removed by removing the two Philip head screws (in front) that hold it in place. Below is a typical self-test printout Your printout may vary depending on printer configuration and ticket stock used. - Page 8 4.1 Roll Holder Adaptor Kit (P/N 424184) Your printer may have come with an optional roll holder kit used for desktop and the below reviews how to install it. Kit will include floor plate (2pcs), one roll holder arm, one spindle, one adjustable stopper and various mounting screws. Some parts may vary from above photo 1.
- Page 9 3. Install the floor plate onto the bottom of the Lemur-X UPG printer. Align the two holes on the floor plate up with the two mounting holes on the printer. Install the two self-tapping 5/16” hex head screws and tighten.
- Page 10 6. Tear off a full turn of the paper or media from the new roll. Caution: It is important that the outer end of the media is free of glue or other adhesive substance that may cause a paper jam or damage the print head. REMOVE Place the roll onto the spindle so the media turns in a clockwise direction.
- Page 11 (see below photo) to the printer. Install the roll holder arm onto the mounting plate and secure it in place with a Philip ¼” hex head screw. STRAIGHT ANGLE Above photo shows arm attached to a Lemur-X printer at an angle...
- Page 12 4. Prior to installing the receipt roll onto the roll holder arm the printer needs to be secured in place. 5. Tear off a full turn of the paper from the new paper roll. Caution: This is important as the outer end of the paper is usually secured to the roll with glue or other adhesive substance that may cause paper jam or damage the print head.
- Page 13 4.3 Optional Low Paper Sensor for Roll Holder (P/N 424078) An optional low paper sensor may be installed onto the receipt roll holder. This sensor will alert the printer when the paper roll physically goes below the sensor eye. When this happens, the printer will send a low paper status message (0F hex or 15 decimal) to the host computer.
- Page 14 Above shows roll holder arm (P/N 424089-UPG) Cable Tie Mount Above shows roll holder adaptor (P/N 424184) Once installed, you may plug the sensor connector into the low paper connector on the printer. In the Lemur- X printer a low paper condition is signaled when the printer returns a low paper status message (In Hex 0F, in decimal 15) to the host computer.
- Page 15 In the Lemur-X a low paper condition is signaled when the printer returns a low paper status message (In Hex 0F, in decimal 15) to the host computer. The low paper condition is detected when the see through opto beam is no longer blocked.
- Page 16 4.5 Optional Eject Bezel We offer two optional Eject Bezel sizes to enables a Lemur-X 2.0 printer to be able to trap a ticket once it has been printed. The bezel is able to trap multiple tickets too. Short Tickets or Receipts between 2” to 4” length (P/N 424076-X-TM-1) The bezel kit comes with bezel and two 5/16”...
- Page 17 3. Unlock the print head assembly and lift up to allow easy access to the mounting holes. 4. Insert the two 5/6” Hex head screws into the bezel. Align the two screws with the two top holes on the Lemur-X. Tighten the two screws. The bezel is now installed. Lock the print head assembly back closed.
-
Page 18: Ticket Load Procedure
5.0 Ticket Load Procedure 1. Plug the power pack into the printer and the printer will automatically turn on when the AC cord is plugged into the AC cord. The red CHECK PAPER led will be illuminated. You will also hear the cutter knife cycle during this time. -
Page 19: Ticket Width Adjustment
5.1 Ticket Width Adjustment To adjust the paper path for use with a different ticket width, adjust the slider rail to the fully open position. Insert your ticket stock into the paper guide. Adjust the slider bar down to the proper ticket width, making sure the bar is not too tight against the ticket. -
Page 20: Standard Interface Pinouts
6.0 Standard Interface Pinouts RJ12 Serial Connection +5VDC RJ12 Connector TYPICAL DB9 to RJ12 PIN CONNECTIONS 9 pin host BOCA RJ12 Transmit Receive USB USB 2.0 compliant devices. LOW PAPER PORT used in conjunction with the roll holder with low paper sensor. BLUETOOTH (Optional) Allows connection via Bluetooth interface. -
Page 21: Specification
Thermal Paper - Theory & Specification Refer to the BOCA Systems website at www.bocasystems.com, THERMAL TICKETS section for the most current paper specifications. The print head’s life expectancy is composed of both a mechanical and an electrical component. Both of these factors are strongly influenced by the quality of the thermal paper used. -
Page 22: Maintenance
8.0 Maintenance Your ticket printer is solidly constructed and requires minimal care to provide maximum service. WARNING: The appearance of this symbol indicates the proximity of an exposed high voltage area. Please follow all directions carefully for your personal safety. You must read the following safety information carefully before working on the printer. -
Page 23: Optical Sensors
(yellow dot) The location of these sensors may vary depending how your printer was configured when it left the factor. On a Lemur-X with optional Presenter module, the ticket taking sensor should also be cleaned too. Black Timing Sensor Adjustment There is one optical sensor (opto) mounted on the aluminum rail (with RED dot on it) that senses the black timing mark on the ticket stock. -
Page 24: Thermal Print Head
8.2 THERMAL PRINT HEAD The print head should be cleaned periodically to prevent debris from building up on the print element. The required cleaning interval varies greatly depending on the quality of the ticket stock and the amount of dust entering the print area. Excessive dirt buildup on the print head will result in reduced quality. -
Page 25: Thermal Print Head Replacement
8.2.1 THERMAL PRINT HEAD REPLACEMENT Below reviews how to replace the thermal print head in your printer. The follow needs to be done with the AC cord unplugged from the power pack. 1. Unlock and lift open the print head assembly as show in section 8.2. - Page 26 8.3 Platen (Rubber Driver Roller) The Platen (rubber drive roller) should be cleaned once a year to prevent paper dust from building up on the roller. (NOTE: The platen may require more frequent cleaning in dusty environments or when using inferior ticket stock.) 1.
-
Page 27: Cutter Assembly
8.4 Cutter Assembly The BOCA cutter system is a fully integrated cutter knife mechanism powered by a stepper motor. The cutter requires no adjustments and is rated for approximately 750,000 cuts. Please be aware of the following: Wait five seconds before feeding ticket stock into the printer after power up. During this time the cutter knife will move up and down. -
Page 28: Troubleshooting Guide
9.0 Troubleshooting Guide This is a simplified troubleshooting guide listing some of the typical problems. It is not intended to provide As a safety technical details or repair methods, but can serve as a guide to fault isolation in the field. precaution, all service to the printer should be done by qualified persons with power off and... - Page 29 POOR PRINT OUT (white voids in print out) a. Clean print head. Consult “Thermal Print Head” section. For Lemur-R see “Thermal Print Head” b. Replace thermal head. Consult 8.2.1 Thermal Print Head Replacement. c. Contact your system provider or BOCA for further assistance.
- Page 30 10.0 Spare Parts List Part Number Description 423534-X Anti-static brush 200C3 Print Head for Lemur-R & 2C printers only 424181 Cable, Print Head 2C (single cable) 423760-L3B-Z Platen complete 424012-PG-5 Platen Paper Guide SQ LOAD-U Opto Detector Ticket load (yellow DOT) SQ OPTO-U Opto Detector cut or tear PM35I-024...
-
Page 31: Appendix A - Vertical Printer Installation
Picture of Lemur-X with optional bezel If an auto cut Lemur-X is going to be used to print multiple tickets per transaction then an optional bezel should be used to prevent the media from falling back into the cutter area. -
Page 32: Appendix B -Ethernet Parameters
APPENDIX B –ETHERNET PARAMETERS General Each Boca Ethernet Printer is assigned a unique MAC address based in part on the printer's serial number. All Boca printers are factory configured in DHCP enabled mode (Exceptions may be made by special request). When the printer is plugged in the Network’s IP server should issue an IP address to the printer (this happens with 2-3 minutes). - Page 33 APPENDIX C – TESTING A LEMUR Boca Systems, Inc. has developed various program that allows customers to communicate from a host computer or mobile device to the printer. Below are the various configure and test programs we offer: WINDOWS: (Allow connection via Ethernet/ Wi-Fi, Parallel, Serial, USB-HID interfaces and print driver connection) https://www.bocasystems.com/documents/Testing%20a%20BOCA.pdf...
- Page 34 You may click on the HELP button at any time to open up the help window. The following command setting commands are available: mark is at 1.5” for the Lemur-X Note: The kiosk black (www.bocasystems.com/ticket_specs10.html...
- Page 35 7 - DHCP/SUB/GATE/NR* (automatically attempts to get an IP address/Subnet Mask/Gateway from Local Server and then register the name with the local NetBIOS name server – usually the WINS Server). The below commands are for Lemur-X with optional presenter only Command only needs to be sent once to take effect.
-
Page 36: Appendix E - Windows Usb Driver Installation Guide
APPENDIX E – WINDOWS USB DRIVER INSTALLATION GUIDE Do not connect the printer to your computer’s USB port until instructed. Please contact your software provider to confirm if the use of our driver is required for their ticketing software. We recommend that the print driver is installed by either your system administrator or IT support staff. -
Page 37: Appendix F - Mac Driver Installation Guide
APPENDIX F – MAC DRIVER INSTALLATION GUIDE Do not connect the printer to your computer’s USB port until instructed. Please contact your software provider to confirm if the use of our driver is required for their ticketing software. We recommend that the print driver is installed by either your system administrator or IT support staff. - Page 38 APPENDIX G Optional Presenter The Lemur-X may be ordered with an optional presenter mechanism with a built in present and retract function. The following illustrations provide an overview of the functionality of the various stages of printer operation. • PRESENT – Once the media has been printed and cut. It will be presented and held in place for to the customer to take.
-
Page 39: Appendix H - Bluetooth Connection
APPENDIX H – BLUETOOTH CONNECTION If your printer is equipped with an optional Bluetooth interface port then you will see BT LE in the Interface 2 or Interface 3 field of the serial number tag. The printer will also have the Bluetooth interface board mount onto one of the paper guides rails (see below photo). -
Page 40: Appendix I - Configure Wi-Fi Connection
APPENDIX I – CONFIGURE WI-FI CONNECTION To use the wireless capabilities of a printer equipped with the optional 802.11b wireless interface (Wi-Fi), it will first be necessary to setup the printer with information and security settings that match the settings of the IEEE 802.11b/g/n compatible wireless server/router you are connecting to. - Page 41 5. You will need to enter the SSID value. The Service Set Identifier is a 1 to 32 byte string. This normally would be the name of the Wi-Fi router you are connection to. Please note the ID is case sensitive. Security Mode: you will need to choose the security mode that is appropriate for your Wi-Fi router.
- Page 42 8. WEP Security Mode – Allows the user to communicate through the network using WEP wireless encryption. With WEP one can select 64 bit or 128-bit encryption. When the security encryption mode is chosen it will be required to enter the “Key” for the local wireless network. Please note the key is case sensitive. Some networks also enforce the use of a default transmit key.
-
Page 43: Appendix J - Service Plans
APPENDIX J – SERVICE PLANS For enhanced warranty coverage or for an out of warranty printer, we offer two types of service plans. GOLD SERVICE • Printer repair at BOCA facility (3 business day turnaround) Replace defective parts (ship within one business day) – customer must return defective parts •... -
Page 44: Appendix K - Technical Support
APPENDIX K – TECHNICAL SUPPORT Please go to the link below if you require technical support with your BOCA printer. There is no fee for initial email support. www.bocasystems.com/onlinesupportform.html PHONE / EMAIL SUPPORT - BOCA provides free technical support via email for all printers under warranty or service contracts. - Page 45 APPENDIX L – LEMUR-X UPG REFERENCE DRAWING...
- Page 46 REFERENCE DRAWING WITH 424089-UPG ROLL HOLDER ATTACHED...
- Page 47 APPENDIX M – LEMUR-X UPG PRESENTER REFERENCE DRAWING...
Need help?
Do you have a question about the LEMUR-X and is the answer not in the manual?
Questions and answers