
Related Manuals for Samsung NV75A657 Series


Summary of Contents for Samsung NV75A657 Series
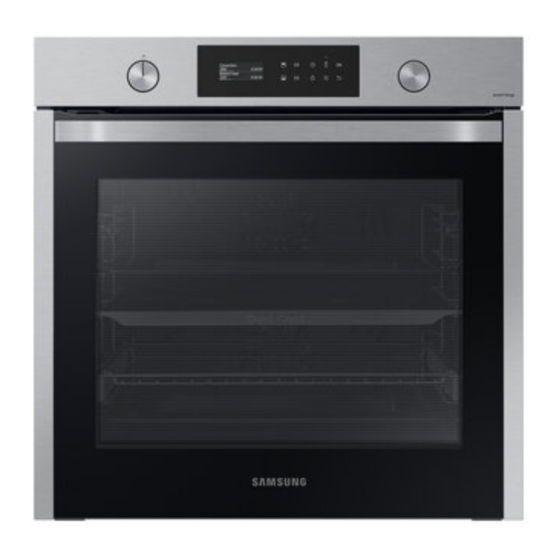
- Page 1 Built-in Oven User & Installation manual NV75A657*** / NV75A6549** NV75A6549RS_EU_DG68-01361L-00_EN.indd 1 NV75A6549RS_EU_DG68-01361L-00_EN.indd 1 2021-03-09 오후 5:58:21 2021-03-09 오후 5:58:21...
-
Page 2: Table Of Contents
Contents More Functions Using this manual System Settings The following symbols are used in this User Manual: Smart Control Safety instructions Cooking smart Important safety precautions Manual cooking Correct Disposal of This Product (Waste Electrical & Electronic Equipment) Auto cook programmes Auto energy saving function Test dishes Collection of frequent Auto cook recipes... -
Page 3: Using This Manual
Using this manual Safety instructions Thank you for choosing SAMSUNG Built-In Oven. Installation of this oven must be performed only by a licensed electrician. The This User Manual contains important information on safety and instructions installer is responsible for connecting the appliance to the mains power supply in intended to assist you in the operation and maintenance of your appliance. - Page 4 Safety instructions The method of fixing stated is not to depend on the use of If this appliance has cleaning function, during cleaning conditions adhesives since they are not considered to be a reliable fixing the surfaces may get hotter than usual and children should be means.
- Page 5 If your oven needs repair, contact to the enamel surfaces and cause poor cooking results. a SAMSUNG Service center or your dealer. Fruit juices will leave stains, which can become permanent on the enamel surfaces Electrical leads and cables should not be allowed to touch the oven.
-
Page 6: Correct Disposal Of This Product (Waste Electrical & Electronic Equipment)
Make sure all parts and accessories are included in the product package. If you household waste at the end of their working life. To prevent have a problem with the oven or accessories, contact a local Samsung customer possible harm to the environment or human health from centre or the retailer. -
Page 7: Power Connection
Divider Meat probe * 2 screws (M4 L25) Samsung is not responsible for accidents caused by missing or faulty earth grounding. WARNING Do not step on or twist the wires during installation, and keep them away from heat-emitting parts of the oven. -
Page 8: Cabinet Mount
458.5 If installing the oven in a built-in cabinet, the cabinet must have its plastic surfaces and adhesive parts resistant up to 90 °C. Samsung is not responsible for damage to furniture from the oven’s heat emission. The oven must be properly ventilated. For ventilation, leave a gap of about 50 mm between the lower shelf of the cabinet and the supporting wall. - Page 9 Oven (mm) Under-sink cabinet (mm) Min. 550 Min. 560 Max. 50 Min. 600 Min. 460 x Min. 50 NOTE • The built-in cabinet must have vents (D) to ventilate heat and circulate the air. • Minimum height requirement (C) is for oven installation alone.
- Page 10 Installation Mounting the oven After installation is complete, remove the protective film, tape, and other packing material, and take out the provided accessories from inside the oven. To remove Make sure to leave a gap (A) of at least the oven from the cabinet, disconnect power to the oven first, and then remove 5 mm between the oven and each side of 2 screws on both sides of the oven.
-
Page 11: Before You Start
Before you start Initial settings To set the time format 1. Tap When you turn on the oven for the first time, the First Use Guide screen appears. 2. Select Time format using the Value Dial, and then tap OK. Complete the on-screen instructions, and the First Use Guide will not appear again. -
Page 12: Accessories
Before you start Accessories Extra-deep tray * The extra-deep tray (depth: 50 mm) is used for roasting with or without the wire-tray insert. Put the slanted side For first time use, clean the accessories thoroughly with warm water, detergent to the front. and a soft clean cloth. -
Page 13: Dual Cook Mode
Operations Control panel Uninstallation • Loosen and remove the screw from the The front panel comes in a wide range of materials and colours. For improved lock handle. quality, the actual appearance of the oven is subject to change without notice. 04 05 07 09 Lock/unlock •... -
Page 14: Common Settings
Operations Common settings 07 Smart Control Set the Smart Control function on or off. It is common to change the default temperature and/or cooking time across all NOTE cooking modes. Follow the steps below to adjust the temperature and/or cooking Easy Connection must be set before using this function. - Page 15 Cooking time NOTE • To change the set temperature, turn the Value Dial to set the desired 1. Select a cooking mode and set the temperature. temperature, and then tap OK or - See the “Mode and temperature” • The exact temperature inside the oven can be measured with authorized section for detailed instructions.
-
Page 16: Cooking Modes
Operations Cooking modes End time 1. Select a cooking mode and set the 1. Turn the Mode Dial to select a cooking temperature. mode. - See the “Mode and temperature” 2. Set the cooking time and/or temperature section for detailed instructions if necessary. - Page 17 Cooking mode descriptions Temperature range (°C) Suggested The cooking modes with an asterisk (*) are available for fast preheating and Mode Dual temperature disabled for temperatures set at less than 100 °C. Single (°C) Upper Lower Dual Temperature range (°C) Suggested 100- 40-250...
- Page 18 Operations Dual cook mode Temperature range (°C) Suggested You can use the provided divider to separate the cooking chamber in the upper Mode Dual temperature and lower zones. This allows users to enable two different cooking modes Single (°C) Upper Lower Dual simultaneously, or to simply choose one zone to cook with.
- Page 19 Cooking with the meat probe (applicable models only) NOTE The meat probe measures the internal temperature of meat while it’s cooking. Availability of Dual cook mode depends on the cooking mode. For more When the temperature reaches the target temperature, the oven stops and finishes information, see the Cooking smart section in this manual.
-
Page 20: Dual Cook Mode Temperature Setting Range
Operations WARNING Upper zone is limited to (°C) If Lower is set to (°C) • To prevent damage, do not use the meat probe with the spit accessory. Minimum Maximum • When cooking is complete, the meat probe becomes very hot. To prevent burns, use oven gloves to take out the food. -
Page 21: To Stop Cooking
To stop cooking To stop cooking for an individual zone Follow these instructions to stop cooking in Dual cook mode. • While cooking is in process, you can turn • You can tap to pause cooking, or tap the Mode Dial to “ ”... -
Page 22: Special Function
Operations Special Function Auto Cook Additional functions improve your cooking experience. Special functions are not For inexperienced cooks, the oven offers a total of 50 auto cooking recipes. Take enabled in Dual cook mode. advantage of this feature to save you time or shorten your learning curve. The cooking time and temperature will be adjusted according to the selected recipe. -
Page 23: Cleaning
Cleaning Dual cook mode 1. Insert the divider in level 3 to activate Two cleaning modes are available for you. This function saves you time by Dual cook mode. removing the need for regular manual cleaning. The remaining time appears on the display during this process. - Page 24 Operations 3. Turn the Mode Dial (or Value Dial for Pyrolytic NV75A657*** models) to select Steam Pyrolytic features high temperature thermal cleaning. It burns off oily leftovers to Clean, and then tap OK to start cleaning. facilitate manual cleaning. Steam cleaning runs for 26 minutes. NOTE The Pyrolytic function is available for NV75A657*** model only.
-
Page 25: More Functions
Timer CAUTION , and then tap OK. • Do not touch the oven because the oven becomes very hot during the cycle. Select Timer using the Value Dial, and then tap • To avoid accidents, keep children away from the oven. Set the timer (hour and minute) using the Value Dial, and then tap •... -
Page 26: System Settings
Operations System Settings Smart Control Tap and hold for 3 seconds to enter the System Settings menu, and then turn To use the oven’s Smart Control, you must download the SmartThings app to a the Value Dial to change various settings for your oven. mobile device. -
Page 27: Cooking Smart
Cooking smart Manual cooking Baking We recommend to preheat the oven for best results. WARNING on acrylamide Type of Temp. Time Food Accessory Level Acrylamide produced while baking starch-contained food such as potato chips, heating (°C) (min.) French fries, and bread may cause health problems. It is recommended to cook Sponge cake Wire rack, Ø... - Page 28 Cooking smart Type of Temp. Time Type of Temp. Time Food Accessory Level Food Accessory Level heating (°C) (min.) heating (°C) (min.) Apple pie Wire rack, 160-170 65-75 Poultry(Chicken/Duck/Turkey) Ø 20 cm tin Chicken, Whole, Wire rack + 80-100* Chilled pizza Universal tray 180-200 5-10...
- Page 29 Grilling Frozen ready-meal We recommend preheat the oven using large grill mode. Turn over after half of Type of Temp. Time time. Food Accessory Level heating (°C) (min.) Type of Temp. Time Frozen pizza, Wire rack 200-220 15-25 Food Accessory Level heating (°C)
- Page 30 Cooking smart Pro-Roasting ECO convection This mode includes an automatic heating-up cycle up to 220 °C. The top heater This mode uses the optimized heating system so that you save the energy during and the convection fan are operating during the process of searing the meat. After cooking your dishes.
- Page 31 Dual cook Type of Temp. Time Zone Food Accessory Level Before using dual cook function insert the divider into the oven. We recommend heating (°C) (min.) preheat the oven for best results. Upper Chicken, Wire rack + 210-230 30-35 The following table presents 5 dual cook guides we recommended for cooking, drumstick universal tray roasting and baking.
-
Page 32: Auto Cook Programmes
Cooking smart Auto cook programmes You can also use upper or lower zone only to save power. The cooking time can be extended when you use separated zone. We recommend preheat the oven for best results. CAUTION Foods that can easily spoil (such as milk, eggs, fish, meat, or poultry) should not Upper stand in the oven for more than 1 hour before cooking begins, and should be removed promptly when cooking is completed. - Page 33 Code Food Weight (kg) Accessory Level Code Food Weight (kg) Accessory Level 1.2-1.5 Wire rack 0.4-0.5 Wire rack Prepare pasta gratin using 22-24 cm ovenproof Put the dough into a black metal buttered Pasta bake Fruit flan base dish. Start programme, after preheating beep baking dish for cake base.
- Page 34 Cooking smart Code Food Weight (kg) Accessory Level Code Food Weight (kg) Accessory Level 0.8-1.2 Wire rack Wire rack 0.8-1.2 Put fresh fruits (raspberries, blackberries, apple Universal tray slices, or pear slices) into oven dish 22-24 cm. Roast sirloin of beef Season the beef and leave in refrigerator for Fruit crumbles Distribute crumbles on top.
- Page 35 Code Food Weight (kg) Accessory Level Code Food Weight (kg) Accessory Level Wire rack 0.3-0.7 Universal tray 1.0-1.4 Universal tray Sole Put sole on baking paper on the universal tray. Chicken, Whole Cut surface with knife. Rinse and clean chicken. Brush chicken with oil and spices.
- Page 36 Cooking smart Dual cook Code Food Weight (kg) Accessory Level The following table presents 10 auto programmes for cooking, roasting and 0.8-1.2 Universal tray baking. You can use only upper zone or lower zone and use the upper and lower Prepare homemade pizza with the yeast dough zone at the same time.
- Page 37 Code Food Weight (kg) Accessory Level Code Food Weight (kg) Accessory Level 0.5-0.9 Universal tray 0.3-0.7 Wire rack Cut large potatoes (each 200 g) into halves Start programme, after preheating beep Frozen Pizza Baked potato halves lengthways. Put with cut side up on universal sounds, put the frozen pizza on the middle of tray and brush with olive oil, herbs and the wire rack.
-
Page 38: Test Dishes
Cooking smart Test dishes 2. Grilling Preheat the empty oven for 5 minutes using Large Grill function. According to standard EN 60350-1. Type of Temp. Time Type of food Accessory Level 1. Baking heating (°C) (min.) The recommendations for baking refer to a preheated oven. Do not use the Fast White bread Wire rack Preheat function. -
Page 39: Collection Of Frequent Auto Cook Recipes
Collection of frequent Auto cook recipes Lasagne Ingredients 2 tbsp olive oil, 500 g minced beef, 500 ml tomato sauce, Potato gratin 100 ml beef stock, 150 g dried lasagne sheets, 1 onion (chopped), 200 g grated cheese, 1 tsp each of dried parsley Ingredients 800 g potatoes, 100 ml milk, 100 ml cream, 50 g beaten whole flakes, oregano, basil... - Page 40 Cooking smart Apple pie Quiche Lorraine Ingredients • Pastry: 275 g flour, tbsp salt, 125 g white castor sugar, 8 g Ingredients • Pastry: 200 g plain flour, 80 g butter, 1 egg vanilla sugar, 175 g cold butter, 1 egg(beaten) •...
- Page 41 Homemade pizza Herb roasted lamb chops Ingredients • Pizza dough: 300 g flour, 7 g dried yeast, 1 tbsp olive oil, Ingredients 1 kg lamb chops (6 pieces), 4 large garlic cloves (pressed), 200 ml warm water, 1 tbsp sugar and salt 1 tbsp fresh thyme (crushed), 1 tbsp fresh rosemary(crushed), •...
-
Page 42: Maintenance
Maintenance Cleaning Door Do not remove the oven door unless for cleaning purposes. To remove the door for For easier cleaning, regularly clean the oven. cleaning, follow these instructions. WARNING WARNING • Make sure the oven and accessories are cool before cleaning. The oven door is heavy. - Page 43 Door glass 5. Remove the third sheet from the door in the arrow direction. Depending on the model, the oven door is equipped with 3-4 sheets of glass 6. Clean the glass with soapy water and a placed against each other. Do not remove the door glass unless for cleaning clean cloth.
-
Page 44: Replacement
• Before replacing a bulb, turn off the oven and unplug the power cord. • Use only 25-40 W/220-240 V, 300 °C heat-resistant bulbs. You can purchase approved bulbs at a local Samsung service centre. • Always use a dry cloth when handling a halogen bulb. This is to prevent the bulb from being tampered with fingerprints or sweat, resulting in a shortened lifecycle. -
Page 45: Troubleshooting
If you encounter a problem with the oven, first check the table below and try the There is no power • If there is no power • Check whether there is suggestions. If the problem continues, contact a local Samsung service centre. to the oven. supplied power supplied. - Page 46 Troubleshooting Problem Cause Action Problem Cause Action There is water • There may be water or • Let the oven cool and Smoke comes out • During initial operation • Smoke may come from dripping. steam in some cases then wipe with a dry dish during operation.
-
Page 47: Information Codes
C-d0 Occurs when a button is pressed and oven and try again. If the held for a period of time. problem continues, contact a local Samsung service centre. English 47 NV75A6549RS_EU_DG68-01361L-00_EN.indd 47 NV75A6549RS_EU_DG68-01361L-00_EN.indd 47 2021-03-09 오후 5:58:44 2021-03-09 오후 5:58:44... -
Page 48: Technical Specifications
Technical specifications SAMSUNG strives to improve its products at all times. Both the design specifications and these user instructions are thus subject to change without Code Meaning Action notice. The divider must not be removed during cooking in Connection voltage 230-240 V ~ 50 Hz Dual cook mode. -
Page 49: Appendix
Type of oven Built-in conformtiy is available at the following internet address: The official Declaration of conformity may be found at http://www.samsung.com. go to Support > Search Mass of the appliance (M) NV75A657***: 41.5 kg Product Support and enter the model name. -
Page 50: Open Source Announcement
Appendix Memo Open Source Announcement The software included in this product contains open source software. The following URL http://opensource.samsung.com/opensource/SMART_TP2_0/ seq/0 leads to open source license information as related to this product. 50 English NV75A6549RS_EU_DG68-01361L-00_EN.indd 50 NV75A6549RS_EU_DG68-01361L-00_EN.indd 50 2021-03-09 오후 5:58:44... - Page 51 Memo NV75A6549RS_EU_DG68-01361L-00_EN.indd 51 NV75A6549RS_EU_DG68-01361L-00_EN.indd 51 2021-03-09 오후 5:58:44 2021-03-09 오후 5:58:44...
- Page 52 06196 77 555 77 www.samsung.com/de/support ITALIA 800-SAMSUNG (800.7267864) www.samsung.com/it/support CYPRUS 8009 4000 only from landline, toll free www.samsung.com/gr/support 80111-SAMSUNG (80111 726 7864) only from land line GREECE www.samsung.com/gr/support (+30) 210 6897691 from mobile and land line LUXEMBURG 261 03 710 www.samsung.com/be_fr/support NETHERLANDS 088 90 90 100 www.samsung.com/nl/support...