Xilinx Virtex-6 FPGA ML605 Getting Started
Evaluation kit
Hide thumbs
Also See for Virtex-6 FPGA ML605:
- Manual (381 pages) ,
- User manual (317 pages) ,
- Getting started manual (77 pages)

Related Manuals for Xilinx Virtex-6 FPGA ML605


Summary of Contents for Xilinx Virtex-6 FPGA ML605
- Page 1 Getting Started with the Xilinx Virtex-6 FPGA ML605 Evaluation Kit [Guide Subtitle] [optional] UG533 (v1.4) November 15, 2010 [optional] UG533 (v1.4) November 15, 2010 XPN 0402771-01...
- Page 2 Xilinx. Xilinx expressly disclaims any liability arising out of your use of the Documentation. Xilinx reserves the right, at its sole discretion, to change the Documentation without notice at any time. Xilinx assumes no obligation to correct any errors contained in the Documentation, or to advise you of any corrections or updates.
-
Page 3: Table Of Contents
..............69 Appendix A: References ML605 Evaluation Kit Getting Started Guide www.xilinx.com UG533 (v1.4) November 15, 2010... - Page 4 ML605 Evaluation Kit Getting Started Guide UG533 (v1.4) November 15, 2010...
-
Page 5: Preface: About This Guide
ML605 board functionality. Additional Documentation The following documents are also available for download at http://www.xilinx.com/support/documentation/virtex-6.htm. • Virtex-6 Family Overview The features and product selection of the Virtex-6 family are outlined in this overview. -
Page 6: Additional Support Resources
PCB and interface level. Additional Support Resources To search the database of silicon and software questions and answers or to create a technical support case in WebCase, see the Xilinx website at: http://www.xilinx.com/support. www.xilinx.com ML605 Evaluation Kit Getting Started Guide UG533 (v1.4) November 15, 2010... -
Page 7: Introduction
• DVI to VGA Adapter • Ethernet Cat5 Cable • ISE® Design Suite DVD ♦ A full-seat of Xilinx ISE® Design Suite: Logic Edition – Device-Locked to Virtex-6 LX240T FPGA • ML605 Documentation ♦ Welcome Letter ♦ Hardware Setup Guide ♦... -
Page 8: Key Features
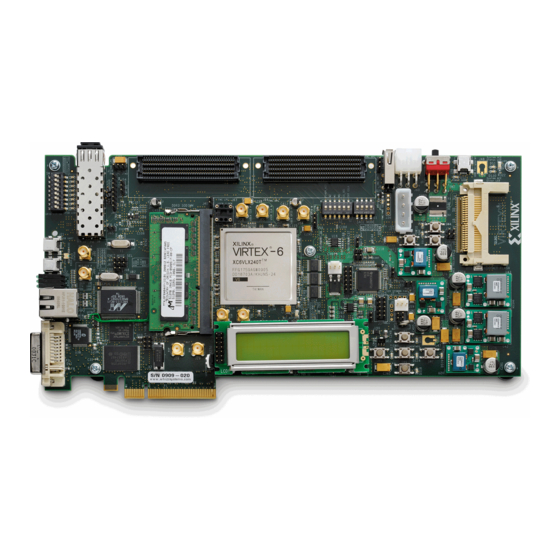
Key Features What is Available on the Web • Product Home Page: www.xilinx.com/ml605 • Reference design user guide, tutorials, and design files • Schematics, Gerber, and board bill of materials (BOM) • Additional detailed documentation Key Features Virtex-6 FPGA •... -
Page 9: Input/Output And Expansion Ports
Evaluation Board. These demonstrations provide an overview of the board features. This evaluation kit comes with a number of pre-installed demonstrations and examples, as well as additional reference designs and application notes found on the Xilinx website. The default demonstrations on the Platform Flash and CompactFlash exercise some of the board features including verifying PCI Express connectivity and testing the UART, Ethernet, DDR3, IIC, LEDs, and other commonly used embedded processing features. -
Page 10: Board Features
3 OFF (M0 = 0) 5 OFF 2 ON (CS_SEL = 1) 4 OFF 1 OFF (EXT_CCLK = 0) 3 OFF 2 OFF UG533_01_02_121709 1 OFF Figure 1-2: Default Jumper and Switches Settings www.xilinx.com Virtex-6 Getting Started Guide UG533 (v1.4) November 15, 2010... -
Page 11: Connecting The Cables And Power
Power on ML605 board for UART Drivers Installation Install the CP210x VCP Win2K/XP/2K3 Drivers Server from www.silabs.com. Note: The drivers are also available on the USB flash drive shipped with the board. Virtex-6 Getting Started Guide www.xilinx.com UG533 (v1.4) November 15, 2010... -
Page 12: Setting The System Properties
Setting the System Properties Right-click My Computer and select Properties Select the Hardware tab b. Click on Device Manager X-Ref Target - Figure 1-4 UG533_01_04_061909 Figure 1-4: Select the Device Manager www.xilinx.com Virtex-6 Getting Started Guide UG533 (v1.4) November 15, 2010... - Page 13 Getting Started with the Flash Demonstration Expand the Ports Hardware Right-click on USB to UART Bridge and select Properties. X-Ref Target - Figure 1-5 UG533_01_05_061909 Figure 1-5: Select the USB to UART Bridge Properties Virtex-6 Getting Started Guide www.xilinx.com UG533 (v1.4) November 15, 2010...
- Page 14 Select your USB com port from the Port drop down window b. Set the baud rate to 9600 X-Ref Target - Figure 1-7 9600 UG533_01_08_111809 Figure 1-7: Set the USG Com Port www.xilinx.com Virtex-6 Getting Started Guide UG533 (v1.4) November 15, 2010...
-
Page 15: Configuring The Fpga
Reset pushbutton. The CompactFlash card contains a Built-In System Test (BIST) design which is used for verification of the board's functionality. X-Ref Target - Figure 1-9 Figure 1-9: Insert the CompactFlash Card Virtex-6 Getting Started Guide www.xilinx.com UG533 (v1.4) November 15, 2010... - Page 16 After FPGA configuration, a menu of feature tests appears as shown in the Tera Terminal window (Figure 1-10). X-Ref Target - Figure 1-10 Figure 1-10: Initial Test Menu after FPGA Configuration www.xilinx.com Virtex-6 Getting Started Guide UG533 (v1.4) November 15, 2010...
-
Page 17: Running The Bist Application
10. Type a 1 to start the UART test. X-Ref Target - Figure 1-11 Figure 1-11: 1. UART Test 11. Type a 2 to start the LED test. X-Ref Target - Figure 1-12 Figure 1-12: 2. LED Test Virtex-6 Getting Started Guide www.xilinx.com UG533 (v1.4) November 15, 2010... - Page 18 12. Type a 3 to start the Timer test. X-Ref Target - Figure 1-13 Figure 1-13: 3. Timer Test 13. Type a 4 to start the flash test. X-Ref Target - Figure 1-14 Figure 1-14: 4. Flash Test www.xilinx.com Virtex-6 Getting Started Guide UG533 (v1.4) November 15, 2010...
- Page 19 Figure 1-15: 5. IIC EEPROM Test 15. Type a 6 to start the Ethernet Loopback (Temac) test. This takes approximately 10 seconds to complete. X-Ref Target - Figure 1-16 Figure 1-16: 6. Temac Test Virtex-6 Getting Started Guide www.xilinx.com UG533 (v1.4) November 15, 2010...
- Page 20 Getting Started with the Flash Demonstration 16. Type a 7 to start the GPIO Switch test. X-Ref Target - Figure 1-17 Figure 1-17: 7. GPIO Switch Test www.xilinx.com Virtex-6 Getting Started Guide UG533 (v1.4) November 15, 2010...
- Page 21 17. Type an 8 to start the External Memory (Multi-Port Memory Controller, MPMC) test. This takes approximately 20 minutes to complete. X-Ref Target - Figure 1-18 Figure 1-18: 8. MPMC Test Virtex-6 Getting Started Guide www.xilinx.com UG533 (v1.4) November 15, 2010...
- Page 22 Getting Started with the Flash Demonstration Figure 1-19 shows the MPMC test status. X-Ref Target - Figure 1-19 Figure 1-19: MPMC Test Status www.xilinx.com Virtex-6 Getting Started Guide UG533 (v1.4) November 15, 2010...
- Page 23 Getting Started with the Flash Demonstration 18. Type a 9 to start the System Monitor test. X-Ref Target - Figure 1-20 Figure 1-20: 9. System Monitor Test Virtex-6 Getting Started Guide www.xilinx.com UG533 (v1.4) November 15, 2010...
- Page 24 X-Ref Target - Figure 1-21 Figure 1-21: ML605 North, South, East, West, and Center Pushbuttons Figure 1-22 shows the test menu. X-Ref Target - Figure 1-22 Figure 1-22: Pushbutton Test www.xilinx.com Virtex-6 Getting Started Guide UG533 (v1.4) November 15, 2010...
- Page 25 Getting Started with the Flash Demonstration 20. Type a B to start the LCD test. X-Ref Target - Figure 1-23 Figure 1-23: LCD Test Virtex-6 Getting Started Guide www.xilinx.com UG533 (v1.4) November 15, 2010...
- Page 26 Getting Started with the Flash Demonstration 21. Type a C to start the System ACE CF test. X-Ref Target - Figure 1-24 Figure 1-24: System ACE CF Test www.xilinx.com Virtex-6 Getting Started Guide UG533 (v1.4) November 15, 2010...
- Page 27 23. Type a D to start the DVI/VGA (TFT) test. The test patterns indicated in Figure 1-26 appear on the monitor. X-Ref Target - Figure 1-26 Figure 1-26: TFT Test Virtex-6 Getting Started Guide www.xilinx.com UG533 (v1.4) November 15, 2010...
-
Page 28: Getting Started With Pci Express Pio Demonstration
CORE Generator, which allows users to easily bring up their system board with a known established working design to verify the link and functionality of the board. The step-by-step procedure for creating the PIO design by Xilinx CORE Generator™ software is illustrated by the ML605 PCIe x8 Gen1 Design Creation tutorial [Ref 23]. -
Page 29: System Requirements, Installation, And Setup
Unzip PCItree.zip to your folder of choice Click on PCITree.exe and proceed with the installation Copy HLP.SYS to C:\WINDOWS\system32\drivers directory Verify the installation X-Ref Target - Figure 1-28 Figure 1-28: About the PciTree Tool Virtex-6 Getting Started Guide www.xilinx.com UG533 (v1.4) November 15, 2010... - Page 30 Caution! Do not use the PCIe power connector from the PC power supply. Use only the 4-pin ATX connector. X-Ref Target - Figure 1-29 UG533_c1_29_060110 Figure 1-29: Board Insertion Location www.xilinx.com Virtex-6 Getting Started Guide UG533 (v1.4) November 15, 2010...
-
Page 31: Running The Pci Express Pio Demonstration
FPGA, the DONE LED (DS13) should illuminate. 11. Launch the PciTree tool and verify the menu shown in Figure 1-30. X-Ref Target - Figure 1-30 Figure 1-30: Launch the PciTree Tool Virtex-6 Getting Started Guide www.xilinx.com UG533 (v1.4) November 15, 2010... -
Page 32: Configuration Registers Test
12. Set the number of configuration registers to 64 (as shown in Figure 1-31) and click on the refresh dump: button. X-Ref Target - Figure 1-31 Figure 1-31: Set Configuration Registers www.xilinx.com Virtex-6 Getting Started Guide UG533 (v1.4) November 15, 2010... - Page 33 Getting Started with PCI Express PIO Demonstration 13. Locate the Xilinx device as shown in figure Figure 1-32. ♦ Xilinx PCI vendor ID is 0x10EE ♦ Device ID of the x8 Gen1 configuration is 0x6018 X-Ref Target - Figure 1-32...
- Page 34 14. Navigate to the linked list in the configuration space (as shown in Figure 1-33) to locate the PCIe capabilities structure. 15. With the Xilinx device selected, select register 0x40. ♦ Register 0x40 points to the next structure ♦ 0x48 is the address of the next structure...
- Page 35 ♦ 0x60 is the address of the next structure, indicating the data at this offset is the PCIe Capabilities Structure. X-Ref Target - Figure 1-34 Figure 1-34: Select Register 0x48 Virtex-6 Getting Started Guide www.xilinx.com UG533 (v1.4) November 15, 2010...
- Page 36 Getting Started with PCI Express PIO Demonstration 17. Select register 0x60 (as shown in Figure 1-35). ♦ 0x60 is a type 0x10 X-Ref Target - Figure 1-35 Figure 1-35: Select Register “0x60” www.xilinx.com Virtex-6 Getting Started Guide UG533 (v1.4) November 15, 2010...
- Page 37 The Link Status Register (0x70) shows the current link status ♦ This design is trained to Gen1 x8 as indicated by 0x81 X-Ref Target - Figure 1-36 Figure 1-36: Select Register 0x6C Virtex-6 Getting Started Guide www.xilinx.com UG533 (v1.4) November 15, 2010...
-
Page 38: Base Address Register (Bar) Test
X-Ref Target - Figure 1-37 Figure 1-37: Double-Click on BAR 0 20. Click Yes on the dialog box (as shown in Figure 1-38). X-Ref Target - Figure 1-38 Figure 1-38: Click Yes www.xilinx.com Virtex-6 Getting Started Guide UG533 (v1.4) November 15, 2010... - Page 39 Getting Started with PCI Express PIO Demonstration 21. Select auto read memory (as shown in Figure 1-39). X-Ref Target - Figure 1-39 Figure 1-39: Select Auto Read Memory Virtex-6 Getting Started Guide www.xilinx.com UG533 (v1.4) November 15, 2010...
- Page 40 22. Click on the first memory location by holding <Shift-End> keys. This will select 1024 bytes as shown in Figure 1-40. X-Ref Target - Figure 1-40 Figure 1-40: Select 1024 Bytes www.xilinx.com Virtex-6 Getting Started Guide UG533 (v1.4) November 15, 2010...
- Page 41 23. Write to memory by selecting the count box and Write Memory button (as shown in Figure 1-41). 24. Verify the result (counting up to FF) by selecting the refr. view: button. X-Ref Target - Figure 1-41 Figure 1-41: Select to Write Memory Virtex-6 Getting Started Guide www.xilinx.com UG533 (v1.4) November 15, 2010...
- Page 42 25. Restore the memory by deselecting the count box and clicking the Write Memory button (as shown in Figure 1-42). 26. Review the result by clicking on the refr. view: button. X-Ref Target - Figure 1-42 Figure 1-42: Restore Memory www.xilinx.com Virtex-6 Getting Started Guide UG533 (v1.4) November 15, 2010...
-
Page 43: Getting Started With The Base Reference Design
PC, and receive status from the demo. A simple MDIO controller is implemented using a Xilinx PicoBlaze™ processor. The purpose of this controller is to determine presence of an Ethernet link as well as its operating speed. -
Page 44: Setting Up The Hardware For The Base Reference Design
BaseRefDISetup2_0_6.msi. This is an application GUI that is used to display the graphical information for the Base Reference Design. Please double click on this application to install the software. www.xilinx.com Virtex-6 Getting Started Guide UG533 (v1.4) November 15, 2010... - Page 45 Getting Started with the Base Reference Design X-Ref Target - Figure 1-44 Figure 1-44: Run BRD GUI Installer Click Run. Virtex-6 Getting Started Guide www.xilinx.com UG533 (v1.4) November 15, 2010...
- Page 46 Getting Started with the Base Reference Design X-Ref Target - Figure 1-45 Figure 1-45: BRD Interface Setup Click Next to run the BRD Setup Wizard. www.xilinx.com Virtex-6 Getting Started Guide UG533 (v1.4) November 15, 2010...
- Page 47 Getting Started with the Base Reference Design X-Ref Target - Figure 1-46 Figure 1-46: Install Required WinPcap Component Click Next. Virtex-6 Getting Started Guide www.xilinx.com UG533 (v1.4) November 15, 2010...
- Page 48 Getting Started with the Base Reference Design X-Ref Target - Figure 1-47 Figure 1-47: Confirm BRD Installation Confirm the Installation by clicking Next. www.xilinx.com Virtex-6 Getting Started Guide UG533 (v1.4) November 15, 2010...
- Page 49 Getting Started with the Base Reference Design X-Ref Target - Figure 1-48 Figure 1-48: BRD Installation in Progress Virtex-6 Getting Started Guide www.xilinx.com UG533 (v1.4) November 15, 2010...
- Page 50 Getting Started with the Base Reference Design X-Ref Target - Figure 1-49 Figure 1-49: Launch WinPcap Installer Click Next. www.xilinx.com Virtex-6 Getting Started Guide UG533 (v1.4) November 15, 2010...
- Page 51 Getting Started with the Base Reference Design X-Ref Target - Figure 1-50 Figure 1-50: WinPcap Installation Wizard Click Next. Virtex-6 Getting Started Guide www.xilinx.com UG533 (v1.4) November 15, 2010...
- Page 52 Getting Started with the Base Reference Design X-Ref Target - Figure 1-51 Figure 1-51: WinPcap License Agreement Click I Agree if you agree with the WinPCAP license terms and conditions. www.xilinx.com Virtex-6 Getting Started Guide UG533 (v1.4) November 15, 2010...
- Page 53 Getting Started with the Base Reference Design X-Ref Target - Figure 1-52 Figure 1-52: WinPcap Installation Wizard Successful Click Finish. Virtex-6 Getting Started Guide www.xilinx.com UG533 (v1.4) November 15, 2010...
- Page 54 Getting Started with the Base Reference Design X-Ref Target - Figure 1-53 Figure 1-53: BRD Installation Complete Click Close. www.xilinx.com Virtex-6 Getting Started Guide UG533 (v1.4) November 15, 2010...
-
Page 55: Running The Base Reference Design
Turn off any wireless cards while running this demonstration. To start the application GUI, please go to your Windows START menu and select All Programs → XILINX → Base Reference Design → Base Reference Design Interface The GUI shown in Figure 1-54 will start. - Page 56 Select the menu item Setup, then select the appropriate Wired Network. Wait for few seconds and then press SW3 on the ML605 to configure the FPGA using the System ACE CF controller and the CompactFlash card. www.xilinx.com Virtex-6 Getting Started Guide UG533 (v1.4) November 15, 2010...
- Page 57 You can now select an image. It is best to select an image smaller than 1024 pixels wide. On the USB flash drive there are a number of images to select or you can select one of your Virtex-6 Getting Started Guide www.xilinx.com UG533 (v1.4) November 15, 2010...
- Page 58 FPGA. Unless the effect has been changed, the default effect is Identity (Figure 1-57). X-Ref Target - Figure 1-57 Figure 1-57: Original and FPGA Filtered Images using Identity Effect www.xilinx.com Virtex-6 Getting Started Guide UG533 (v1.4) November 15, 2010...
- Page 59 As you can see in Figure 1-58, the image is updated using the selected filter operation. X-Ref Target - Figure 1-58 Figure 1-58: Original and FPGA Filtered Images using SobelX Effect Virtex-6 Getting Started Guide www.xilinx.com UG533 (v1.4) November 15, 2010...
- Page 60 Select Smooth effect and notice how the 2-D FIR filter coefficient matrix values change. Figure 1-59 shows how the image display changes as well. X-Ref Target - Figure 1-59 Figure 1-59: Original and FPGA Filtered Images using Smooth Effect www.xilinx.com Virtex-6 Getting Started Guide UG533 (v1.4) November 15, 2010...
-
Page 61: Installing The Ise Software
ISE Design Suite: Logic Edition to be used with a Virtex-6 XC6VLX240T-1FFG1156C FPGA. This software can be installed from the DVD provided with the kit. The latest version can also be downloaded from http://www.xilinx.com/support/download/index.htm. The ML605 evaluation kit also works with the software listed here: •... -
Page 62: Redeeming The Software And Ip License
ISE software and/or the IP included with the evaluation kit. X-Ref Target - Figure 1-61 UG525_c1_21_110110 Figure 1-61: Software Voucher To create a license: Go to www.xilinx.com/getlicense/ (Figure 1-62). www.xilinx.com Virtex-6 Getting Started Guide UG533 (v1.4) November 15, 2010... - Page 63 X-Ref Target - Figure 1-62 UG525_c1_22_101410 Figure 1-62: Licensing Site Sign-In Page If you have a Xilinx account, enter your User ID, Password and click Sign In. If you don't have an account, click Create Account to create one. Note: If you have questions or need help, contact Xilinx customer service at: http://www.xilinx.com/support/techsup/tappinfo.htm.
- Page 64 Click Generate Node Locked License at the bottom of the page to start the license generation flow (Figure 1-64). www.xilinx.com Virtex-6 Getting Started Guide UG533 (v1.4) November 15, 2010...
- Page 65 Ethernet MAC address, or a disk volume ID. When license generation is complete, the license will be emailed to you. Follow the instructions in the Xilinx License email to complete the licensing process (Figure 1-65).
- Page 66 Copy License... (Figure 1-66). X-Ref Target - Figure 1-66 UG525_36_111209 Figure 1-66: Manage Xilinx License Tab Navigate to the location where the Xilinx.lic file is saved and select it (Figure 1-67). www.xilinx.com Virtex-6 Getting Started Guide UG533 (v1.4) November 15, 2010...
-
Page 67: Now What
After following the steps in this Getting Started Guide, you can test the features of the board using the ML605 Board Diagnostic Flash and PCI Express demonstrations. You now have a complete and updated installation of the Xilinx ISE Device-Locked to Virtex-6 LX240T FPGA software, and should have been able to open your first project. -
Page 68: Getting Additional Help And Support
Asia Pacific including Japan - apaccase@xilinx.com For technical support including the installation and use of your product license file you may contact Xilinx Online Technical Support at www.support.xilinx.com. On this site you will also find the following resources for assistance:... -
Page 69: Warranty
For any breach by Xilinx of this limited warranty, the exclusive remedy of Customer and the sole liability of Xilinx shall be, at the option of Xilinx, to replace or repair the affected products, or to refund to Customer the price of the affected products. The availability of replacement products is subject to product discontinuation policies at Xilinx. - Page 70 Warranty www.xilinx.com Virtex-6 Getting Started Guide UG533 (v1.4) November 15, 2010...
-
Page 71: Appendix A: References
Appendix A References This section provides references to documentation supporting Virtex-6 FPGAs, tools, and IP. For additional information, see www.xilinx.com/support/documentation/index.htm. UG534, ML605 Hardware User Guide UG535, ML605 Reference Design User Guide DS150, Virtex-6 Family Overview DS152, Virtex-6 FPGA Data Sheet: DC and Switching Characteristics... - Page 72 Appendix A: References www.xilinx.com ML605 Evaluation Kit Getting Started Guide UG533 (v1.4) November 15, 2010...
Need help?
Do you have a question about the Virtex-6 FPGA ML605 and is the answer not in the manual?
Questions and answers