Table of Contents
Advertisement
Quick Links
English
繁體中文
Thank you for purchasing this Panasonic product.
Before operating this unit, please read these instructions completely and save them for future use.
感謝您購買本 Panasonic 產品。
使用本產品之前,請仔細閱讀本說明書,並妥善保存以供未來使用。
1
00_P9310MA03421.indb 1
Operating Instructions
(Household)
EN2
TC2
使用說明書
Massage Lounger
電動按摩椅
(家用)
Model No.
EP-MA03
型號
2015-3-6 15:52:25
Advertisement
Table of Contents

Related Manuals for Panasonic EP-MA03


Summary of Contents for Panasonic EP-MA03
- Page 1 Massage Lounger (Household) 電動按摩椅 (家用) Model No. EP-MA03 型號 English 繁體中文 Thank you for purchasing this Panasonic product. Before operating this unit, please read these instructions completely and save them for future use. 感謝您購買本 Panasonic 產品。 使用本產品之前,請仔細閱讀本說明書,並妥善保存以供未來使用。 00_P9310MA03421.indb 1 2015-3-6 15:52:25...
-
Page 2: Warning / Caution
SAFETY PRECAUTIONS These must be observed Be sure to follow these precautions to prevent injury to people or damage to property. The following precautions are classified according to the extent of possible harm or damage resulting from misuse of the product. WARNING If not observed, may result in death or serious injury. - Page 3 WARNING • If you feel physically abnormal while using or have no effect after use, stop the product immediately and consult a physician. Failure to observe this may result in accident or physical disorder. • While using the massage or when adjusting the backrest or leg/foot massage section, make sure there are no people or pets around the unit (behind, underneath, in front or side of the unit).
- Page 4 CAUTION • The following persons must consult with a physician before use, even if they are currently healthy. (1) People with weak muscles due to aging or slim people, (2) People with lumbago attributed to bones or internal organs, (3) People who often bruise or sustain sprains, (4) People who suffer from severe motion sickness, (5) People who have had a heart surgery or surgery of the internal organs in the past.
-
Page 5: Grounding Instructions
Backrest Backrest height Armrest height height Approx.105 cm Approx. 61 cm Seat height Approx. 82 cm Approx. 45 cm Width of section touching the ground Approx.61 cm Area where the unit and leg/foot Approx. 102 cm EP-MA03.indb 2012/07/09 17:42:38... -
Page 6: Part Names And Functions
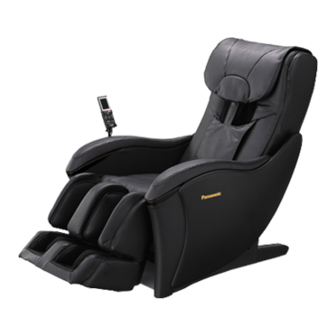
PART NAMES AND FUNCTIONS Main unit Front Back 1 Lower Back Cover 11 Wheels 2 Armrest 12 Controller 3 Seat 13 Safety Precaution Label 4 Leg/Foot Massage Section 14 Controller Holder Calf Section Controller holder clamp screw Sole Section 15 Controller Stand 16 Power Switch Section •... - Page 7 Controller Display 1 “FULL BODY” Display • When selecting a program: mark for the currently selected program is displayed. • During the massage: The current program is displayed. 2 “SELECTED AREA” Display • When selecting a program: mark for the currently selected program is displayed. •...
-
Page 8: Setting Up The Unit
• least 63 cm × 104 cm) to cover the areas where the unit touches and where the leg/foot massage section could touch the • Install the unit near a power outlet. EP-MA03.indb 2012/07/09 17:42:42... - Page 9 1. Open the packaging and take out the unit and accessories. Main unit Accessories * llustrated in the condition that it is taken out of the box. Elbow Component (left) Controller Holder (When the backrest is fully reclined) Lock Switch Key (1 pcs.) •...
- Page 10 2. Moving the unit and setting it up. g), be careful to avoid back injuries. (The unit must be carried by two persons.) • Since the unit is very heavy (approximately 63 k • Put the unit down slowly and carefully watch your step. Assembly Lifting the unit to install and setup the unit •...
- Page 11 Attach the controller holder and place Connect the power cord to the unit the controller into the controller stand. 1) Check for dirt and damage on appliance inlet 1 Insert the controller holder into the controller holder of the power switch section and the until it clicks in to place.
- Page 12 BEFORE EVERY MASSAGE (CHECK THE UNIT) Check the surrounding area. Make sure there are no objects, people, or pets in the vicinity of the unit. Flip up the pillow. Make sure there is no foreign matter Backrest between the unit. Seat Lower Back Cover...
- Page 13 Touch the massage heads with your hands Check to make sure that they are retracted. When the massage heads are not in the retracted position • Press the button twice to return the massage heads to the retracted position. Lower Back Check that the fabric of the unit where Cover the massage heads move has not been...
- Page 14 SELECTING A MENU AND STARTING THE MASSAGE WARNING • Be sure to start on the gentle massage program “RELAX” when using the unit for the first time. • The unit must not be used for more than a total of 15 minutes. •...
- Page 15 USING “FULL BODY” MASSAGE [Program Selection Mode] Press the button to enter the program selection mode for FULL BODY Programs. (The power will turn off automatically if no operation is performed within 3 minutes after entering the program selection mode.) Press to select a program.
- Page 16 3 The massage heads rise up and stop where they least contact the body. Massage Head indicate that the [Shoulder Position Adjustment Mode] <How to adjust> Press to adjust the position. (Each press moves the massage heads approximately 1.5 cm.) 5 When the shoulder position is matched, press button to begin the program.
- Page 17 To Customize When turning off the the leg/foot (Heat/Air) massage Press the button. (See page EN21.) To adjust the intensity of the leg/foot (Air) massage Press the button. (See page EN21.) When turning off the sole heat function only. Press the button.
- Page 18 USING “SELECTED AREA” MASSAGE [Program Selection Mode] Press the button to enter the program selection mode for SELECTED AREA. (The power will turn off automatically if no operation is performed within 3 minutes after entering the program selection mode.) Press the buttons to select a program.
-
Page 19: Press The Button
USING “MANUAL” MASSAGE WARNING • Avoid massaging any one part of your body for more than 5 minutes at a time. Failure to observe this may result in an adverse effect or injury. Press the button to select preferred massage operating mode. (The power will turn off automatically if no operation is performed within 3 minutes.) Basic massage (when used with a single operation) Select the types of massage using the... - Page 20 To Customize To adjust the upper and lower positions of the massage heads Press buttons to adjust. • Each press moves the massage heads Flashing indicates the approximately 1.5 cm. approximate current position. • When you hold down the button, the operation will continue until you release it.
- Page 21 USING LEG/FOOT MASSAGE For a person with sensitive skin, wear thick socks. 1. Press the button to turn on the power. 2. Press the button. The leg/foot massage begins. • The massage begins with the intensity at “2” and heat function “on”.
- Page 22 Operations of leg/foot (heat/air) massage Calf Sole Calves will be compressed by pressing against from both Position your feet in the footrests so that the shiatsu nodules are in sides. contact with the soles of your feet. Foot will be compressed from bottom using the shiatsu projections. This operation warms up the soles and makes you feel comfortable.
-
Page 23: Timer Function
END THE MASSAGE Timer function The massage will complete automatically approximately 15 minutes after the start of operations. • The leg/foot massage section will be lowered automatically • The massage heads move to the retracted position. • Backrest will not rise automatically. Backrest will rise by pressing button twice. -
Page 24: Disconnecting The Power
Disconnecting the power WARNING • After use, be sure to slide the power switch to the “off” position and turn the lock switch to the “lock” position, and remove the key and power plug. Failure to observe this may result in accident or injury due to tampering by children. Slide the power switch to the “off”... -
Page 25: Cleaning And Maintenance
CLEANING AND MAINTENANCE Elbow Component Dismantling Method Never use chemicals such as thinner, benzine, alcohol, etc. If it is required to move the body due to housing moving and it cannot pass through the door, please dismantle the left-side elbow component. Remove the clamp screw (1 piece each for front and rear) Synthetic Leather, Plastic Area... - Page 26 Q&A Can I use the unit if I am going to hospital due to an illness? Consult with your physician before using the unit. Massaging uses “contact pressure stimulation” to relax the muscles by applying pressure and to improve blood circulation.
- Page 27 When the massage ends with the timer, in accordance with the settings, the backrest does not become upright to maintain the reclining position. To return the massage lounger to its original position, press the button on the controller twice and the chair will automatically returns to its original position.
-
Page 28: Troubleshooting
TROUBLESHOOTING Inspect and remedy the following items. Contact the service center if something is still wrong after attempting to remedy a problem. Problem Cause and Remedy Motor Noises 1. Operational noises in the kneading region (upper body) • The massager's kneading and tapping operational noises •... -
Page 29: Error Display
Sometimes the power won’t turn on when Approximately 5 seconds once all movement has stopped before pressing The unit has been damaged. Stop using the unit immediately. The power cord or power plug is abnormally hot. Stop using the unit immediately. Error display Error display Contents... - Page 30 重要安全事項 必須遵守 下文列舉的是使用中為防止人身、財產損害而必須嚴格遵守的安全事項。 ■所有安全事項是根據因錯誤使用而導致危害或損害的程度予以說明。 警告 可能造成重傷或死亡後果的事項內容。 注意 可能造成輕傷或財產損害的事項內容。 ■請注意各安全事項前的符號。 (下文為符號範例) 絕對禁止事項。 必須執行事項。 警告 下列人員請勿使用本機。 被醫生禁止按摩的人(例:患有血栓、重度動脈瘤、急性靜脈瘤、各種皮膚炎或皮膚感染 症 [ 包括罹患皮 下組織炎]的人等) 不遵守本事項,可能會導致病情惡化。 兒童禁止使用本機。此外,請勿讓兒童在本機上玩耍,或者攀爬到小腿•腳部按摩部、座面、靠背或扶手上。 請勿攀爬靠背或扶手。 請勿讓無法表達自己意思的人或沒有能力操作本機的人使用本機。 按摩頸部時,請注意按摩輪的動向,請勿按摩前頸,並避免用力按摩頸部。 不遵守以上事項,可能會引起事故或造成傷害。 請勿損壞電源線及電源插頭。 (請避免此類行為:損傷、加工、強行彎曲、扭轉、拉長電源線及電源插頭,或將電源線及電源插頭靠近發 熱器,或在電源線及電源插頭上繫重物、或任意捆綁。 ) 禁止 使用破損的電源線或電源插頭,可能引起觸電、短路或引發火警。請到購買本機的商店或指定的維修中 心諮詢修理電源線或電源插頭的方法。 請勿長時間使用腳部溫熱按摩。 不遵守本事項,有導致低溫燙傷的危險。 ※ 即使溫度相對較低(40 ℃∼ 60 ℃) ,長時間接觸某一處皮膚後,雖然沒有明顯燙或痛的感覺,仍有可能 導致低溫燙傷。...
- Page 31 警告 使用中感到身體異常、或使用後覺得沒有效果時,請立即停止使用,並諮詢醫生。 不遵守此事項,或會發生事故或造成身體不適。 按摩中或移動靠背、小腿•腳部按摩部時,請事先確認本機周圍(本機後面、下面、前面和側面)沒有 人或寵物。 不遵守此事項,或會發生事故或造成傷害。 在使用中請勿將手、手臂、腳塞入靠背覆蓋在按摩輪活動範圍上的面料。 在使用本機前,一定要掀開枕、腰靠,以確認靠背覆蓋在按摩輪的活動範圍上的面料是否破損。同時確認其 他部位面料是否破損。 (無論發現多麼細微的損傷,都請立刻停止使用,拔下電源插頭,並送修本機。 ) 在面料破損的情況下使用本機,可能引發受傷或觸電的危險。 使用最初,請選擇輕度按摩的「RELAX」( 舒展放鬆 ) 程式。 每次按摩請控制在 15 分鐘內。 請將對身體同一部位的按摩控制在 5 分鐘內。 不遵守本事項,可能引起反效果或引發受傷的危險。 必須遵守 每次使用完畢,應將電源開關滑到「off」 (關閉)位置,並將安全鎖開關撥到「lock」 (鎖定)位置。取走安 全鎖開關鑰匙後,拔掉電源插頭。 不遵守本事項,可能因兒童頑皮引發事故或造成傷害。 請嚴格遵守插座和配線器具的使用規定。 請使用 220 V 交流電。 (請勿在國外使用本機,或擅自連接變壓器。 ) 不遵守本事項,可能引發觸電、機體故障或因過熱導致火警。 請務必將電源插頭插到底,使其確實地插入插座中。 不遵守本事項,可能引發觸電或因過熱導致火警。 請定期清理電源插頭上的灰塵等髒污。 不遵守本事項,可能因濕氣等原因引發絕緣不良,從而導致火警。...
- Page 32 注意 下列人員即使目前身體健康,也請諮詢醫生意見後再使用本機。 (1) 因年齡增長而導致肌肉萎縮的人或身體瘦弱的人 (2) 因骨頭或內臟問題而感覺腰痛的人 (3) 容易扭傷或容易瘀傷的人 (4) 暈車、船或其他交通工具時,反應異常激烈的人 (5) 過去曾被施予心臟手術或其他內臟手術的人 不遵守本事項,可能有損自身健康。 就坐前,請先確認本機各個部件之間沒有異物。 (確認靠背、座面、小腿•腳部按摩部、靠枕、腰部襯墊內側沒有夾雜異物。 ) 不遵守本事項,可能因手、腳或其他物件被本機夾住,而引發事故、造成傷害或機體故障。 頭部佩戴任何硬質飾物(如髮夾等)時請勿使用本機。 如果褲子口袋放有硬質物品,請取出後按摩(按摩前如發現褲袋中有硬質物品請先取出) 不遵守本事項,可能有受傷的危險。 就坐前,確認按摩輪處在收納位置。 按摩途中若想離開座位,必須先停止按摩椅運作,再離開座位。 不遵守本事項,可能引發事故或造成傷害。 請勿扯電源線試圖拔出電源插頭,一定要握住插頭本身將其拔出。 不遵守本事項,可能引發觸電或短路。 為保證安全,請將本機接地插頭連接至形狀匹配的插座。 不遵守本事項,可能引發機體故障,或在漏電時發生觸電。 移動本機前,必須把小腿•腳部按摩部的角度調節回最初位置。 必須遵守 不遵守本事項,可能造成傷害。 將安全鎖鑰匙保管在兒童無法觸及的地方。 不遵守本事項,可能因兒童誤食或頑皮引發事故或造成傷害。 使用滑輪移動本機前,須先清空周圍障礙物。將靠背調至最高位置後,抬起小腿•腳部按摩部及座面到略 低於腰的位置,慢慢移動。 (請參閱第 TC11 頁) 不遵守本事項,可能因機身翻倒引發事故或造成傷害。 須將本機放置在水平面上使用。 不遵守本事項,可能因機身翻倒引發事故。 使用中不能動彈或發覺機體異常時,請立即停止使用,拔出電源插頭,將本機送交指定維修中心檢查修理。...
- Page 33 接地說明 本機必須接地。如果本機發生功能失常,接地將為電流提供阻力最小的通道,以減少觸電危險。 本機裝備了具有設備接地導線和接地插頭的電源線。必須將該插頭插入已完全依照當地代碼和法令進行正確安裝和 接地的、合適的插座。 注意 若設備接地導線的連接不當,則會導致觸電危險。如果您對本機的接地是否正確存有疑問,請委託專業電工進行檢 查。即使本機附帶的插頭與插座不配,也不能對其進行改造。請委託專業電工安裝合適的插座。 本機具有接地插頭。請確認本機連接至具有與插頭形狀匹配的插座。本機不能使用轉接插座。 規格 AC 220 V 50 Hz 電源: 139 W 消耗電力︰ 上半身按摩 可按摩範圍(上下方向)︰ 約 64 cm(按摩輪移動的總距離約為 58 cm) 機 可按摩範圍(左右方向)︰ 在使用本 過程中按摩輪間的間距 頸部、肩部、背部、腰部:約 4 cm ∼ 15 cm 可按摩範圍(前後方向)︰ 按摩輪的突出量 約 6 cm 捶拍:約...
- Page 34 各部位名稱和功能 主體 正面 背面 1 腰部襯墊 10 電源插頭 2 扶手 11 滑輪 3 座面 12 遙控器 4 小腿•腳部按摩部 13 安全警示標籤 14 遙控器托架 小腿區域 腳部 區域 遙控器托架固定螺絲 15 遙控器支架 指壓突起區域 加熱區域 16 電源開關部分 • 請參閱第 TC12 頁。 5 靠枕 • 出廠前安全鎖開關設定為「open」 (開鎖) ,電源開關設 6 按摩輪的收納位置...
- Page 35 遙控器 液晶顯示屏 1 「FULL BODY」 (自動程式)程式顯示 • 選擇程式時: 當前選中程式前的 標記會閃爍。 • 按摩時: 顯示當前程式。 2 「SELECTED AREA」( 部位集中 ) 程式顯示 • 選擇程式時: 當前選中程式前的 標記會閃爍。 • 按摩時: 顯示當前程式。 3 小腿•腳部氣囊按摩強度顯示 • 使用三個級別顯示當前小腿•腳部按摩的強度。 4 肩部位置顯示 • 肩部位置調整模式時閃爍(約 15 秒) 。 • 運行「FULL BODY」 (自動程式)和「SELECTED AREA」( 部位集中...
- Page 36 設置按摩椅 使用前(安裝位置) 在將按摩椅取出包裝箱之前,應先確定其安裝位置。 確保有足夠空間可以對本機電源開關部分進行操作。 (本機後面、兩側要保留約 10 cm 的空間。 ) 請與牆保持 3 cm 以上的距離。 (靠背完全傾斜時) 約 178 cm (小腿•腳部按摩部滑動時:約 188 cm) 約 157 cm 10 cm 以上 約 150 cm (靠背完全立起時) 寬度約 78 cm 墊子 本機主體和小腿• 腳部按摩部 接觸地面的長度約 102 cm • 請勿將按摩椅暴露于陽光直射或高溫環境下(如,加熱設備前) ,因為這樣可能導致按摩椅合成皮革褪色或硬化。 •...
- Page 37 1. 打開包裝箱,取出主體和所有配件 確認包裝箱內含有主體和各個配件。 主體 配件 *圖例所示為從包裝箱中取出時的狀態 肘部件(左) 遙控器托架 (靠背完全傾斜時) 安全鎖鑰匙 (1 枚) • 出廠前,安全鎖鑰匙插在電源 開關部分的安全鎖開關內。 電源線 六角扳手(1 枚) 截面 附件螺絲 (M6×19)黑 (2 枚) 00_P9310MA03421.indb 9 2015-3-6 15:52:32...
- Page 38 2. 移動並安裝本體 • 由於本機較重(約 63 kg) ,因此搬運時請小心,以免造成背部拉傷。 (本機必須由兩人或多人搬運。 ) • 緩慢地放下本機,小心腳部被壓傷。 抬起本機進行安裝和設置 組裝 • 如果不正確握持本機,可能會摔落本機損壞地板。 將肘部件裝入本體 1 肘部件與本體 3 點配合插入 2 從上至下壓入 插入部 將遙控器和電源線放在座位上。 肘部件內側 放置區域 ※ 請注意夾到手指 (墊子等) 不要握住這裡。 用螺絲固定 否則可能會導致損 (前後各一處) 壞或受傷。 1 固定螺絲插入螺絲孔和本體側的螺絲孔重合將肘部件向下 壓 2 將固定螺絲固定在內六角板手的邊緣將其固定。 ...
- Page 39 安裝遙控器托架,然後將遙控器放入托架 連接本機電源線 中。 1) 檢查電源開關部分的電氣插座和電源線 連接器上是否有灰塵或損壞。 1 將遙控器托架插入遙控器支架中,直至其嵌入到位。 2) 將連接器插入電氣插座中。 2 使用遙控器托架固定螺絲進行固定 3 將遙控器放入遙控器托架中。 3) 確保將連接器完全插入插座中。 警告 請勿讓兒童使用遙控器托架的固定螺絲。 電氣插座 不遵守本事項,可能因兒童誤食或頑皮引發事故或造成 傷害。 連接器 使用滑輪移動本機 執行第 TC12 頁上的步驟 1 ∼ 5 後: 1) 按下 按鈕 將靠背返回至其原始位置 2) 將電源開關滑到「off」 (關閉)位置,拔下本機插頭。 抬起的高度不應高於腰部。 將遙控器和電源線 放在座位上。 墊子等...
- Page 40 每次按摩之前(檢查設備) 檢查周圍。 確定本機周圍沒有人、寵物及其他物體。 向上翻起枕頭。 靠背 確保本機縫隙間沒有異物。 座面 腰部襯墊 小腿•腳部按摩部 檢查電源線和電源插頭。 警告 檢查是否有 灰塵或損壞 檢查是 請定期清理電源插頭上的灰塵等髒污。 否有損壞 不遵守本事項,可能因濕氣等原因引發絕緣不良,從而 導致火警。 (請用乾燥的抹布擦拭電源插頭。 ) 請勿損壞電源線及電源插頭。 請避免此類行為:損傷、加工、強行彎曲、扭轉、拉長 電源線及電源插頭,或將電源線及電源插頭靠近發熱器, 或在電源線及電源插頭上繫重物、或任意捆綁。 ) 使用破損的電源線或電源插頭,可能引起觸電、短路或 引發火警。請到購買本機的商店或指定的維修中心諮詢 修理電源線或電源插頭的方法。 接通電源。 警告 請務必將電源插頭插到底,使其確實地插入插座中。 不遵守本事項,可能因濕氣等原因引發絕緣不良,從而 導致火警。 (請用乾燥的抹布擦拭電源插頭。 ) 請嚴格遵守插座和配線器具的使用規定。 請使用 220 V 交流電。 (請勿在國外使用本機,或擅自連接變壓器。...
- Page 41 檢查 確認按摩輪處於收納位置。 按摩輪不處於收納位置時 • 按下 按鈕兩次,將按摩輪返回至收納位置。 腰部襯墊 檢查本體上按摩輪的移動部位是否有裂 縫。 • 翻起靠枕和腰部襯墊,檢查按摩輪可行走部分的靠背面料是否 檢查 破損。 警告 在使用本機前,一定要掀開靠枕和腰部襯墊,以檢查 按摩輪可行走部分的面料是否破損。 同時確認其他部位面料是否破損。 (無論發現多麼細小的破損,都請立刻停止使用,拔掉 電源插頭,並將本機送修。 ) 在面料破損的情況下使用本機,可能引發受傷或觸電 的危險。 坐下並調整靠枕。 調整靠枕高度,使其底 部邊緣位於耳朵的位 置。 調整遙控器支架。 • 可左右進行調節。 選擇按摩功能表。 (請參閱第 TC14 頁) 根據需要調整傾斜的角度。 TC13 00_P9310MA03421.indb 13 2015-3-6 15:52:39...
- Page 42 選擇功能表並開始按摩 警告 使 用 最 初 , 請 選 擇 輕 度 按 摩 的 「 」 舒 展 放 鬆 程 式 。 每次按摩請控制在 15 分鐘內。 請將對身體同一部位的按摩控制在 5 分鐘內。 不遵守本事項,可能引起反效果或引發受傷的危險。 使用 15 分鐘後,推薦休息 10 分鐘。 每天最多使用產品兩次,最長 30 分鐘。 按下 按鈕,開啟電源。...
- Page 43 使用「FULL BODY」(自動程式) 按摩 [ 程式選擇模式 ] 按下 按鈕進入程式選擇模式,然後選擇自 動程式中的按摩程式。 (進入程式選擇模式後,三分鐘內如果未執行任何操作,電源會自動關閉。 ) 按下 選擇程式。 從「DEEP」 (緩和酸痛) 、 「RELAX」 (舒展放鬆) 、 「REFRESH」 (活力暢快)和 「QUICK (8min.) 」 (8 分鐘速按)中進行選擇。 閃爍的箭頭會指向當前所選的程式。 不論選擇哪個程式,小腿•腳部按摩會同時啟動。 「FULL BODY」( 自動程式 ) 的程式特性 DEEP ( 緩和酸痛 ) REFRESH ( 活力暢快 ) 肩頸酸痛、腰部疲勞特別嚴重時,想要...
- Page 44 3 按摩輪升至與身體沒有接觸的時候會停止。 按摩輪 4 聽到兩聲「嗶嗶」聲,並看到液晶屏上 標誌閃爍後,可 自行調整按摩輪至最佳肩部位置。 [ 肩部位置調整模式 ] < 如何調整 > 按下 調整位置。 (每按一下,按摩輪移動約 1.5 cm。 ) 5 肩部位置匹配后,按下 按鈕,開始程式。 按鈕,程式會在 15 秒後自動運行。 • 如果未按下 註: < 肩部目標位置 > 太高 合適的按摩輪位置 (可以感覺到按摩輪捶拍動作的位置) 太低 • 固定肩部位置後,根據人體高度與實際高度的差距,小腿•腳部按摩部可能 會升起。 (以確保當同時使用小腿•腳部(溫熱 氣囊)按摩時,雙腳能力接觸腳底 按摩區域。...
- Page 45 自訂設定 當關閉小腿•腳部 (溫熱 氣囊) 按摩時 按下 按鈕。 (請參閱第 TC21 頁) 要調整小腿•腳部 (氣囊) 按摩的強度時 按下 按鈕。 (請參閱第 TC21 頁) 當僅關閉加熱功能時 按下 按鈕。 (請參閱第 TC21 頁) 更改按摩內容 要從「FULL BODY」 (自動程式)按摩中選擇其他程式時 按鈕,然後選擇其他程式。 按下 上半身按摩會暫時停止。 (請參閱第 TC15 頁) 要更改為「SELECTED AREA」( 部位集中 ) 按摩時 按鈕,然後選擇程式。 按下...
- Page 46 使用「SELECTED AREA」(部位集中) 按摩 [ 程式選擇模式 ] 按下 按鈕進入程式選擇模式,然後選擇部 位集中下的按摩程式。 (進入程式選擇模式後,三分鐘內如果未執行任何操作,電源會自動關閉。 ) 按下 選擇程式。 選擇「NECK SHOULDER」 (肩頸)或「LOWER BACK」 (腰部) 。 閃爍的箭頭會指向當前所選的程式。 不論選擇哪個程式,小腿•腳部按摩會同時啟動。 選擇程式,然後按下 按鈕。 本機會自動傾斜至正確的按摩位置。 (請參閱第 TC15 頁) 自訂設定 當關閉小腿•腳部 (溫熱 氣囊) 按摩時 按下 按鈕。 要調整小腿•腳部 (氣囊) 按摩的強度時 按下 按鈕。 當僅關閉加熱功能時 按下...
- Page 47 使用「MANUAL」(隨心選擇) 按摩 警告 請將對身體同一部位的按摩控制在 5 分鐘內。 不遵守本事項,可能引起反效果或引發受傷的危險。 按鈕將切換為選擇喜歡的按摩手法的模式。 按下 (三分鐘內如果未執行任何操作,電源會自動關閉。 ) 基本按摩(僅選擇一個按摩手法使用時) 使用 按鈕選擇按摩類別。 從「頸椎推拿」 、 「頸椎揉按」 、 「揉按」 、 「捶拍」和「拉伸」中選擇按摩類別。 類別 手法 頸椎推拿 頸椎推拿 頸椎揉按 頸椎揉按 兩側按摩輪向內側滾動, 進行揉按 揉按 兩側按摩輪向外側滾動, ※ 在選擇的種類旁閃爍。 進行揉按 快捶 使用 按鈕選擇按摩手法。 捶拍 慢捶 * 選擇的按摩手法會顯示在方框中。 全背拉伸...
- Page 48 自訂設定 需要向上或向下調節按摩輪位置時 按下 按鈕進行調整。 • 每按一下,按摩輪移動約 1.5 cm。 閃爍顯示當前的大約位置。 • 如果按住按鈕,按摩輪會持續移動,直至鬆開 按鈕。 要調整按摩輪間距 只有在「捶拍」和「拉伸」的手法時可用。 按下 按鈕進行調整。 • 可以調節按摩輪間距。 要 同 時 使 用 小 腿 • 腳 部 ( 溫 熱 氣 囊 ) 按 摩 時 按下 按鈕。 (請參閱第 TC21 頁上的步驟 2) 更改按摩內容...
- Page 49 使用小腿•腳部(溫熱 氣囊)按摩 如果用戶皮膚比較敏感,請穿上厚襪。 1. 按下 按鈕,開啟電源。 2. 按下 按鈕。 小腿•腳部按摩開始。 • 按摩開始時的強度級別為「2」且加熱功能為「on」( 開啟 ) • 未使用上半身的按摩時,即使按下 也不可結束 按摩。 • 單獨按下 按鈕,小腿•腳部氣囊按摩開始。此時,溫 熱功能並不開啟。 • 無法單獨使用 。 調整小腿•腳部按摩的強度 顯示內容 High 強度 關閉 弱 強 按下 按鈕,可如右圖調整氣囊強度。 未使用上半身的按摩選項時,無法通過 按鈕關閉小腿• 腳部氣囊按摩。 關閉「HEAT」( 加熱 ) 功能 按下...
- Page 50 小腿 足底 會同時從兩側擠壓小腿。 確保將腳底放在指壓突起物上。 會使用指壓突起物按壓腳底。 該操作會溫暖腳底,讓人感到舒適。 在腿上放置一塊毯子等可以感到更加溫暖。 加熱器區域 無法單獨使用「HEAT」 (溫熱)功能。 TC22 00_P9310MA03421.indb 22 2015-3-6 15:52:56...
- Page 51 結束按摩 計時器功能 按摩開始後約 15 分鐘,按摩將自動結束。 • 小腿•腳部按摩部將自動下降。 • 按摩輪移動到收納位置。 • 靠背不會自動升起。 按兩次 按鈕,靠背將升起。 中斷按摩 按下 按鈕。 • 小腿•腳部按摩部自動降低,按摩輪恢復至收納位置。 • 收回按摩輪後,靠背將升起。 如果您發現任何異常 按下 按鈕。 • 所有操作將立即停止。 • 小心走下按摩椅,以防按摩椅翻倒。 縮回小腿•腳部按摩部 警告 兒童禁止使用本機。此外,請勿讓兒童在本機上玩耍,或者爬到小腿•腳部按摩部、座面、靠背或扶手上。 不遵守以上事項,可能會引起事故或造成傷害。 稍微抬起腳, 則小腿• 腳部按摩部復位。 TC23 00_P9310MA03421.indb 23 2015-3-6 15:52:57...
- Page 52 切斷電源 警告 每次使用完後,應將電源開關滑到「off」 (關閉)位置,並將安全鎖開關撥到「lock」 (鎖定)位置。取走安全鎖鑰匙後,拔 掉電源插頭。 不遵守以上事項,可能會引起事故或造成傷害。 將電源開關滑到「off」 (關閉)位置。 將安全鎖鑰匙撥到「lock」 (鎖定)位置。 從電源插座上拔下電源插頭。 安全鎖鑰匙必須存放在兒童無法觸及的地方。 TC24 00_P9310MA03421.indb 24 2015-3-6 15:52:57...
- Page 53 清洗及保養 切勿使用諸如稀釋劑、汽油、酒精等化學品。 肘組件的拆卸方法 搬家等需要搬運本體時,無法通過門口的情況下,請拆卸左側的 肘部件 稀 汽 酒 釋 油 精 取下固定螺絲 劑 (前后各 1 个地方) 合成皮革、塑膠部位 常規清潔及維護 使用柔軟的乾布清潔掉灰塵和輕度髒污。 髒污時 1. 將軟布浸入水中或含 3% 至 5% 中性洗滌劑的熱水中,然後徹底 擰乾。 中 性 洗 滌 劑 2. 清潔表面。 ( 輕拍清潔座椅面料 部分、合成皮革。 ) 拆卸螺絲的方法 內六角扳手 • 將固定螺絲固定在內六角扳手的 邊緣,然後將其水平對準孔并鬆開...
-
Page 54: 常見問題(Q&A
常見問題(Q&A) 因為生病而經常出入醫院的人士可以使用本機嗎? 經常出入醫院的人士,請在與醫生商量的前提下使用本機。 按摩即所謂「觸壓刺激」 ,即通過對肌肉進行壓迫,緩解肌肉緊張,促進血液流動。根據不同的病因,按摩有可能造 成病情惡化,因此請務必在和主治醫生商量之後使用本機。 (請參閱第 TC2 - TC4 頁上的說明) 身高多少的人士適合使用本機? 根據體型的不同多少會有所差異。請大致參考下文使用本機。 身高低於 150 cm 的身型瘦弱者和身高超過 185 cm 的身型高大者在使用本機時,同時開啟上半身按摩和小腿•腳 部按摩後,可能會感到坐姿不適。 * 低身高者採用自動模式可能存在足底按摩不到的現象,可以採取抬高腳摩位置,並保持靠背傾斜角度為最高以改 善按摩效果。 按摩時,枕頭的正確使用方法是? 按摩時,枕頭的正確使用方法: • 當覺得頸部、肩膀的按摩力道不足時,可以將枕 • 通常情況下,應將枕頭的位置調整到──枕頭下端與 頭向後翻起。在不使用枕頭的情況下按摩。 耳朵相同高度。 按摩中感覺左右兩邊按摩輪的按摩力度有差異是正常現象嗎? 由於機芯構造,在按摩過程中,確有可能感覺左右按摩輪的力度有差異。 為了能夠模擬出最自然的按摩手法,本機機芯採用了允許左右按摩輪交替捶背的機芯構造。 在按摩過程中,左右按摩輪接觸背部的具體位置可能稍有差異,從而導致了使用者產生左右兩側按摩力度有所不同 的感覺。此時,本機本身並未發生故障。 感到背後的按摩輪在進行猶如「彈跳」般的動作,要緊嗎? 為了讓按摩的感覺更為柔和,本機採用了按摩輪浮動機構技術。根據顧客的體型和坐姿,浮動機構自行微調,出 現按摩輪進行猶如在「彈跳」般的動作,並非故障。 根據所選程式的不同,剩餘時間表示內容會有所不同嗎?... - Page 55 有點在意按摩椅運作時發出的聲音… 按摩椅運作時產生的聲音,一般是基於機芯構造而發出的。 (具體請請參閱第 TC28 頁上的說明) 如果機芯發出的聲音非常大,請將按摩椅帶到直營店或維修中心進行檢測和修理。 腳部按摩時有噪音是否正常? 本機腳部按摩是通過氣囊擠壓的方式進行按摩,機器內部有氣泵元件進行充氣工作,電磁閥元件進行充氣和放氣 工作,有聲音屬於正常。 如果聲音非常大,則按摩椅可能發生故障,此時,請將按摩椅帶到直營店或維修中心進行檢測和修理。 搬家時,有什麼需要特別注意的地方? 請注意以下幾點。 • 為了方便搬運,請先將按摩椅靠背傾斜到最低位置。 • 搬運前,請確認沒有人坐在按摩椅上。 1. 按下 按鈕,接入電源。 2. 按下 按鈕,使靠背呈完全傾斜狀態。 請長按這兩個按鈕,直到聽到「嗶嗶嗶」的提示音。 * 小腿•腳部按摩部收納時,也會發出「嗶嗶嗶」的提示音。 請確認在靠背完全傾斜前,一直按住靠背傾斜按鈕。 3. 通過按下 按鈕切斷電源,拔掉電源插頭。 (請參閱第 TC24 頁上的說明) • 在沒有原裝紙箱的情況下,為了防止機體劃傷和搬運中的震動,請妥善使用其他包裝輔材包裹本機。 • 在有原裝紙箱的情況下,請先確認電源線未被纏繞在本機上,將電源線纏好放在座面上;搬運的時候,請注意 電源線沒有掉落且未與地面發生摩擦。 • 無法通過門口時請將右側肘組件卸掉。 請問哪裡可以看到產品的製造編號? 請抬起小腿•腳部按摩部,在座面下方的座下盒處尋找本機製造編號。...
- Page 56 疑難排解 發現故障後,首先檢查並嘗試以下方法。 如果在嘗試後,故障依然存在,請聯絡服務中心。 問題 原因和處理方法 電機雜訊 1. 按摩機芯部(上半身)的操作音 • 進行揉按或捶拍等動作時的操作音 • 按摩輪上移或下移時發出聲音 • 按摩機芯大負荷工作時發出咯吱聲 • 馬達、傳送帶回轉時發出的聲音 2. 傾斜時的操作音 3. 小腿•腳部按摩部的操作音 4. 氣囊按摩運作音 • 充氣泵工作音 • 排氣音 • 座椅下電磁閥發出的工作音 5. 傾斜動作開始時的震動 使用時,因本機構造而聽到上述聲音或有上述感覺很正常,並非故障。 在本機使用過程中按摩輪停止。 (響起「嗶嗶」聲時,遙控器上的按摩手法燈熄滅,按摩停止。 ) 如果在使用本機時對按摩輪用力過大,出於安全考慮,按摩輪可能會停止移動。 如果按摩輪停止,關閉本機電源一次,約 10 秒鐘後再次打「on」 (開啟)電源,然後操作本機。 如果按摩輪再次停止,請調整自己的坐姿,不要使背部完全貼在靠背上。 ( 體重...
- Page 57 故障顯示 故障顯示 內容 內部通信出現問題,運作終止。 小腿•腳部按摩出現異常,運作終止。 上半身按摩輪浮動機構內部出現異常,運作終止。 傾斜裝置或小腿•腳部按摩部的上下裝置出現異常,按摩輪浮動機構以外的運作終止。 出於安全考慮,當未能確認有人坐在按摩椅上時,按摩椅將停止運行。如果坐在按摩椅上依然出現 該錯誤,請按下 ,並靠在靠背上坐好,重新進行操作。 * 請聯絡授權服務中心。 (售後服務中心的電話號碼可於保用證書中找到。 ) 聯絡時若能提供故障代碼,服務和維修將進行得更順利。 警告 請勿擅自改造本機。請勿自行分解或修理本機。 不遵守本事項,可能引起火警、機體運行異常或造成傷害。 使用中不能動彈或發覺機體異常時,請立即停止使用,拔出電源插頭,將本機送交指定維修中心檢查修理。 不遵守本事項,可能引發觸電或火警。 TC29 00_P9310MA03421.indb 29 2015-3-6 15:53:07...
- Page 58 MEMO TC30 00_P9310MA03421.indb 30 2015-3-6 15:53:07...
- Page 59 MEMO TC31 00_P9310MA03421.indb 31 2015-3-6 15:53:07...
- Page 60 Panasonic Corporation © Panasonic Corporation 2015 P9310MA03421 http://www.panasonic.com Y0715-0 No.1 EN, TC Printed in China 00_P9310MA03421.indb 32 2015-3-6 15:53:07...