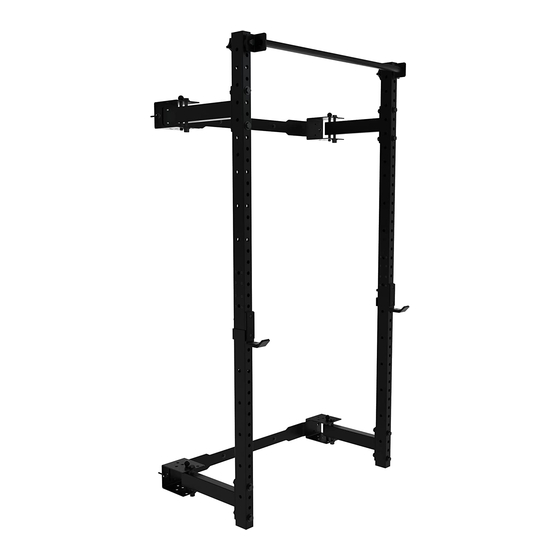
PRx Performance Profile PRO Squat Rack with Pull-Up Bar 96” Assembly Instructions Manual
Hide thumbs
Also See for Profile PRO Squat Rack with Pull-Up Bar 96”:
- Install instructions manual (12 pages)
Advertisement
Quick Links
Profi le® PRO Squat Rack with Pull-Up Bar 96"
PRx Performance Retractable Wall Mounted Exercise Rack System, also known as the Profile
Rack and Profile PRO:
U.S. Patent No. 9,333,387
U.S. Patent No. 9,409,048
U.S. Patent No. 9,498,670
U.S. Patent No. 9,649,525
For installation video visit:
prxperformance.com/pages/support
Advertisement

Summary of Contents for PRx Performance Profile PRO Squat Rack with Pull-Up Bar 96”
- Page 1 Profi le® PRO Squat Rack with Pull-Up Bar 96” PRx Performance Retractable Wall Mounted Exercise Rack System, also known as the Profile Rack and Profile PRO: U.S. Patent No. 9,333,387 U.S. Patent No. 9,409,048 U.S. Patent No. 9,498,670 U.S. Patent No. 9,649,525 For installation video visit: prxperformance.com/pages/support...
- Page 2 Prof i le® PRO Squat Rack with Pull-Up Bar 96" Tools Needed - Cordless drill - 3/16” drill bit - Stud finder - Level - Tape measure - Pencil - Plumb line - Ratchet - 15/16” Socket - 15/16” Open-ended wrench - 1/2"...
- Page 3 Getting Started Assemble all the tools listed on page 2 and clear your working space Measure your ceiling height to ensure your wall space can accommodate the Rack Recruit a work partner to assist with steps that require lifting and holding the Rack Questions? Email us at sales@prxperformance.com...
- Page 4 Required Ceiling Height Upper Bracket Lower Bracket Distance between brackets (center to center) 114” 94” 19” 75” 1 .00 1 .00 1 .00 75.00 94.00 24.00 24.00 19.00 prxperformance.com...
- Page 5 Locate Studs Profile® PRO Squat Rack with Pull-Up Bar is designed to be mounted to wooden studs with standard 16” or 24” spacing, with or without drywall For mounting your rack to a wall with non-standard stud spacing, please see or email us at sales@prxperformance.com PRx recommends professional installation for mounting the wall brackets to a block, concrete, or metal stud wall Use a stud finder to locate the rightmost stud where you intend to install the right side of your Rack Begin at the height of your lower bracket (19”)
- Page 6 Linkage Arms to Wall Brackets 1. Place the small side of the Plastic Spacer (#9) in the straight, gas shock facing portion of unbent end of the linkage arm (as pictured above) 2. Place the linkage arm with the Plastic Spacer (#9) facing the inside of the wall bracket “ear” 3.
- Page 7 Attach Pull-Up Bar To Uprights 1. Lay uprights on ground facing upward (with space between for Pull-Up Bar) 2. Lay the Pull-Up Bar flat on the ground so it is between the tops of the uprights (see diagram). The top of the uprights will not have a plug 3.
- Page 8 Attach Pull-Up Bar to Linkage Arms Upper Linkage Arms 1. Attach the left linkage arm by removing the 5/8” x 5” hex head bolt (#13) from the top left pull up bar. Place the Plastic Spacer on the inside of the linkage arm and place it against the top hole of the upright 2.
- Page 9 Attach Gas Shocks to Wallbrackets 1. *ATTENTION: TEAM LIFT the rack by holding each upright and pushing up against the wall. NOTE: T h e rack will be heavy 2. Attach Gas Shocks to ‘ear’ of the wall bracket with the 5/16” Serr Flange Nut (#8 already attached to the shock)and tighten using a two 1/2”...
- Page 10 (Yay!), You've got your equipment now get your workouts. Our app, PRx Fit, offers a variety of free daily workouts to help you crush it in your new PRx gym! _____ ,----- ..GETITON "'""" Google Play Download PRx Fit from the App Store or on the Google Play store.


Need help?
Do you have a question about the Profile PRO Squat Rack with Pull-Up Bar 96” and is the answer not in the manual?
Questions and answers